Key Features
- DNS Integration: Provides a stable hostname and seamless connectivity even when underlying IP addresses change.
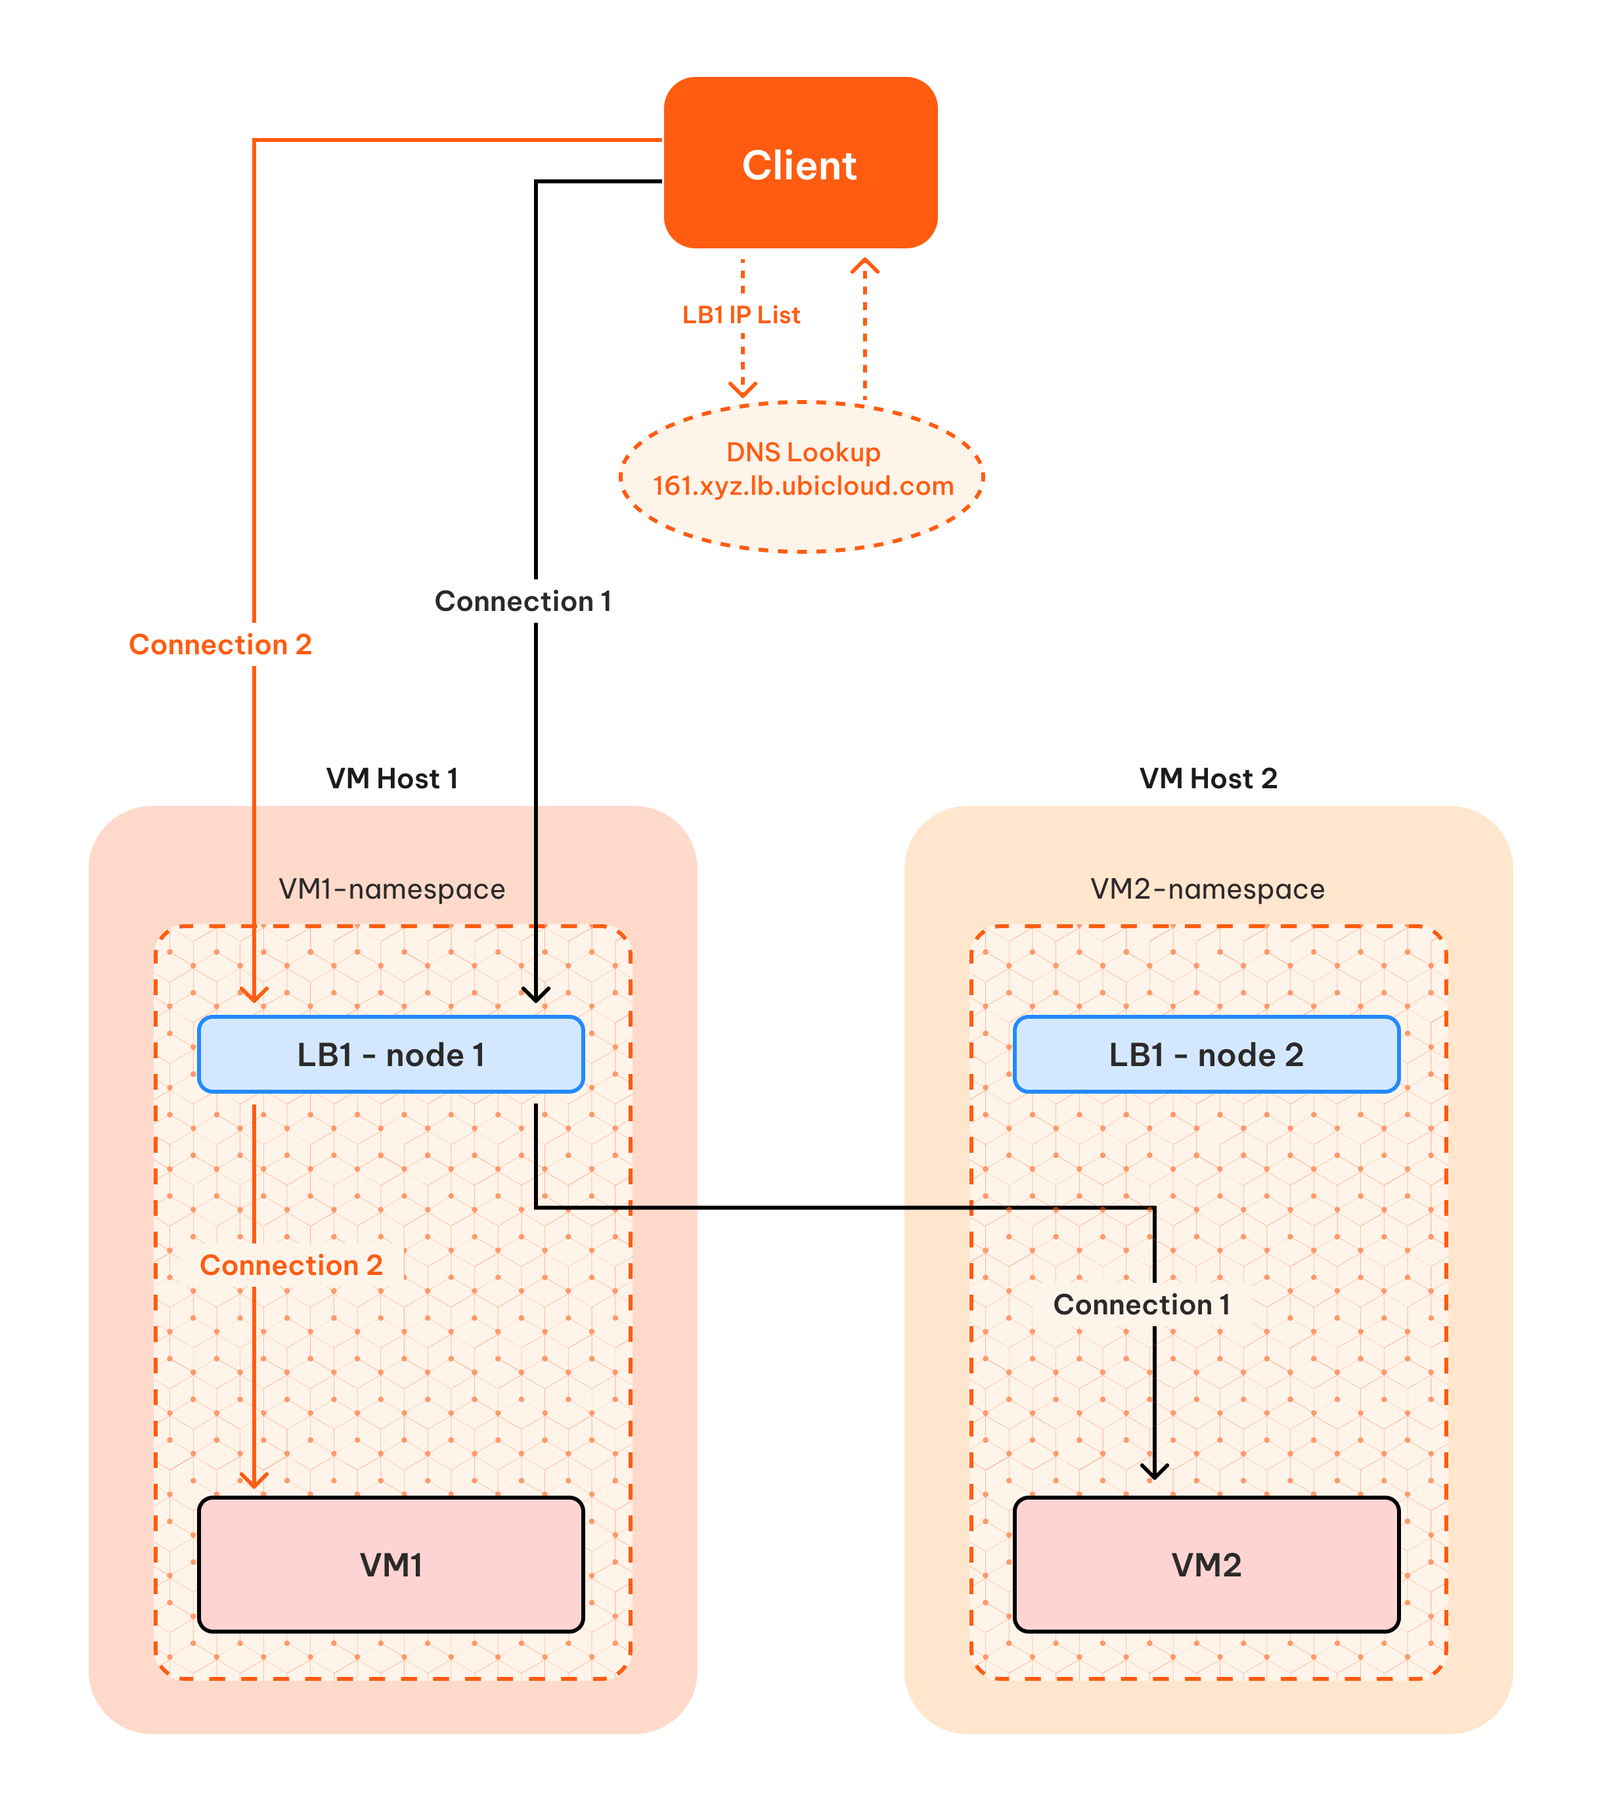
- High Availability: Increases availability by distributing traffic across Ubicloud VMs.
- Health Probes: Monitors load-balanced VMs and updates the load balancer to route traffic only to healthy instances.
- IPv4 / IPv6: Supports diverse network configurations, including load balancing of IPv6.
- Security: Ubicloud Load Balancers live and operate inside your Ubicloud Private Subnet. Therefore, the traffic that is managed by the load balancer is fully encrypted and secure.
- Multiple Algorithms: Supports round-robin and hash based load balancing.
- SSL Certificates: We provision ZeroSSL certificates for the load balancer hostname that you can directly use for your HTTPS enabled web apps.
Getting Started
Creating a Load Balancer
Navigate to Load Balancers: On the dashboard, select the “Networking” option from the left menu. And then choose the “Load Balancers” from the upper tab Create a New Load Balancer: Click on the ”+ New Load Balancer” button. You will be prompted to enter the following fields. After filling the details, click “Create”.- Name: The name of the load balancer, which will also be used in the hostname.
- Private Subnet: Select the private subnet that the load balancer will operate in. Note that VMs from different private subnets cannot be mixed within a single load balancer.
- Load Balancing Algorithm: Choose between round_robin and hash_based algorithms. For hash-based load balancing, the following fields are used:
- Source IP address
- Source Port number
- Destination IP address
- Destination Port number
- Load Balancer Port: Configure the port (e.g., Port 80) that the load balancer will accept connections from.
- Application Port: The port that the backend VM serves connections from.
- Health Check Endpoint: The HTTP endpoint that is used for health checks, such as /up. Make sure your application sends a response code 200 to this URL.
Attaching a VM to a Load Balancer
Access Load Balancer Details: From the dashboard, select “Networking” and choose the “Load Balancers” tab. The overview page of your Private Subnet provides a comprehensive view of your subnet’s configuration and resources. Here, you’ll find: Attach a VM to the Load Balancer: At the bottom of the detailed Load Balancer page, you will see the “Attached VMs” section. You will click to the VM picker and choose the VM and then click the “Attach” button at the right hand side.Detaching a VM from a Load Balancer
After the VM is attached, you can detach it back from the same page, at the “Attached VMs” section, you will need to click to the “Detach” button on the right hand side of the VM that you want to be detached.SSL Certificates
Ubicloud load balancers do not support SSL termination. However, we automatically generate public SSL certificates for the load balancer hostname. Attached VMs can easily download thecert and key files using the following commands: