kubectl, deploy a sample app and expose it to public. For this dedicated cluster, you’ll pay about 3x lower than you would with AWS or Azure.
Navigate to Kubernetes Service
From the left menu on the console and select the Kubernetes option and click on the Create Kubernetes Cluster button. This will take you to a new page where you can select the cluster details.Configure the Cluster
- Enter your desired cluster name.
- Select the preferred location.
- Choose the specifications for the control plane and worker node pools.
Launch the Cluster
After completing the configuration, click the Create button. Your Kubernetes cluster will be up and running in a few minutes based on the specified size.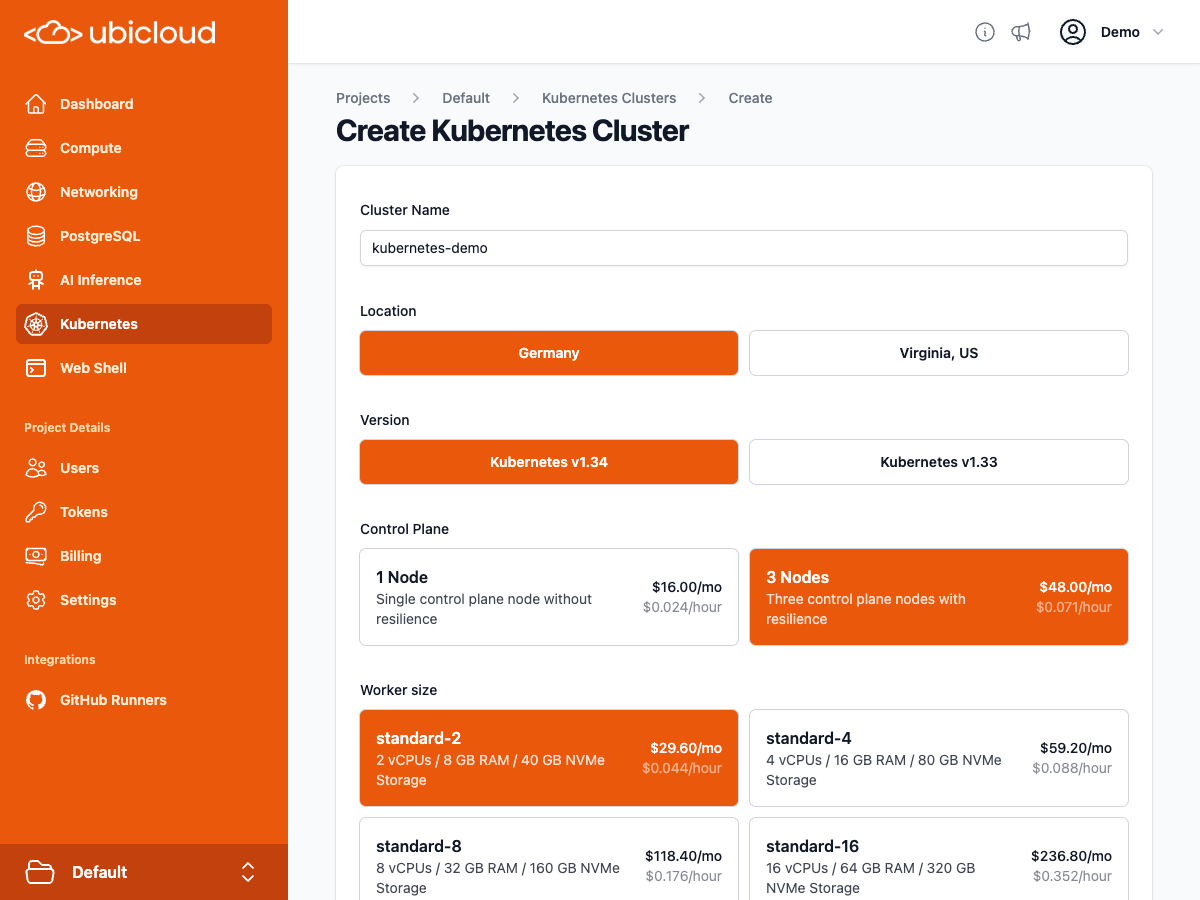
Download the kubeconfig
Once theDownload button appears, click it to download the kubeconfig file. Then, run the following command to start using it:
Create an Nginx deployment
Use the following command to deploy the Nginx applicationExpose the Application
Use the following command to expose your Nginx deployment via a LoadBalancer serviceAccess Your Application
Run the following command to retrieve the external domain assigned to your LoadBalancer serviceEXTERNAL-IP or the Service URL in the cluster’s panel. This URL sits behind a load balancer and it takes about a minute for it to become available. Once it does, you can access your application by opening up this URL in your browser