# Pricing
Source: https://ubicloud.com/docs/about/pricing
Ubicloud provides IaaS cloud features on bare metal providers, such as Hetzner, Leaseweb, or AWS Bare Metal. You can set it up yourself on these providers or use our managed service.
The pricing information below is for our managed service. Billing is based on the resources provisioned, pro-rated for the time they are provisioned. We calculate resource consumption at per minute granularity and bill monthly.
At a high level, our prices are 3-10x lower than comparable offerings. For example, 2 vCPU instance prices for different services are:
* [GitHub Actions](#github-actions): \$0.0008/min on Ubicloud vs. \$0.008/min on GitHub
* [Compute (VMs)](#compute): \$26/month on Ubicloud vs. \$90/month on AWS Germany
* [Managed PostgreSQL](#managed-postgresql): \$65/month on Ubicloud vs. \$200/month on AWS Germany
* [Burstable VMs](#burstable-vms) start at \$6.65/month and [Burstable Managed PostgreSQL](#burstable-postgresql) starts at \$12.40/month
## GitHub Actions
Ubicloud runners come with dedicated CPU, memory, local block storage, and a public IPv4 address. Our GitHub Managed Runner Application allocates virtual machines (VMs) across data centers in Germany to provide high availability. Every account gets a \$1/month credit that's equivalent to 1,250 minutes of Ubicloud runner time.
The tag `ubicloud-standard-2` defaults to Linux x64 2 vCPUs. Given Ubicloud's price advantage, we recommend trying 4 vCPUs or more if your pipeline benefits from parallelism.
When you enable premium runners, we automatically route your jobs to premium machines. If capacity's full, you seamlessly fall back to standard runners with no extra wait time. You are billed by the minute based on the type of runner you're using.
### Linux x64 Runners
| vCPU | Memory | Standard Runners | Premium Runners |
| ---- | ------ | ---------------- | --------------- |
| 2 | 8GB | \$0.0008/min | \$0.0016/min |
| 4 | 16GB | \$0.0016/min | \$0.0032/min |
| 8 | 32GB | \$0.0032/min | \$0.0064/min |
| 16 | 64GB | \$0.0064/min | \$0.0128/min |
| 30 | 120GB | \$0.0120/min | \$0.0240/min |
### Linux arm64 Runners
| vCPU | Memory | Price |
| ---- | ------ | ------------ |
| 2 | 6GB | \$0.0008/min |
| 4 | 12GB | \$0.0016/min |
| 8 | 24GB | \$0.0032/min |
| 16 | 48GB | \$0.0064/min |
| 30 | 90GB | \$0.0120/min |
## Compute
Ubicloud virtual machines (VMs) come in standard and burstable flavors. The following tables display our VM pricing in Hetzner's Germany region.
* You can choose extra storage in the portal at additional cost.
* Ubicloud prices in our LeaseWeb US region is 25% higher than in Germany.
### Standard VMs
Standard VMs come with dedicated CPU, memory, and local block storage. You can think of the standard family as our general purpose instances.
| Virtual Machine | vCPU | Memory | Storage | Pricing |
| :-------------: | :--: | :----: | :-----: | :--------------------------------: |
| standard-2 | 2 | 8GB | 40GB | \$0.00067/min
(\$26.60/mo) |
| standard-4 | 4 | 16GB | 80GB | \$0.00133/min
(\$53.20/mo) |
| standard-8 | 8 | 32GB | 160GB | \$0.00266/min
(\$106.40/mo) |
| standard-16 | 16 | 64GB | 320GB | \$0.00533/min
(\$212.80/mo) |
| standard-30 | 30 | 120GB | 600GB | \$0.01000/min
(\$399.00/mo) |
| standard-60 | 60 | 240GB | 1200GB | \$0.02000/min
(\$798.00/mo) |
### Burstable VMs
Burstable VMs come with shared CPUs. Each VM can utilize host cpu capacity up to 50% of the allocated vCPU and additionally burst up to 100% of the allocated vCPU at micro-intervals. Memory and block storage is currently dedicated to each VM. Burstable VMs are best suited for low-traffic websites, development and testing workloads, and AI agents.
| Virtual Machine | vCPU | Memory | Storage | Pricing |
| :-------------: | :--: | :----: | :-----: | :-------------------------------: |
| burstable-1 | 1 | 2GB | 10GB | \$0.00017/min
(\$6.65/mo) |
| burstable-2 | 2 | 4GB | 20GB | \$0.00033/min
(\$13.40/mo) |
### Networking
Ubicloud creates each VM in a private subnet. For free, each VM gets a private IPv4 and IPv6 address. The VM also gets a public IPv6 address for free. For a public IPv4 address, we charge \$3.00/month pro-rated per minute. You can opt out of getting a public IPv4 when creating the VM.
Each VM has a monthly egress quota of 0.625TB per 2 vCPUs. If you exceed this limit, we will charge you \$3 per TB of egress traffic. We don't charge for ingress traffic or traffic between your resources within the same cloud region.
## Managed PostgreSQL
Ubicloud Managed PostgreSQL comes in standard and burstable flavors. The following tables display our pricing in Germany.
* We calculate usage at per minute granularity and bill you at the end of the month for usage.
* We retain backups for 7 days for disaster recovery purposes. You can restore from backups at per-minute granularity.
* You can choose extra storage in the portal at additional cost.
* Ubicloud prices in our US region are 20% higher than in Germany.
### Standard PostgreSQL
Standard Managed PostgreSQL comes with dedicated CPU, memory, and local block storage.
| PostgreSQL | vCPU | Memory | Storage | Monthly Price |
| :---------: | :--: | :----: | :-----: | :-----------: |
| standard-2 | 2 | 8GB | 64GB | \$49 |
| standard-4 | 4 | 16GB | 128GB | \$99 |
| standard-8 | 8 | 32GB | 256GB | \$198 |
| standard-16 | 16 | 64GB | 512GB | \$396 |
| standard-30 | 30 | 120GB | 1,024GB | \$749 |
| standard-60 | 60 | 240GB | 2,048GB | \$1498 |
### Burstable PostgreSQL
Burstable Managed PostgreSQL comes with shared CPUs. Each VM can utilize host cpu capacity up to 50% of the allocated vCPU and additionally burst up to 100% of the allocated vCPU at micro-intervals. Memory and local block storage are currently dedicated to the database.
| PostgreSQL | vCPU | Memory | Storage | Monthly Price |
| :---------: | :--: | :----: | :-----: | :-----------: |
| burstable-1 | 1 | 2GB | 16GB | \$12.41 |
| burstable-2 | 2 | 4GB | 32GB | \$24.81 |
### Managed ParadeDB
ParadeDB is an Elasticsearch alternative built on Postgres. ParadeDB instances managed by Ubicloud team and ParadeDB team jointly.
| ParadeDB | vCPU | Memory | Storage | Monthly Price |
| :---------: | :--: | :----: | :-----: | :-----------: |
| standard-2 | 2 | 8GB | 64GB | \$99 |
| standard-4 | 4 | 16GB | 128GB | \$198 |
| standard-8 | 8 | 32GB | 256GB | \$396 |
| standard-16 | 16 | 64GB | 512GB | \$749 |
| standard-30 | 30 | 120GB | 1,024GB | \$1498 |
| standard-60 | 60 | 240GB | 2,048GB | \$2997 |
## Managed Kubernetes
Managed Kubernetes comes with dedicated CPU, memory, local block storage, and public IP address for each node. With Ubicloud Kubernetes, you only pay for the nodes you use and there are no hidden costs for networking, load balancers or egress fees. The following table display our pricing in Germany:
| Control Plane | Worker Nodes | Node Specs | Monthly Price |
| :-------------------------: | :----------: | :---------------------------------------: | :-----------: |
| Single node
(non-HA) | 1 | 2 vCores, 8 GB memory, 40GB local storage | \$45.60 |
| Single node
(non-HA) | 3 | 2 vCores, 8 GB memory, 40GB local storage | \$104.80 |
| Single node
(non-HA) | 10 | 2 vCores, 8 GB memory, 40GB local storage | \$312.00 |
| 3 nodes (HA) | 3 | 2 vCores, 8 GB memory, 40GB local storage | \$136.80 |
| 3 nodes (HA) | 5 | 2 vCores, 8 GB memory, 40GB local storage | \$196.00 |
| 3 nodes (HA) | 10 | 2 vCores, 8 GB memory, 40GB local storage | \$344.00 |
We calculate usage at per-minute granularity and bill you at the end of the month for usage.
Ubicloud prices for worker nodes in our US region are 20% higher than in Germany. Control plane pricing is the same in US and Germany.
# Ubicloud Privacy Notice
Source: https://ubicloud.com/docs/about/privacy-policy
Last updated: 12/04/2024
This Privacy Notice explains how Ubicloud B.V. and Ubicloud Inc. (“Ubicloud,” “we,” “our,” or “us”) collect, use, share and otherwise process information that identifies or could be identifiable to you (“personal data”) when you interact with websites, applications and services that display or reference this notice (together, “Ubicloud Services”).
**This Privacy Notice applies to Customer Account Data. It does not apply to Customer Content Data, i.e., the "content" which our customers choose to process, store or host using Ubicloud Services in connection with a Ubicloud account. Customer Content Data also includes personal data in the input to our Ubicloud EuroGPT services, including your prompts, and the output you rightfully receive from them. As a customer, you maintain full ownership and control of this content.** Our [Terms of Service](/about/terms-of-service) apply to this content and our processing of any personal data included in it. For more information, see our [Terms of Service](/about/terms-of-service) and [Customer Content Data](/about/sub-processors#customer-content-data).
When you use third-party extensions, integrations, or follow references and links to third-party providers within Ubicloud Services (for example, when using Ubicloud runners for Github Actions, or when using any other Ubicloud Services offered as part of any partnerships with third parties we disclose on our website), the privacy policies of these third parties apply to any personal data you provide or consent to share with them. Their privacy statements will also govern how this data is processed.
## Personal data we collect
Personal data is collected from you directly, automatically from your device and also from third parties.
When you register and use an account with us, we collect and process certain personal data from you such as your name, email address, authentication credentials (if applicable) and, where relevant, company information. When you communicate with us via email or otherwise to use Ubicloud Services, for example when asking for support or giving feedback, you supply information to us which may also include personal data of yourself and/or those within your organization such as your name, email address, phone number and job title. We may also collect personal data such as name, email address, job title and company information when you attend events or conferences and consent to provide us your personal data. When you enter your billing information to use Ubicloud Services on our website, we do not collect or store any of your payment information as you disclose this information directly to our payment service provider, Stripe. However, we are able to access the following data you provide to Stripe: your name, email address, your address, last four digits of your credit card number and credit card expiration date.
We receive personal data automatically. Examples of personal data we automatically collect include network and connection information such as your IP address and geographical location based on that IP address, information such as computer and device information including its geolocation, your service access times and statistics on page views and usage details.
We collect anonymized statistics from third-party website analytics provider Matomo to help understand our website traffic and usage and tailor our marketing efforts. We may also receive your personal data from other users within your organization, publicly available sources, third parties like vendors, resellers or partners for purposes outlined in this Privacy Notice.
## How we use your personal data
The primary purpose of collecting your personal data is to provide Ubicloud Services to you and process transactions related to these services such as registrations, purchases and payments for our services. In addition, we use your personal data to measure, provide, develop, customize and improve our Ubicloud Services and our business operations (such as use of aggregated data for internal reporting, product strategy and capacity planning). We also use your personal data to communicate with you for support, feedback, direct marketing or respond to your requests. In certain cases, we may use your personal data to comply with a legal obligation, or to detect or prevent fraud and abuse and analyze security incidents to protect safety and security across Ubicloud Services.
We store personal data of all of our customers only in the European Economic Area ("EEA"). From time to time, your personal data may be accessed from outside of the EEA, including by a Ubicloud Affiliate from the United States. Any such processing would be for the purposes outlined, and in compliance with, this Privacy Notice and in reliance on either the European Commission’s adequacy decisions pursuant to Article 45(1) GDPR, or the Standard Contractual Clauses as approved by the European Commission pursuant to Article 46(2)(c) GDPR. If you'd like to find more about places of processing and security measures which we’ve taken to safeguard your personal data, or to receive a copy of the standard contractual clauses between Ubicloud entities, please contact [info@ubicloud.com](mailto:info@ubicloud.com).
## How we share your personal data
We take care in selecting the organizations that may handle personal data on our behalf, including reviewing their security posture and data protection policies. They are bound by contractual obligations towards us to ensure the security, privacy, and confidentiality of your information.
Please visit [our sub-processors](/about/sub-processors) page for a list of our processor and sub-processors of customer account data.
In addition, we may be required to share your personal data to satisfy applicable law, regulation, legal process, or governmental requests, including requests made by public authorities, or to enforce our Terms of Service. This includes sharing of your data to detect, prevent or otherwise address fraud, security, or technical issues or to protect our rights, property or safety, our users and the public.
## Legal basis for processing your personal data
We may process personal data relating to you if one of the following applies:
* Processing is required to fulfil our contractual duties to you in accordance with our Terms of Service.
* We process personal data when it's necessary to comply with applicable laws.
* We process data for purposes that are in our legitimate interests, such as securing Ubicloud Services, communicating with you, and analyzing, developing and improving Ubicloud Services.
* We process personal data when you have explicitly consented to such processing. When we rely on consent as the legal basis, you have the right to withdraw your consent for data processing at any time; however, you may not be able to use some Ubicloud Services if you withdraw your consent.
## How we secure and retain your personal data
We use appropriate technical, administrative and physical security controls to protect your personal data. You can read about our security practices in [the general security page](/security/overview) and under the "Security Tab" of our Documentation generally.
We'll retain your personal data while you maintain an account with us, and for as long as required by the purpose for which we collected it. Personal data which we collected relating to a contract will be retained until the contract has been fully performed by both parties. Personal data collected for our legitimate interests will be retained as long as needed to fulfil such purpose. We may retain personal data for longer if you have given us consent for it or if we are required to do so to comply with our legal obligations, to resolve disputes and enforce agreements.
## Your rights
You may exercise certain legal rights regarding your personal data processed by us. In particular, you could have a right to do the following:
* The right to access the personal data collected about you
* The right to request detailed information about the specific types of personal data we've collected from you
* The right to rectify or update inaccurate or incomplete personal data under certain circumstances
* The right to erase or limit the processing of your personal data under specific conditions
* The right to object to the processing of your personal data, as allowed by applicable law
* The right to withdraw consent, where processing is based on your consent
* The right to receive your collected personal data in a structured, commonly used, and machine-readable format to facilitate its transfer to another company, where technically feasible.
To exercise these rights, please send an email to [info@ubicloud.com](mailto:info@ubicloud.com). To verify your identity for security, we may request extra information before addressing your data-related request. You may also have the right to complain to your local Data Protection Authority. Customers within EEA can find authority contacts on the European Data Protection Board website. We aim to promptly respond to requests in compliance with legal requirements.
## Contact us
Contact us by emailing [info@ubicloud.com](mailto:info@ubicloud.com). Ubicloud B.V. Turfschip 267, Amstelveen, 1186 XK, The Netherlands.
Ubicloud B.V. is the "Data Controller" if you are a customer resident in the EEA.
Ubicloud Inc. 310 Santa Ana Avenue, San Francisco, 94127, CA.
## Changes to our Privacy Notice
Our business changes constantly, and our Privacy Notice may also change. We strongly recommend that you check this page often, referring to the date of last modification listed at the top of this page.
# Regions
Source: https://ubicloud.com/docs/about/regions
Ubicloud managed services are offered through data centers of various bare metal providers, such as Hetzner and Leaseweb. We are adding new providers and regions based on demand. If you are interested specific regions, please contact us at [support@ubicloud.com](mailto:support@ubicloud.com).
Each Ubicloud region can be mapped to particular provider and its data center. Below you can find the mapping of existing Ubicloud regions.
| Region Name | Bare Metal Provider | Location |
| :-----------: | :-----------------: | :------------------: |
| eu-central-h1 | Hetzner | Falkenstein, Germany |
| eu-north-h1 | Hetzner | Helsinki, Finland |
| us-east-a2 | Leaseweb | Manassas, VA, US |
### Github Action Runners
Github runners are automatically provisioned either at `eu-central-h1` or `eu-north-h1` regions based on the overall availability of the regions at the time of the provisioning.
# Support
Source: https://ubicloud.com/docs/about/support
We are here to help. We offer two types of support for our users and customers.
## Community Forums
All users and customers have access to [our community forum](https://github.com/ubicloud/ubicloud/discussions). This forum is best for general questions, troubleshooting, and best practices.
We're regularly in the forums to help out with customer issues and post new announcements. We'd also like the forums to grow and have customers help each other out.
## Email Support
If you're using our managed service, you also have access to email support. This channel is best for questions or issues that are specific to your account. If you need this type of help, you can reach us at [support@ubicloud.com](mailto:support@ubicloud.com).
If you need guaranteed response times or other enterprise level features, please contact us through email.
# Terms of Service
Source: https://ubicloud.com/docs/about/terms-of-service
Last updated: 05/12/2024
These Terms of Service apply to our managed service. For our source code's terms and conditions, please see our [License](https://github.com/ubicloud/ubicloud/blob/main/LICENSE).
## 1. Introduction
Welcome to **Ubicloud** ("**Ubicloud**", "**Company**", "**we**", "**our**", "**us**")! As you have just clicked our Terms of Service, please pause, grab a cup of coffee, and carefully read the following pages. It will take you approximately 20 minutes.
These Terms of Service ("**Terms**", "**Terms of Service**") govern your use of our web pages and our managed services ("**Services**") located at [https://ubicloud.com](https://ubicloud.com) operated by Ubicloud.
Your agreement with us is with the Ubicloud entity set forth in Section 12 and includes these Terms ("**Agreements**"). You acknowledge that you have read and understood Agreements, agree to be bound by them, and you represent to us that you are lawfully able to enter into these Agreements and bind the entity you represent. These Agreements also refer to and incorporate our Privacy Policy, and where applicable, the data processing agreement which outlines the terms of personal data processing on your behalf through our managed Services.
If you do not agree with (or cannot comply with) the Agreements, then you may not use the Services, but please let us know by emailing at [support@ubicloud.com](mailto:support@ubicloud.com) so we can try to find a solution. These Terms apply to all visitors, users and others who wish to access or use Services.
Thank you for being responsible.
## 2. Eligibility & Registration
* Before you use our Services, you must ensure that such use is in compliance with all laws, rules and regulations applicable to you. Your right to access the Services is revoked to the extent your use thereof is prohibited or to the extent our provision thereof conflicts with any applicable law, rule or regulation. You are responsible for making these determinations before using the Services.
* The Services are not targeted towards, nor intended for use by, anyone under the age of 18. By using the Services, you represent and warrant to us that: (a) you are 18 years of age or older; or (b) you otherwise have sufficient legal consent, permission and capacity to use the Services in applicable jurisdiction(s) as determined by you.
* To access the Services, you must register for an account ("**Account**"). When you register for your Account, you may be required to provide us with some information about yourself, such as your name, email address, and a valid form of payment, and you may also provide optional information about yourself on a voluntary basis.
* We may, in our sole discretion, refuse to provide or continue providing the Services to any person or entity and change eligibility criteria at any time, including if you fail to comply with the Terms. We reserve the right to deactivate, terminate, prevent access to, disable services for, and/or delete any Accounts or access to the Services at any time at our sole discretion.
## 3. Proprietary Rights
* As between you and Ubicloud, the Services are owned and provided by Ubicloud. The names, logos, trademarks, trade dress, arrangements, visual interfaces, graphics, design, compilation, information, data, computer code (including source code or object code), products, software, services, and all other elements of the Services ("**Materials**") that we provide are protected by intellectual property and other laws. All Materials included in the Services are the property of Ubicloud or its third-party licensors. You may only use the Services as expressly authorized by us and as set forth in these Terms. You shall abide by and maintain all intellectual property notices, information, and restrictions contained in the Services. We reserve all rights to the Services not granted expressly in these Terms.
* If you choose to provide feedback regarding problems with or proposed modifications or improvements to the Services, then you hereby grant to us an unrestricted, perpetual, irrevocable, non-exclusive, fully-paid, royalty-free right to exploit the feedback in any manner and for any purpose, including to improve the Services and create other products and services.
* You grant us permission to include your name, logos, and trademarks in our promotional and marketing materials and communications.
* Some of the Materials provided by Ubicloud are licensed under one or more open source, Creative Commons, or similar licenses (collectively, "**Open Source Licenses**"). Nothing in these Terms prevents, restricts, or is intended to prevent or restrict you from obtaining such materials under the applicable Open Source Licenses or to limit your use of such materials under those Open Source Licenses.
* Subject to your complete and ongoing compliance with these Terms and our rights therein, Ubicloud grants you a limited, non-exclusive, non-transferable, non-sublicensable, revocable license to access and use the Services as described in and subject to these Terms.
## 4. Content and Privacy
1. Content found on our website is the property of Ubicloud or used with permission. You may not distribute, modify, transmit, reuse, download, repost, copy, or use said Content, whether in whole or in part, for commercial purposes or for personal gain, without express advance written permission from us.
2. Our Services allow you and your End Users (as defined below) to provide us with source code, files, software, processes, interfaces, data, text, settings, media, or other information for storage, hosting, or processing by the Services (your "**Services Content**"). With respect to our EuroGPT offering, Services Content includes the input you or your End Users may provide to the Services ("**Input**") and the output that you/your End Users receive from them (the "**Output**"). Subject to these Terms, by providing your Services Content to or via the Services, you grant Ubicloud a license to host, store, transfer, display, perform, reproduce, modify for the purpose of formatting for display, and distribute your Services Content solely for the purpose of providing the Services to you.
3. As between you and Ubicloud, to the extent permitted by applicable law, you retain any copyright and other ownership rights that you may hold in your Services Content.
4. Some of our Services allow third parties to access, use, or contribute to your Services Content, including via resale, your own products and services, or public-facing websites, applications, interfaces, and other manifestations of your Services Content. Such other users are collectively defined as your "End Users" for purposes of these Terms. For clarity, "**End Users**" in this context includes all such other users, regardless of whether they are intermediary parties, End Users of other End Users, or the like. You are responsible for your End Users' compliance with these Terms.
5. You are solely responsible for your Services Content, End Users and any activity by your End Users, and you agree Ubicloud is not and will not be in any way liable for your Services Content, End Users and/or activity by your End Users. With respect to our EuroGPT offering in particular, you are responsible for all rights, permissions and licenses required to provide the Input, and solely responsible for all use of the Output, and evaluating the Output for accuracy and appropriateness of your use case, including utilizing human review as appropriate. By providing your Services Content via the Services, you affirm, represent, and warrant that:
* Your Services Content, and your or your End Users' use of your Services Content, will not violate these Terms or any applicable law, regulation, rule, or third-party rights;
* You are solely responsible for the development, moderation, operation, maintenance, support and use of your Services Content, including when your Services Content is contributed by your End Users;
* You are the Data Controller with respect to Services Content, and you agree to protect the privacy and legal rights of your End Users and will provide them with legally adequate privacy notices;
* You will not send to us any personal information of children under 13 or the applicable age of digital consent or allow minors to use our Services without consent from their parent or guardian;
* Your Services Content, and your or your End Users' use of your Services Content, does not and will not: (i) infringe, violate, or misappropriate any third party right, including any copyright, trademark, patent, trade secret, moral right, privacy right, right of publicity, or any other intellectual property or proprietary right; (ii) slander, defame, libel, or invade a right of privacy, publicity or other property rights of any other person; or (iii) cause us to violate any law, regulation, rule, or rights of third parties; and
* Except for the specific Services provided to you under these Terms or other express contract, you are solely responsible for the technical operation of your Services Content, including on behalf of your End Users.
6. Without limiting Sections 8 and 9 or your obligations under this Section 4, Section 5, or Section 6, Ubicloud will implement reasonable and appropriate measures designed to help you secure your Services Content against accidental or unlawful loss, access or disclosure. You are responsible for properly configuring and using the Services and otherwise taking appropriate action to secure, protect and backup your account and your Services Content in a manner that will provide appropriate security and protection, which might include use of encryption to protect your Services Content from unauthorized access and routinely archiving your Services Content. Ubicloud does not promise to retain any preservations or backups of your Services Content. You are solely responsible for the integrity, preservation and backup of your Services Content, regardless of whether your use of Services includes a Ubicloud backup feature or functionality, and to the fullest extent permitted by law, Ubicloud shall have no liability for any data loss, unavailability, or other consequences related to the foregoing.
7. When purchasing Services, you provide certain information about you and/or your End Users in connection with the creation and administration of your account, which Ubicloud refers to as “Customer Account Data.” Ubicloud will only use your Customer Account Data in accordance with the Privacy Policy, where applicable, the data processing agreement between you and Ubicloud, and you explicitly consent to such usage.
8. When purchasing and using our Services, you may specify the geographic region and jurisdiction in which your Services Content will be stored. You consent to the storage of your Services Content in, and transfer of your Services Content into, the geographic region and jurisdiction you select. Unless otherwise agreed in writing between you and Ubicloud, you agree that Ubicloud may transfer your Services Content in other geographic regions or jurisdictions at its sole discretion. You represent and warrant that such storage and transfer are adequately consented to by you and permissible pursuant to applicable laws, regulations, rules, and third-party rights, including rights of any End Users or other third parties whose personal data you might process in connection with the Services.
9. If you wish to process personal data of third parties with our Services, you alone remain the responsible party under data protection laws. Ubicloud is generally unable to determine whether a customer is processing personal data under applicable data protection laws, and in the absence of a data processing agreement, we assume that you are not processing third party personal data as part of your Services Content. Ubicloud will only process personal data as part of Services Content if you conclude a data processing agreement with us. Please contact us at [info@ubicloud.com](mailto:info@ubicloud.com) to obtain a copy of our data processing agreement for review and execution.
10. Further, you agree not to use any of our Services to create, receive, maintain, transmit or otherwise process any information that includes or constitutes “Protected Health Information” as defined under HIPAA Privacy Rule (45 C.F.R. Section 160.103) or special category data as defined under Article 9 of General Data Protection Regulation (Regulation (EU) 2016/679), unless agreed to separately in writing between us.
## 5. Rules of Conduct
1. You may use Service only for lawful purposes and in accordance with Terms. You agree not to use Service:
* In any way that violates any applicable national or international law or regulation.
* For the purpose of exploiting, harming, or attempting to exploit or harm minors in any way by exposing them to inappropriate content or otherwise.
* To transmit, or procure the sending of, any advertising or promotional material, including any "junk mail", "chain letter," "spam," or any other similar solicitation.
* To impersonate or attempt to impersonate Company, a Company employee, another user, or any other person or entity.
* In any way that infringes upon the rights of others, or in any way is illegal, threatening, fraudulent, or harmful, or in connection with any unlawful, illegal, fraudulent, or harmful purpose or activity.
* To engage in any other conduct that restricts or inhibits anyone's use or enjoyment of Service, or which, as determined by us, may harm or offend Company or users of Service or expose them to liability.
**Additionally you agree not to**:
* Introduce intentionally, knowingly or recklessly, any virus or other contaminating code into the Service, or collecting, transmitting, or using information, including email addresses, screen names or other identifiers, by deceit or covert means (such as phishing, Internet scamming, password robbery, spidering, and harvesting).
* Interfere with the proper functioning of any System, including any deliberate attempt to overload a system by mail bombing, news bombing, broadcast attacks, flooding techniques, or conducting a denial of service ("DoS") attack.
* Operate open proxies, open mail relays, open recursive domain name servers, Tor exit nodes, or other similar network services.
* Perform any activity intended to withhold or cloak identity or contact information, including the omission, deletion, forgery or misreporting of any transmission or identification information, such as return mailing and IP addresses.
* Scan foreign networks or foreign IP addresses.
* Mine any cryptocurrency, including but not limited to BitCoin or any similar currency.
2. You are solely responsible for the activity that occurs on your Account, regardless of whether the activities are undertaken by you, your employees, any third party (including your contractors or agents), your End Users, your licensees, or your customers.
3. You are responsible for notifying your employees, agents, and others related to your use of the Services of the provisions of these Terms, including where the Terms of Service are binding on them.
4. You shall not (directly or indirectly): (i) decipher, decompile, disassemble, reverse engineer or otherwise attempt to derive any source code or underlying ideas or algorithms of any part of the Services (including without limitation any application), except to the limited extent applicable laws specifically prohibit such restriction; (ii) modify, translate, or otherwise create derivative works of any part of the Services; or (iii) copy, rent, lease, distribute, or otherwise transfer any of the rights that you receive hereunder. You shall abide by all applicable local, state, national and international laws and regulations. To the extent any portions of the Services are subject to Open Source Licenses, such Open Source Licenses apply regardless of this section.
5. We reserve the right to access, read, preserve, and disclose any information as we reasonably believe is necessary to (i) respond to any applicable law, regulation, legal process or governmental request; (ii) enforce these Terms, including investigation of potential violations hereof; (iii) detect, prevent, or otherwise address fraud, security or technical issues; (iv) respond to user support requests; or (v) protect the rights, property or safety of us, our users and the public.
6. The Services are subject to the trade and economic sanctions maintained by the Office of Foreign Assets Control ("**OFAC**") and the European Union. By accessing the Services, you agree to comply with these laws and regulations. Specifically, you represent and warrant that you are not (a) located in any country that is subject to OFAC's trade and economic sanctions, currently Cuba, Iran, North Korea, Syria, and the Crimea region of Ukraine; or (b) an individual or entity included on any U.S. lists of prohibited parties including: the Treasury Department's List of Specially Designated Nationals List ("**SDN List**"), Sectoral Sanctions List ("**SSI List**") or EU's Consolidated List of Persons, Groups and Entities Subject to EU Financial Sanctions or on UN Security Council Consolidated List. Additionally, you agree not to – directly or indirectly – sell, export, reexport, transfer, divert, or otherwise dispose of any service received from Ubicloud in contradiction with these laws and regulations. Failure to comply with these laws and regulations may result in the suspension or termination of your Account.
7. You agree to comply with all applicable export and import control laws and regulations in your use of the Services, and, in particular, you will not utilize the Services to export or re-export data or software without all required United States and foreign government licenses. You assume full legal responsibility for any access and use of the Services from outside the United States, with full understanding that such access or use may constitute export of technology and technical data that may implicate export regulations and/or require export license.
8. You shall utilize proper security protocols, such as setting strong passwords and access control mechanisms, safeguarding access to all logins and passwords, and verifying the trustworthiness of persons who are entrusted with account access information. You are solely responsible for any unauthorized access to your Account, and must notify Ubicloud immediately of any such unauthorized access upon becoming aware of it.
9. You shall notify Ubicloud if and when you learn of any security incidents or breaches affecting the Services, including unauthorized access to your Account or Account credentials, and shall aid in any investigation or legal action that is taken by authorities and/or Ubicloud to investigate and cure the security incident or breach to the extent caused by your Account or your use of the Services.
## 6. Payment & Billing
* We use third-party payment processors (the "**Payment Processors**") to bill you through the payment account(s) linked to your Account (your "**Billing Information**"). The processing of payments may be subject to the Terms, conditions and policies of the Payment Processors in addition to these Terms. We are not responsible for acts or omissions of the Payment Processors. You agree to pay us, through the Payment Processors or as otherwise agreed to by Ubicloud, all sums for Services you select or use at applicable prices in accordance with our pricing and billing policies and you hereby authorize us and applicable Payment Processors to charge all such sums (including all applicable taxes) to the payment method(s) specified in or linked to your Account (your "**Payment Method**").
* You must provide current, complete and accurate information for your Account and Billing Information, and must promptly update all such information in the event of changes (such as a change in billing address, credit card number, or credit card expiration date). You must promptly notify us or our Payment Processors if your payment method is canceled (e.g., for loss or theft) or otherwise inoperable. Changes to such information can be made in your project details.
* By entering into these Terms and using the Services, you agree to be billed on a recurring basis and to be automatically charged by us or our Payment Processors using your Payment Methods upon invoicing. If your Payment Method or payment of fees is subject to other Terms and conditions, as set forth in order forms, invoices or otherwise, then those other Terms and conditions apply in addition to these Terms. You may also be billed an amount up to your current balance at any time to verify the accuracy of your account information. We reserve the right to deactivate, terminate, prevent access to, disable services for, and/or delete any Accounts or access to the Services at any time at our sole discretion, including for nonpayment, late payment, or failure to charge your Payment Methods upon invoicing.
* You are responsible for any duties, customs fees, taxes, and related penalties, fines, audits, interest and back-payments relating to your purchase of the Services, including but not limited to national, state or local sales taxes, use taxes, value-added taxes (VAT) and goods and services taxes (GST) (collectively, "**Taxes**"). Unless otherwise stated, our pricing policies do not include and are not discounted or enhanced for any such Taxes. If we become obligated to collect or pay Taxes in connection with your purchase of the Services, those Taxes will be invoiced to you as part of a billing process or collected at the time of purchase. In certain states, countries and territories, we may determine if your purchase of Services is subject to certain Taxes, and if so, may collect such Taxes and remit them to the appropriate taxing authority. If you believe that a given Tax does not apply or that some amount must be withheld from payments to us, you must promptly provide us with a tax certificate, withholding receipt, tax identifier (e.g., VAT ID) or other adequate proof, provided such information is valid and sufficiently authorized by all appropriate taxing authorities. You must also provide us with any tax identification information that is necessary for us to comply with our tax obligations, as we determine from time to time. You will be solely responsible for any misrepresentations made or non-compliance caused by you regarding Taxes, whether with respect to us or other parties, including any penalties, fines, audits, interest, back-payments or further taxes associated with such misrepresentations or non-compliance.
* We may offer Service credits from time to time, and any provision of such credits is governed by the disclosures, Terms and policies concerning the credits. You acknowledge and agree that all credits, whether previously offered or otherwise, are revocable or subject to early expiration at any time and for any reason or no reason by us, including for abuse, misrepresentation of Account information, unauthorized transfer, or illegal conduct by you.
## 7. Third Party Services
Our web pages and Services may include links to third party websites, services or other resources on the Internet, and third-party websites, services or other resources may include links to our Services as well. When you access third party resources on the Internet, you do so at your own risk. These third-party resources are not under our control, and, to the fullest extent permitted by law, we are not responsible or liable for the content, functions, accuracy, legality, appropriateness or any other aspect of such resources. The inclusion of any such link does not imply our endorsement or any association between us and any third party. To the fullest extent permitted by law, we shall not be responsible or liable, directly or indirectly, for any damage or loss caused or alleged to be caused by or in connection with the use of or reliance on any such third-party resource. It is your responsibility to protect your system from risks such as viruses, worms, Trojan horses and other security risks that may be presented by the third-party resources described in this section.
# 8. Disclaimer of Warranty
THESE SERVICES ARE PROVIDED BY COMPANY ON AN "AS IS" AND "AS AVAILABLE" BASIS. COMPANY MAKES NO REPRESENTATIONS OR WARRANTIES OF ANY KIND, EXPRESS OR IMPLIED, AS TO THE OPERATION OF THEIR SERVICES, OR THE INFORMATION, CONTENT OR MATERIALS INCLUDED THEREIN. YOU EXPRESSLY AGREE THAT YOUR USE OF THESE SERVICES, THEIR CONTENT, AND ANY SERVICES OR ITEMS OBTAINED FROM US IS AT YOUR SOLE RISK.
NEITHER COMPANY NOR ANY PERSON ASSOCIATED WITH COMPANY MAKES ANY WARRANTY OR REPRESENTATION WITH RESPECT TO THE COMPLETENESS, SECURITY, RELIABILITY, QUALITY, ACCURACY, OR AVAILABILITY OF THE SERVICES. WITHOUT LIMITING THE FOREGOING, NEITHER COMPANY NOR ANYONE ASSOCIATED WITH COMPANY REPRESENTS OR WARRANTS THAT THE SERVICES, THEIR CONTENT, OR ANY SERVICES OR ITEMS OBTAINED THROUGH THE SERVICES WILL BE ACCURATE, RELIABLE, ERROR-FREE, OR UNINTERRUPTED, THAT DEFECTS WILL BE CORRECTED, THAT THE SERVICES OR THE SERVER THAT MAKES IT AVAILABLE ARE FREE OF VIRUSES OR OTHER HARMFUL COMPONENTS OR THAT THE SERVICES OR ANY SERVICES OR ITEMS OBTAINED THROUGH THE SERVICES WILL OTHERWISE MEET YOUR NEEDS OR EXPECTATIONS.
COMPANY HEREBY DISCLAIMS ALL WARRANTIES OF ANY KIND, WHETHER EXPRESS OR IMPLIED, STATUTORY, OR OTHERWISE, INCLUDING BUT NOT LIMITED TO ANY WARRANTIES OF MERCHANTABILITY, NON-INFRINGEMENT, AND FITNESS FOR PARTICULAR PURPOSE.THE FOREGOING DOES NOT AFFECT ANY WARRANTIES WHICH CANNOT BE EXCLUDED OR LIMITED UNDER APPLICABLE LAW.
## 9. Limitation of Liability
EXCEPT AS PROHIBITED BY LAW, YOU WILL HOLD US AND OUR OFFICERS, DIRECTORS, EMPLOYEES, AND AGENTS HARMLESS FOR ANY INDIRECT, PUNITIVE, SPECIAL, INCIDENTAL, OR CONSEQUENTIAL DAMAGE, HOWEVER IT ARISES (INCLUDING ATTORNEYS' FEES AND ALL RELATED COSTS AND EXPENSES OF LITIGATION AND ARBITRATION, OR AT TRIAL OR ON APPEAL, IF ANY, WHETHER OR NOT LITIGATION OR ARBITRATION IS INSTITUTED), WHETHER IN AN ACTION OF CONTRACT, NEGLIGENCE, OR OTHER TORTIOUS ACTION, OR ARISING OUT OF OR IN CONNECTION WITH THIS AGREEMENT, INCLUDING WITHOUT LIMITATION ANY CLAIM FOR PERSONAL INJURY OR PROPERTY DAMAGE, ARISING FROM THIS AGREEMENT AND ANY VIOLATION BY YOU OF ANY FEDERAL, STATE, OR LOCAL LAWS, STATUTES, RULES, OR REGULATIONS, EVEN IF COMPANY HAS BEEN PREVIOUSLY ADVISED OF THE POSSIBILITY OF SUCH DAMAGE. EXCEPT AS PROHIBITED BY LAW, IF THERE IS LIABILITY FOUND ON THE PART OF COMPANY, IT WILL BE LIMITED TO THE AMOUNT PAID FOR THE PRODUCTS AND/OR SERVICES, AND UNDER NO CIRCUMSTANCES WILL THERE BE CONSEQUENTIAL OR PUNITIVE DAMAGES. SOME STATES DO NOT ALLOW THE EXCLUSION OR LIMITATION OF PUNITIVE, INCIDENTAL OR CONSEQUENTIAL DAMAGES, SO THE PRIOR LIMITATION OR EXCLUSION MAY NOT APPLY TO YOU.
## 10. Indemnification
To the fullest extent permitted by law, you are responsible for your use of the Services, and you shall defend, indemnify, and hold harmless us and our employees, officers, directors, agents, contractors, and representatives from all liabilities, claims, and expenses, including reasonable attorneys' fees and costs, that arise from or relate to your Services Content, your End Users, or your access to or use of the Services, including your breach of these Terms or applicable law, willful misconduct, negligence, illegal activity, breach of security or data, unauthorized access to or use of your Account, or infringement of a third party's right, including any intellectual property, confidentiality, property or privacy right. We reserve the right to assume the exclusive defense and control of any matter otherwise subject to indemnification by you, without limiting your indemnification obligations with respect to that matter, in which event you will make best efforts to assist and cooperate with us in defending the matter at your expense.
## 11. Termination
While we prefer to give advance notice of termination, we reserve the right, in our sole discretion, to terminate your access to all or any part of the Services at any time, with or without notice, effective immediately. Any such termination may result in the immediate forfeiture and destruction of data associated with your Account. Except as otherwise set forth herein or expressly agreed between the parties, any and all fees paid to us are non-refundable and any and all fees still owed to us at the time of such termination shall be immediately due and payable. Upon termination, any and all rights granted to you by these Terms will immediately be terminated, and you must also promptly discontinue all use of the Services. All provisions of these Terms which by their nature should reasonably be expected to survive termination shall survive termination.
## 12. Miscellaneous Provisions
* Updates and Modifications. Ubicloud reserves the right to update, change or otherwise modify these Terms on a going-forward basis at any time and in Ubicloud's sole discretion. If Ubicloud updates these Terms, Ubicloud may provide notice of such updates, such as by sending an email notification to the email address listed in your Account and/or updating the "Last Updated" date at the beginning of these Terms. Updates will be effective on the date specified in the notice. By continuing to access or use the Services after the date specified in the notice or updated Terms, you are agreeing to accept and be bound by the updated Terms and all of the Terms incorporated therein. If you do not agree to the updated Terms, then you may not continue to use the Services and your sole and exclusive remedy is to deactivate your Account and otherwise discontinue use of the Services.
* General. These Terms, including all documents expressly incorporated by reference herein, constitutes the entire agreement between the parties and supersedes all prior and contemporaneous agreements, proposals or representations, written or oral, concerning its subject matter. No provision of any purchase order, agreement, or business form employed by a user, including any electronic invoicing portals and vendor registration processes, will supersede the Terms and conditions of these Terms, and any such document relating to these Terms shall be for administrative purposes only and shall have no legal effect. Use of section headers in these Terms is for convenience only and will not have any impact on the interpretation of any provision. Any use of the singular shall be reasonably construed as if it also includes the plural, and vice versa. If not already specified, any use of "including" or "such as" shall be construed to mean "including but not limited to." If any part of these Terms is held to be invalid or unenforceable, the unenforceable part will be given effect to the greatest extent possible, and the remaining parts will remain in full force and effect. The failure to require performance of any provision will not affect our right to require performance at any other time after that, nor will a waiver by us of any breach or default of these Terms, or any provision of these Terms, be a waiver of any subsequent breach or default or a waiver of the provision itself.
* Assignment. You may not assign, transfer or delegate these Terms or any of your rights and obligations under the Terms, in whole or in part, by operation of law or otherwise, without our prior written consent. We may assign, transfer or delegate these Terms or our rights and obligations under these Terms without notice or consent. Subject to this section, these Terms will be binding upon and inure to the benefit of the parties and their respective permitted successors and assigns, and any assignment or transfer in violation of this section will be void.
* Your Agreements are with Ubicloud B.V if you are a customer resident in the European Economic Area and with Ubicloud Inc if you are a customer resident outside of the European Economic Area.
* Notwithstanding the foregoing and irrespective of the Ubicloud entity with which you are contracting, any payments you make will be made to Ubicloud Inc. and you will be billed accordingly by Ubicloud Inc. in accordance with Section 6.
* Notice. You must send notices to: [support@ubicloud.com](mailto:support@ubicloud.com). You agree to receive electronic notices from us, which will be sent by email to the email address then associated with your Account. Notices are effective on the date on the return receipt or, for email, when sent. You are responsible for ensuring that the email address associated with your Account is accurate and current. Any email notice that we send to that email address will be effective when sent, whether or not you actually receive the email.
* Consent to Electronic Communications. By using the Services, you consent to receiving certain electronic communications from. You agree that any notices, agreements, disclosures, or other communications that we send to you electronically will satisfy any legal communication requirements, including that those communications be in writing. However, you may opt out of receiving any, or all, of these communications from us by following the unsubscribe link or by emailing at.
* Notice to California Residents. If you are a California resident, under California Civil Code Section 1789.3, you may contact the Complaint Assistance Unit of the Division of Consumer Services of the California Department of Consumer Affairs in writing at 1625 N. Market Blvd., Suite N 112, Sacramento, California 95834, or by telephone at (800) 952-5210 in order to resolve a complaint or to receive further information regarding use of the Services.
* Governing Law. These Terms are governed by the laws of the State of California without regard to conflict of law principles.
* Relationship of the Parties. The parties are independent contractors. These Terms does not create a partnership, franchise, joint venture, agency, fiduciary or employment relationship between the parties. Neither party, nor any of their respective affiliates, is an agent of the other for any purpose or has the authority to bind the other.
* Force Majeure. Ubicloud shall not be liable for nonperformance of the Terms herein to the extent that Ubicloud is prevented from performing as a result of any act or event which occurs and is beyond Ubicloud's reasonable control, including, without limitation, acts of God, war, unrest or riot, strikes, any action of a governmental entity, weather, quarantine, fire, flood, earthquake, explosion, utility or telecommunications outages, Internet disturbance, epidemic, pandemic or any unforeseen change in circumstances, or any other causes beyond our reasonable control.
* No Third-Party Beneficiaries. These Terms does not create any third-party beneficiary rights in any individual or entity that is not a party to these Terms.
# 13. Contact Us
Please send your feedback, comments, requests for technical support:By email: [support@ubicloud.com](mailto:support@ubicloud.com).
# Prior Versions of our Terms of Service
* Effective on February 25, 2024 Prior TOS available [here](/about/terms-of-service-2024-02-25).
# Create a new firewall rule
Source: https://ubicloud.com/docs/api-reference/firewall-rule/create-a-new-firewall-rule
api-reference/openapi.yml post /project/{project_id}/location/{location}/firewall/{firewall_reference}/firewall-rule
# Delete a specific firewall rule
Source: https://ubicloud.com/docs/api-reference/firewall-rule/delete-a-specific-firewall-rule
api-reference/openapi.yml delete /project/{project_id}/location/{location}/firewall/{firewall_reference}/firewall-rule/{firewall_rule_id}
# Delete a specific firewall rule
Source: https://ubicloud.com/docs/api-reference/firewall-rule/delete-a-specific-firewall-rule-1
api-reference/openapi.yml delete /project/{project_id}/location/{location}/postgres/{postgres_database_reference}/firewall-rule/{firewall_rule_id}
# Get details of a firewall rule
Source: https://ubicloud.com/docs/api-reference/firewall-rule/get-details-of-a-firewall-rule
api-reference/openapi.yml get /project/{project_id}/location/{location}/firewall/{firewall_reference}/firewall-rule/{firewall_rule_id}
# Modify a firewall rule
Source: https://ubicloud.com/docs/api-reference/firewall-rule/modify-a-firewall-rule
api-reference/openapi.yml patch /project/{project_id}/location/{location}/firewall/{firewall_reference}/firewall-rule/{firewall_rule_id}
# Attach a subnet to firewall
Source: https://ubicloud.com/docs/api-reference/firewall/attach-a-subnet-to-firewall
api-reference/openapi.yml post /project/{project_id}/location/{location}/firewall/{firewall_reference}/attach-subnet
# Create a new firewall
Source: https://ubicloud.com/docs/api-reference/firewall/create-a-new-firewall
api-reference/openapi.yml post /project/{project_id}/location/{location}/firewall/{firewall_reference}
# Delete a specific firewall
Source: https://ubicloud.com/docs/api-reference/firewall/delete-a-specific-firewall
api-reference/openapi.yml delete /project/{project_id}/location/{location}/firewall/{firewall_reference}
# Detach a subnet from firewall
Source: https://ubicloud.com/docs/api-reference/firewall/detach-a-subnet-from-firewall
api-reference/openapi.yml post /project/{project_id}/location/{location}/firewall/{firewall_reference}/detach-subnet
# Get details of a specific firewall
Source: https://ubicloud.com/docs/api-reference/firewall/get-details-of-a-specific-firewall
api-reference/openapi.yml get /project/{project_id}/location/{location}/firewall/{firewall_reference}
# Rename a firewall
Source: https://ubicloud.com/docs/api-reference/firewall/rename-a-firewall
api-reference/openapi.yml post /project/{project_id}/location/{location}/firewall/{firewall_reference}/rename
# Return the list of firewalls in the project
Source: https://ubicloud.com/docs/api-reference/firewall/return-the-list-of-firewalls-in-the-project
api-reference/openapi.yml get /project/{project_id}/firewall
# Return the list of firewalls in the project and location
Source: https://ubicloud.com/docs/api-reference/firewall/return-the-list-of-firewalls-in-the-project-and-location
api-reference/openapi.yml get /project/{project_id}/location/{location}/firewall
# Update a firewall
Source: https://ubicloud.com/docs/api-reference/firewall/update-a-firewall
api-reference/openapi.yml patch /project/{project_id}/location/{location}/firewall/{firewall_reference}
# Delete a cache entry for a GitHub repository for an installation in the project
Source: https://ubicloud.com/docs/api-reference/github/delete-a-cache-entry-for-a-github-repository-for-an-installation-in-the-project
api-reference/openapi.yml delete /project/{project_id}/github/{github_installation_reference}/repository/{github_repository_reference}/cache/{github_cache_entry_id}
# Delete all cache entries for a GitHub repository for an installation in the project
Source: https://ubicloud.com/docs/api-reference/github/delete-all-cache-entries-for-a-github-repository-for-an-installation-in-the-project
api-reference/openapi.yml delete /project/{project_id}/github/{github_installation_reference}/repository/{github_repository_reference}/cache
# Return information for a all cache entries for a GitHub repository for an installation in the project
Source: https://ubicloud.com/docs/api-reference/github/return-information-for-a-all-cache-entries-for-a-github-repository-for-an-installation-in-the-project
api-reference/openapi.yml get /project/{project_id}/github/{github_installation_reference}/repository/{github_repository_reference}/cache
# Return information for a single cache entry for a GitHub repository for an installation in the project
Source: https://ubicloud.com/docs/api-reference/github/return-information-for-a-single-cache-entry-for-a-github-repository-for-an-installation-in-the-project
api-reference/openapi.yml get /project/{project_id}/github/{github_installation_reference}/repository/{github_repository_reference}/cache/{github_cache_entry_id}
# Return information for a single GitHub installation
Source: https://ubicloud.com/docs/api-reference/github/return-information-for-a-single-github-installation
api-reference/openapi.yml get /project/{project_id}/github/{github_installation_reference}
# Return information for a single GitHub repository for an installation in the project
Source: https://ubicloud.com/docs/api-reference/github/return-information-for-a-single-github-repository-for-an-installation-in-the-project
api-reference/openapi.yml get /project/{project_id}/github/{github_installation_reference}/repository/{github_repository_reference}
# Return repositories for a single GitHub installation in the project
Source: https://ubicloud.com/docs/api-reference/github/return-repositories-for-a-single-github-installation-in-the-project
api-reference/openapi.yml get /project/{project_id}/github/{github_installation_reference}/repository
# Return the list of GitHub installations in the project
Source: https://ubicloud.com/docs/api-reference/github/return-the-list-of-github-installations-in-the-project
api-reference/openapi.yml get /project/{project_id}/github
# Create a new inference API key
Source: https://ubicloud.com/docs/api-reference/inference-api-key/create-a-new-inference-api-key
api-reference/openapi.yml post /project/{project_id}/inference-api-key
# Delete a specific inference API key
Source: https://ubicloud.com/docs/api-reference/inference-api-key/delete-a-specific-inference-api-key
api-reference/openapi.yml delete /project/{project_id}/inference-api-key/{inference_api_key_id}
# Get a specific inference API key
Source: https://ubicloud.com/docs/api-reference/inference-api-key/get-a-specific-inference-api-key
api-reference/openapi.yml get /project/{project_id}/inference-api-key/{inference_api_key_id}
# Return the list of inference API keys in the project
Source: https://ubicloud.com/docs/api-reference/inference-api-key/return-the-list-of-inference-api-keys-in-the-project
api-reference/openapi.yml get /project/{project_id}/inference-api-key
# Change number of nodes of a kubernetes nodepool
Source: https://ubicloud.com/docs/api-reference/kubernetes-cluster/change-number-of-nodes-of-a-kubernetes-nodepool
api-reference/openapi.yml post /project/{project_id}/location/{location}/kubernetes-cluster/{kubernetes_cluster_reference}/nodepool/{kubernetes_nodepool_reference}/resize
# Create a new KubernetesCluster in a specific location of a project
Source: https://ubicloud.com/docs/api-reference/kubernetes-cluster/create-a-new-kubernetescluster-in-a-specific-location-of-a-project
api-reference/openapi.yml post /project/{project_id}/location/{location}/kubernetes-cluster/{kubernetes_cluster_reference}
# Delete a specific KubernetesCluster
Source: https://ubicloud.com/docs/api-reference/kubernetes-cluster/delete-a-specific-kubernetescluster
api-reference/openapi.yml delete /project/{project_id}/location/{location}/kubernetes-cluster/{kubernetes_cluster_reference}
# Get details of a specific KubernetesCluster in a location
Source: https://ubicloud.com/docs/api-reference/kubernetes-cluster/get-details-of-a-specific-kubernetescluster-in-a-location
api-reference/openapi.yml get /project/{project_id}/location/{location}/kubernetes-cluster/{kubernetes_cluster_reference}
# Get kubeconfig.yaml of a specific KubernetesCluster in a location
Source: https://ubicloud.com/docs/api-reference/kubernetes-cluster/get-kubeconfigyaml-of-a-specific-kubernetescluster-in-a-location
api-reference/openapi.yml get /project/{project_id}/location/{location}/kubernetes-cluster/{kubernetes_cluster_reference}/kubeconfig
# List all KubernetesClusters created under the given project ID and visible to logged in user
Source: https://ubicloud.com/docs/api-reference/kubernetes-cluster/list-all-kubernetesclusters-created-under-the-given-project-id-and-visible-to-logged-in-user
api-reference/openapi.yml get /project/{project_id}/kubernetes-cluster
# List KubernetesClusters in a specific location of a project
Source: https://ubicloud.com/docs/api-reference/kubernetes-cluster/list-kubernetesclusters-in-a-specific-location-of-a-project
api-reference/openapi.yml get /project/{project_id}/location/{location}/kubernetes-cluster
# Rename a kubernetes cluster
Source: https://ubicloud.com/docs/api-reference/kubernetes-cluster/rename-a-kubernetes-cluster
api-reference/openapi.yml post /project/{project_id}/location/{location}/kubernetes-cluster/{kubernetes_cluster_reference}/rename
# Attach a VM to a Load Balancer in a specific location of a project
Source: https://ubicloud.com/docs/api-reference/load-balancer/attach-a-vm-to-a-load-balancer-in-a-specific-location-of-a-project
api-reference/openapi.yml post /project/{project_id}/location/{location}/load-balancer/{load_balancer_reference}/attach-vm
# Create a new Load Balancer in a specific location of a project
Source: https://ubicloud.com/docs/api-reference/load-balancer/create-a-new-load-balancer-in-a-specific-location-of-a-project
api-reference/openapi.yml post /project/{project_id}/location/{location}/load-balancer/{load_balancer_reference}
# Delete a specific Load Balancer
Source: https://ubicloud.com/docs/api-reference/load-balancer/delete-a-specific-load-balancer
api-reference/openapi.yml delete /project/{project_id}/location/{location}/load-balancer/{load_balancer_reference}
# Detach a VM from a Load Balancer in a specific location of a project
Source: https://ubicloud.com/docs/api-reference/load-balancer/detach-a-vm-from-a-load-balancer-in-a-specific-location-of-a-project
api-reference/openapi.yml post /project/{project_id}/location/{location}/load-balancer/{load_balancer_reference}/detach-vm
# Get details of a specific Load Balancer in a location
Source: https://ubicloud.com/docs/api-reference/load-balancer/get-details-of-a-specific-load-balancer-in-a-location
api-reference/openapi.yml get /project/{project_id}/location/{location}/load-balancer/{load_balancer_reference}
# List Load Balancers in a specific location of a project
Source: https://ubicloud.com/docs/api-reference/load-balancer/list-load-balancers-in-a-specific-location-of-a-project
api-reference/openapi.yml get /project/{project_id}/location/{location}/load-balancer
# List Load Balancers in a specific project
Source: https://ubicloud.com/docs/api-reference/load-balancer/list-load-balancers-in-a-specific-project
api-reference/openapi.yml get /project/{project_id}/load-balancer
# Rename a load balancer
Source: https://ubicloud.com/docs/api-reference/load-balancer/rename-a-load-balancer
api-reference/openapi.yml post /project/{project_id}/location/{location}/load-balancer/{load_balancer_reference}/rename
# Toggle the SSL certificate for a load balancer
Source: https://ubicloud.com/docs/api-reference/load-balancer/toggle-the-ssl-certificate-for-a-load-balancer
api-reference/openapi.yml post /project/{project_id}/location/{location}/load-balancer/{load_balancer_reference}/toggle-ssl-certificate
# Update a Load Balancer in a specific location of a project
Source: https://ubicloud.com/docs/api-reference/load-balancer/update-a-load-balancer-in-a-specific-location-of-a-project
api-reference/openapi.yml patch /project/{project_id}/location/{location}/load-balancer/{load_balancer_reference}
# Overview
Source: https://ubicloud.com/docs/api-reference/overview
Ubicloud APIs (Beta) allow users to programmatically manage their resources.
The API is designed with predictable endpoints and an intuitive design, making it easy to understand and use. It adheres to REST principles, allowing users to send requests using any client that supports HTTPS requests to Ubicloud API endpoints. All request and response bodies are in JSON format.
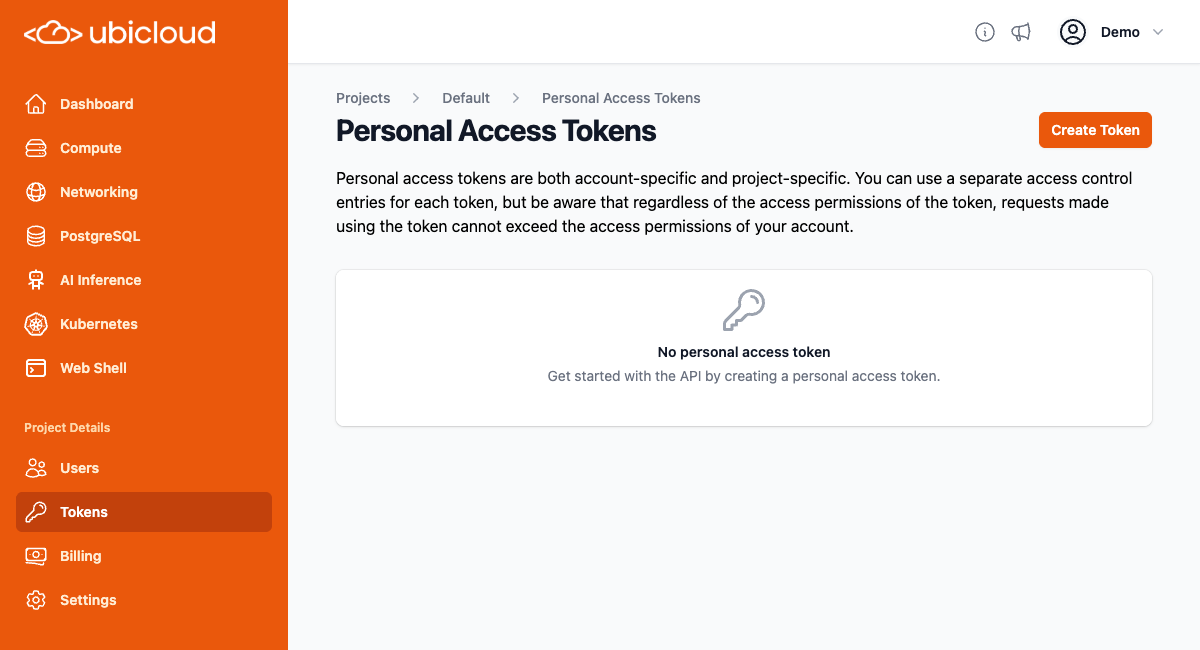
## Authentication
The Ubicloud API uses personal access tokens for authentication. If you have not already created a personal access token for your project, you can create one by going to the `Tokens` page for your project, and clicking the `Create Token` button:
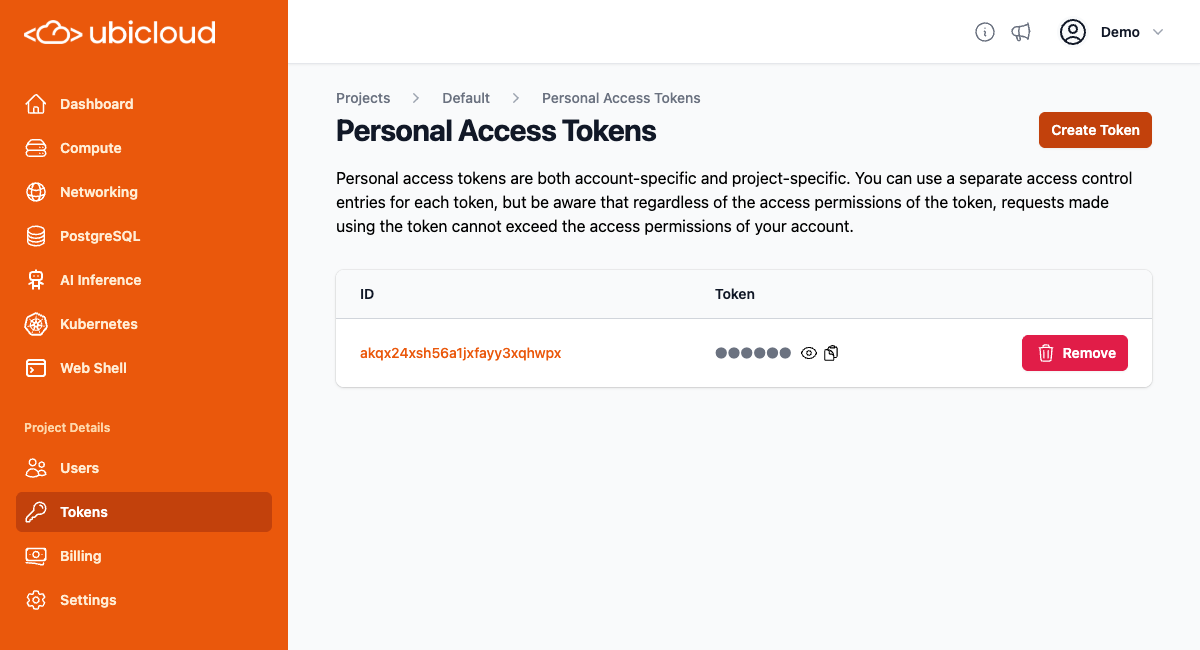
 That will create a personal access token. Click on the clipboard icon under the token heading to copy the token to your clipboard:
 You must pass the personal access token in the authorization header for all subsequent requests. Examples are provided in the API reference.
## Requests
API communicates with clients via HTTPS requests. All data sent in request bodies must be in JSON format. The API supports the following HTTP methods:
| Method | Usage |
| ------ | --------------------------------------------------------------------------------------------------------------------------------------------- |
| GET | Retrieves either a single resource or a list of resources. Supports pagination for lists. |
| POST | Creates a resource. All required attributes must be included in the JSON body of the request. Also allows for executing actions on resources. |
| DELETE | Deletes a resource. If the given resource URI is valid, it returns a 204 status code irrespective of the resource exists or not. |
| PATCH | Updates a resource. All required attributes must be included in the JSON body of the request. |
## Responses
Following HTTP response status codes can be returned from the API.
| Status | Description |
| ------ | -------------------------------------------------- |
| 200 | Request was successful |
| 204 | Request was successful and no content returns back |
| 400 | Invalid request |
| 401 | Not authenticated to the API |
| 403 | Unauthorized user access |
| 404 | Resource not found |
| 409 | Resource state is not valid to handle request |
| 419 | Invalid Token |
| 500 | Unexpected internal error |
All the responses except the ones with the HTTP code 204 returns the content in the JSON format.
## API Design
This section explains core concepts of the Ubicloud API.
### Global and Location Based Resources
Ubicloud API users can manage two types of resources: global and location-based.
Global resources on Ubicloud are created independently of any specific location. Global resources can be managed with the API currently are projects, firewalls and firewall rules. Global resources do not have a globally unique name but do have a globally unique ID. Therefore, users can create multiple global resource of the same type with the same name, and each will be assigned a unique ID.
Resources created under a specific project and location are termed location-based resources. Users can create resources in various locations for a given project. Location-based resources have unique IDs and also names unique at the project and location level. The uniqueness of names allows API to make requests idempotent by using the name as an idempotency token.
#### Accessing Resources
As mentioned above, all resources have unique IDs, and location-based resources also have unique names. Resources can be accessed either by their ID or by their name (if available). We refer to the former as static access and the latter as dynamic access, because static access allows users to access the same resource even if its name changes (note that renaming resources is not supported yet).
For global resources, which have only a unique ID, users can access a specific resource by its ID. For example, to retrieve a project with ID `pj1234ab9eyt7jd4zmwby6ymd3`, user would send a GET request to `api.ubicloud.com/project/pj1234ab9eyt7jd4zmwby6ymd3`.
For location-based resources, which have both unique IDs and names, users can access them either way. For example, a VM named `my-ubicloud-vm` with ID `vm123451fzj3k70d3p8f1709s` in the `pj1234ab9eyt7jd4zmwby6ymd3` project located in `eu-north-h1` can be accessed either via `api.ubicloud.com/project/pj1234ab9eyt7jd4zmwby6ymd3/location/eu-north-h1/vm/my-ubicloud-vm` or `api.ubicloud.com/project/pj1234ab9eyt7jd4zmwby6ymd3/location/eu-north-h1/vm/id/vm123451fzj3k70d3p8f1709s`. This enables both dynamic and static access as described.
#### Creating Resources
To create a global resource all attributes must be sent in the body. For example to create a project, send a POST request to `api.ubicloud.com/project` with the required parameters in the body of the request. To create a firewall in the project `pj1234ab9eyt7jd4zmwby6ymd3` user can send a POST request to `api.ubicloud.com/project/pj1234ab9eyt7jd4zmwby6ymd3/firewall` with all the required parameters in the body.
For creating location-based resources, Ubicloud supports a more condensed and straightforward method. Instead of sending a POST request to the parent URI of the resource, user can send a POST request directly to the resource's URI using its unique name, making the requests idempotent. For example, to create the previously mentioned VM, user would send a POST request to `api.ubicloud.com/project/pj1234ab9eyt7jd4zmwby6ymd3/location/eu-north-h1/vm/my-ubicloud-vm` with other required parameters in the request body. Essentially, URIs including the name of location-based resources can be used like variables in programming, simplifying creation, access, and deletion. No need to have a special case forPOST requests.
### Deleting Resources
To delete a resource, user would send a DELETE request using the ID for global resources and either the ID or name for location-based resources. The DELETE endpoints return a 204 status code, whether the resource was deleted or did not exist to simplify client implementation. Note that, DELETE requests can still return 404 if the given resource URI is not a valid one. Please check the API reference for sample usage.
### Listing Resources with Pagination Support
Users would send a GET request to the resource's parent URI to retrieve a list of resources. For instance, a request to `api.ubicloud.com/project` will return all the projects user has created. All listing endpoints on Ubicloud support pagination, using cursor-based pagination as it scales better and handles parallel operations more effectively than offset-based pagination. Users can pass three different query parameters to list endpoints:
**order\_column:** Specifies the attribute by which pages will be ordered. Each list endpoint supports ordering by id, and those with unique names also support ordering by name.
**start\_after:** A polymorphic value after which the page will include resources. Its' type depends on the value of order\_column. If order\_column is id, the value of start\_after must be a valid ID. If it is name, the value of start\_after can be any text. For example, to get a paginated list of VMs named alphabetically after "my-ubi", set the order\_column to "name" and start\_after to "my\_ubi".
**page\_size:** Indicates how many items will be returned in a page. The default value is 1000, and it must be between 1 and 1000.
This polymorphic **start\_after** value helps us continue returning pages even if the record with the given **start\_after** value is deleted in parallel. We do not try to retrieve a resource with the **start\_after** value but compare existing items' related column with the passed value directly, overcoming a main limitation of cursor-based pagination.
List endpoints return the response JSON with two keys: **items**, which holds the list of resources, and **count**, which keeps track of how many resources exist in total.
### UBID
You might be curious why unique IDs for projects start with "pj" and those for virtual machines start with "vm". This is intentional to make life easier for both Ubicloud developers and users. As soon as you see a resource's ID, you can immediately understand its type, as different types of resources have different two-letter prefixes. We call these ubids, and you can see how they are both user-friendly and globally unique from the [implementation](https://github.com/ubicloud/ubicloud/blob/main/ubid.rb).
# Create a new Postgres Database in a specific location of a project
Source: https://ubicloud.com/docs/api-reference/postgres-database/create-a-new-postgres-database-in-a-specific-location-of-a-project
api-reference/openapi.yml post /project/{project_id}/location/{location}/postgres/{postgres_database_reference}
# Create a read replica of the Postgres database
Source: https://ubicloud.com/docs/api-reference/postgres-database/create-a-read-replica-of-the-postgres-database
api-reference/openapi.yml post /project/{project_id}/location/{location}/postgres/{postgres_database_reference}/read-replica
# Delete a specific Postgres Database
Source: https://ubicloud.com/docs/api-reference/postgres-database/delete-a-specific-postgres-database
api-reference/openapi.yml delete /project/{project_id}/location/{location}/postgres/{postgres_database_reference}
# Download CA certificates for a specific Postgres Database in a location with name
Source: https://ubicloud.com/docs/api-reference/postgres-database/download-ca-certificates-for-a-specific-postgres-database-in-a-location-with-name
api-reference/openapi.yml get /project/{project_id}/location/{location}/postgres/{postgres_database_reference}/ca-certificates
# Get configuration for a specific Postgres Database
Source: https://ubicloud.com/docs/api-reference/postgres-database/get-configuration-for-a-specific-postgres-database
api-reference/openapi.yml get /project/{project_id}/location/{location}/postgres/{postgres_database_reference}/config
# Get details of a specific Postgres database in a location
Source: https://ubicloud.com/docs/api-reference/postgres-database/get-details-of-a-specific-postgres-database-in-a-location
api-reference/openapi.yml get /project/{project_id}/location/{location}/postgres/{postgres_database_reference}
# Get details of a specific Postgres database upgrade
Source: https://ubicloud.com/docs/api-reference/postgres-database/get-details-of-a-specific-postgres-database-upgrade
api-reference/openapi.yml get /project/{project_id}/location/{location}/postgres/{postgres_database_reference}/upgrade
# Get metrics for a specific Postgres Database in a location
Source: https://ubicloud.com/docs/api-reference/postgres-database/get-metrics-for-a-specific-postgres-database-in-a-location
api-reference/openapi.yml get /project/{project_id}/location/{location}/postgres/{postgres_database_reference}/metrics
# List backups for a specific Postgres database
Source: https://ubicloud.com/docs/api-reference/postgres-database/list-backups-for-a-specific-postgres-database
api-reference/openapi.yml get /project/{project_id}/location/{location}/postgres/{postgres_database_reference}/backup
# List Postgres Databases in a specific location of a project
Source: https://ubicloud.com/docs/api-reference/postgres-database/list-postgres-databases-in-a-specific-location-of-a-project
api-reference/openapi.yml get /project/{project_id}/location/{location}/postgres
# List visible Postgres Databases
Source: https://ubicloud.com/docs/api-reference/postgres-database/list-visible-postgres-databases
api-reference/openapi.yml get /project/{project_id}/postgres
# Partially update configuration for a specific Postgres Database
Source: https://ubicloud.com/docs/api-reference/postgres-database/partially-update-configuration-for-a-specific-postgres-database
api-reference/openapi.yml patch /project/{project_id}/location/{location}/postgres/{postgres_database_reference}/config
# Promote a specific Postgres Read Replica Database
Source: https://ubicloud.com/docs/api-reference/postgres-database/promote-a-specific-postgres-read-replica-database
api-reference/openapi.yml post /project/{project_id}/location/{location}/postgres/{postgres_database_reference}/promote
# Rename a Postgres database
Source: https://ubicloud.com/docs/api-reference/postgres-database/rename-a-postgres-database
api-reference/openapi.yml post /project/{project_id}/location/{location}/postgres/{postgres_database_reference}/rename
# Reset superuser password of the Postgres database
Source: https://ubicloud.com/docs/api-reference/postgres-database/reset-superuser-password-of-the-postgres-database
api-reference/openapi.yml post /project/{project_id}/location/{location}/postgres/{postgres_database_reference}/reset-superuser-password
# Restart a specific Postgres Database
Source: https://ubicloud.com/docs/api-reference/postgres-database/restart-a-specific-postgres-database
api-reference/openapi.yml post /project/{project_id}/location/{location}/postgres/{postgres_database_reference}/restart
# Restore a new Postgres database in a specific location of a project
Source: https://ubicloud.com/docs/api-reference/postgres-database/restore-a-new-postgres-database-in-a-specific-location-of-a-project
api-reference/openapi.yml post /project/{project_id}/location/{location}/postgres/{postgres_database_reference}/restore
# Set maintenance window for the Postgres database
Source: https://ubicloud.com/docs/api-reference/postgres-database/set-maintenance-window-for-the-postgres-database
api-reference/openapi.yml post /project/{project_id}/location/{location}/postgres/{postgres_database_reference}/set-maintenance-window
# Update a Postgres Database in a specific location of a project
Source: https://ubicloud.com/docs/api-reference/postgres-database/update-a-postgres-database-in-a-specific-location-of-a-project
api-reference/openapi.yml patch /project/{project_id}/location/{location}/postgres/{postgres_database_reference}
# Update configuration for a specific Postgres Database
Source: https://ubicloud.com/docs/api-reference/postgres-database/update-configuration-for-a-specific-postgres-database
api-reference/openapi.yml post /project/{project_id}/location/{location}/postgres/{postgres_database_reference}/config
# Upgrade a Postgres database to the next major version
Source: https://ubicloud.com/docs/api-reference/postgres-database/upgrade-a-postgres-database-to-the-next-major-version
api-reference/openapi.yml post /project/{project_id}/location/{location}/postgres/{postgres_database_reference}/upgrade
# Create a new Postgres firewall rule
Source: https://ubicloud.com/docs/api-reference/postgres-firewall-rule/create-a-new-postgres-firewall-rule
api-reference/openapi.yml post /project/{project_id}/location/{location}/postgres/{postgres_database_reference}/firewall-rule
# List location Postgres firewall rules
Source: https://ubicloud.com/docs/api-reference/postgres-firewall-rule/list-location-postgres-firewall-rules
api-reference/openapi.yml get /project/{project_id}/location/{location}/postgres/{postgres_database_reference}/firewall-rule
# Update a specific Postgres firewall rule
Source: https://ubicloud.com/docs/api-reference/postgres-firewall-rule/update-a-specific-postgres-firewall-rule
api-reference/openapi.yml patch /project/{project_id}/location/{location}/postgres/{postgres_database_reference}/firewall-rule/{firewall_rule_id}
# Create a new Postgres Metric Destination
Source: https://ubicloud.com/docs/api-reference/postgres-metric-destination/create-a-new-postgres-metric-destination
api-reference/openapi.yml post /project/{project_id}/location/{location}/postgres/{postgres_database_reference}/metric-destination
# Delete a specific Metric Destination
Source: https://ubicloud.com/docs/api-reference/postgres-metric-destination/delete-a-specific-metric-destination
api-reference/openapi.yml delete /project/{project_id}/location/{location}/postgres/{postgres_database_reference}/metric-destination/{metric_destination_id}
# Create a new private location
Source: https://ubicloud.com/docs/api-reference/private-location/create-a-new-private-location
api-reference/openapi.yml post /project/{project_id}/private-location
# Delete a specific private location
Source: https://ubicloud.com/docs/api-reference/private-location/delete-a-specific-private-location
api-reference/openapi.yml delete /project/{project_id}/private-location/{private_location_name}
# Get details of a specific private location
Source: https://ubicloud.com/docs/api-reference/private-location/get-details-of-a-specific-private-location
api-reference/openapi.yml get /project/{project_id}/private-location/{private_location_name}
# Return the list of private locations in the project
Source: https://ubicloud.com/docs/api-reference/private-location/return-the-list-of-private-locations-in-the-project
api-reference/openapi.yml get /project/{project_id}/private-location
# Update a specific private location name
Source: https://ubicloud.com/docs/api-reference/private-location/update-a-specific-private-location-name
api-reference/openapi.yml post /project/{project_id}/private-location/{private_location_name}
# Connect private subnet to another private subnet
Source: https://ubicloud.com/docs/api-reference/private-subnet/connect-private-subnet-to-another-private-subnet
api-reference/openapi.yml post /project/{project_id}/location/{location}/private-subnet/{private_subnet_reference}/connect
# Create a new Private Subnet in a specific location of a project
Source: https://ubicloud.com/docs/api-reference/private-subnet/create-a-new-private-subnet-in-a-specific-location-of-a-project
api-reference/openapi.yml post /project/{project_id}/location/{location}/private-subnet/{private_subnet_reference}
# Delete a specific Private Subnet
Source: https://ubicloud.com/docs/api-reference/private-subnet/delete-a-specific-private-subnet
api-reference/openapi.yml delete /project/{project_id}/location/{location}/private-subnet/{private_subnet_reference}
# Disconnect private subnet from another private subnet
Source: https://ubicloud.com/docs/api-reference/private-subnet/disconnect-private-subnet-from-another-private-subnet
api-reference/openapi.yml post /project/{project_id}/location/{location}/private-subnet/{private_subnet_reference}/disconnect/{private_subnet_id}
# Get details of a specific Private Subnet in a location
Source: https://ubicloud.com/docs/api-reference/private-subnet/get-details-of-a-specific-private-subnet-in-a-location
api-reference/openapi.yml get /project/{project_id}/location/{location}/private-subnet/{private_subnet_reference}
# List Private Subnets in a specific location of a project
Source: https://ubicloud.com/docs/api-reference/private-subnet/list-private-subnets-in-a-specific-location-of-a-project
api-reference/openapi.yml get /project/{project_id}/location/{location}/private-subnet
# List visible Private Subnets
Source: https://ubicloud.com/docs/api-reference/private-subnet/list-visible-private-subnets
api-reference/openapi.yml get /project/{project_id}/private-subnet
# Rename a private subnet
Source: https://ubicloud.com/docs/api-reference/private-subnet/rename-a-private-subnet
api-reference/openapi.yml post /project/{project_id}/location/{location}/private-subnet/{private_subnet_reference}/rename
# Create a new project
Source: https://ubicloud.com/docs/api-reference/project/create-a-new-project
api-reference/openapi.yml post /project
# Delete a project
Source: https://ubicloud.com/docs/api-reference/project/delete-a-project
api-reference/openapi.yml delete /project/{project_id}
# List all projects visible to the logged in user.
Source: https://ubicloud.com/docs/api-reference/project/list-all-projects-visible-to-the-logged-in-user
api-reference/openapi.yml get /project
# Retrieve a project
Source: https://ubicloud.com/docs/api-reference/project/retrieve-a-project
api-reference/openapi.yml get /project/{project_id}
# Return information on object type, location, and name
Source: https://ubicloud.com/docs/api-reference/project/return-information-on-object-type-location-and-name
api-reference/openapi.yml get /project/{project_id}/object-info/{object_id}
# Delete a specific SSH public key
Source: https://ubicloud.com/docs/api-reference/ssh-public-key/delete-a-specific-ssh-public-key
api-reference/openapi.yml delete /project/{project_id}/ssh-public-key/{ssh_public_key_reference}
# Get a specific SSH public key
Source: https://ubicloud.com/docs/api-reference/ssh-public-key/get-a-specific-ssh-public-key
api-reference/openapi.yml get /project/{project_id}/ssh-public-key/{ssh_public_key_reference}
# Register a SSH public key
Source: https://ubicloud.com/docs/api-reference/ssh-public-key/register-a-ssh-public-key
api-reference/openapi.yml post /project/{project_id}/ssh-public-key
# Return the list of SSH public keys in the project
Source: https://ubicloud.com/docs/api-reference/ssh-public-key/return-the-list-of-ssh-public-keys-in-the-project
api-reference/openapi.yml get /project/{project_id}/ssh-public-key
# Update SSH public key information
Source: https://ubicloud.com/docs/api-reference/ssh-public-key/update-ssh-public-key-information
api-reference/openapi.yml post /project/{project_id}/ssh-public-key/{ssh_public_key_reference}
# Create a new VM in a specific location of a project
Source: https://ubicloud.com/docs/api-reference/virtual-machine/create-a-new-vm-in-a-specific-location-of-a-project
api-reference/openapi.yml post /project/{project_id}/location/{location}/vm/{vm_reference}
# Delete a specific VM
Source: https://ubicloud.com/docs/api-reference/virtual-machine/delete-a-specific-vm
api-reference/openapi.yml delete /project/{project_id}/location/{location}/vm/{vm_reference}
# Get details of a specific VM in a location
Source: https://ubicloud.com/docs/api-reference/virtual-machine/get-details-of-a-specific-vm-in-a-location
api-reference/openapi.yml get /project/{project_id}/location/{location}/vm/{vm_reference}
# List all VMs created under the given project ID and visible to logged in user
Source: https://ubicloud.com/docs/api-reference/virtual-machine/list-all-vms-created-under-the-given-project-id-and-visible-to-logged-in-user
api-reference/openapi.yml get /project/{project_id}/vm
# List VMs in a specific location of a project
Source: https://ubicloud.com/docs/api-reference/virtual-machine/list-vms-in-a-specific-location-of-a-project
api-reference/openapi.yml get /project/{project_id}/location/{location}/vm
# Rename a VM
Source: https://ubicloud.com/docs/api-reference/virtual-machine/rename-a-vm
api-reference/openapi.yml post /project/{project_id}/location/{location}/vm/{vm_reference}/rename
# Restart a specific VM
Source: https://ubicloud.com/docs/api-reference/virtual-machine/restart-a-specific-vm
api-reference/openapi.yml post /project/{project_id}/location/{location}/vm/{vm_reference}/restart
# Attribute-Based Access Control (ABAC) Design
Source: https://ubicloud.com/docs/architecture/attribute-based-access-control-abac
## Motivation
Authentication confirms that users are who they say they are. Authorization gives those users permissions to access a resource.
Ubicloud uses [Rodauth](https://github.com/jeremyevans/rodauth) for authentication. For authorization, we need to implement a system that gives users the flexibility they need to access various resources across different cloud services on the cloud.
Today, there's a big bifurcation of how authorization is implemented in the cloud. Hyperscalers such as AWS, Azure, and GCP, have powerful authorization models. Other cloud and hosting providers only have authorization at the most basic level (a user has access to a project or not).
Ubicloud's authorization intends to deliver something as powerful as the Identity Access Management (IAM) seen on the hyperscalers. It's in active development, so expect to see major adjustments.
## Background
There are two common security models on the cloud today: role-based access control (RBAC) and attribute-based access control (ABAC). In RBAC, an administrator puts users into roles. Then permissions to resources are defined over these roles.
For example, an administrator puts the user “Enes Cakir” into “engineering” and “devops” roles. The “devops” role can then access production resources and make deployments.
ABAC takes this one step further, where permissions to resources are defined over attributes. In addition to roles, attributes can also include things like a user's location, client device type, or authentication method. For example, the user “Enes Cakir” can access production resources when he's in Europe, but not when he's in the US. This ensures that organizations can define flexible policies to meet their business needs.
[Tailscale has a great blog post](https://tailscale.com/blog/rbac-like-it-was-meant-to-be/) that describes security policies, RBAC, and ABAC in more detail.
All three hyperscalers seem to be moving towards the ABAC model. You can read more about [AWS](https://docs.aws.amazon.com/IAM/latest/UserGuide/introduction_attribute-based-access-control.html), [Azure](https://learn.microsoft.com/en-us/azure/role-based-access-control/conditions-overview), and [GCP](https://cloud.google.com/iam/docs/conditions-overview)'s ABAC designs on their websites. These designs rely on conditional expressions and are more complex than a clean-sheet ABAC design. This is probably because all hyperscalers need to be backwards compatible with their RBAC designs. We'd like to provide something much simpler, both in design and implementation.
## An ABAC example
In the following, we start with an ABAC example and build on top of it. The following diagram describes a simple scenario, where the users on the left have associated “tags” (classic roles) and the resources on the right also have “tags”.
You must pass the personal access token in the authorization header for all subsequent requests. Examples are provided in the API reference.
## Requests
API communicates with clients via HTTPS requests. All data sent in request bodies must be in JSON format. The API supports the following HTTP methods:
| Method | Usage |
| ------ | --------------------------------------------------------------------------------------------------------------------------------------------- |
| GET | Retrieves either a single resource or a list of resources. Supports pagination for lists. |
| POST | Creates a resource. All required attributes must be included in the JSON body of the request. Also allows for executing actions on resources. |
| DELETE | Deletes a resource. If the given resource URI is valid, it returns a 204 status code irrespective of the resource exists or not. |
| PATCH | Updates a resource. All required attributes must be included in the JSON body of the request. |
## Responses
Following HTTP response status codes can be returned from the API.
| Status | Description |
| ------ | -------------------------------------------------- |
| 200 | Request was successful |
| 204 | Request was successful and no content returns back |
| 400 | Invalid request |
| 401 | Not authenticated to the API |
| 403 | Unauthorized user access |
| 404 | Resource not found |
| 409 | Resource state is not valid to handle request |
| 419 | Invalid Token |
| 500 | Unexpected internal error |
All the responses except the ones with the HTTP code 204 returns the content in the JSON format.
## API Design
This section explains core concepts of the Ubicloud API.
### Global and Location Based Resources
Ubicloud API users can manage two types of resources: global and location-based.
Global resources on Ubicloud are created independently of any specific location. Global resources can be managed with the API currently are projects, firewalls and firewall rules. Global resources do not have a globally unique name but do have a globally unique ID. Therefore, users can create multiple global resource of the same type with the same name, and each will be assigned a unique ID.
Resources created under a specific project and location are termed location-based resources. Users can create resources in various locations for a given project. Location-based resources have unique IDs and also names unique at the project and location level. The uniqueness of names allows API to make requests idempotent by using the name as an idempotency token.
#### Accessing Resources
As mentioned above, all resources have unique IDs, and location-based resources also have unique names. Resources can be accessed either by their ID or by their name (if available). We refer to the former as static access and the latter as dynamic access, because static access allows users to access the same resource even if its name changes (note that renaming resources is not supported yet).
For global resources, which have only a unique ID, users can access a specific resource by its ID. For example, to retrieve a project with ID `pj1234ab9eyt7jd4zmwby6ymd3`, user would send a GET request to `api.ubicloud.com/project/pj1234ab9eyt7jd4zmwby6ymd3`.
For location-based resources, which have both unique IDs and names, users can access them either way. For example, a VM named `my-ubicloud-vm` with ID `vm123451fzj3k70d3p8f1709s` in the `pj1234ab9eyt7jd4zmwby6ymd3` project located in `eu-north-h1` can be accessed either via `api.ubicloud.com/project/pj1234ab9eyt7jd4zmwby6ymd3/location/eu-north-h1/vm/my-ubicloud-vm` or `api.ubicloud.com/project/pj1234ab9eyt7jd4zmwby6ymd3/location/eu-north-h1/vm/id/vm123451fzj3k70d3p8f1709s`. This enables both dynamic and static access as described.
#### Creating Resources
To create a global resource all attributes must be sent in the body. For example to create a project, send a POST request to `api.ubicloud.com/project` with the required parameters in the body of the request. To create a firewall in the project `pj1234ab9eyt7jd4zmwby6ymd3` user can send a POST request to `api.ubicloud.com/project/pj1234ab9eyt7jd4zmwby6ymd3/firewall` with all the required parameters in the body.
For creating location-based resources, Ubicloud supports a more condensed and straightforward method. Instead of sending a POST request to the parent URI of the resource, user can send a POST request directly to the resource's URI using its unique name, making the requests idempotent. For example, to create the previously mentioned VM, user would send a POST request to `api.ubicloud.com/project/pj1234ab9eyt7jd4zmwby6ymd3/location/eu-north-h1/vm/my-ubicloud-vm` with other required parameters in the request body. Essentially, URIs including the name of location-based resources can be used like variables in programming, simplifying creation, access, and deletion. No need to have a special case forPOST requests.
### Deleting Resources
To delete a resource, user would send a DELETE request using the ID for global resources and either the ID or name for location-based resources. The DELETE endpoints return a 204 status code, whether the resource was deleted or did not exist to simplify client implementation. Note that, DELETE requests can still return 404 if the given resource URI is not a valid one. Please check the API reference for sample usage.
### Listing Resources with Pagination Support
Users would send a GET request to the resource's parent URI to retrieve a list of resources. For instance, a request to `api.ubicloud.com/project` will return all the projects user has created. All listing endpoints on Ubicloud support pagination, using cursor-based pagination as it scales better and handles parallel operations more effectively than offset-based pagination. Users can pass three different query parameters to list endpoints:
**order\_column:** Specifies the attribute by which pages will be ordered. Each list endpoint supports ordering by id, and those with unique names also support ordering by name.
**start\_after:** A polymorphic value after which the page will include resources. Its' type depends on the value of order\_column. If order\_column is id, the value of start\_after must be a valid ID. If it is name, the value of start\_after can be any text. For example, to get a paginated list of VMs named alphabetically after "my-ubi", set the order\_column to "name" and start\_after to "my\_ubi".
**page\_size:** Indicates how many items will be returned in a page. The default value is 1000, and it must be between 1 and 1000.
This polymorphic **start\_after** value helps us continue returning pages even if the record with the given **start\_after** value is deleted in parallel. We do not try to retrieve a resource with the **start\_after** value but compare existing items' related column with the passed value directly, overcoming a main limitation of cursor-based pagination.
List endpoints return the response JSON with two keys: **items**, which holds the list of resources, and **count**, which keeps track of how many resources exist in total.
### UBID
You might be curious why unique IDs for projects start with "pj" and those for virtual machines start with "vm". This is intentional to make life easier for both Ubicloud developers and users. As soon as you see a resource's ID, you can immediately understand its type, as different types of resources have different two-letter prefixes. We call these ubids, and you can see how they are both user-friendly and globally unique from the [implementation](https://github.com/ubicloud/ubicloud/blob/main/ubid.rb).
# Create a new Postgres Database in a specific location of a project
Source: https://ubicloud.com/docs/api-reference/postgres-database/create-a-new-postgres-database-in-a-specific-location-of-a-project
api-reference/openapi.yml post /project/{project_id}/location/{location}/postgres/{postgres_database_reference}
# Create a read replica of the Postgres database
Source: https://ubicloud.com/docs/api-reference/postgres-database/create-a-read-replica-of-the-postgres-database
api-reference/openapi.yml post /project/{project_id}/location/{location}/postgres/{postgres_database_reference}/read-replica
# Delete a specific Postgres Database
Source: https://ubicloud.com/docs/api-reference/postgres-database/delete-a-specific-postgres-database
api-reference/openapi.yml delete /project/{project_id}/location/{location}/postgres/{postgres_database_reference}
# Download CA certificates for a specific Postgres Database in a location with name
Source: https://ubicloud.com/docs/api-reference/postgres-database/download-ca-certificates-for-a-specific-postgres-database-in-a-location-with-name
api-reference/openapi.yml get /project/{project_id}/location/{location}/postgres/{postgres_database_reference}/ca-certificates
# Get configuration for a specific Postgres Database
Source: https://ubicloud.com/docs/api-reference/postgres-database/get-configuration-for-a-specific-postgres-database
api-reference/openapi.yml get /project/{project_id}/location/{location}/postgres/{postgres_database_reference}/config
# Get details of a specific Postgres database in a location
Source: https://ubicloud.com/docs/api-reference/postgres-database/get-details-of-a-specific-postgres-database-in-a-location
api-reference/openapi.yml get /project/{project_id}/location/{location}/postgres/{postgres_database_reference}
# Get details of a specific Postgres database upgrade
Source: https://ubicloud.com/docs/api-reference/postgres-database/get-details-of-a-specific-postgres-database-upgrade
api-reference/openapi.yml get /project/{project_id}/location/{location}/postgres/{postgres_database_reference}/upgrade
# Get metrics for a specific Postgres Database in a location
Source: https://ubicloud.com/docs/api-reference/postgres-database/get-metrics-for-a-specific-postgres-database-in-a-location
api-reference/openapi.yml get /project/{project_id}/location/{location}/postgres/{postgres_database_reference}/metrics
# List backups for a specific Postgres database
Source: https://ubicloud.com/docs/api-reference/postgres-database/list-backups-for-a-specific-postgres-database
api-reference/openapi.yml get /project/{project_id}/location/{location}/postgres/{postgres_database_reference}/backup
# List Postgres Databases in a specific location of a project
Source: https://ubicloud.com/docs/api-reference/postgres-database/list-postgres-databases-in-a-specific-location-of-a-project
api-reference/openapi.yml get /project/{project_id}/location/{location}/postgres
# List visible Postgres Databases
Source: https://ubicloud.com/docs/api-reference/postgres-database/list-visible-postgres-databases
api-reference/openapi.yml get /project/{project_id}/postgres
# Partially update configuration for a specific Postgres Database
Source: https://ubicloud.com/docs/api-reference/postgres-database/partially-update-configuration-for-a-specific-postgres-database
api-reference/openapi.yml patch /project/{project_id}/location/{location}/postgres/{postgres_database_reference}/config
# Promote a specific Postgres Read Replica Database
Source: https://ubicloud.com/docs/api-reference/postgres-database/promote-a-specific-postgres-read-replica-database
api-reference/openapi.yml post /project/{project_id}/location/{location}/postgres/{postgres_database_reference}/promote
# Rename a Postgres database
Source: https://ubicloud.com/docs/api-reference/postgres-database/rename-a-postgres-database
api-reference/openapi.yml post /project/{project_id}/location/{location}/postgres/{postgres_database_reference}/rename
# Reset superuser password of the Postgres database
Source: https://ubicloud.com/docs/api-reference/postgres-database/reset-superuser-password-of-the-postgres-database
api-reference/openapi.yml post /project/{project_id}/location/{location}/postgres/{postgres_database_reference}/reset-superuser-password
# Restart a specific Postgres Database
Source: https://ubicloud.com/docs/api-reference/postgres-database/restart-a-specific-postgres-database
api-reference/openapi.yml post /project/{project_id}/location/{location}/postgres/{postgres_database_reference}/restart
# Restore a new Postgres database in a specific location of a project
Source: https://ubicloud.com/docs/api-reference/postgres-database/restore-a-new-postgres-database-in-a-specific-location-of-a-project
api-reference/openapi.yml post /project/{project_id}/location/{location}/postgres/{postgres_database_reference}/restore
# Set maintenance window for the Postgres database
Source: https://ubicloud.com/docs/api-reference/postgres-database/set-maintenance-window-for-the-postgres-database
api-reference/openapi.yml post /project/{project_id}/location/{location}/postgres/{postgres_database_reference}/set-maintenance-window
# Update a Postgres Database in a specific location of a project
Source: https://ubicloud.com/docs/api-reference/postgres-database/update-a-postgres-database-in-a-specific-location-of-a-project
api-reference/openapi.yml patch /project/{project_id}/location/{location}/postgres/{postgres_database_reference}
# Update configuration for a specific Postgres Database
Source: https://ubicloud.com/docs/api-reference/postgres-database/update-configuration-for-a-specific-postgres-database
api-reference/openapi.yml post /project/{project_id}/location/{location}/postgres/{postgres_database_reference}/config
# Upgrade a Postgres database to the next major version
Source: https://ubicloud.com/docs/api-reference/postgres-database/upgrade-a-postgres-database-to-the-next-major-version
api-reference/openapi.yml post /project/{project_id}/location/{location}/postgres/{postgres_database_reference}/upgrade
# Create a new Postgres firewall rule
Source: https://ubicloud.com/docs/api-reference/postgres-firewall-rule/create-a-new-postgres-firewall-rule
api-reference/openapi.yml post /project/{project_id}/location/{location}/postgres/{postgres_database_reference}/firewall-rule
# List location Postgres firewall rules
Source: https://ubicloud.com/docs/api-reference/postgres-firewall-rule/list-location-postgres-firewall-rules
api-reference/openapi.yml get /project/{project_id}/location/{location}/postgres/{postgres_database_reference}/firewall-rule
# Update a specific Postgres firewall rule
Source: https://ubicloud.com/docs/api-reference/postgres-firewall-rule/update-a-specific-postgres-firewall-rule
api-reference/openapi.yml patch /project/{project_id}/location/{location}/postgres/{postgres_database_reference}/firewall-rule/{firewall_rule_id}
# Create a new Postgres Metric Destination
Source: https://ubicloud.com/docs/api-reference/postgres-metric-destination/create-a-new-postgres-metric-destination
api-reference/openapi.yml post /project/{project_id}/location/{location}/postgres/{postgres_database_reference}/metric-destination
# Delete a specific Metric Destination
Source: https://ubicloud.com/docs/api-reference/postgres-metric-destination/delete-a-specific-metric-destination
api-reference/openapi.yml delete /project/{project_id}/location/{location}/postgres/{postgres_database_reference}/metric-destination/{metric_destination_id}
# Create a new private location
Source: https://ubicloud.com/docs/api-reference/private-location/create-a-new-private-location
api-reference/openapi.yml post /project/{project_id}/private-location
# Delete a specific private location
Source: https://ubicloud.com/docs/api-reference/private-location/delete-a-specific-private-location
api-reference/openapi.yml delete /project/{project_id}/private-location/{private_location_name}
# Get details of a specific private location
Source: https://ubicloud.com/docs/api-reference/private-location/get-details-of-a-specific-private-location
api-reference/openapi.yml get /project/{project_id}/private-location/{private_location_name}
# Return the list of private locations in the project
Source: https://ubicloud.com/docs/api-reference/private-location/return-the-list-of-private-locations-in-the-project
api-reference/openapi.yml get /project/{project_id}/private-location
# Update a specific private location name
Source: https://ubicloud.com/docs/api-reference/private-location/update-a-specific-private-location-name
api-reference/openapi.yml post /project/{project_id}/private-location/{private_location_name}
# Connect private subnet to another private subnet
Source: https://ubicloud.com/docs/api-reference/private-subnet/connect-private-subnet-to-another-private-subnet
api-reference/openapi.yml post /project/{project_id}/location/{location}/private-subnet/{private_subnet_reference}/connect
# Create a new Private Subnet in a specific location of a project
Source: https://ubicloud.com/docs/api-reference/private-subnet/create-a-new-private-subnet-in-a-specific-location-of-a-project
api-reference/openapi.yml post /project/{project_id}/location/{location}/private-subnet/{private_subnet_reference}
# Delete a specific Private Subnet
Source: https://ubicloud.com/docs/api-reference/private-subnet/delete-a-specific-private-subnet
api-reference/openapi.yml delete /project/{project_id}/location/{location}/private-subnet/{private_subnet_reference}
# Disconnect private subnet from another private subnet
Source: https://ubicloud.com/docs/api-reference/private-subnet/disconnect-private-subnet-from-another-private-subnet
api-reference/openapi.yml post /project/{project_id}/location/{location}/private-subnet/{private_subnet_reference}/disconnect/{private_subnet_id}
# Get details of a specific Private Subnet in a location
Source: https://ubicloud.com/docs/api-reference/private-subnet/get-details-of-a-specific-private-subnet-in-a-location
api-reference/openapi.yml get /project/{project_id}/location/{location}/private-subnet/{private_subnet_reference}
# List Private Subnets in a specific location of a project
Source: https://ubicloud.com/docs/api-reference/private-subnet/list-private-subnets-in-a-specific-location-of-a-project
api-reference/openapi.yml get /project/{project_id}/location/{location}/private-subnet
# List visible Private Subnets
Source: https://ubicloud.com/docs/api-reference/private-subnet/list-visible-private-subnets
api-reference/openapi.yml get /project/{project_id}/private-subnet
# Rename a private subnet
Source: https://ubicloud.com/docs/api-reference/private-subnet/rename-a-private-subnet
api-reference/openapi.yml post /project/{project_id}/location/{location}/private-subnet/{private_subnet_reference}/rename
# Create a new project
Source: https://ubicloud.com/docs/api-reference/project/create-a-new-project
api-reference/openapi.yml post /project
# Delete a project
Source: https://ubicloud.com/docs/api-reference/project/delete-a-project
api-reference/openapi.yml delete /project/{project_id}
# List all projects visible to the logged in user.
Source: https://ubicloud.com/docs/api-reference/project/list-all-projects-visible-to-the-logged-in-user
api-reference/openapi.yml get /project
# Retrieve a project
Source: https://ubicloud.com/docs/api-reference/project/retrieve-a-project
api-reference/openapi.yml get /project/{project_id}
# Return information on object type, location, and name
Source: https://ubicloud.com/docs/api-reference/project/return-information-on-object-type-location-and-name
api-reference/openapi.yml get /project/{project_id}/object-info/{object_id}
# Delete a specific SSH public key
Source: https://ubicloud.com/docs/api-reference/ssh-public-key/delete-a-specific-ssh-public-key
api-reference/openapi.yml delete /project/{project_id}/ssh-public-key/{ssh_public_key_reference}
# Get a specific SSH public key
Source: https://ubicloud.com/docs/api-reference/ssh-public-key/get-a-specific-ssh-public-key
api-reference/openapi.yml get /project/{project_id}/ssh-public-key/{ssh_public_key_reference}
# Register a SSH public key
Source: https://ubicloud.com/docs/api-reference/ssh-public-key/register-a-ssh-public-key
api-reference/openapi.yml post /project/{project_id}/ssh-public-key
# Return the list of SSH public keys in the project
Source: https://ubicloud.com/docs/api-reference/ssh-public-key/return-the-list-of-ssh-public-keys-in-the-project
api-reference/openapi.yml get /project/{project_id}/ssh-public-key
# Update SSH public key information
Source: https://ubicloud.com/docs/api-reference/ssh-public-key/update-ssh-public-key-information
api-reference/openapi.yml post /project/{project_id}/ssh-public-key/{ssh_public_key_reference}
# Create a new VM in a specific location of a project
Source: https://ubicloud.com/docs/api-reference/virtual-machine/create-a-new-vm-in-a-specific-location-of-a-project
api-reference/openapi.yml post /project/{project_id}/location/{location}/vm/{vm_reference}
# Delete a specific VM
Source: https://ubicloud.com/docs/api-reference/virtual-machine/delete-a-specific-vm
api-reference/openapi.yml delete /project/{project_id}/location/{location}/vm/{vm_reference}
# Get details of a specific VM in a location
Source: https://ubicloud.com/docs/api-reference/virtual-machine/get-details-of-a-specific-vm-in-a-location
api-reference/openapi.yml get /project/{project_id}/location/{location}/vm/{vm_reference}
# List all VMs created under the given project ID and visible to logged in user
Source: https://ubicloud.com/docs/api-reference/virtual-machine/list-all-vms-created-under-the-given-project-id-and-visible-to-logged-in-user
api-reference/openapi.yml get /project/{project_id}/vm
# List VMs in a specific location of a project
Source: https://ubicloud.com/docs/api-reference/virtual-machine/list-vms-in-a-specific-location-of-a-project
api-reference/openapi.yml get /project/{project_id}/location/{location}/vm
# Rename a VM
Source: https://ubicloud.com/docs/api-reference/virtual-machine/rename-a-vm
api-reference/openapi.yml post /project/{project_id}/location/{location}/vm/{vm_reference}/rename
# Restart a specific VM
Source: https://ubicloud.com/docs/api-reference/virtual-machine/restart-a-specific-vm
api-reference/openapi.yml post /project/{project_id}/location/{location}/vm/{vm_reference}/restart
# Attribute-Based Access Control (ABAC) Design
Source: https://ubicloud.com/docs/architecture/attribute-based-access-control-abac
## Motivation
Authentication confirms that users are who they say they are. Authorization gives those users permissions to access a resource.
Ubicloud uses [Rodauth](https://github.com/jeremyevans/rodauth) for authentication. For authorization, we need to implement a system that gives users the flexibility they need to access various resources across different cloud services on the cloud.
Today, there's a big bifurcation of how authorization is implemented in the cloud. Hyperscalers such as AWS, Azure, and GCP, have powerful authorization models. Other cloud and hosting providers only have authorization at the most basic level (a user has access to a project or not).
Ubicloud's authorization intends to deliver something as powerful as the Identity Access Management (IAM) seen on the hyperscalers. It's in active development, so expect to see major adjustments.
## Background
There are two common security models on the cloud today: role-based access control (RBAC) and attribute-based access control (ABAC). In RBAC, an administrator puts users into roles. Then permissions to resources are defined over these roles.
For example, an administrator puts the user “Enes Cakir” into “engineering” and “devops” roles. The “devops” role can then access production resources and make deployments.
ABAC takes this one step further, where permissions to resources are defined over attributes. In addition to roles, attributes can also include things like a user's location, client device type, or authentication method. For example, the user “Enes Cakir” can access production resources when he's in Europe, but not when he's in the US. This ensures that organizations can define flexible policies to meet their business needs.
[Tailscale has a great blog post](https://tailscale.com/blog/rbac-like-it-was-meant-to-be/) that describes security policies, RBAC, and ABAC in more detail.
All three hyperscalers seem to be moving towards the ABAC model. You can read more about [AWS](https://docs.aws.amazon.com/IAM/latest/UserGuide/introduction_attribute-based-access-control.html), [Azure](https://learn.microsoft.com/en-us/azure/role-based-access-control/conditions-overview), and [GCP](https://cloud.google.com/iam/docs/conditions-overview)'s ABAC designs on their websites. These designs rely on conditional expressions and are more complex than a clean-sheet ABAC design. This is probably because all hyperscalers need to be backwards compatible with their RBAC designs. We'd like to provide something much simpler, both in design and implementation.
## An ABAC example
In the following, we start with an ABAC example and build on top of it. The following diagram describes a simple scenario, where the users on the left have associated “tags” (classic roles) and the resources on the right also have “tags”.
 Simple ABAC example, where users and resources have associated "tags"
In ABAC terminology, the subject is the user requesting access to a resource to perform an action. The resource is the object (such as VM, simple storage bucket, or source file) that the subject wants to access. The action is what the user is trying to do with the resource. Example actions include VM view, VM create, VM delete, etc.
In addition to the triplet ``, we introduce the notion of tags. We can associate each subject or object with one or more tags. These four concepts give us an enormous amount of flexibility with our authorization model. In the example above, a user or organization can create fine-grained access policies simply by assigning the right tags to users and resources.
Today, Ubicloud's tags are user assigned. We don't have any computed tags over dynamic attributes, such as geolocation. We did this to start simple and grow our authorization model with actual customer needs.
## Making users not worry about ABAC
Of course, most users who are new to Ubicloud shouldn't need to learn about ABAC. Intuitively, after they sign up, they should be able to create, view, and destroy resources on Ubicloud. They should also be able to invite and collaborate with other users on the platform.
To enable this, we introduce the notion of “hyper tags.” Each user and resource in the below diagram has a hidden tag, whereby the hidden tag has the same name as its associated user or resource. This way, after a user comes in, they can create new resources and act on the resources they have created without knowing about ABAC.
Simple ABAC example, where users and resources have associated "tags"
In ABAC terminology, the subject is the user requesting access to a resource to perform an action. The resource is the object (such as VM, simple storage bucket, or source file) that the subject wants to access. The action is what the user is trying to do with the resource. Example actions include VM view, VM create, VM delete, etc.
In addition to the triplet ``, we introduce the notion of tags. We can associate each subject or object with one or more tags. These four concepts give us an enormous amount of flexibility with our authorization model. In the example above, a user or organization can create fine-grained access policies simply by assigning the right tags to users and resources.
Today, Ubicloud's tags are user assigned. We don't have any computed tags over dynamic attributes, such as geolocation. We did this to start simple and grow our authorization model with actual customer needs.
## Making users not worry about ABAC
Of course, most users who are new to Ubicloud shouldn't need to learn about ABAC. Intuitively, after they sign up, they should be able to create, view, and destroy resources on Ubicloud. They should also be able to invite and collaborate with other users on the platform.
To enable this, we introduce the notion of “hyper tags.” Each user and resource in the below diagram has a hidden tag, whereby the hidden tag has the same name as its associated user or resource. This way, after a user comes in, they can create new resources and act on the resources they have created without knowing about ABAC.
 Hyper tags provide hidden names for attributes
The notion of “hyper tags” has the side benefit of enabling more granular access policies. For example, if user “Enes Cakir” has 10 virtual machines and he'd like to grant permissions for just one of those VMs to “Daniel Farina”, he can do so. Of course, Enes could have done this by creating tags for himself, Daniel, and the VM. Hyper tags make this common use case just more convenient.
# Avoiding naming collisions in ABAC
One remaining problem with our ABAC example is naming collisions. It's likely for different organizations and users to create tags with the same name. For example, “prod”, “engineering”, “devops”, “database”, etc. are all common tag names.
To avoid naming collisions, we qualify every tag's name with a namespace. We then use these fully qualified names for authorization. For example, in the example below, Daniel is tagged as belonging to the engineering and devops organizations. So, he can access and deploy code both to dev and prod environments. On the other hand, Enes is only tagged with belonging to the engineering team and can therefore only deploy to the dev environment.
Hyper tags provide hidden names for attributes
The notion of “hyper tags” has the side benefit of enabling more granular access policies. For example, if user “Enes Cakir” has 10 virtual machines and he'd like to grant permissions for just one of those VMs to “Daniel Farina”, he can do so. Of course, Enes could have done this by creating tags for himself, Daniel, and the VM. Hyper tags make this common use case just more convenient.
# Avoiding naming collisions in ABAC
One remaining problem with our ABAC example is naming collisions. It's likely for different organizations and users to create tags with the same name. For example, “prod”, “engineering”, “devops”, “database”, etc. are all common tag names.
To avoid naming collisions, we qualify every tag's name with a namespace. We then use these fully qualified names for authorization. For example, in the example below, Daniel is tagged as belonging to the engineering and devops organizations. So, he can access and deploy code both to dev and prod environments. On the other hand, Enes is only tagged with belonging to the engineering team and can therefore only deploy to the dev environment.
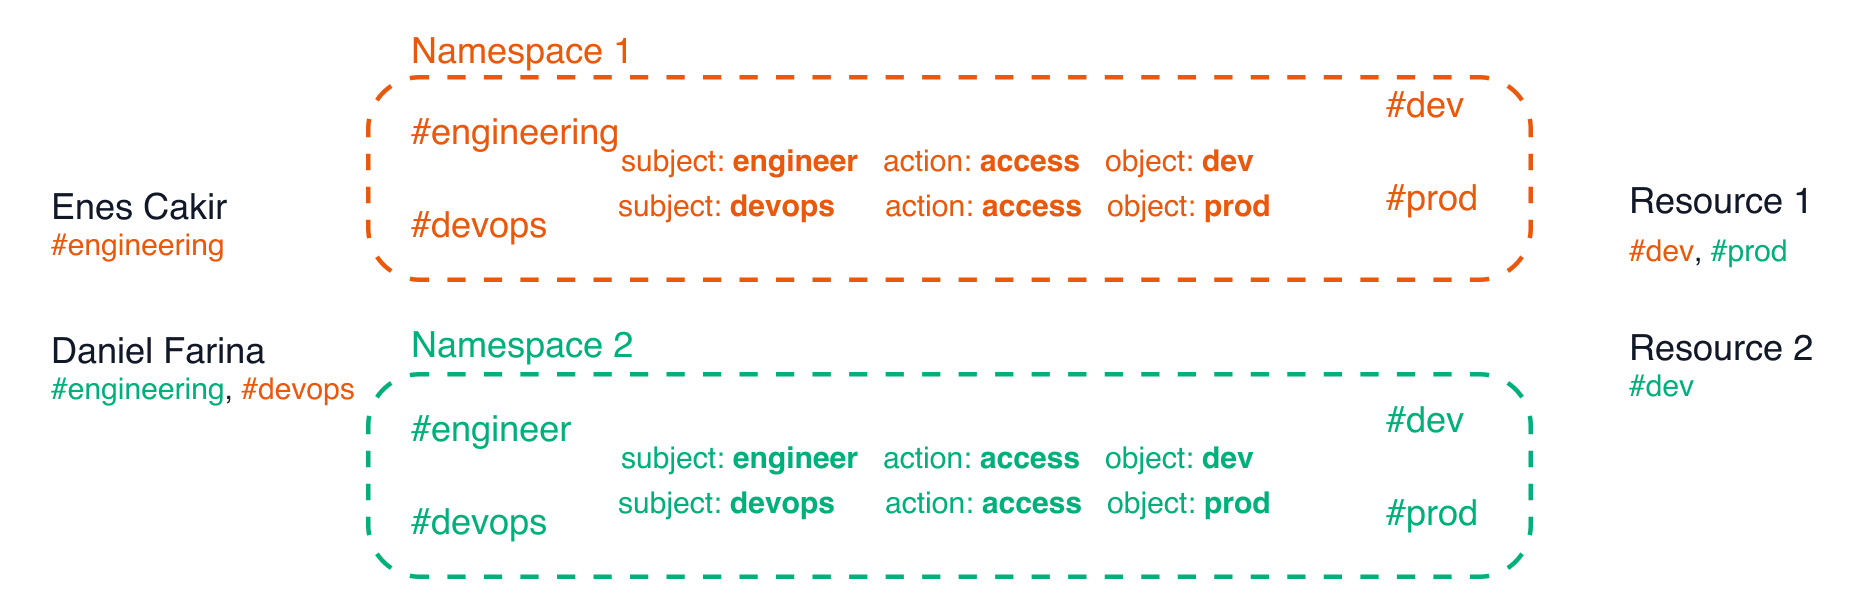 Namespaces qualify tag names and avoid naming collisions
Of course, we don't want to bother a new Ubicloud user with the concept of a namespace. So, when a new user signs up, we create a default namespace for them and create their resources in that namespace. They can then update their “projects” by inviting other users and giving access to their namespace or resources.
# ABAC design
Our ABAC design follows this simple yet powerful example. All we need to do is map the concepts we've introduced above into a data model. In our case, it turns out we need five PostgreSQL tables to implement an ABAC authorization model for the cloud.
Namespaces qualify tag names and avoid naming collisions
Of course, we don't want to bother a new Ubicloud user with the concept of a namespace. So, when a new user signs up, we create a default namespace for them and create their resources in that namespace. They can then update their “projects” by inviting other users and giving access to their namespace or resources.
# ABAC design
Our ABAC design follows this simple yet powerful example. All we need to do is map the concepts we've introduced above into a data model. In our case, it turns out we need five PostgreSQL tables to implement an ABAC authorization model for the cloud.
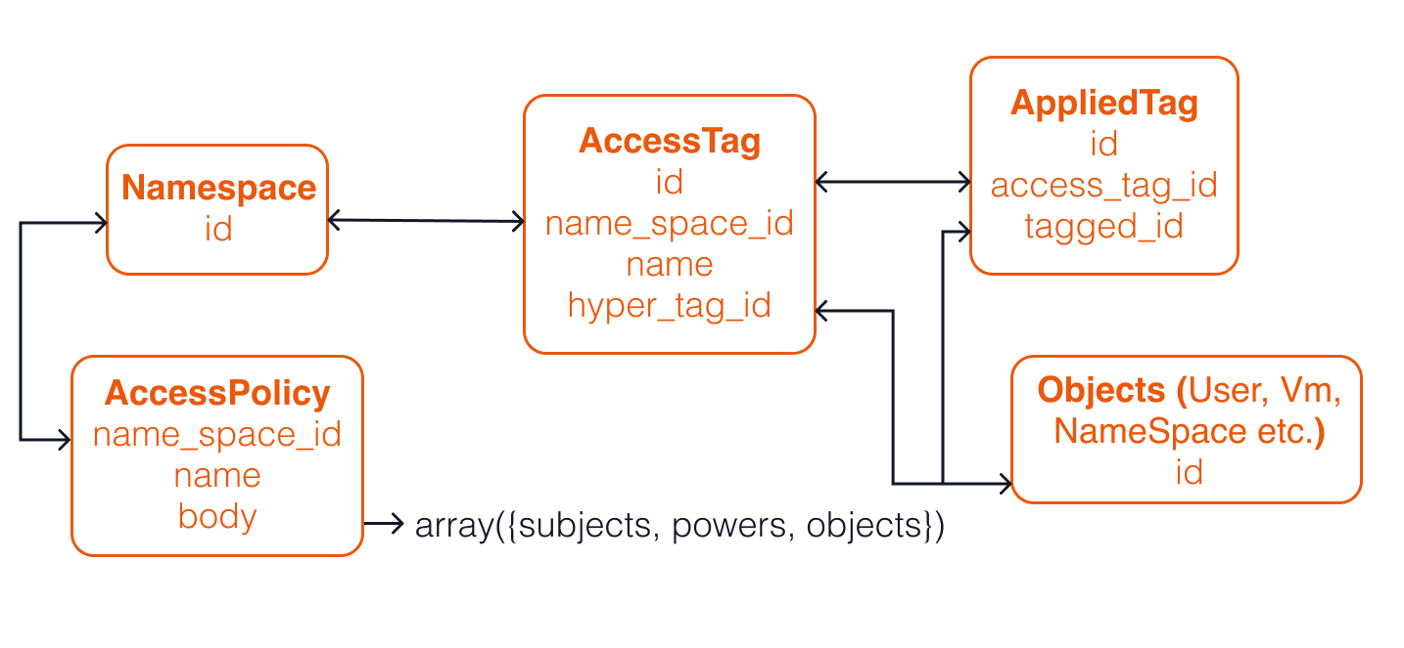 ABAC design's data model, where the model has five PostgreSQL tables
These five Postgres tables are:
1. An access policy table that represents the relationship between ``. Remember the subject here is the user and the object is the resource
2. A namespace table to avoid naming collisions
3. An access tags table to represent tags (we thought the name tags was just too generic, so picked something more descriptive)
4. An items table to represent subjects and objects
5. An applied tags table - this is an intermediary/pivot table that we use to establish a many to many relationship between items and tags
## ABAC implementation in 130 lines of code
With our ABAC concepts mapped onto five PostgreSQL tables, all we need for authorization is to check if a path exists from a subject (a user identified with one or more tags) to the object (a resource identified with one or more tags). We can do this through the following SQL query.
```sql theme={null}
SELECT object_applied_tags.tagged_id, object_applied_tags.tagged_table, subjects, actions, objects
FROM accounts AS subject
JOIN applied_tag AS subject_applied_tags ON subject.id = subject_applied_tags.tagged_id
JOIN access_tag AS subject_access_tags ON subject_applied_tags.access_tag_id = subject_access_tags.id
JOIN access_policy AS acl ON subject_access_tags.project_id = acl.project_id
JOIN jsonb_to_recordset(acl.body->'acls') as items(subjects JSONB, actions JSONB, objects JSONB) ON TRUE
JOIN access_tag AS object_access_tags ON subject_access_tags.project_id = object_access_tags.project_id
JOIN applied_tag AS object_applied_tags ON object_access_tags.id = object_applied_tags.access_tag_id AND objects ? object_access_tags."name"
WHERE subject.id = :subject_id
AND actions ?| array[:actions]
AND subjects ? subject_access_tags."name"
```
The nice thing about this query is the following:
* It's powerful. We can express all attribute-based access control policies with this one query, for user-defined tags.
* It has an existence proof. When you run the query, if it returns a tuple, the subject can access the object. If it doesn't, the subject isn't authorized. Further, you can see all access paths from the subject to the object by looking at the tuples this query returns.
* It's simple. We get an ABAC implementation in 10 lines of SQL. In fact, [the entire file](https://github.com/ubicloud/ubicloud/blob/main/lib/authorization.rb) that implements our authorization policy is 130 lines of code.
Of course, you could argue that running a SQL query for each authorization action won't scale. When we reach that scale, we'd gladly optimize our implementation or rehaul it if need be. At that point, we would have also built a much deeper understanding of customer access patterns. Until then, we'll have a simple ABAC model that matches the expressiveness of AWS, Azure, and GCP, in an open source implementation.
## Conclusion
ABAC enables a flexible way to authorize users. With it, organizations and users can express complex access relationships between users and resources. As importantly, ABAC is simpler than RBAC, simple enough to grasp without much effort. Ubicloud also has the benefit of not having to provide backwards compatibility to RBAC, like AWS or Azure. These properties enable us to express ABAC's data model in a few database tables and have the core implementation in one SQL query.
We also expect our ABAC design to evolve over time. If you have any questions or feedback about this design document, we'd love to hear from you. Please start a conversation on GitHub discussions or reach out to us at [info@ubicloud.com](mailto:info@ubicloud.com).
# Control and Data Plane
Source: https://ubicloud.com/docs/architecture/control-and-data-plane
Ubicloud follows an established pattern in building public cloud services. A control plane manages a data plane, where the data plane usually leverages open source software.The following architecture diagram shows the control and data plane components for our compute service. This service allows you to provision and use virtual machines (VMs); and also forms the basis of some of our other services.
ABAC design's data model, where the model has five PostgreSQL tables
These five Postgres tables are:
1. An access policy table that represents the relationship between ``. Remember the subject here is the user and the object is the resource
2. A namespace table to avoid naming collisions
3. An access tags table to represent tags (we thought the name tags was just too generic, so picked something more descriptive)
4. An items table to represent subjects and objects
5. An applied tags table - this is an intermediary/pivot table that we use to establish a many to many relationship between items and tags
## ABAC implementation in 130 lines of code
With our ABAC concepts mapped onto five PostgreSQL tables, all we need for authorization is to check if a path exists from a subject (a user identified with one or more tags) to the object (a resource identified with one or more tags). We can do this through the following SQL query.
```sql theme={null}
SELECT object_applied_tags.tagged_id, object_applied_tags.tagged_table, subjects, actions, objects
FROM accounts AS subject
JOIN applied_tag AS subject_applied_tags ON subject.id = subject_applied_tags.tagged_id
JOIN access_tag AS subject_access_tags ON subject_applied_tags.access_tag_id = subject_access_tags.id
JOIN access_policy AS acl ON subject_access_tags.project_id = acl.project_id
JOIN jsonb_to_recordset(acl.body->'acls') as items(subjects JSONB, actions JSONB, objects JSONB) ON TRUE
JOIN access_tag AS object_access_tags ON subject_access_tags.project_id = object_access_tags.project_id
JOIN applied_tag AS object_applied_tags ON object_access_tags.id = object_applied_tags.access_tag_id AND objects ? object_access_tags."name"
WHERE subject.id = :subject_id
AND actions ?| array[:actions]
AND subjects ? subject_access_tags."name"
```
The nice thing about this query is the following:
* It's powerful. We can express all attribute-based access control policies with this one query, for user-defined tags.
* It has an existence proof. When you run the query, if it returns a tuple, the subject can access the object. If it doesn't, the subject isn't authorized. Further, you can see all access paths from the subject to the object by looking at the tuples this query returns.
* It's simple. We get an ABAC implementation in 10 lines of SQL. In fact, [the entire file](https://github.com/ubicloud/ubicloud/blob/main/lib/authorization.rb) that implements our authorization policy is 130 lines of code.
Of course, you could argue that running a SQL query for each authorization action won't scale. When we reach that scale, we'd gladly optimize our implementation or rehaul it if need be. At that point, we would have also built a much deeper understanding of customer access patterns. Until then, we'll have a simple ABAC model that matches the expressiveness of AWS, Azure, and GCP, in an open source implementation.
## Conclusion
ABAC enables a flexible way to authorize users. With it, organizations and users can express complex access relationships between users and resources. As importantly, ABAC is simpler than RBAC, simple enough to grasp without much effort. Ubicloud also has the benefit of not having to provide backwards compatibility to RBAC, like AWS or Azure. These properties enable us to express ABAC's data model in a few database tables and have the core implementation in one SQL query.
We also expect our ABAC design to evolve over time. If you have any questions or feedback about this design document, we'd love to hear from you. Please start a conversation on GitHub discussions or reach out to us at [info@ubicloud.com](mailto:info@ubicloud.com).
# Control and Data Plane
Source: https://ubicloud.com/docs/architecture/control-and-data-plane
Ubicloud follows an established pattern in building public cloud services. A control plane manages a data plane, where the data plane usually leverages open source software.The following architecture diagram shows the control and data plane components for our compute service. This service allows you to provision and use virtual machines (VMs); and also forms the basis of some of our other services.
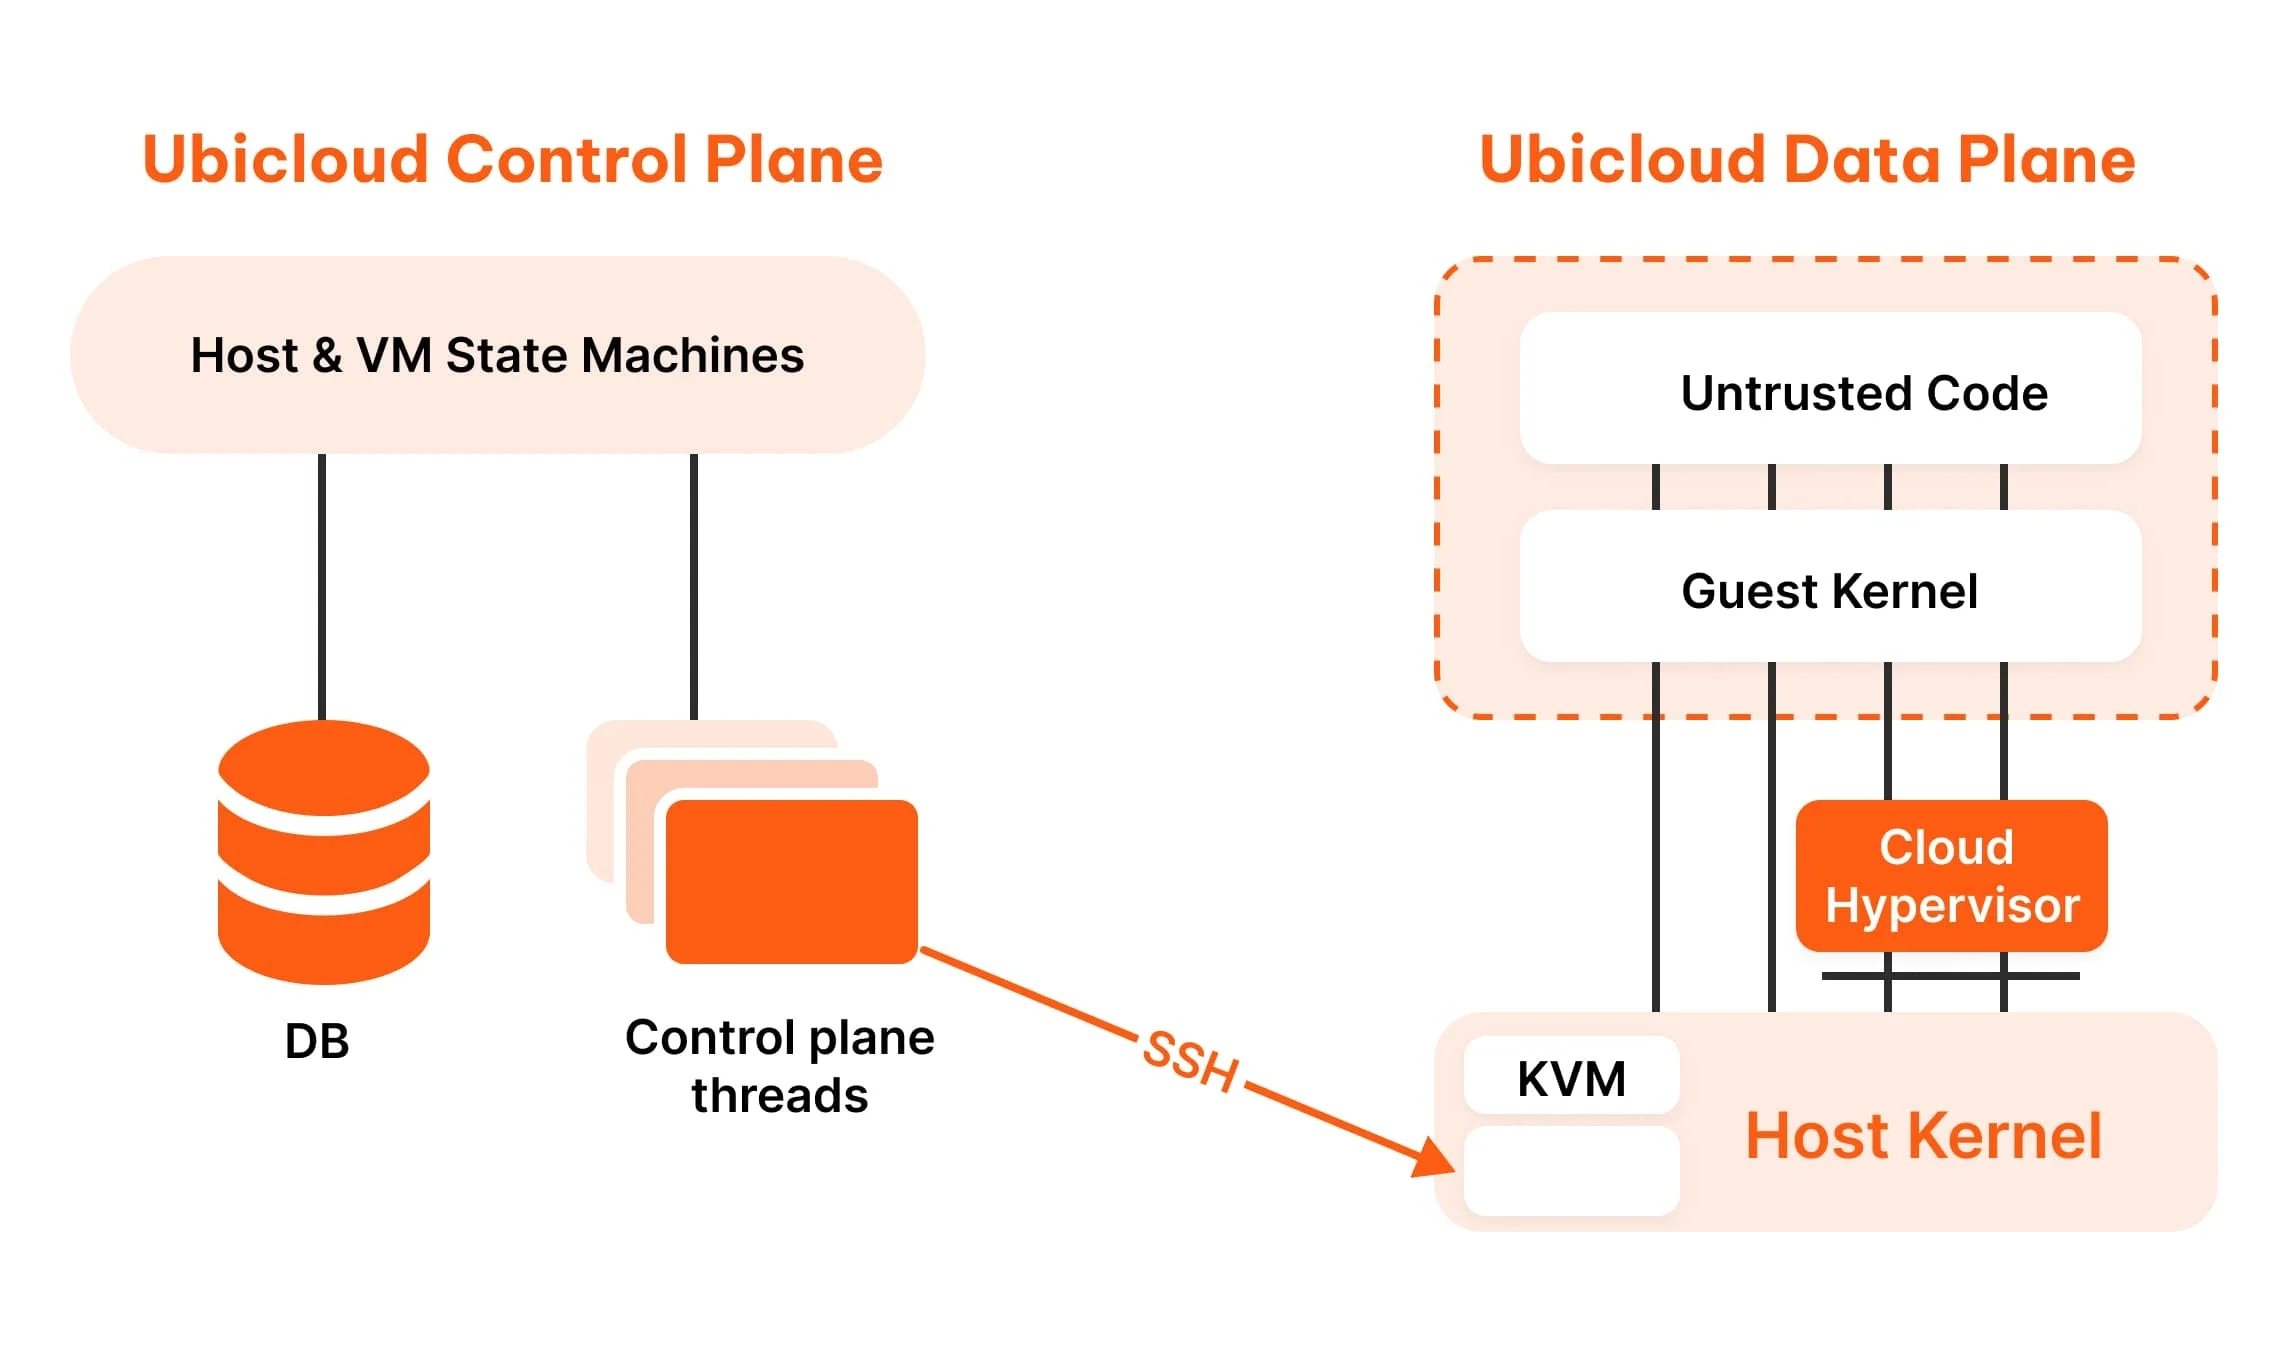 ## Control plane
Control plane manages users, data plane services, and resources. This is a Ruby program that stores its data in Postgres. We use the [Roda](https://roda.jeremyevans.net/) framework to serve HTTP requests and [Sequel](http://sequel.jeremyevans.net/) to access the database. We manage web authentication with [Rodauth](http://rodauth.jeremyevans.net/). The control plane communicates with data plane servers using SSH, via the library [net-ssh](https://github.com/net-ssh/net-ssh).
Users communicate with the control plane through the cloud console or Ubicloud APIs. The console is a web app served by the Roda framework. For the visual design, we use [Tailwind CSS](https://tailwindcss.com/) with components from [Tailwind UI](https://tailwindui.com/). We also use jQuery for interactivity.
Once you've initialized the control plane, create a new user and sign into the cloud console.
## Data plane
The control plane communicates with Linux bare metal servers using SSH. Ubicloud expects Linux with KVM running on these servers. Our managed service uses Ubuntu 22.04 as the underlying Linux distribution.
For our compute service, Ubicloud makes several additions on top of Linux KVM. We use [cloud-init](https://github.com/canonical/cloud-init) to bootstrap SSH access to the server. We use [Cloud Hypervisor](https://github.com/cloud-hypervisor/cloud-hypervisor) as our virtual machine monitor (VMM); and each instance of the VMM is contained within Linux namespaces for further isolation and security.
This section also has design documents that explain how some Ubicloud services work. You can read them here or request new documents by getting in touch with us.
# December 2024
Source: https://ubicloud.com/docs/changelog/2024-12
export const PrList = ({ids}) =>
{ids.map((id, index) => <>
{index > 0 && ", "}
{index === 0 ? "PR " : ""}#{id}
)}
;
## Managed Github Runners
### Transparent caching now available for Github runners
This feature improves your GitHub Actions cache and Docker caching performance by 4x, without changing the caching instructions.
You can enable it by just clicking a button on the Ubicloud console: Integrations > Github Runners > Github Runner Settings > Enable Ubicloud Cache. ([Blog post](https://www.ubicloud.com/blog/github-actions-transparent-cache))
## Control plane
Control plane manages users, data plane services, and resources. This is a Ruby program that stores its data in Postgres. We use the [Roda](https://roda.jeremyevans.net/) framework to serve HTTP requests and [Sequel](http://sequel.jeremyevans.net/) to access the database. We manage web authentication with [Rodauth](http://rodauth.jeremyevans.net/). The control plane communicates with data plane servers using SSH, via the library [net-ssh](https://github.com/net-ssh/net-ssh).
Users communicate with the control plane through the cloud console or Ubicloud APIs. The console is a web app served by the Roda framework. For the visual design, we use [Tailwind CSS](https://tailwindcss.com/) with components from [Tailwind UI](https://tailwindui.com/). We also use jQuery for interactivity.
Once you've initialized the control plane, create a new user and sign into the cloud console.
## Data plane
The control plane communicates with Linux bare metal servers using SSH. Ubicloud expects Linux with KVM running on these servers. Our managed service uses Ubuntu 22.04 as the underlying Linux distribution.
For our compute service, Ubicloud makes several additions on top of Linux KVM. We use [cloud-init](https://github.com/canonical/cloud-init) to bootstrap SSH access to the server. We use [Cloud Hypervisor](https://github.com/cloud-hypervisor/cloud-hypervisor) as our virtual machine monitor (VMM); and each instance of the VMM is contained within Linux namespaces for further isolation and security.
This section also has design documents that explain how some Ubicloud services work. You can read them here or request new documents by getting in touch with us.
# December 2024
Source: https://ubicloud.com/docs/changelog/2024-12
export const PrList = ({ids}) =>
{ids.map((id, index) => <>
{index > 0 && ", "}
{index === 0 ? "PR " : ""}#{id}
)}
;
## Managed Github Runners
### Transparent caching now available for Github runners
This feature improves your GitHub Actions cache and Docker caching performance by 4x, without changing the caching instructions.
You can enable it by just clicking a button on the Ubicloud console: Integrations > Github Runners > Github Runner Settings > Enable Ubicloud Cache. ([Blog post](https://www.ubicloud.com/blog/github-actions-transparent-cache))
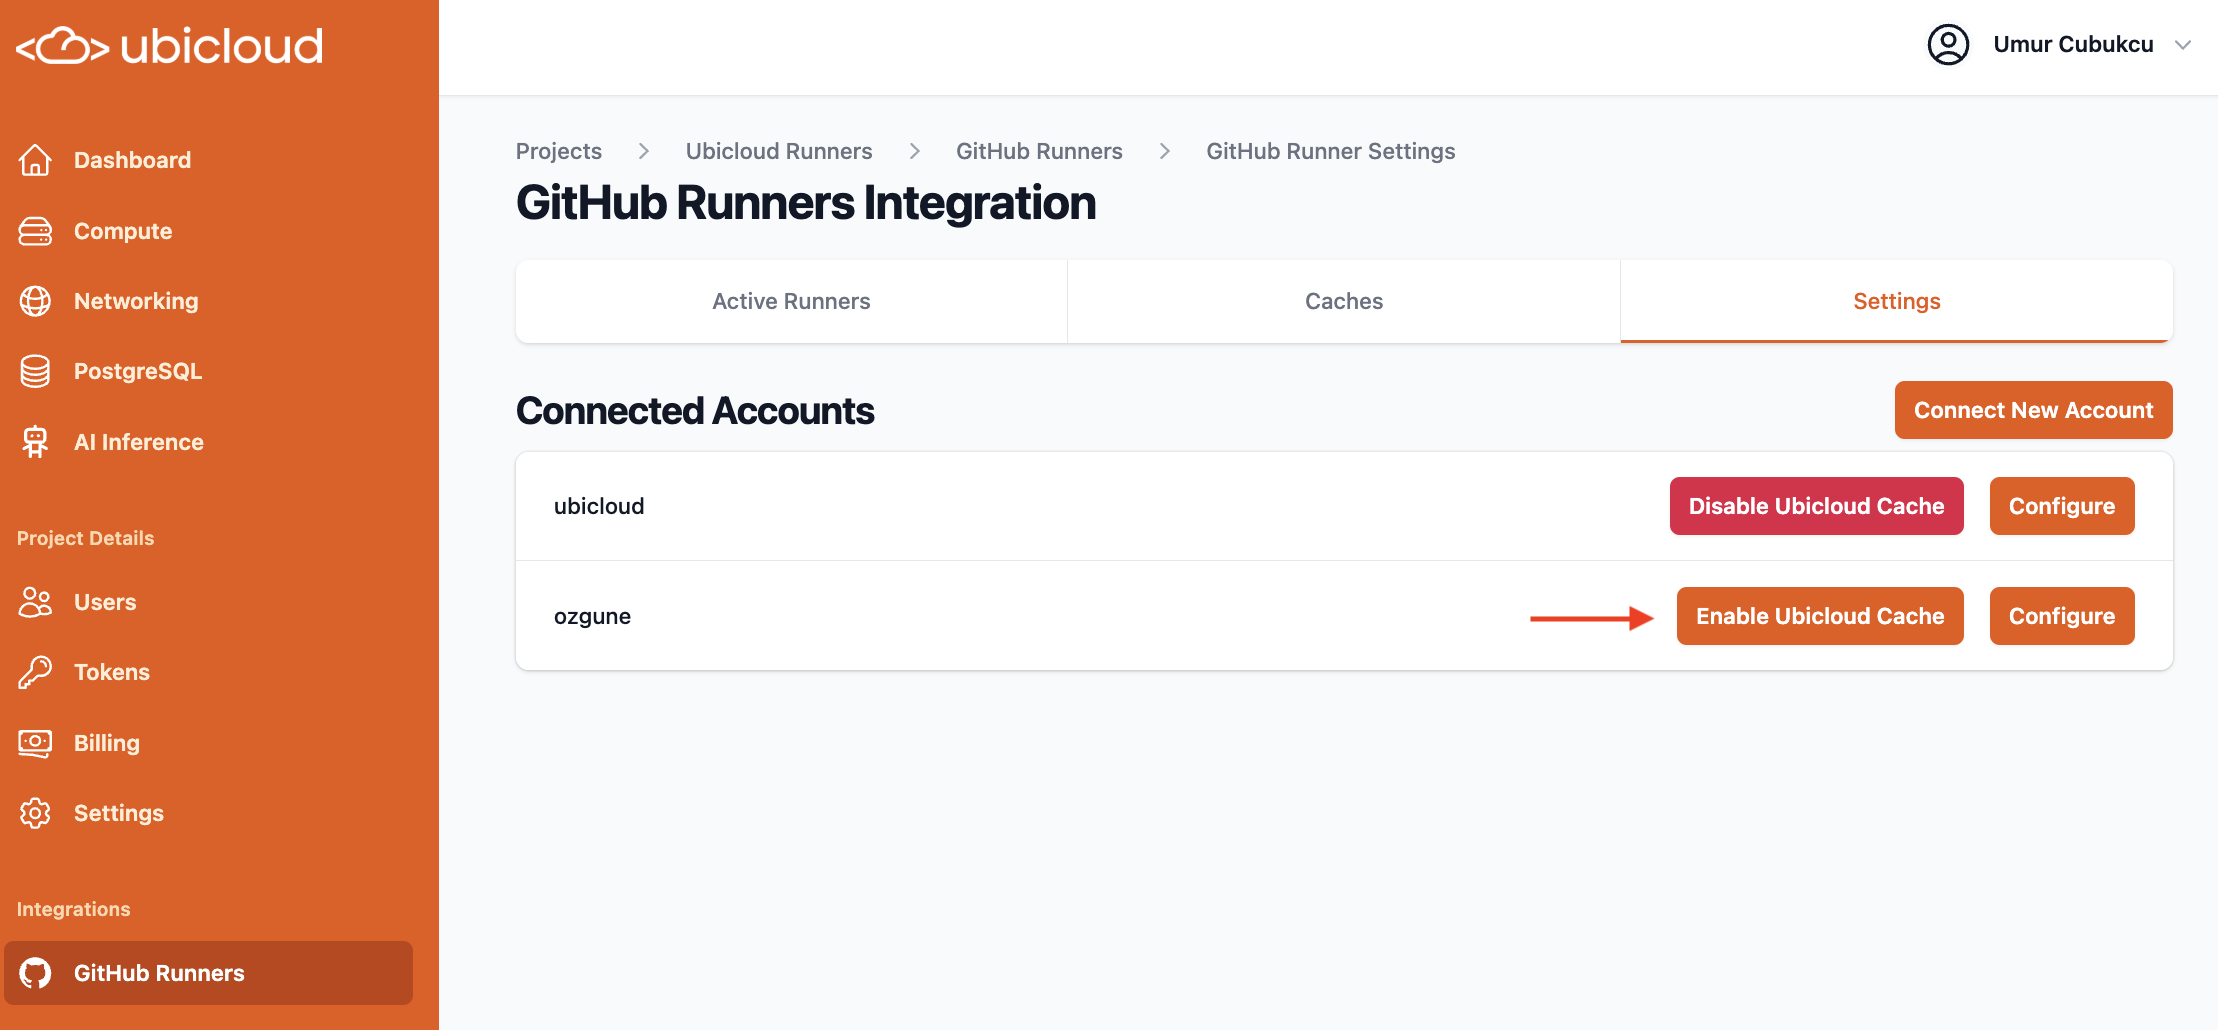 ### Improved reporting for GitHub cache usage, grouped by repository
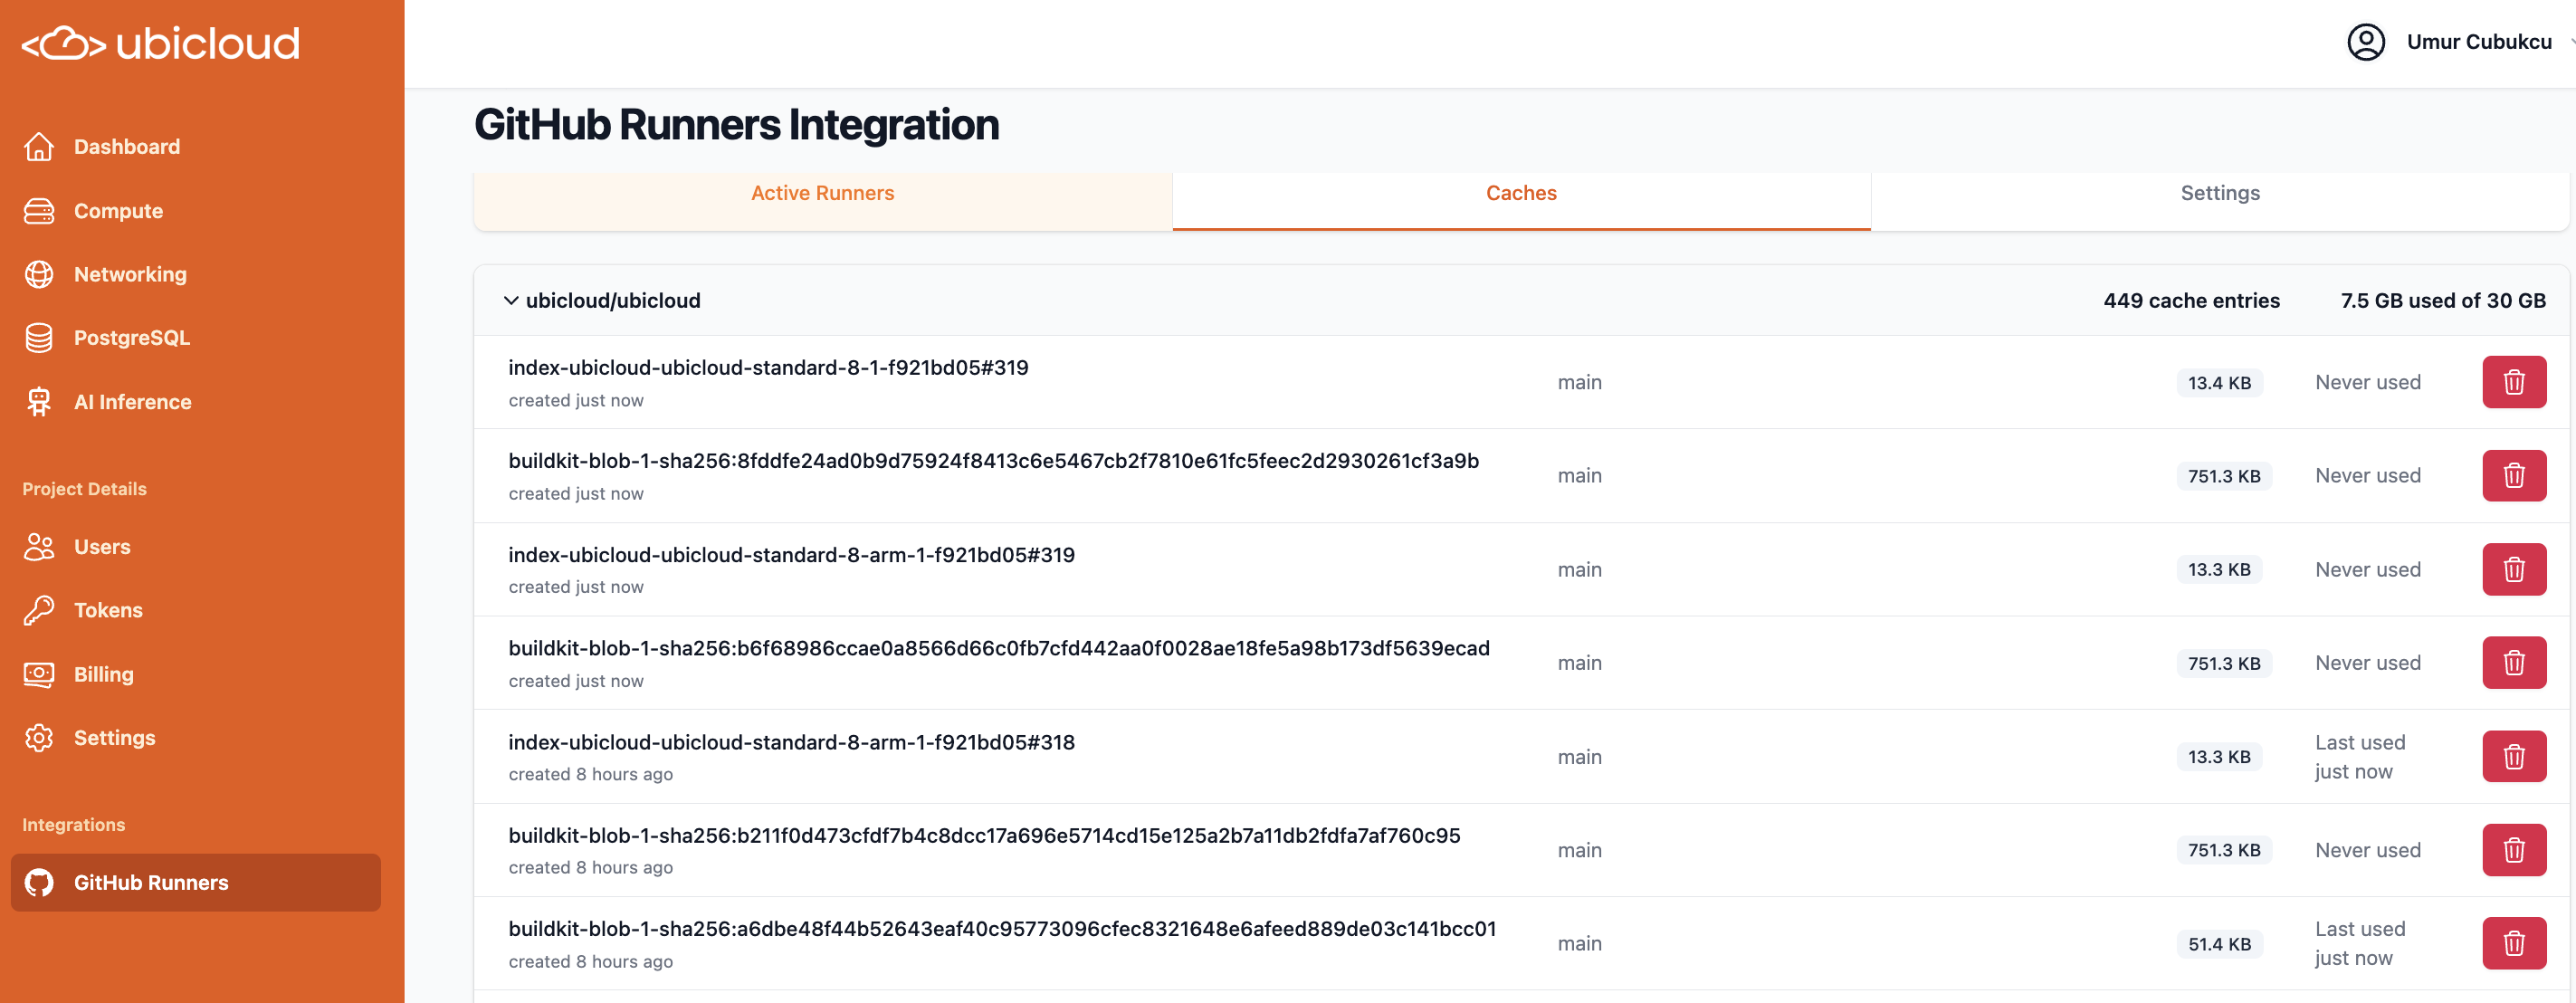 ## APIs
### OpenAPI schema updated; and now enforced
We updated the OpenAPI schema to align with latest backend changes. Going forward, alignment between OpenAPI schema and backend is also now enforced, through the use of [committee](https://github.com/interagent/committee).
### API reference updated with sample responses and interactive playground
See here for examples and the playground:
[https://www.ubicloud.com/docs/api-reference/overview](https://www.ubicloud.com/docs/api-reference/overview)
## APIs
### OpenAPI schema updated; and now enforced
We updated the OpenAPI schema to align with latest backend changes. Going forward, alignment between OpenAPI schema and backend is also now enforced, through the use of [committee](https://github.com/interagent/committee).
### API reference updated with sample responses and interactive playground
See here for examples and the playground:
[https://www.ubicloud.com/docs/api-reference/overview](https://www.ubicloud.com/docs/api-reference/overview)
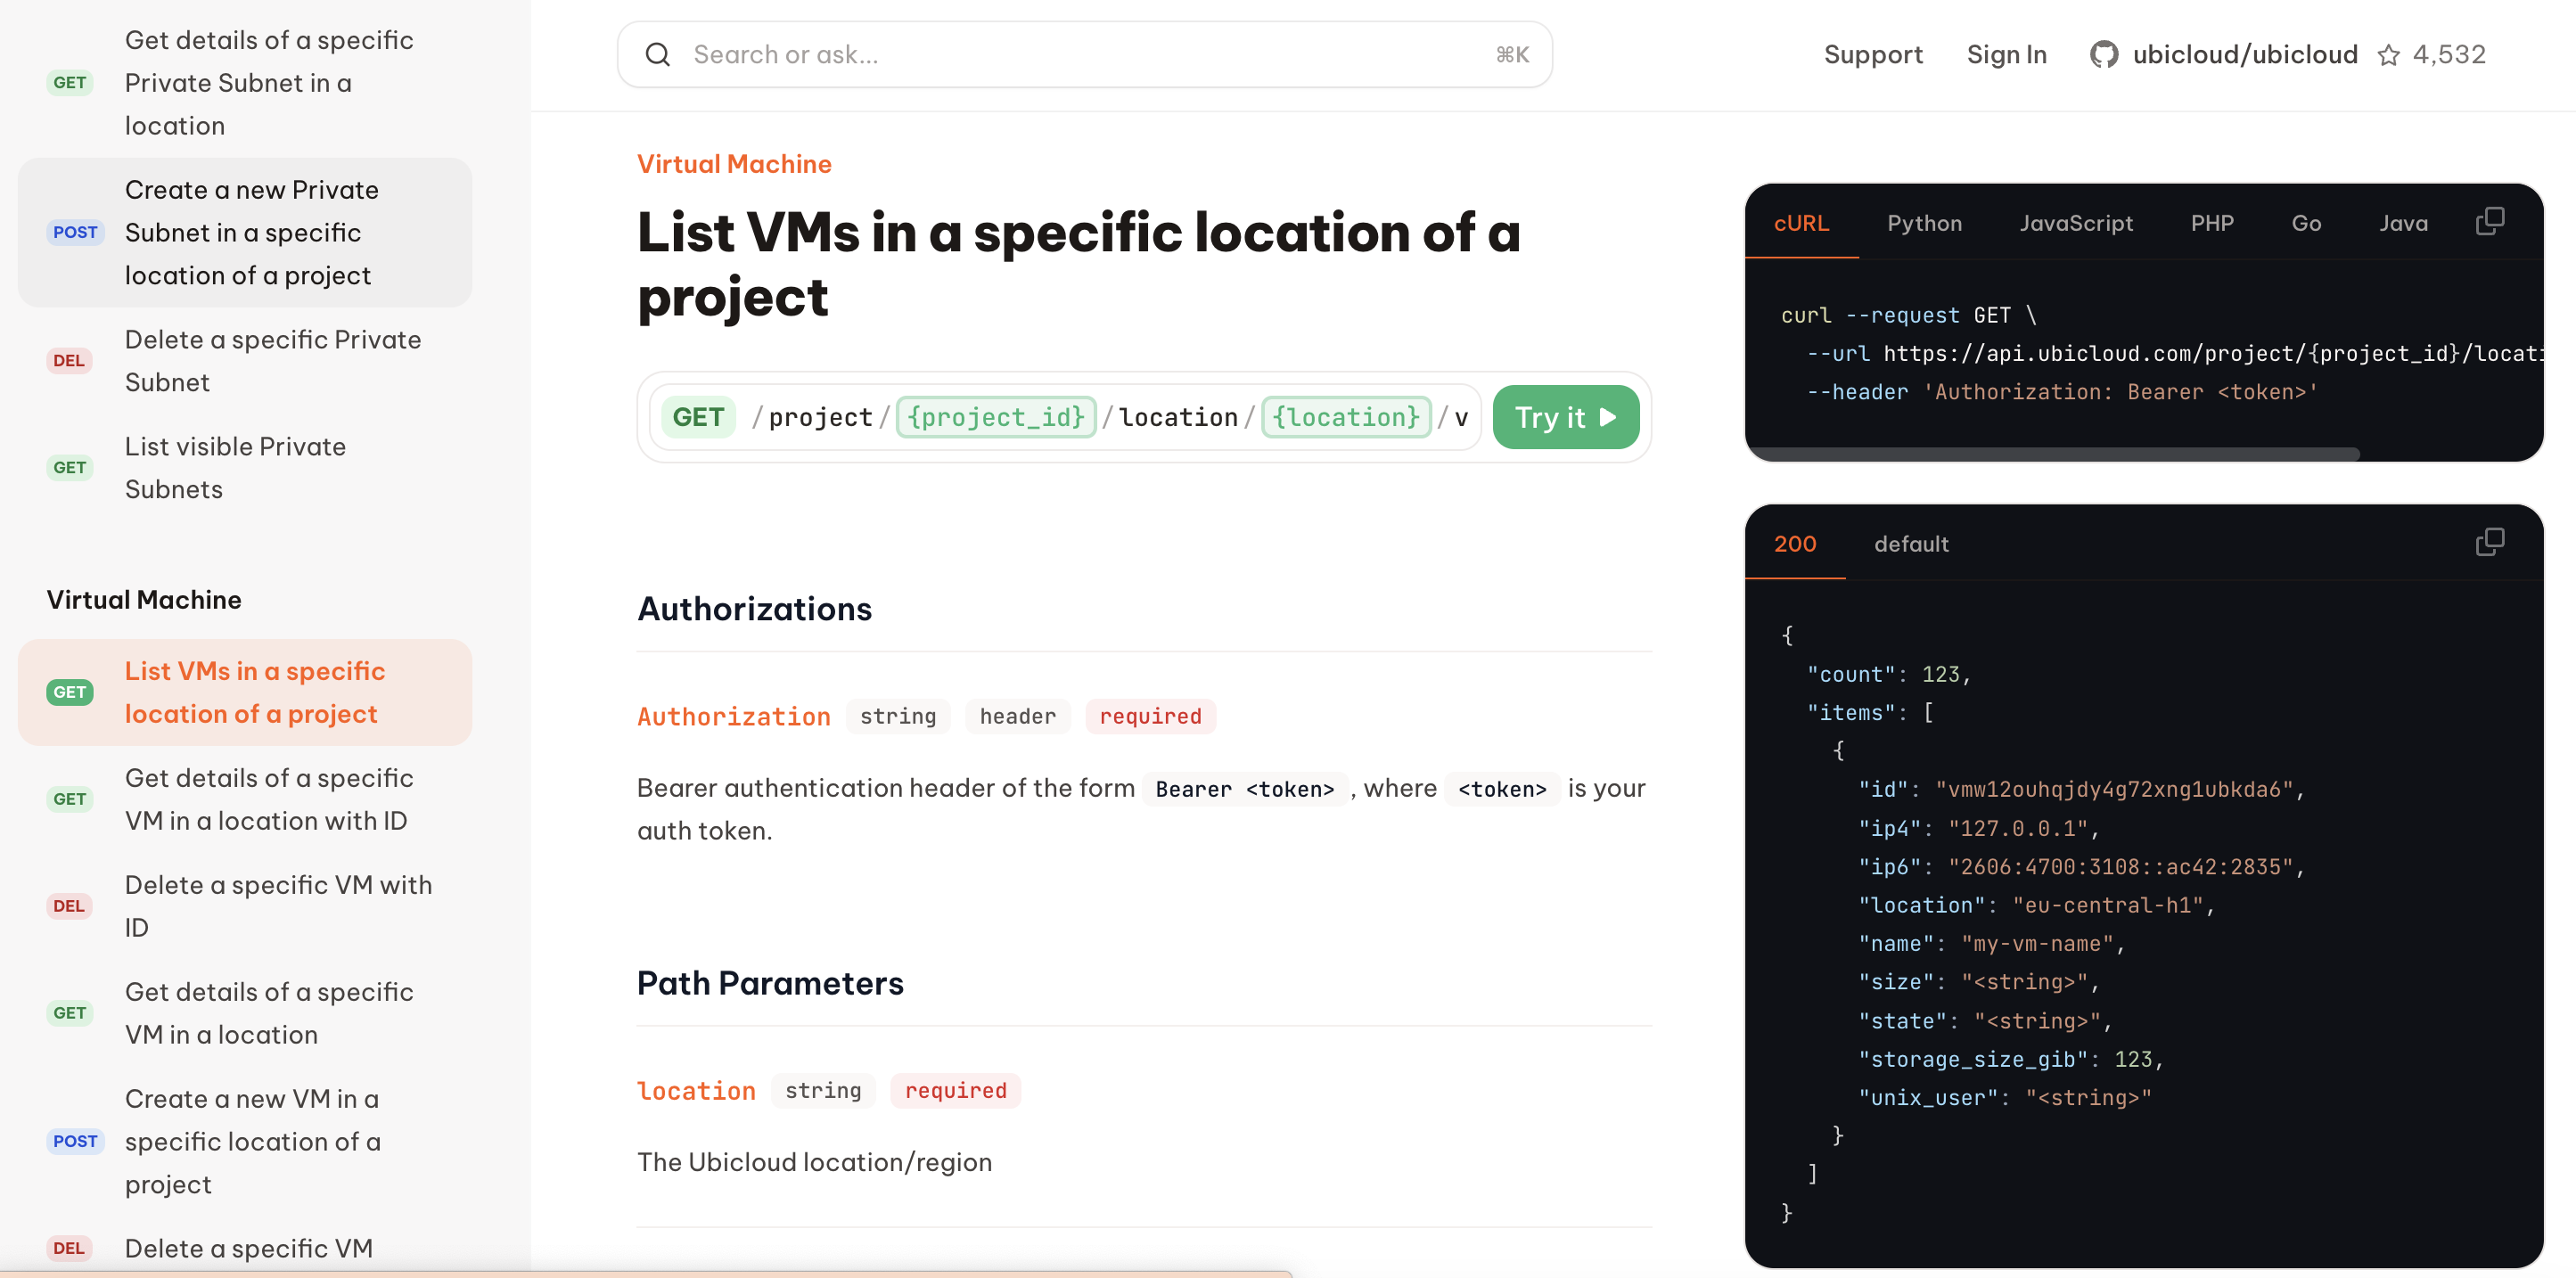 ### Personal access tokens can now be used for API authentication, with token-specific authorization on-top of account authorization
## New project dashboard
This redesign of our main dashboard in the Ubicloud console includes a more intuitive layout, allowing you to quickly view a summary of your project's resources at a glance. Additionally, we've added detailed "Getting Started" links to help you navigate your project with ease.
### Personal access tokens can now be used for API authentication, with token-specific authorization on-top of account authorization
## New project dashboard
This redesign of our main dashboard in the Ubicloud console includes a more intuitive layout, allowing you to quickly view a summary of your project's resources at a glance. Additionally, we've added detailed "Getting Started" links to help you navigate your project with ease.
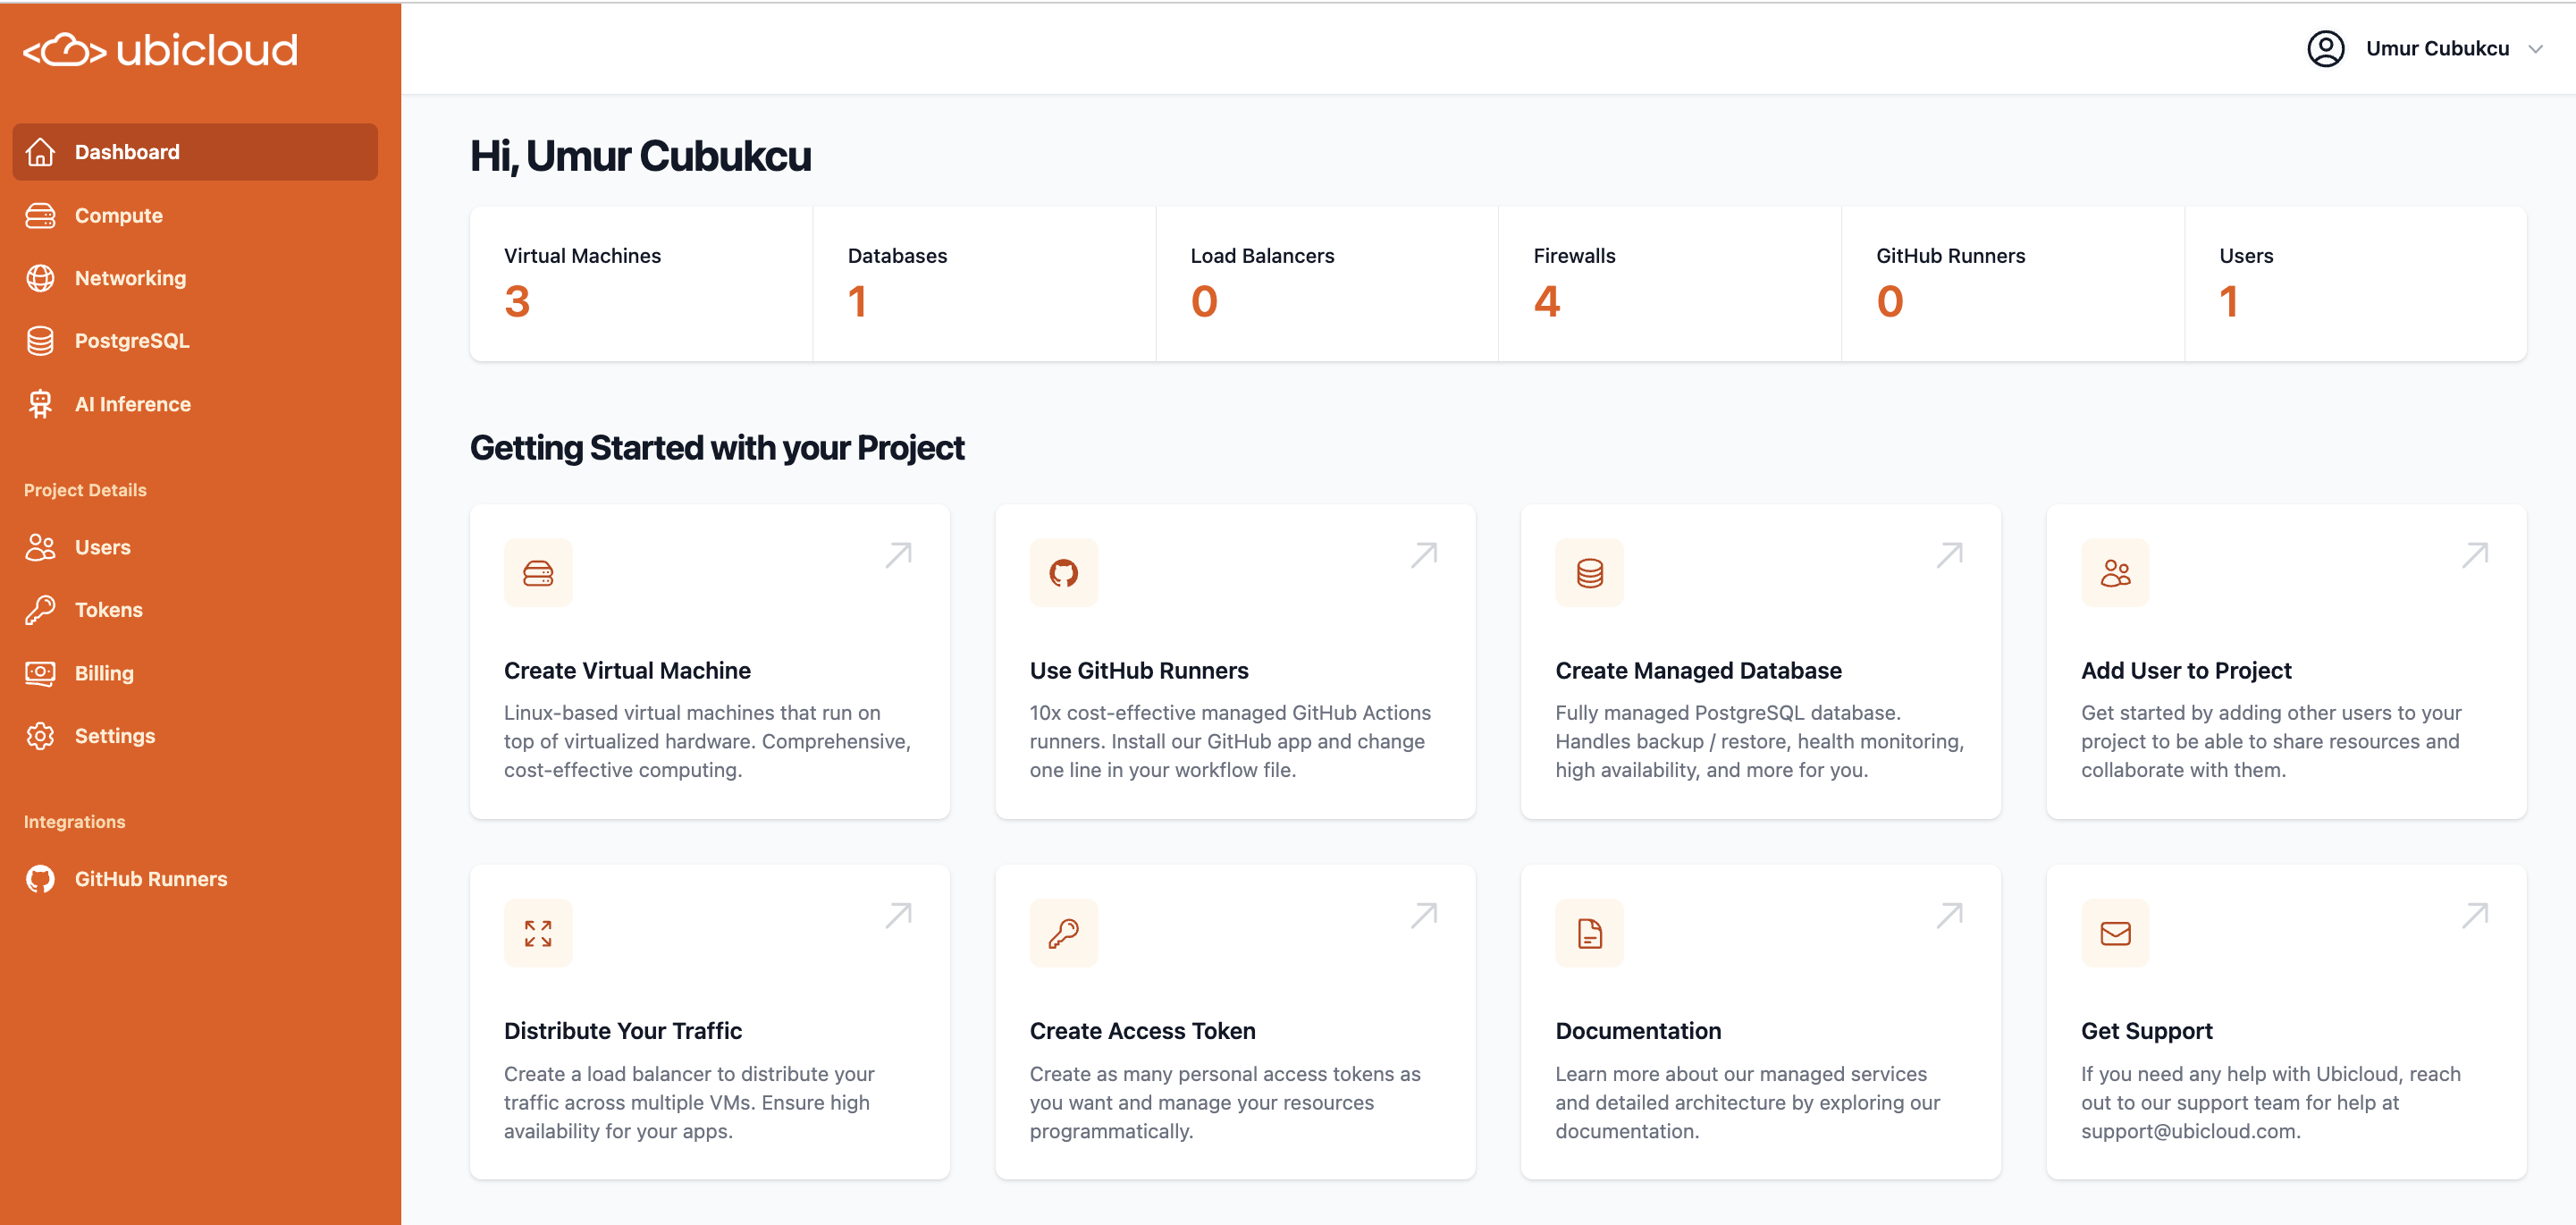 ## VMs and Networking
### Default subnets added to each region to make VM creation simpler
## VMs and Networking
### Default subnets added to each region to make VM creation simpler
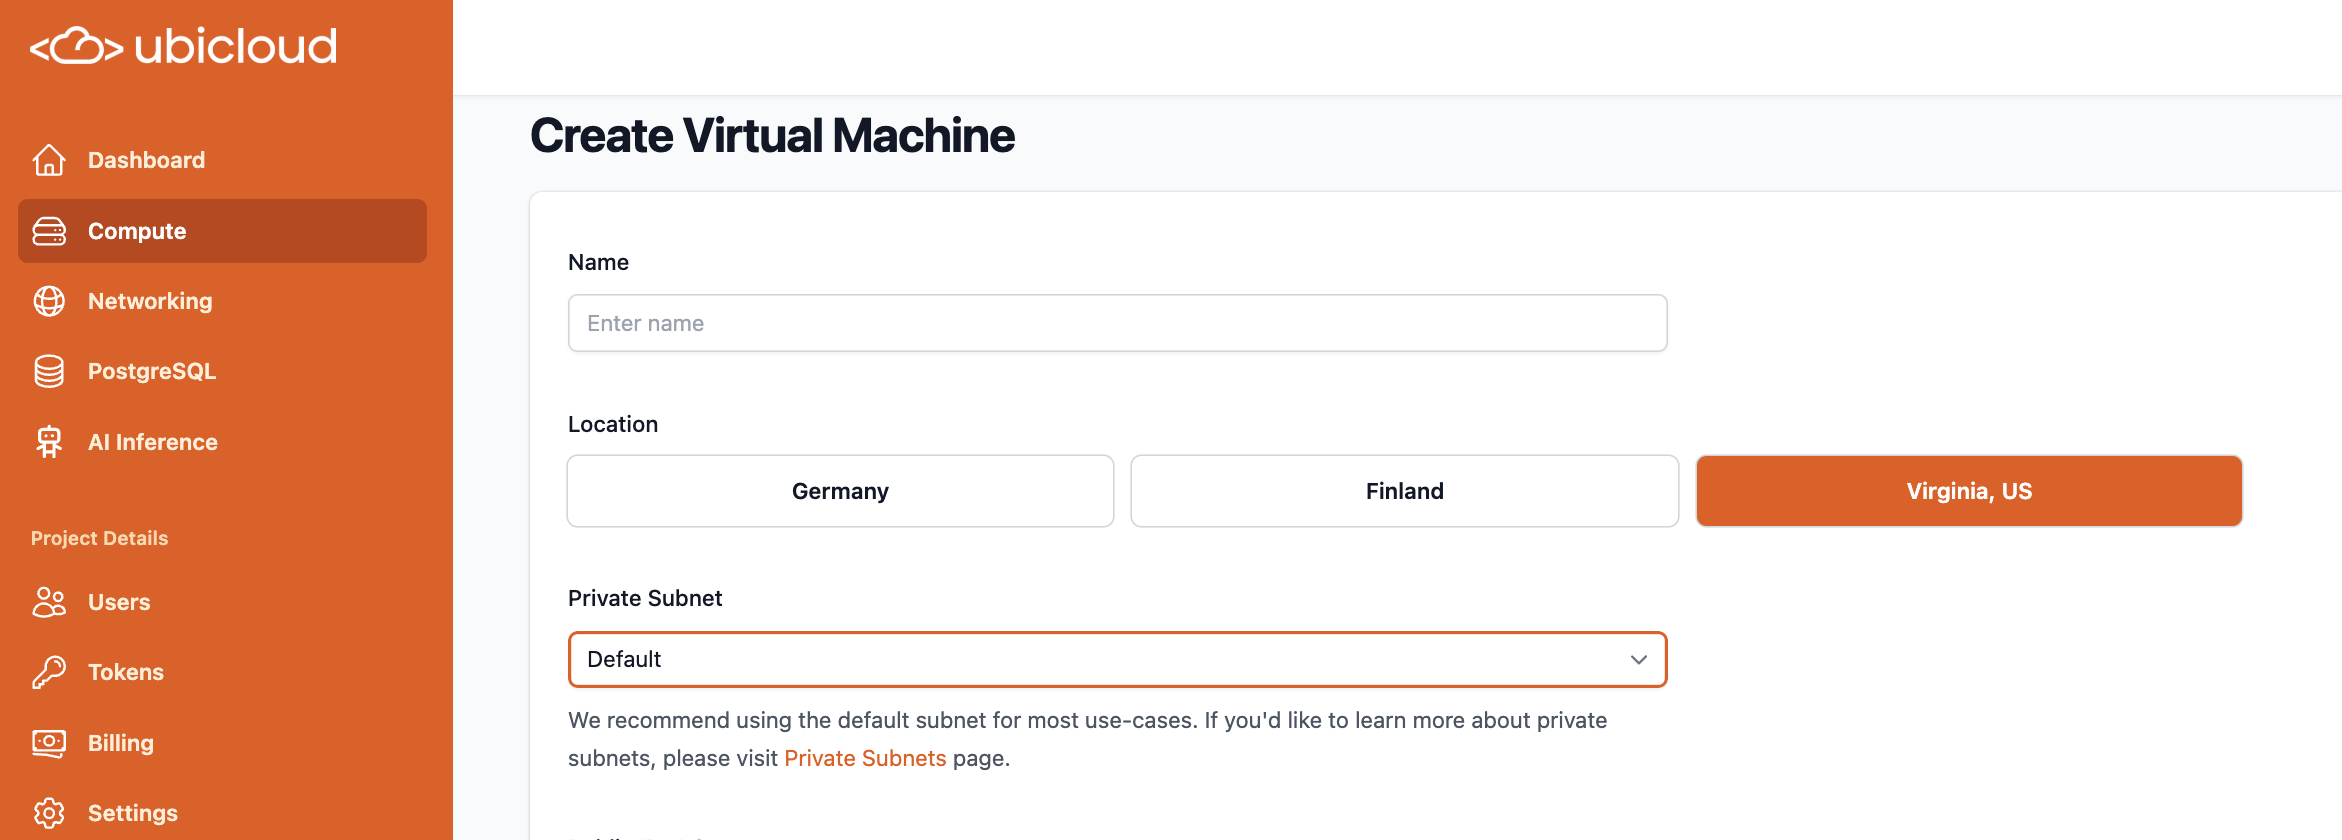 ### You can now restart VMs directly from the console.
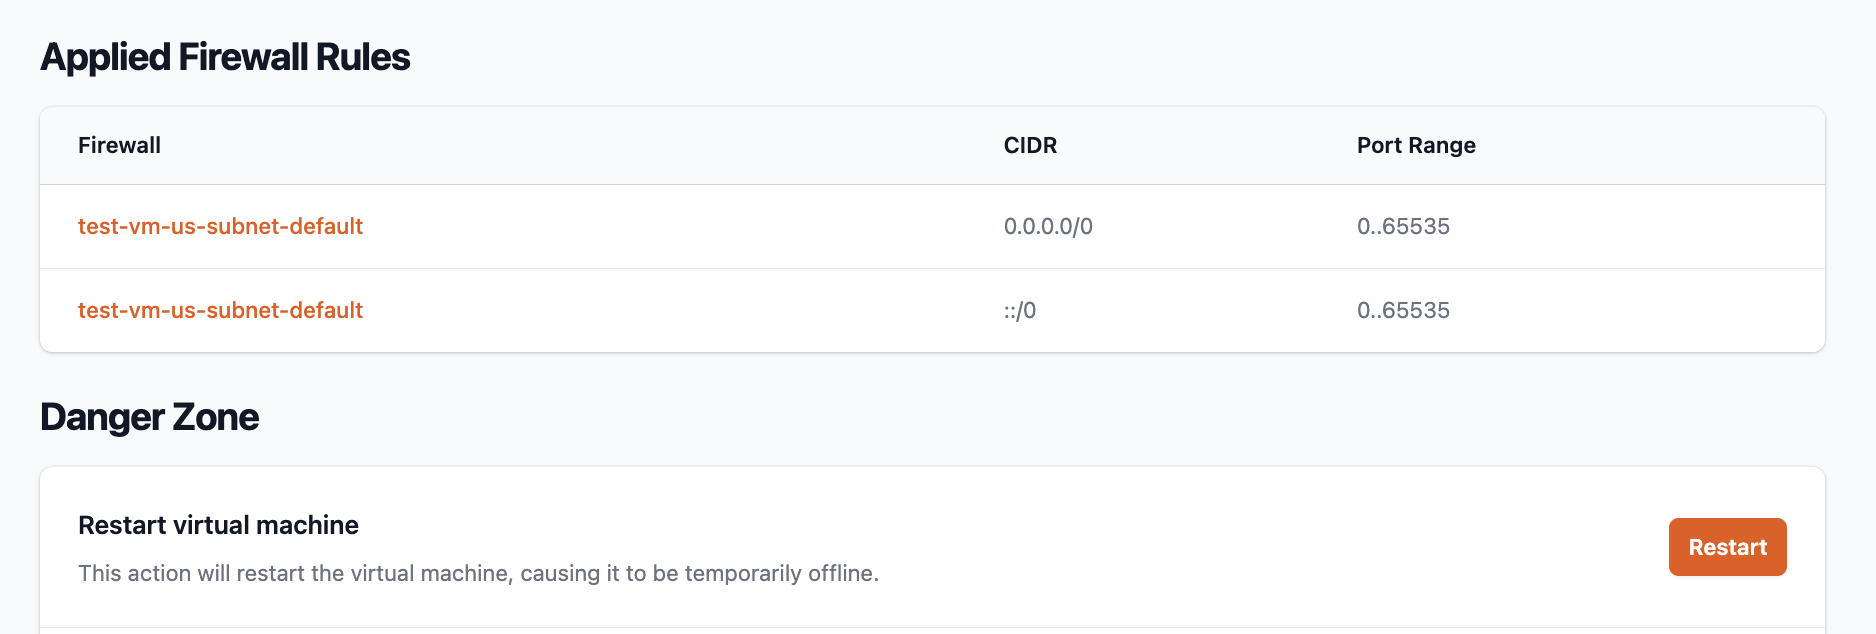 ## Managed PostgreSQL
### Improved Lantern Postgres instances with PostgreSQL 17 support
Prior Lantern versions ran on Postgres 16. Read more about Lantern on Ubiclud:
[https://lantern.dev/blog/ubicloud](https://lantern.dev/blog/ubicloud)
### PG superuser password reset now in danger zone
Scroll down to PostgreQL > Danger Zone in the Ubicloud console, to make sure the password reset is deliberate.
## Moved our documentation to GitHub
We welcome your contributions to Ubicloud docs directly, if you notice anything that you'd like to improve on docs:
[https://github.com/ubicloud/documentation](https://github.com/ubicloud/documentation)
# January 2025
Source: https://ubicloud.com/docs/changelog/2025-01
export const PrList = ({ids}) =>
{ids.map((id, index) => <>
{index > 0 && ", "}
{index === 0 ? "PR " : ""}#{id}
)}
;
## AI inference endpoints (new)
You can now use our OpenAI compatible API endpoints through AI Inference on Ubicloud console.
### 7 open source LLM and embedding models
* Ds-r1-qwen-32b (Text-generation)
* llama-3-1-8b-it
* Llama-3-2-3b-it
* Llama-3-3-70b-it
* qwen-2-5-14b-it
* qwq-32b-preview
* E5-mistral-7b-it (Embedding)
Summary cards display each model's key properties in the console.
## Managed PostgreSQL
### Improved Lantern Postgres instances with PostgreSQL 17 support
Prior Lantern versions ran on Postgres 16. Read more about Lantern on Ubiclud:
[https://lantern.dev/blog/ubicloud](https://lantern.dev/blog/ubicloud)
### PG superuser password reset now in danger zone
Scroll down to PostgreQL > Danger Zone in the Ubicloud console, to make sure the password reset is deliberate.
## Moved our documentation to GitHub
We welcome your contributions to Ubicloud docs directly, if you notice anything that you'd like to improve on docs:
[https://github.com/ubicloud/documentation](https://github.com/ubicloud/documentation)
# January 2025
Source: https://ubicloud.com/docs/changelog/2025-01
export const PrList = ({ids}) =>
{ids.map((id, index) => <>
{index > 0 && ", "}
{index === 0 ? "PR " : ""}#{id}
)}
;
## AI inference endpoints (new)
You can now use our OpenAI compatible API endpoints through AI Inference on Ubicloud console.
### 7 open source LLM and embedding models
* Ds-r1-qwen-32b (Text-generation)
* llama-3-1-8b-it
* Llama-3-2-3b-it
* Llama-3-3-70b-it
* qwen-2-5-14b-it
* qwq-32b-preview
* E5-mistral-7b-it (Embedding)
Summary cards display each model's key properties in the console.
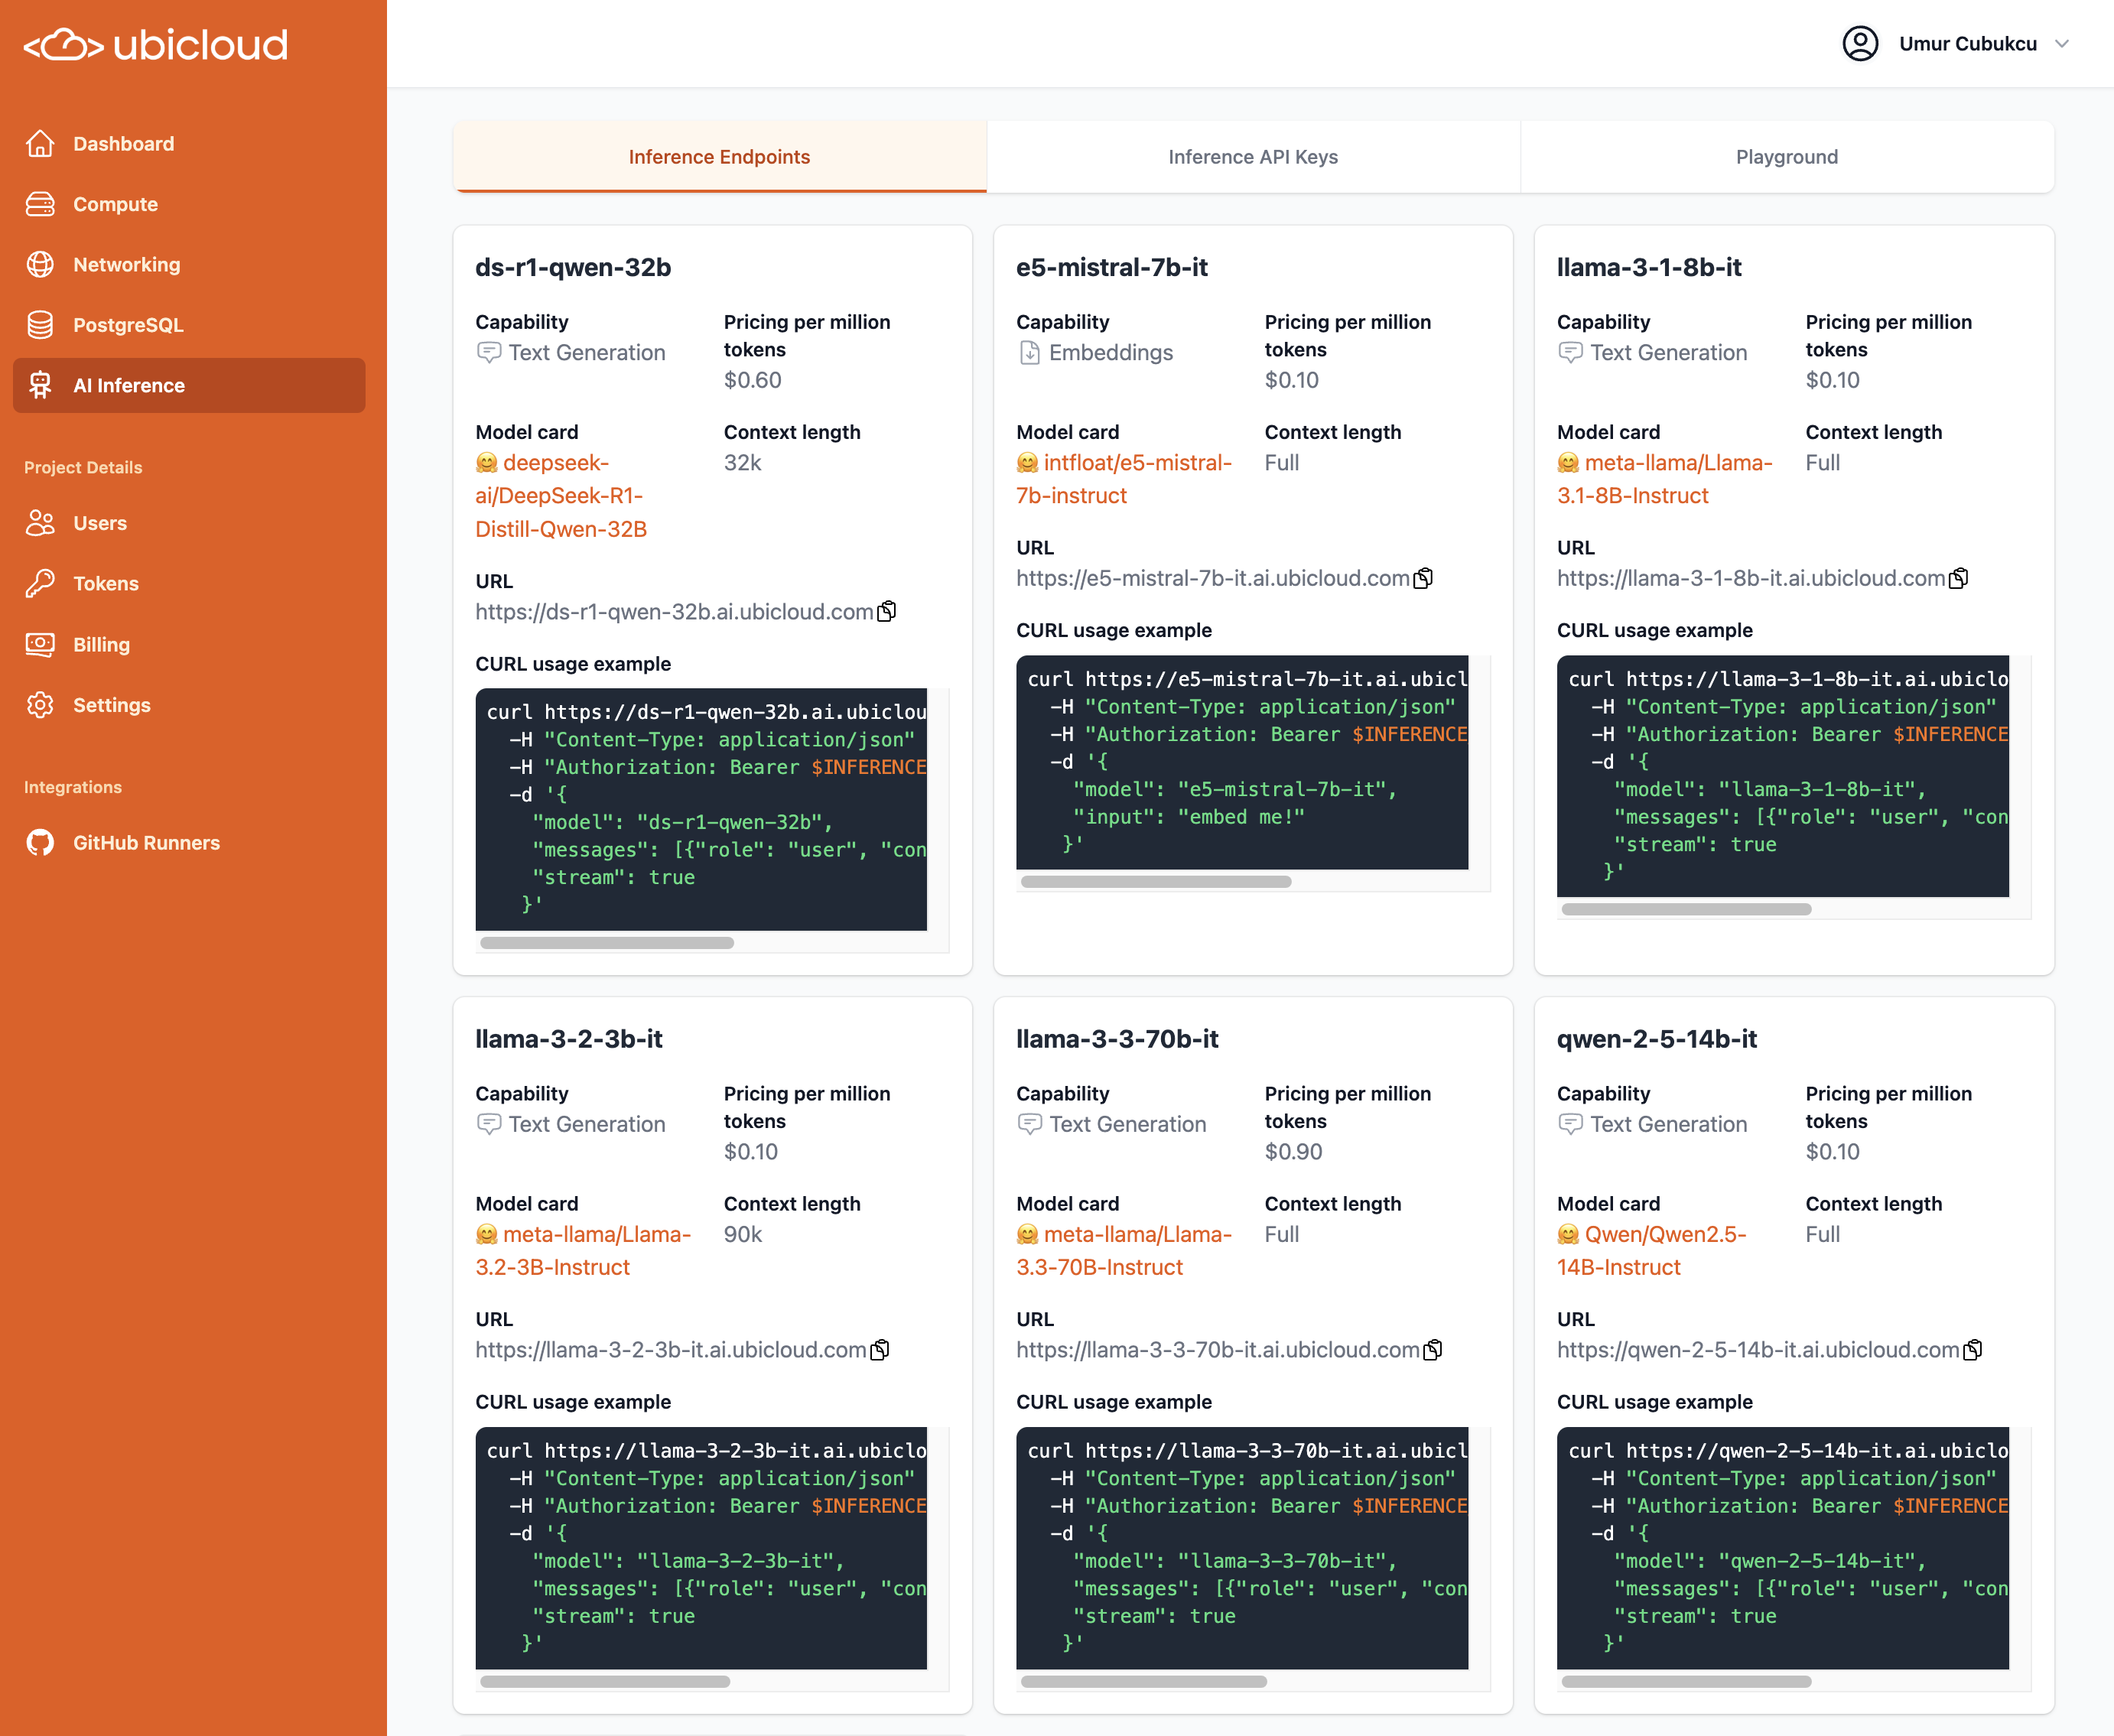 Models are priced between \$0.10 - \$0.60 per million tokens
Ubicloud API endpoints cost \~10x less when compared to OpenAI models at \$4.40 - \$10.00. While different models, the open source models provide notable performance for their price.
### Playground for testing models
Models are priced between \$0.10 - \$0.60 per million tokens
Ubicloud API endpoints cost \~10x less when compared to OpenAI models at \$4.40 - \$10.00. While different models, the open source models provide notable performance for their price.
### Playground for testing models
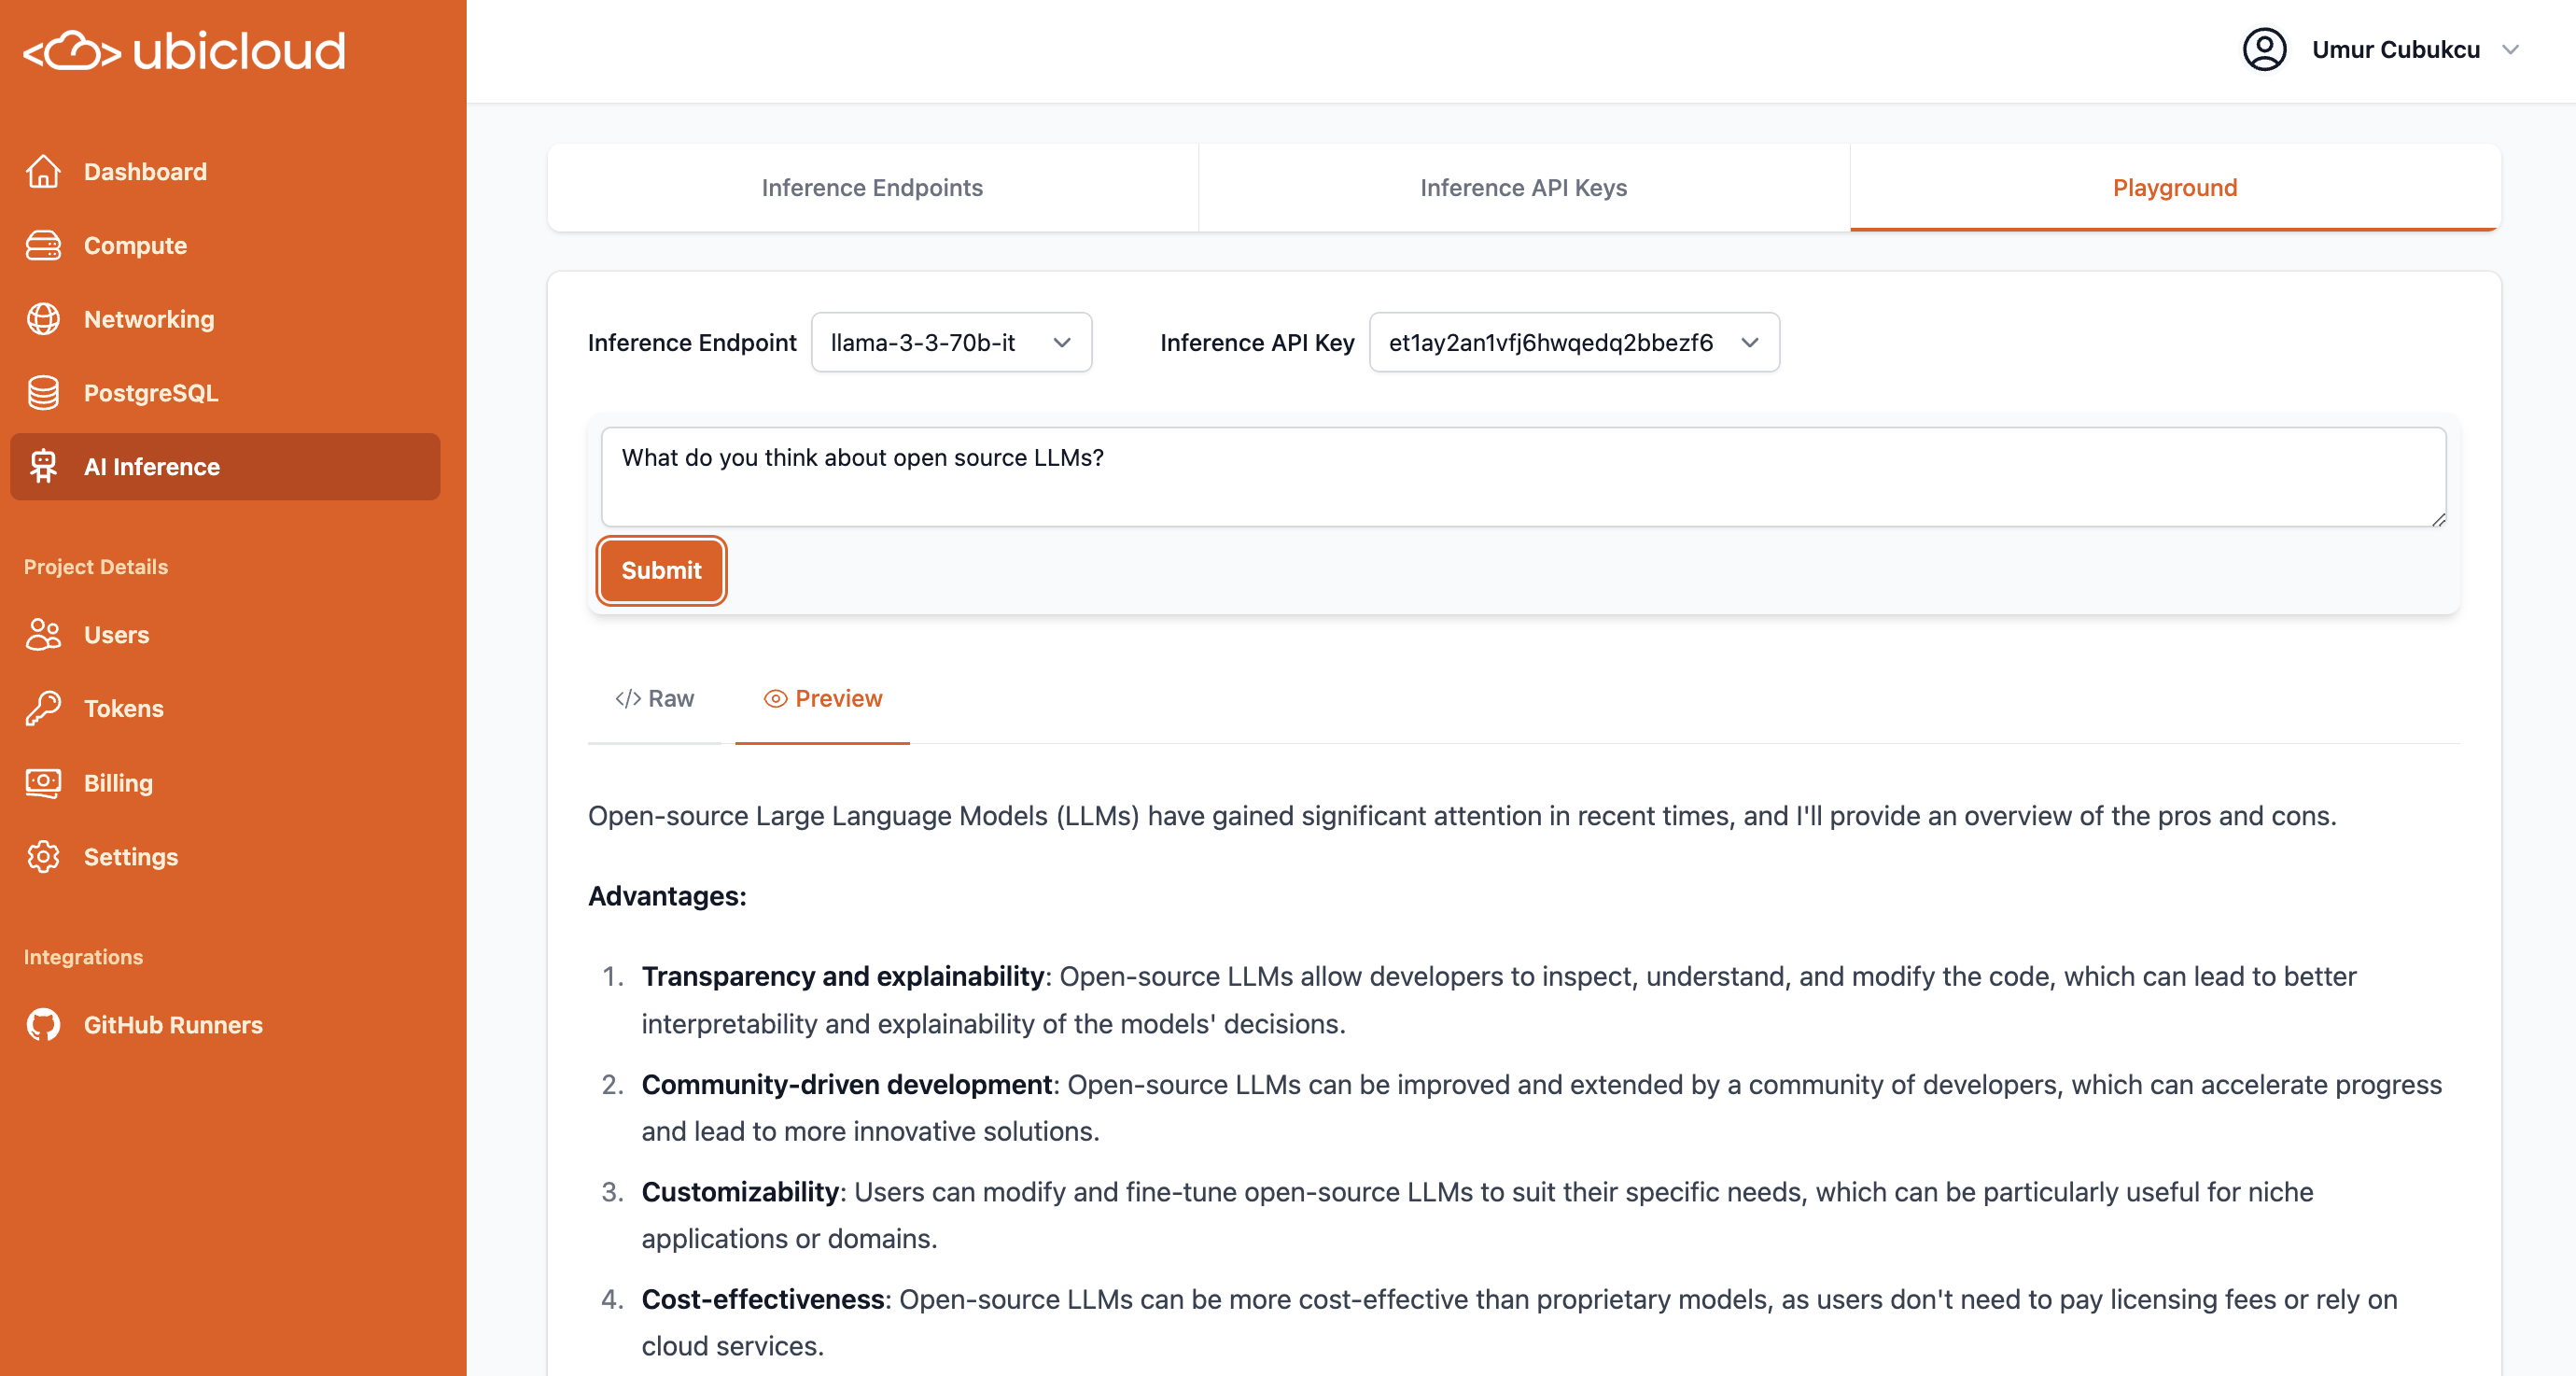 ## Managed PostgreSQL
### Reduced prices by 15-20%, as new hardware continues to improve price-performance\*\*
## Managed PostgreSQL
### Reduced prices by 15-20%, as new hardware continues to improve price-performance\*\*
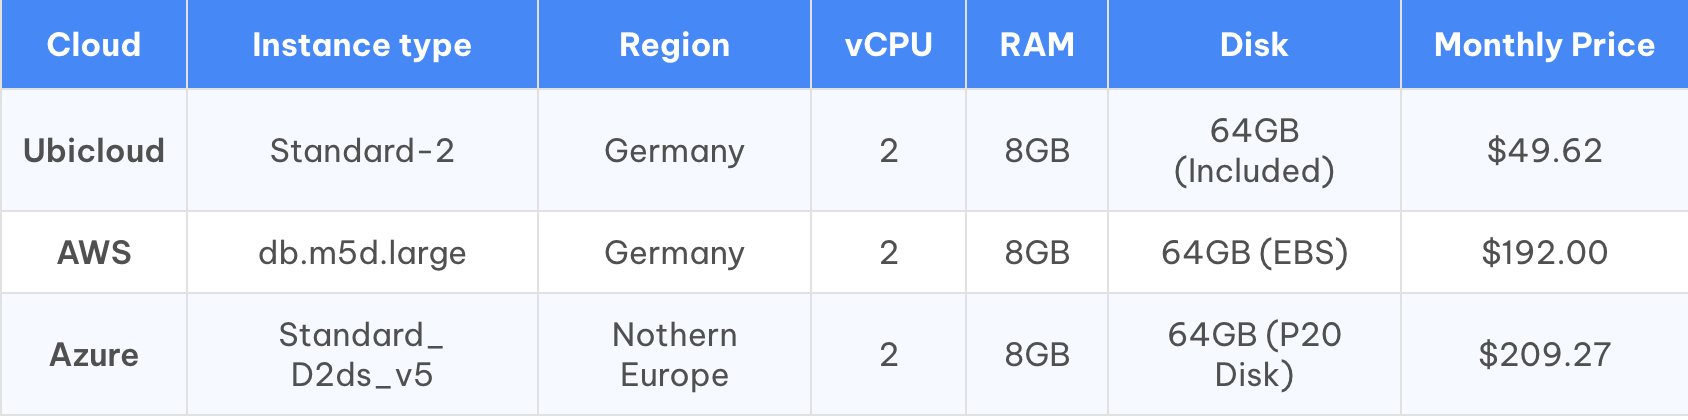 Ubicloud standard-2 PostgreSQL instances now cost below \$50 per month.
This is 4x lower than AWS RDS, while also delivering better performance, driven by new hardware and NVMe disks.
### Minimum disk size reduced from 128 GB to 64 GB
Ubicloud standard-2 PostgreSQL instances now cost below \$50 per month.
This is 4x lower than AWS RDS, while also delivering better performance, driven by new hardware and NVMe disks.
### Minimum disk size reduced from 128 GB to 64 GB
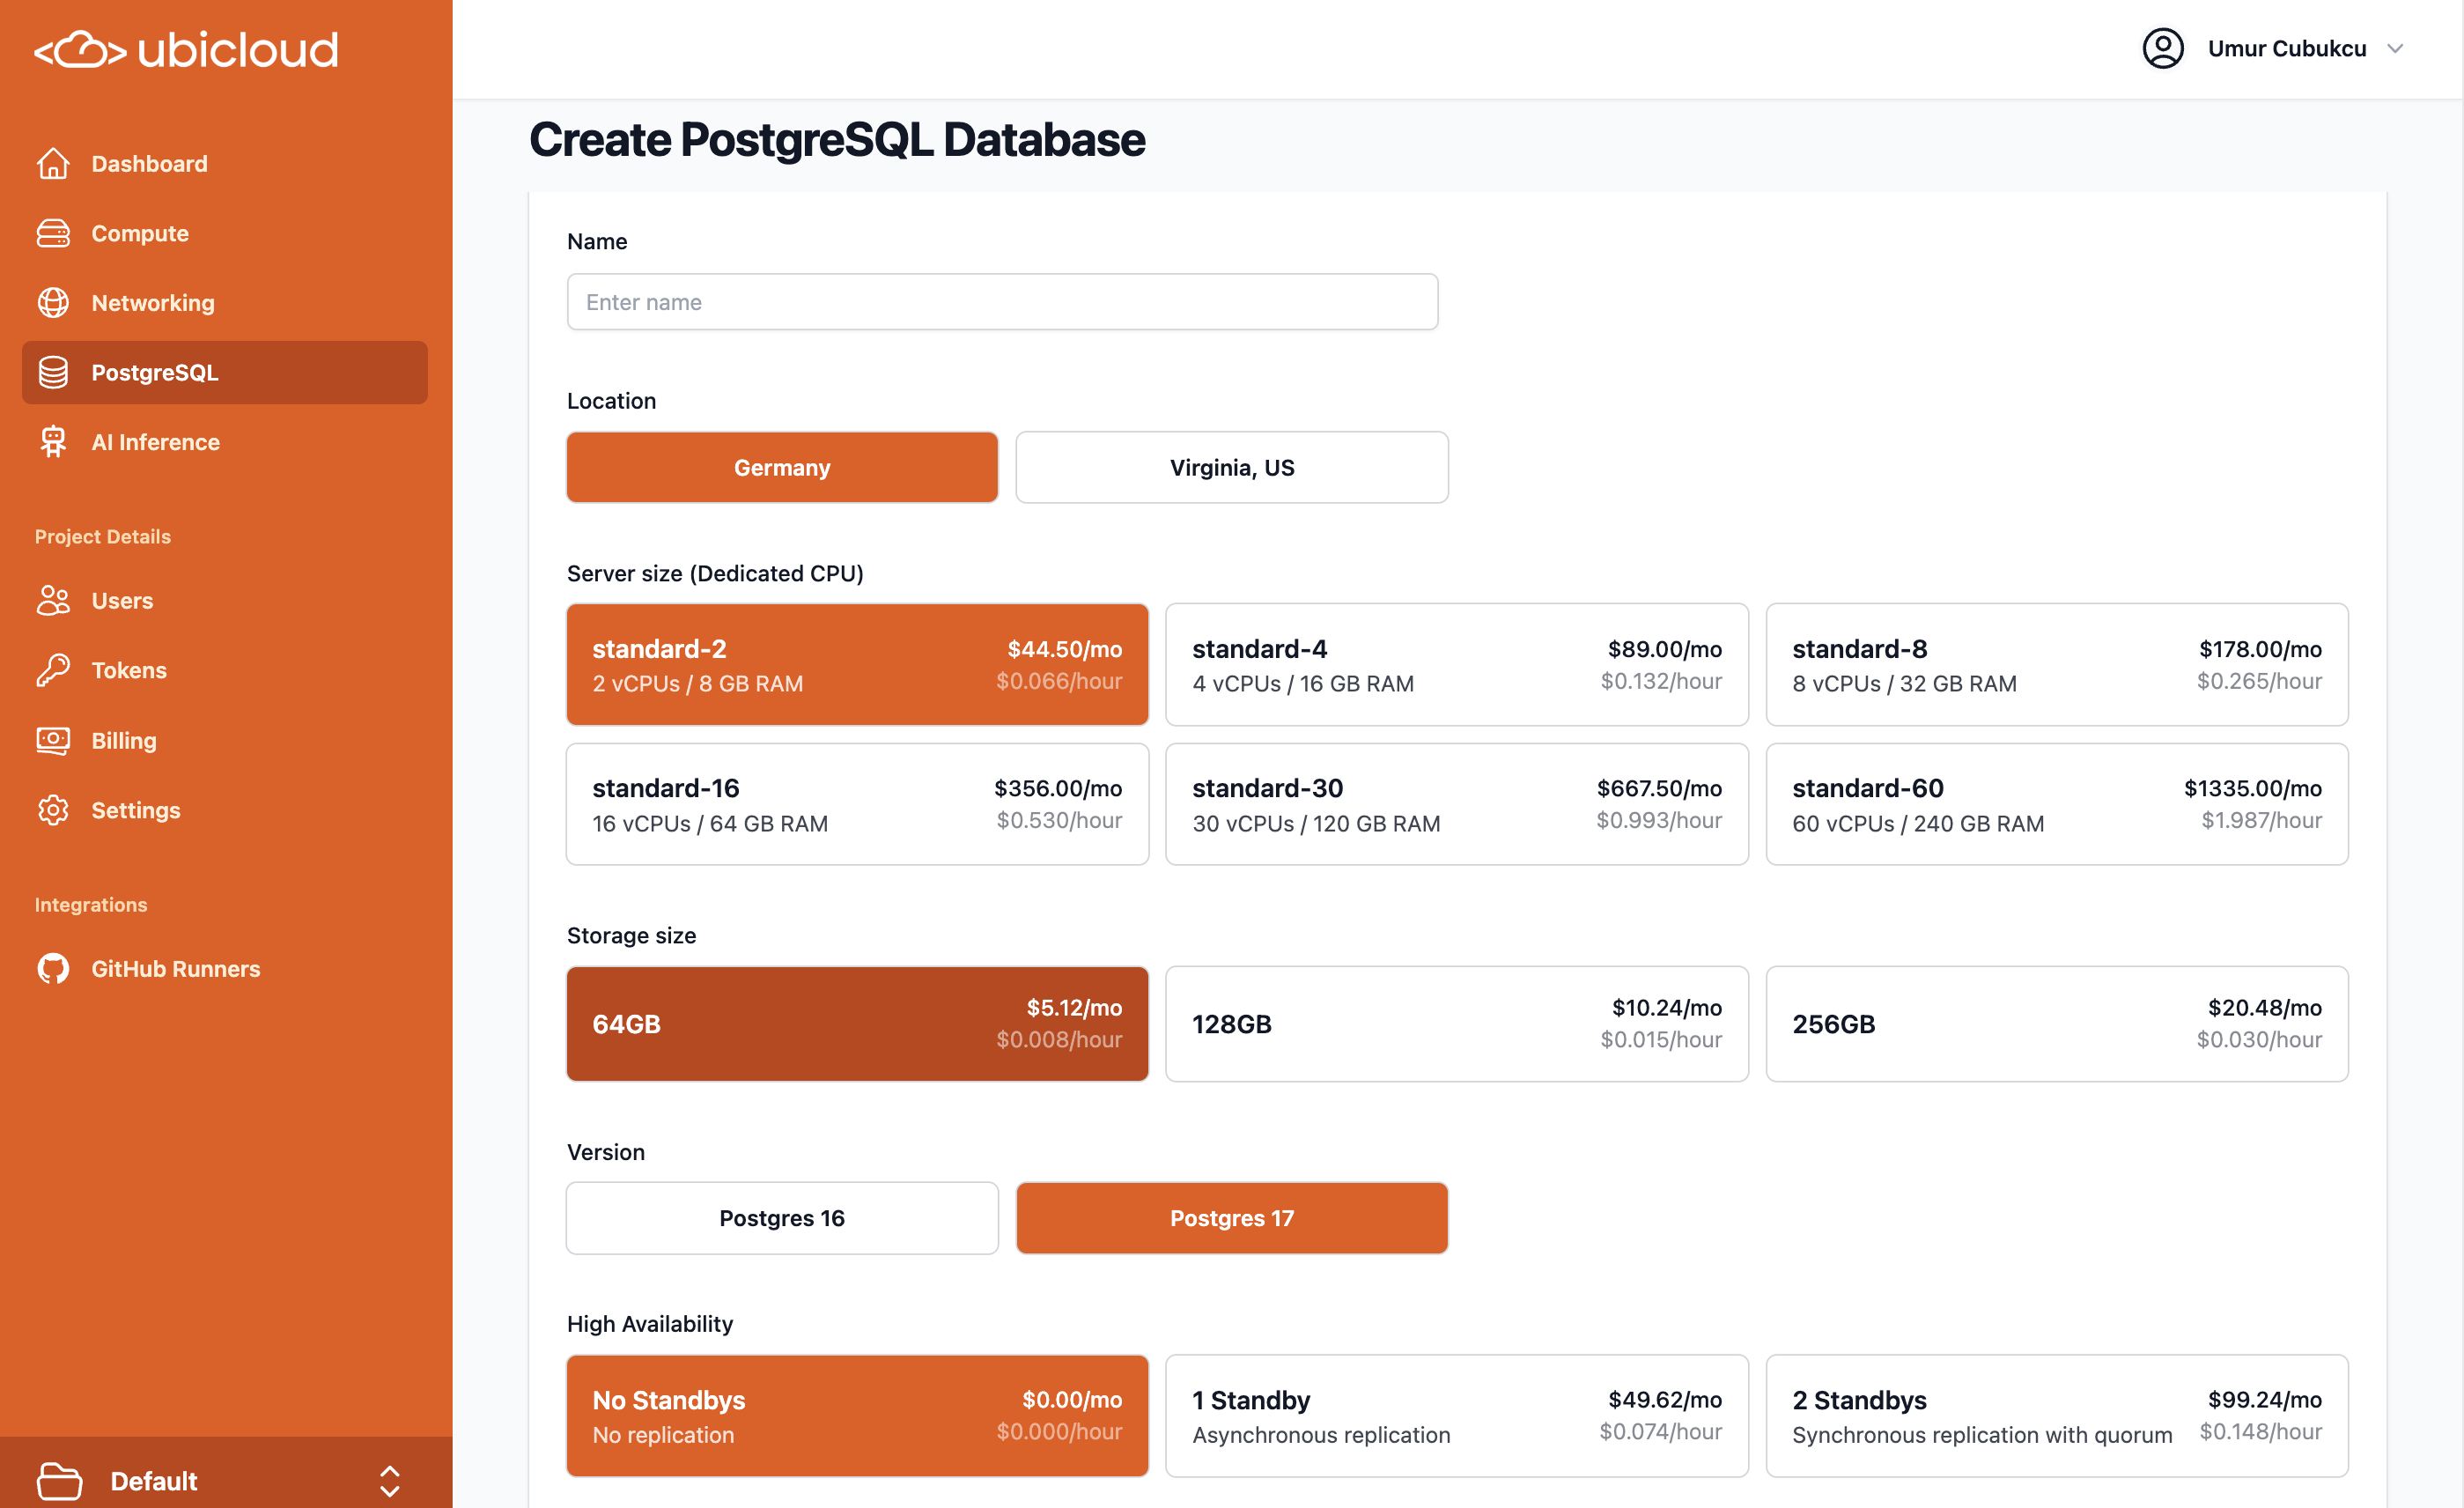 ### Larger storage options introduced also in the US
For large storage options in PostgreSQL that exceed 16 TB, please contact us via support.
### Download PostgreSQL CA certs from Ubicloud console
This makes it easier to verify certs via SSL for more secure connections.
### ParadeDB new images: v0.14.1
ParadeDB got a major upgrade, now running on PostgreSQL block storage. Ubicloud managed ParadeDB has the updated images. Read more on the [ParadeDB blog.](https://www.paradedb.com/blog/block_storage_part_one)
[https://docs.paradedb.com/changelog/0.14.0](https://docs.paradedb.com/changelog/0.14.0)
## Sign in with Google and Github
**You can now use your existing Google or Github accounts to login to Ubicloud.** Passwordless login is also enabled.
### Larger storage options introduced also in the US
For large storage options in PostgreSQL that exceed 16 TB, please contact us via support.
### Download PostgreSQL CA certs from Ubicloud console
This makes it easier to verify certs via SSL for more secure connections.
### ParadeDB new images: v0.14.1
ParadeDB got a major upgrade, now running on PostgreSQL block storage. Ubicloud managed ParadeDB has the updated images. Read more on the [ParadeDB blog.](https://www.paradedb.com/blog/block_storage_part_one)
[https://docs.paradedb.com/changelog/0.14.0](https://docs.paradedb.com/changelog/0.14.0)
## Sign in with Google and Github
**You can now use your existing Google or Github accounts to login to Ubicloud.** Passwordless login is also enabled.
 ## Simplified fine-grained access controls
Ubicloud comes with granular access controls that can be assigned to each user, for different resources. These Attribute Based Access Controls (ABAC) can now be managed much more simply through the console.
### Attribute Based Access Controls (ABAC) managed via console
## Simplified fine-grained access controls
Ubicloud comes with granular access controls that can be assigned to each user, for different resources. These Attribute Based Access Controls (ABAC) can now be managed much more simply through the console.
### Attribute Based Access Controls (ABAC) managed via console
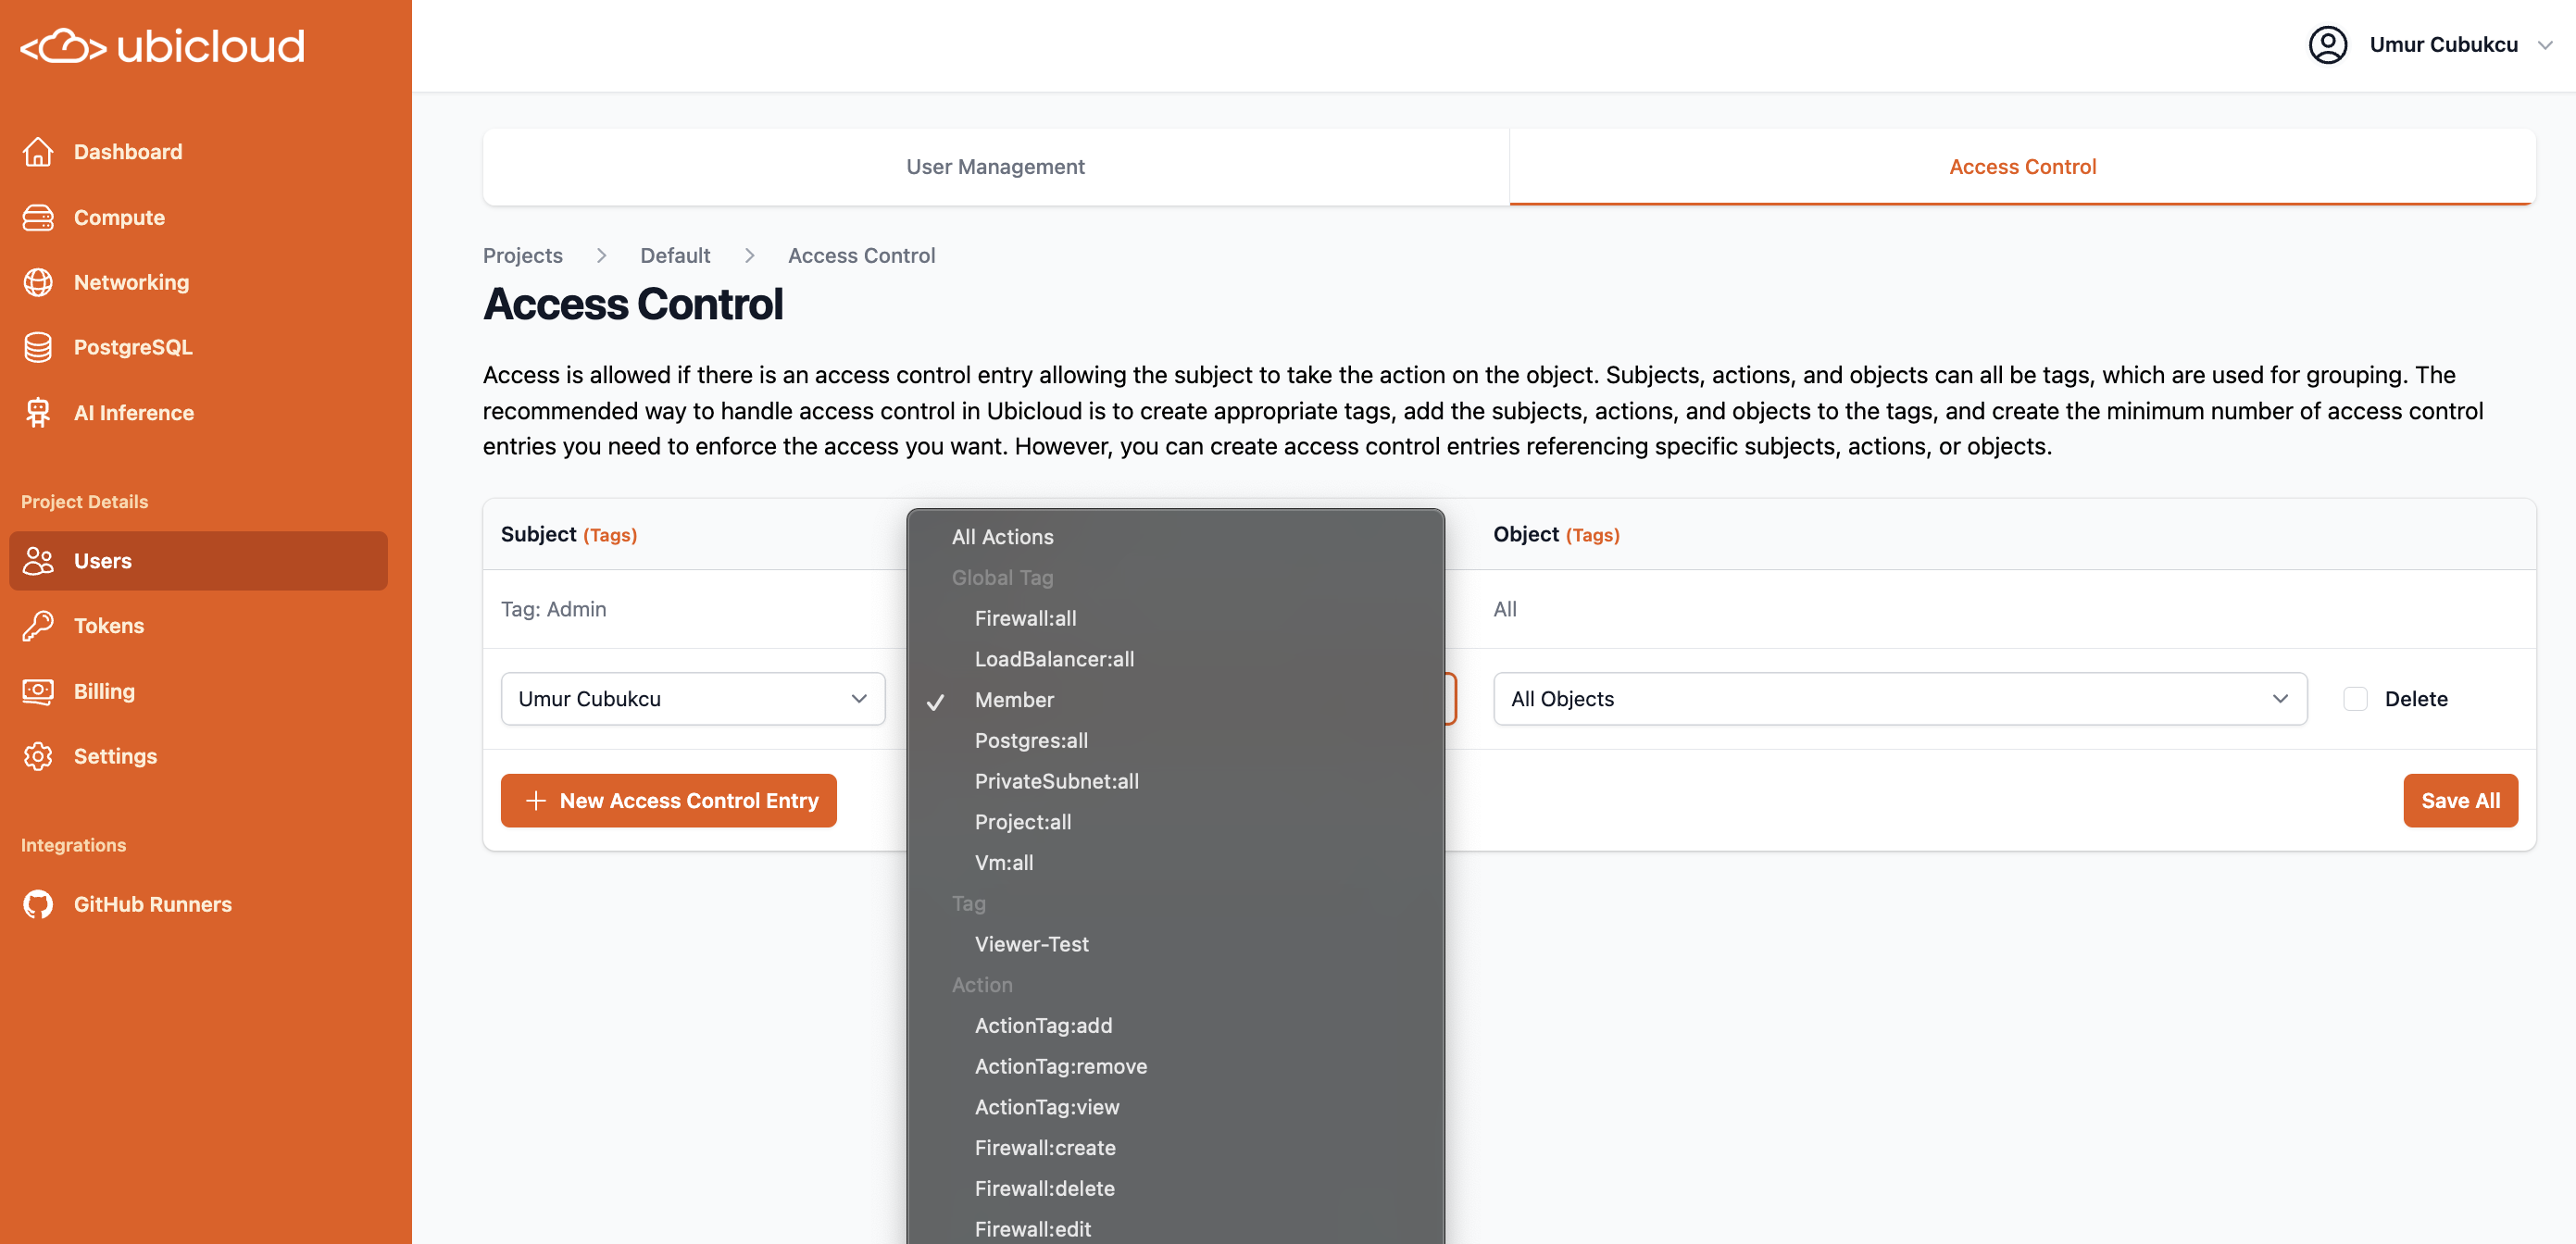 ### Step-by-step guide to user permissions & API access management
With major changes to how authorization is managed, we created a detailed documentation page, with example scenarios: [https://www.ubicloud.com/docs/security/authorization](https://www.ubicloud.com/docs/security/authorization)
### Granular access extended to APIs via personal access tokens
### Step-by-step guide to user permissions & API access management
With major changes to how authorization is managed, we created a detailed documentation page, with example scenarios: [https://www.ubicloud.com/docs/security/authorization](https://www.ubicloud.com/docs/security/authorization)
### Granular access extended to APIs via personal access tokens
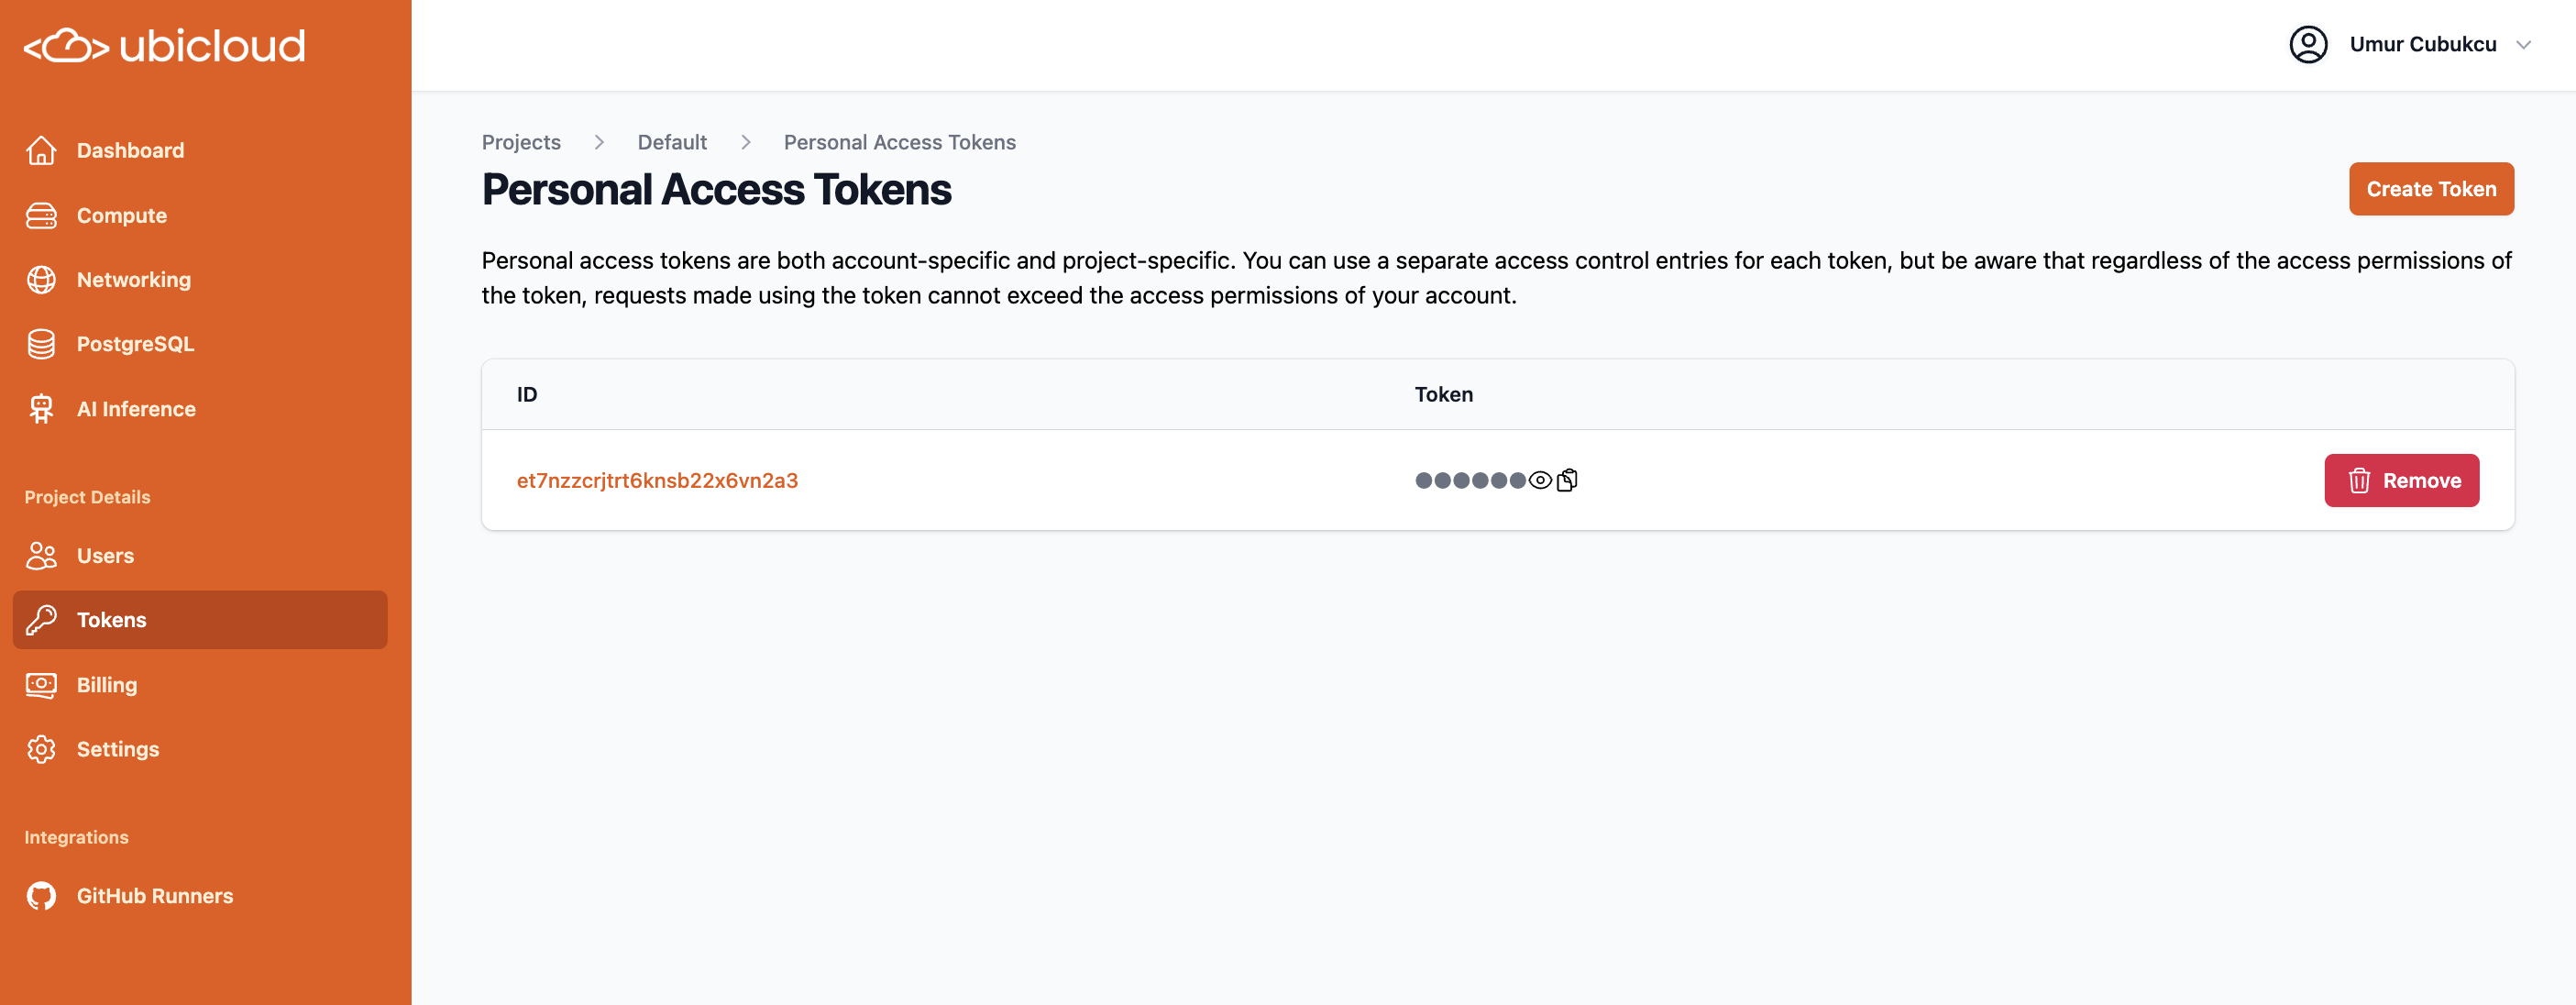 With these changes, we also deprecated our prior JSON based policy editor in the console.
## Managed Github Actions Runners
### Transparent Cache enabled by default for all new customers
We launched this feature last month, and given its favorable performance, now made it the default for all new accounts.
Enabling transparent cache can speed up runs by 4x, without making any changes to your Github Actions caches.
### **Faster runner provisioning times via improved pools**
By optimizing the types of runners we pre-provision and keep ready for incoming jobs, we've cut down average runner provisioning times by a further 2+ seconds.
### Github Actions caches can now be accessible from all scopes of your Github Repos
This is not a common usage pattern, but can be helpful for certain projects.
This feature is behind a feature flag, please open a ticket to enable.
## VMs and Networking
### Simplified Load Balancer port mapping for private networking
Clients now just need to open up the private port for private subnet range.
With these changes, we also deprecated our prior JSON based policy editor in the console.
## Managed Github Actions Runners
### Transparent Cache enabled by default for all new customers
We launched this feature last month, and given its favorable performance, now made it the default for all new accounts.
Enabling transparent cache can speed up runs by 4x, without making any changes to your Github Actions caches.
### **Faster runner provisioning times via improved pools**
By optimizing the types of runners we pre-provision and keep ready for incoming jobs, we've cut down average runner provisioning times by a further 2+ seconds.
### Github Actions caches can now be accessible from all scopes of your Github Repos
This is not a common usage pattern, but can be helpful for certain projects.
This feature is behind a feature flag, please open a ticket to enable.
## VMs and Networking
### Simplified Load Balancer port mapping for private networking
Clients now just need to open up the private port for private subnet range.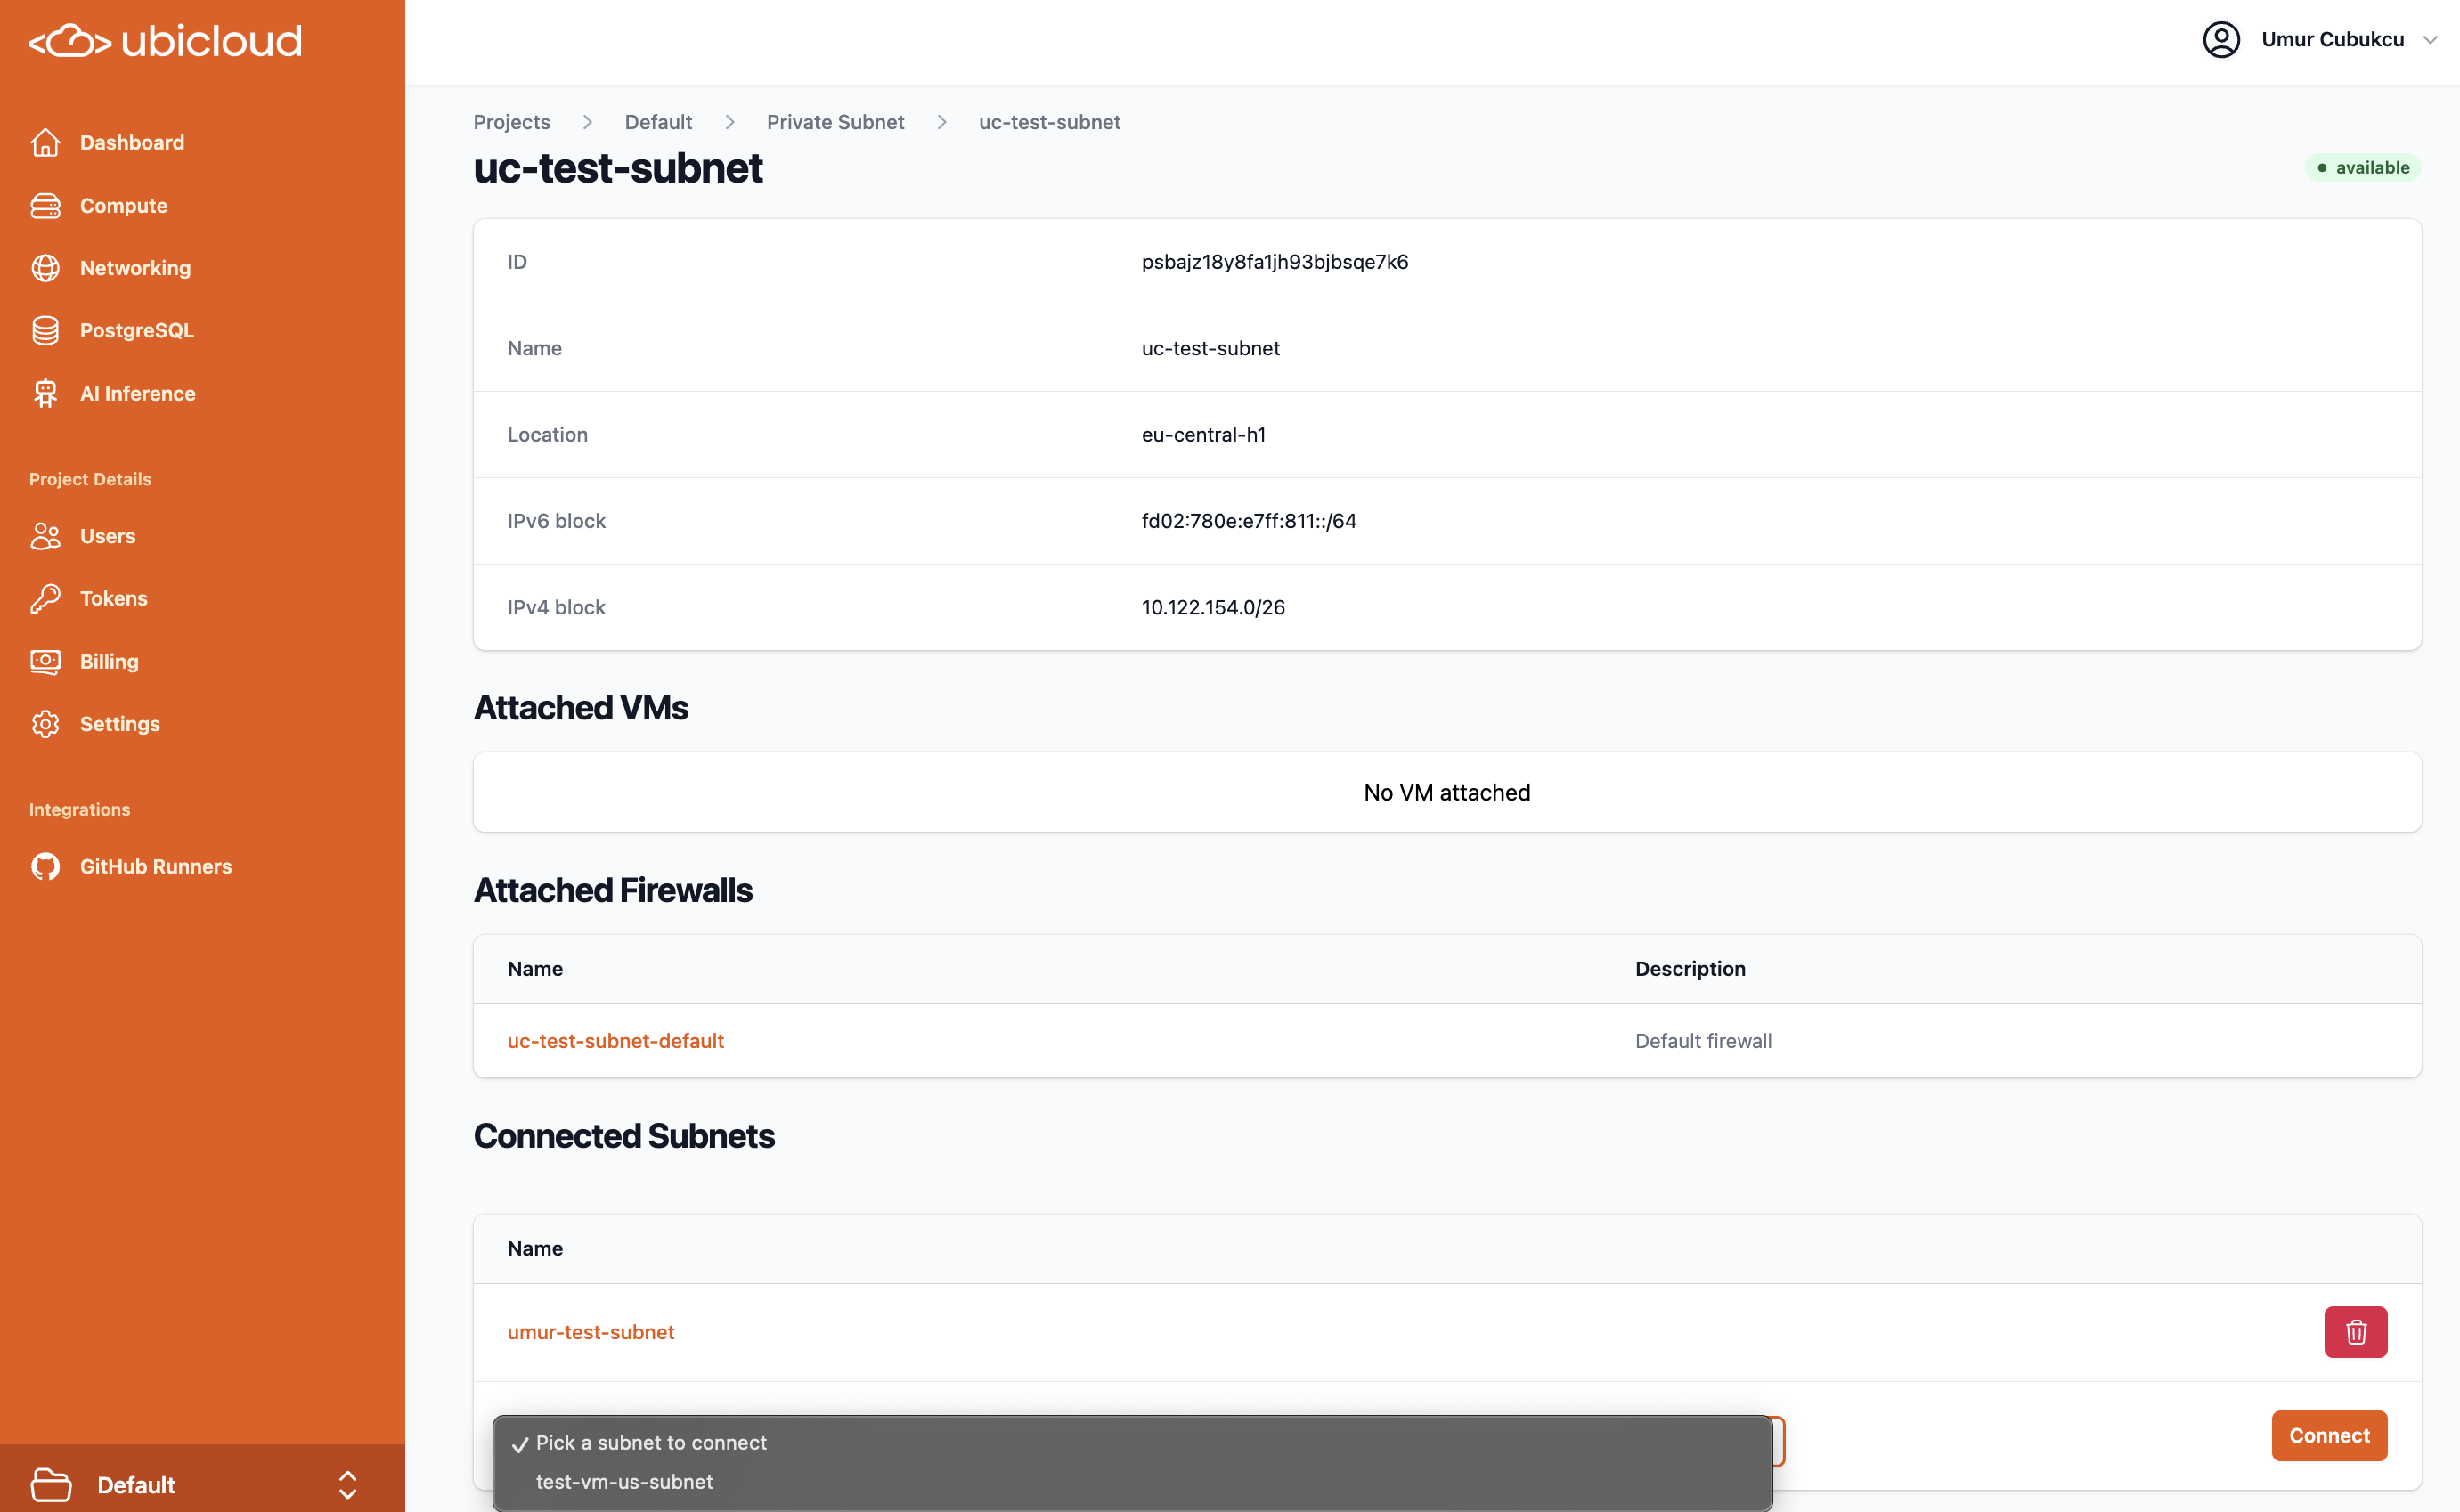 ### Load balancer stack (ipv4, ipv6 or dual) is selectable
This selection is available in both the UI and the API
### Load balancer stack (ipv4, ipv6 or dual) is selectable
This selection is available in both the UI and the API
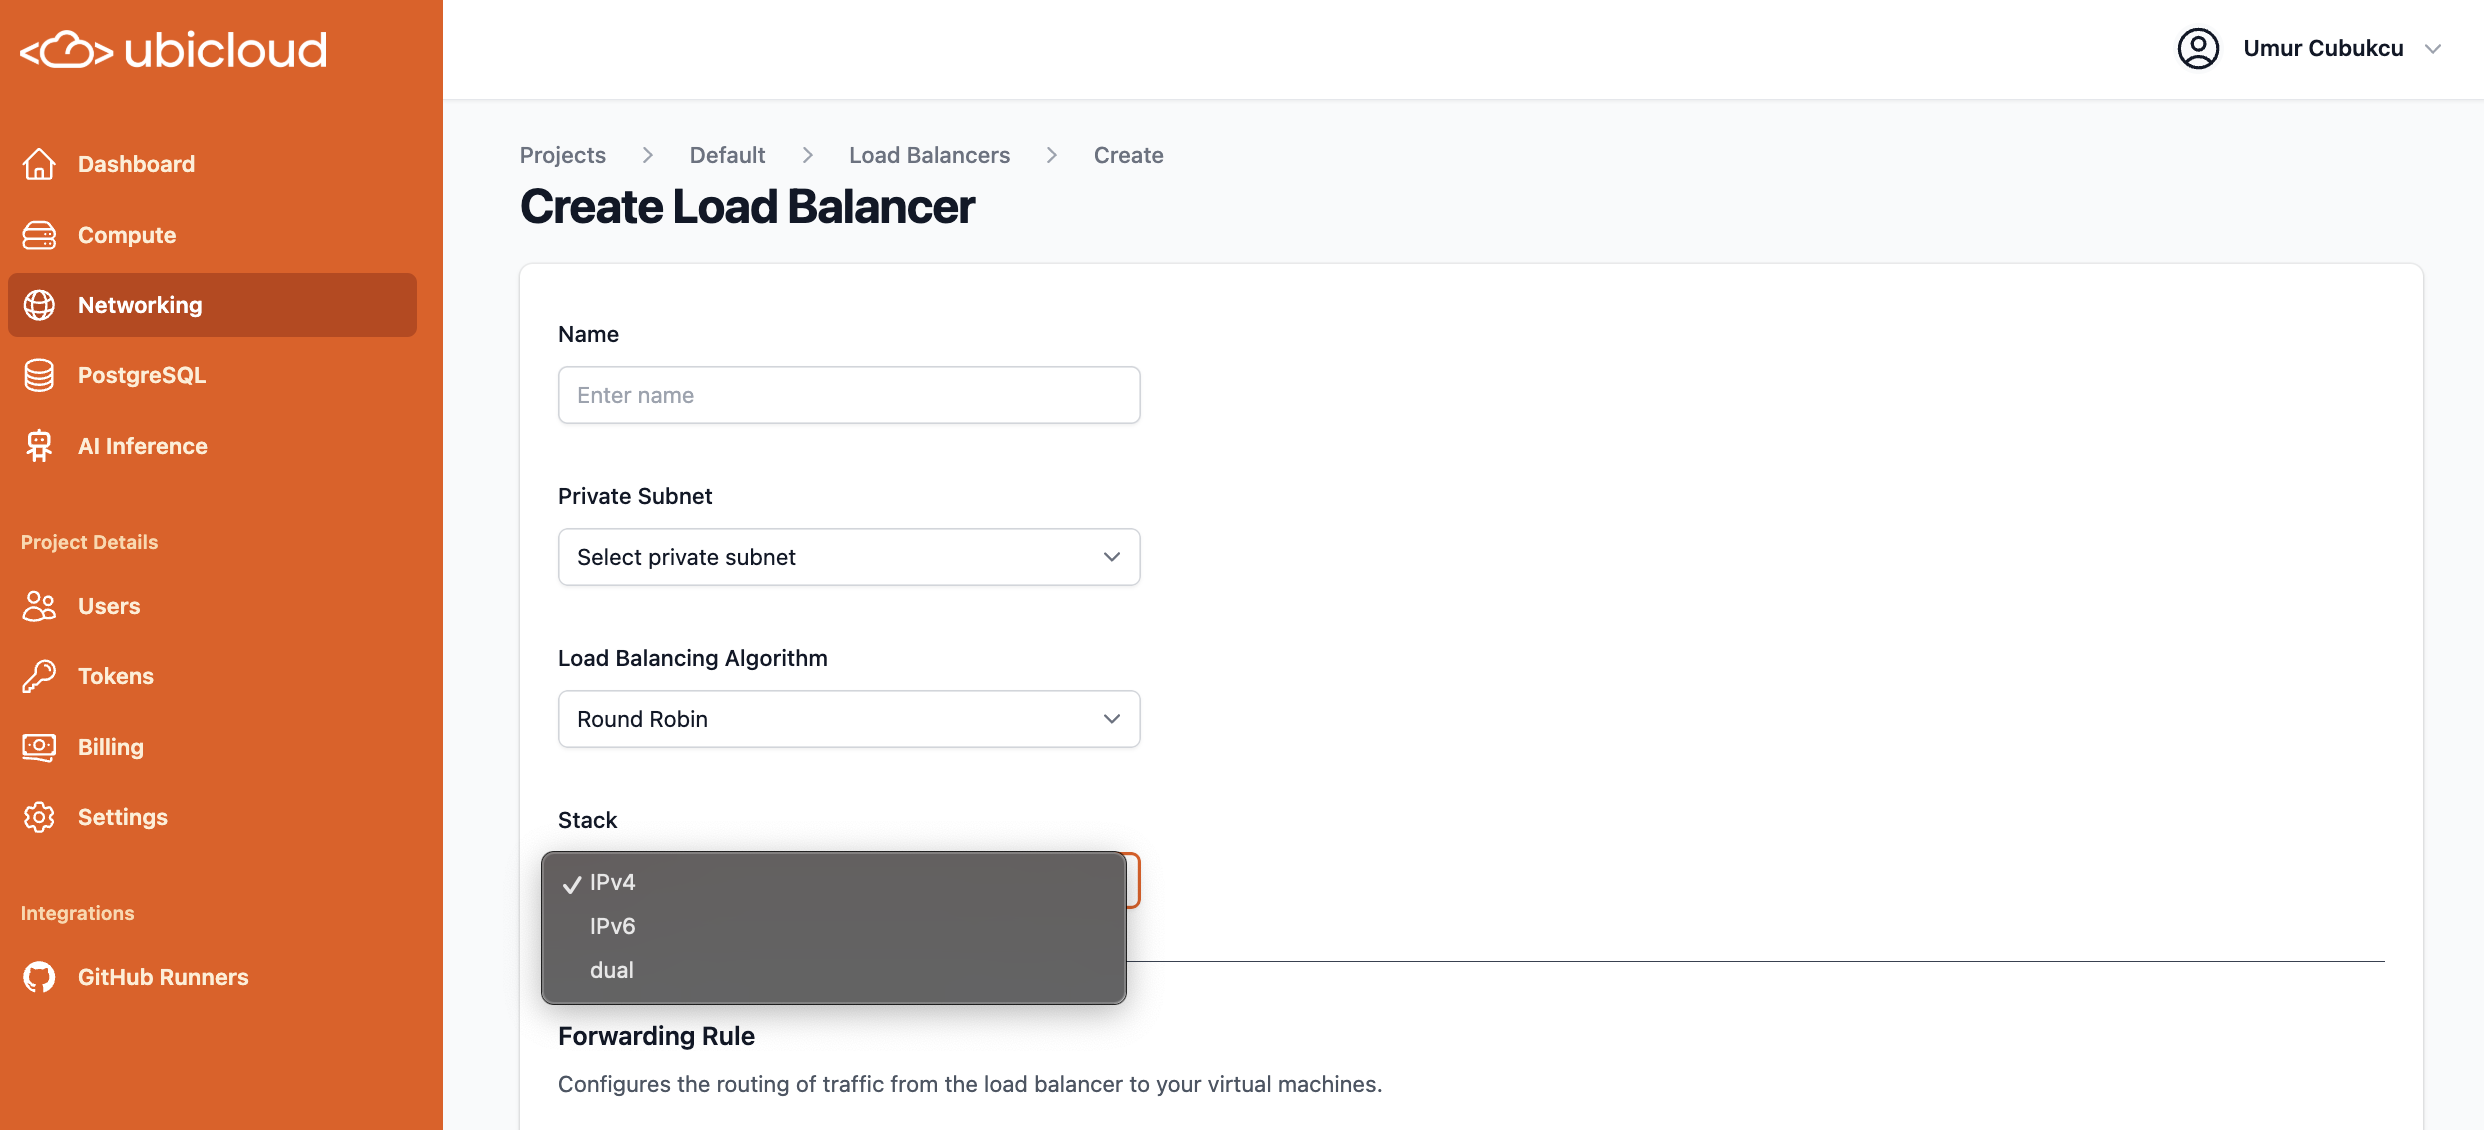 ## Bug fixes / maintenance
Multiple bug fixes and minor improvements, including:
* Demo docker image updated (Github demo was broken)
* Race condition fixed during VM provisioning for private networking
* Autofocus on OTP input field. Thank you @sh0n0 for the fix!
# February 2025
Source: https://ubicloud.com/docs/changelog/2025-02
export const PrList = ({ids}) =>
{ids.map((id, index) => <>
{index > 0 && ", "}
{index === 0 ? "PR " : ""}#{id}
)}
;
## SOC2 Type 2 Compliance
Ubicloud is now SOC2 Type 2 compliant! For a copy of the report and pen-test certificate, please feel free to contact us.
## AI inference endpoints
### New AI Inference Models Available
We are pleased to announce the addition of **mistral-small-3** and the introduction of **llama-3-3-70b-turbo**, which replaces llama-3-3-70b-it for better cost efficiency.
## Bug fixes / maintenance
Multiple bug fixes and minor improvements, including:
* Demo docker image updated (Github demo was broken)
* Race condition fixed during VM provisioning for private networking
* Autofocus on OTP input field. Thank you @sh0n0 for the fix!
# February 2025
Source: https://ubicloud.com/docs/changelog/2025-02
export const PrList = ({ids}) =>
{ids.map((id, index) => <>
{index > 0 && ", "}
{index === 0 ? "PR " : ""}#{id}
)}
;
## SOC2 Type 2 Compliance
Ubicloud is now SOC2 Type 2 compliant! For a copy of the report and pen-test certificate, please feel free to contact us.
## AI inference endpoints
### New AI Inference Models Available
We are pleased to announce the addition of **mistral-small-3** and the introduction of **llama-3-3-70b-turbo**, which replaces llama-3-3-70b-it for better cost efficiency.
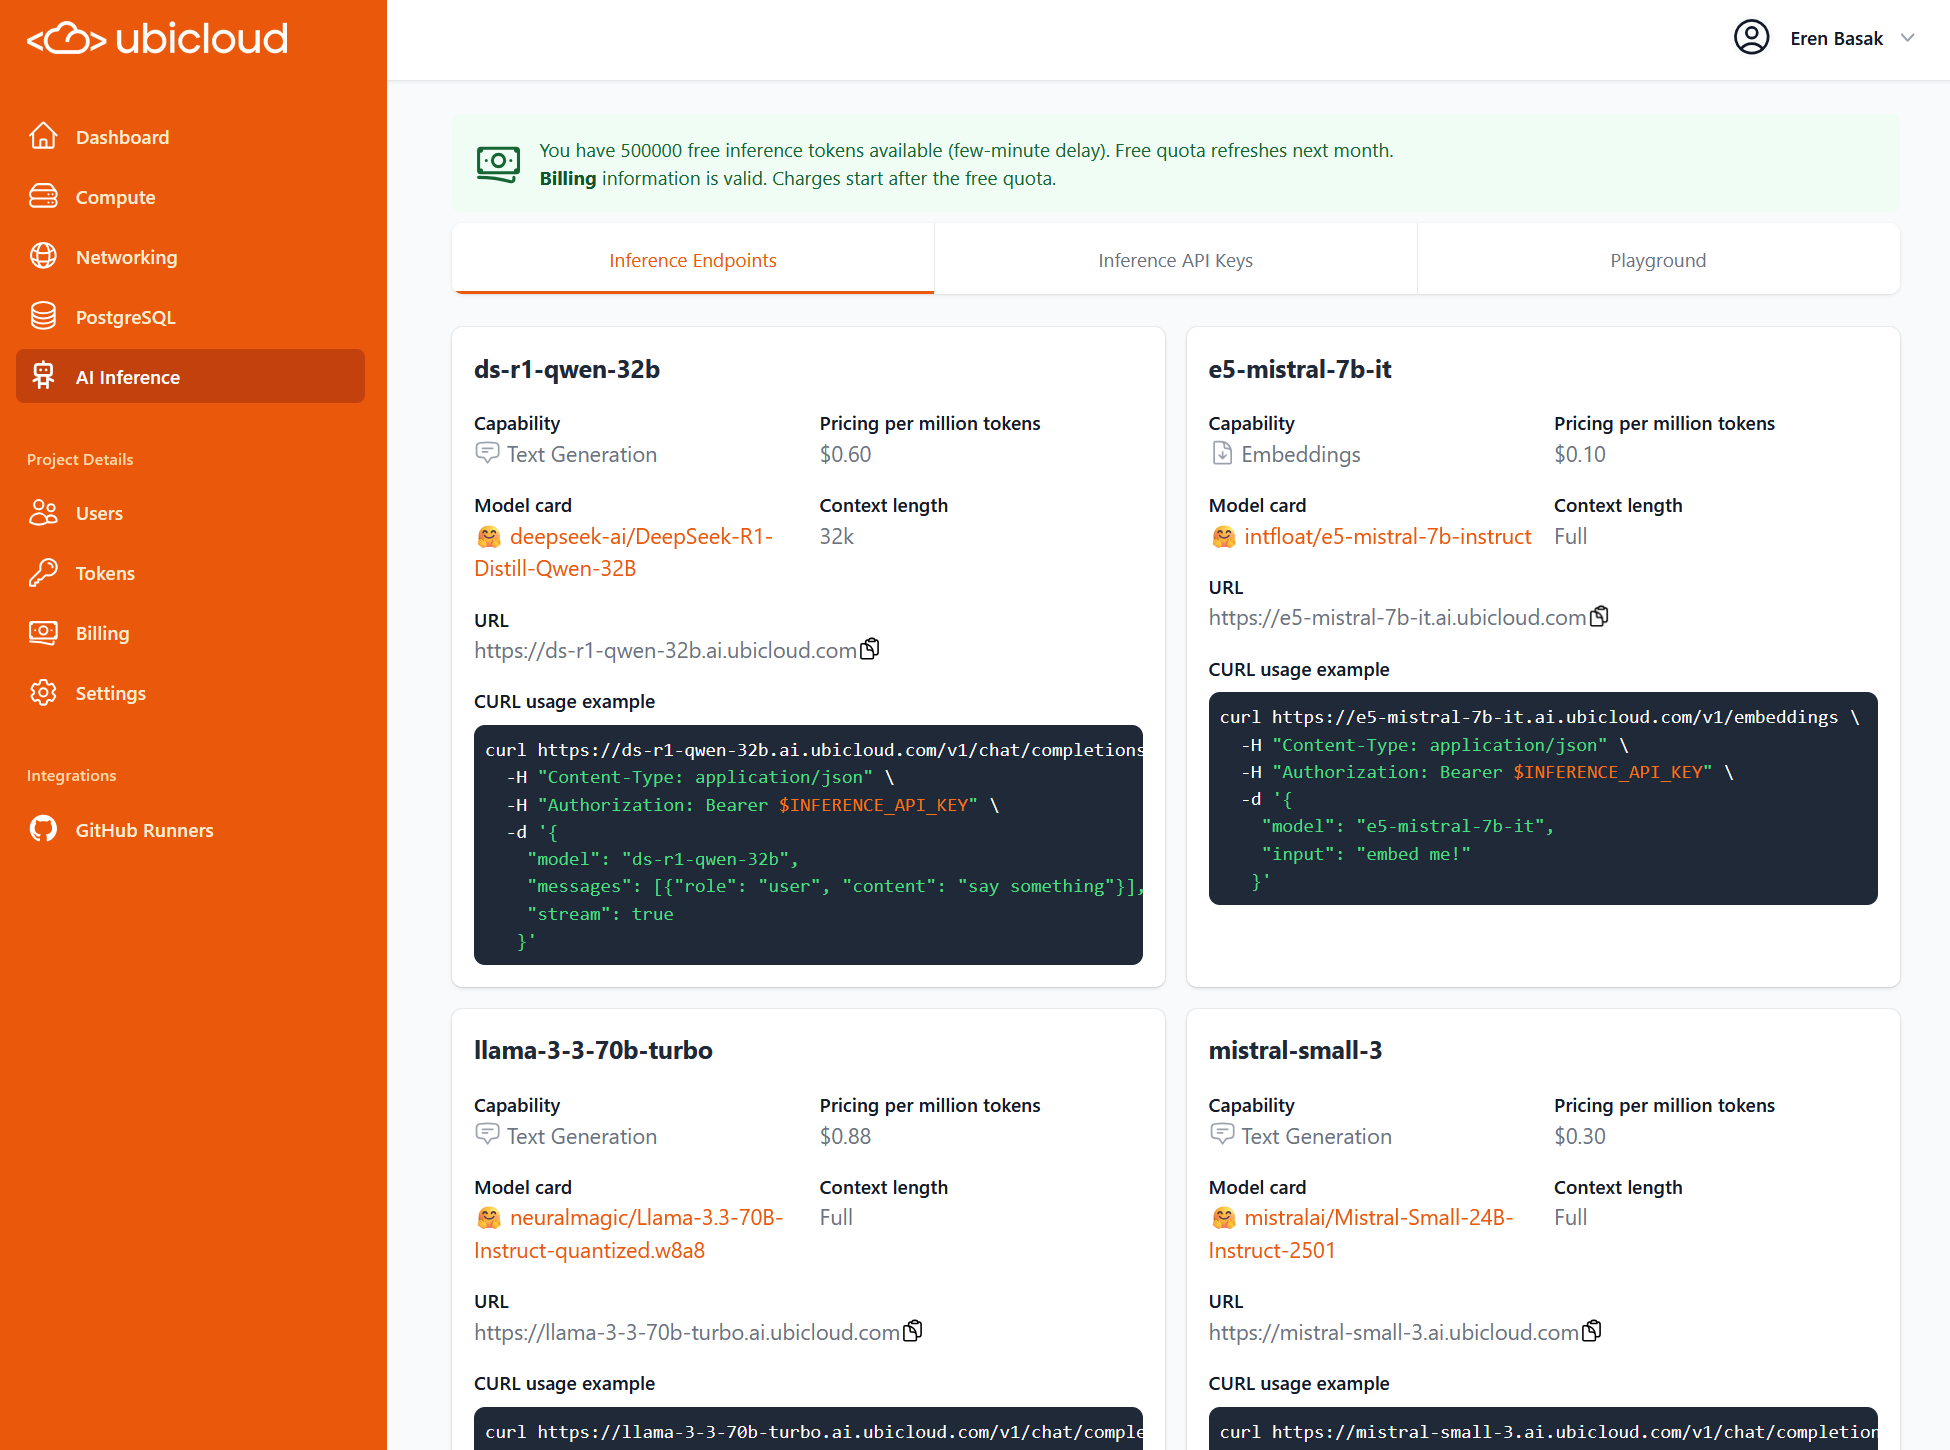 **mistral-small-3** model is also available in Openrouter from Ubicloud provider. For more information, visit our [Openrouter profile](https://openrouter.ai/provider/ubicloud)
### Faster EuroGPT and Inference Endpoints
Our AI inference endpoints stack has been integrated with **FlashInfer**, a high-performance library and kernel generator designed for LLMs, to provide higher inference performance. Learn more about this enhancement in our GitHub pull request here.
### Free AI Inference Tokens
Our AI Inference Endpoints are free for the first 500.000 tokens a month.
### Simplified Model Catalog
To streamline our AI inference endpoints collection, we have removed some lesser-used models, simplifying our model catalog.
## Managed PostgreSQL
### Built-in connection pooling available on all plans
Ubicloud Postgres now comes with [PgBouncer](https://www.pgbouncer.org/) preinstalled. By connecting to PgBouncer at port 6432, you can scale your connections to Postgres to higher levels.
### ParadeDB on Ubicloud PostgreSQL Updated
With the newest 0.15.6 version, ParadeDB on Ubicloud Postgres gains the `paradedb.match` query function, JSON support in `paradedb.term_set`, along with stability improvements and performance enhancements.
[https://docs.paradedb.com/changelog/0.15.6](https://docs.paradedb.com/changelog/0.15.6)
## Ubicloud CLI (Beta)
We have developed a CLI tool, providing a secure and programmatic way to interact with your Ubicloud resources. The tool is available for preview in the [Ubicloud repository.](https://github.com/ubicloud/ubicloud/tree/main/cli)
# March 2025
Source: https://ubicloud.com/docs/changelog/2025-03
export const PrList = ({ids}) =>
{ids.map((id, index) => <>
{index > 0 && ", "}
{index === 0 ? "PR " : ""}#{id}
)}
;
## Burstable VM Family (new)
We are excited to introduce a new family of VMs: **Burstables**. These small instances provide a fraction of shared vCPU and offer the ability to utilize more CPU for occasionally expanding workloads. Burstable VMs are available for Ubicloud Compute and Postgres, with starting prices as low as \$6.65/month for VMs and \$13/month for Postgres.
**mistral-small-3** model is also available in Openrouter from Ubicloud provider. For more information, visit our [Openrouter profile](https://openrouter.ai/provider/ubicloud)
### Faster EuroGPT and Inference Endpoints
Our AI inference endpoints stack has been integrated with **FlashInfer**, a high-performance library and kernel generator designed for LLMs, to provide higher inference performance. Learn more about this enhancement in our GitHub pull request here.
### Free AI Inference Tokens
Our AI Inference Endpoints are free for the first 500.000 tokens a month.
### Simplified Model Catalog
To streamline our AI inference endpoints collection, we have removed some lesser-used models, simplifying our model catalog.
## Managed PostgreSQL
### Built-in connection pooling available on all plans
Ubicloud Postgres now comes with [PgBouncer](https://www.pgbouncer.org/) preinstalled. By connecting to PgBouncer at port 6432, you can scale your connections to Postgres to higher levels.
### ParadeDB on Ubicloud PostgreSQL Updated
With the newest 0.15.6 version, ParadeDB on Ubicloud Postgres gains the `paradedb.match` query function, JSON support in `paradedb.term_set`, along with stability improvements and performance enhancements.
[https://docs.paradedb.com/changelog/0.15.6](https://docs.paradedb.com/changelog/0.15.6)
## Ubicloud CLI (Beta)
We have developed a CLI tool, providing a secure and programmatic way to interact with your Ubicloud resources. The tool is available for preview in the [Ubicloud repository.](https://github.com/ubicloud/ubicloud/tree/main/cli)
# March 2025
Source: https://ubicloud.com/docs/changelog/2025-03
export const PrList = ({ids}) =>
{ids.map((id, index) => <>
{index > 0 && ", "}
{index === 0 ? "PR " : ""}#{id}
)}
;
## Burstable VM Family (new)
We are excited to introduce a new family of VMs: **Burstables**. These small instances provide a fraction of shared vCPU and offer the ability to utilize more CPU for occasionally expanding workloads. Burstable VMs are available for Ubicloud Compute and Postgres, with starting prices as low as \$6.65/month for VMs and \$13/month for Postgres.
 ## Managed PostgreSQL
### Toggle High Availability mode on the fly
You can enable/disable high availability through a single click in the console.
## Managed PostgreSQL
### Toggle High Availability mode on the fly
You can enable/disable high availability through a single click in the console.
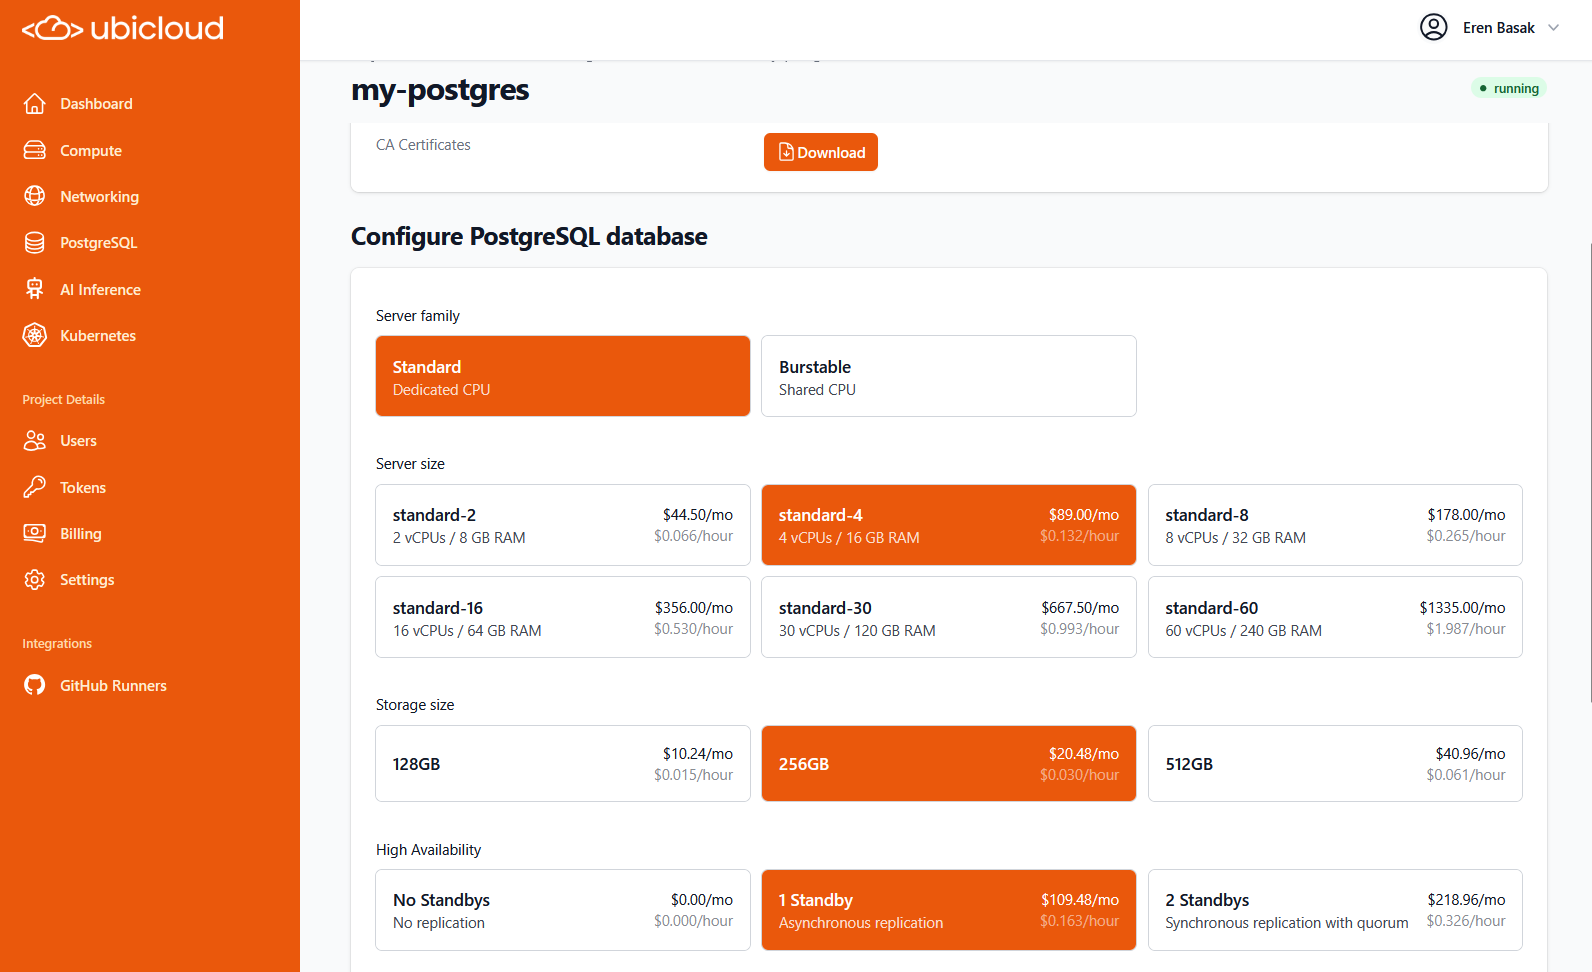 ### Re-size Postgres instance memory, cpu and disk via console/API
Scaling the compute and storage of a Postgres instance on the fly is possible. Updating your instance specifications triggers the creation of a new standby with the updated specs, followed by a failover to ensure seamless and secure scaling.
### Burstable option, starting from \$0.02 per hour / \$13 per month
The burstable VM family is available for Postgres instances, offering compute options of 1 vCPU with 2 GB RAM or 2 vCPUs with 4 GB RAM, bursting under load. With storage starting at 16 GB, pricing begins at just\*\* \$13 per month.\*\*
### Re-size Postgres instance memory, cpu and disk via console/API
Scaling the compute and storage of a Postgres instance on the fly is possible. Updating your instance specifications triggers the creation of a new standby with the updated specs, followed by a failover to ensure seamless and secure scaling.
### Burstable option, starting from \$0.02 per hour / \$13 per month
The burstable VM family is available for Postgres instances, offering compute options of 1 vCPU with 2 GB RAM or 2 vCPUs with 4 GB RAM, bursting under load. With storage starting at 16 GB, pricing begins at just\*\* \$13 per month.\*\*
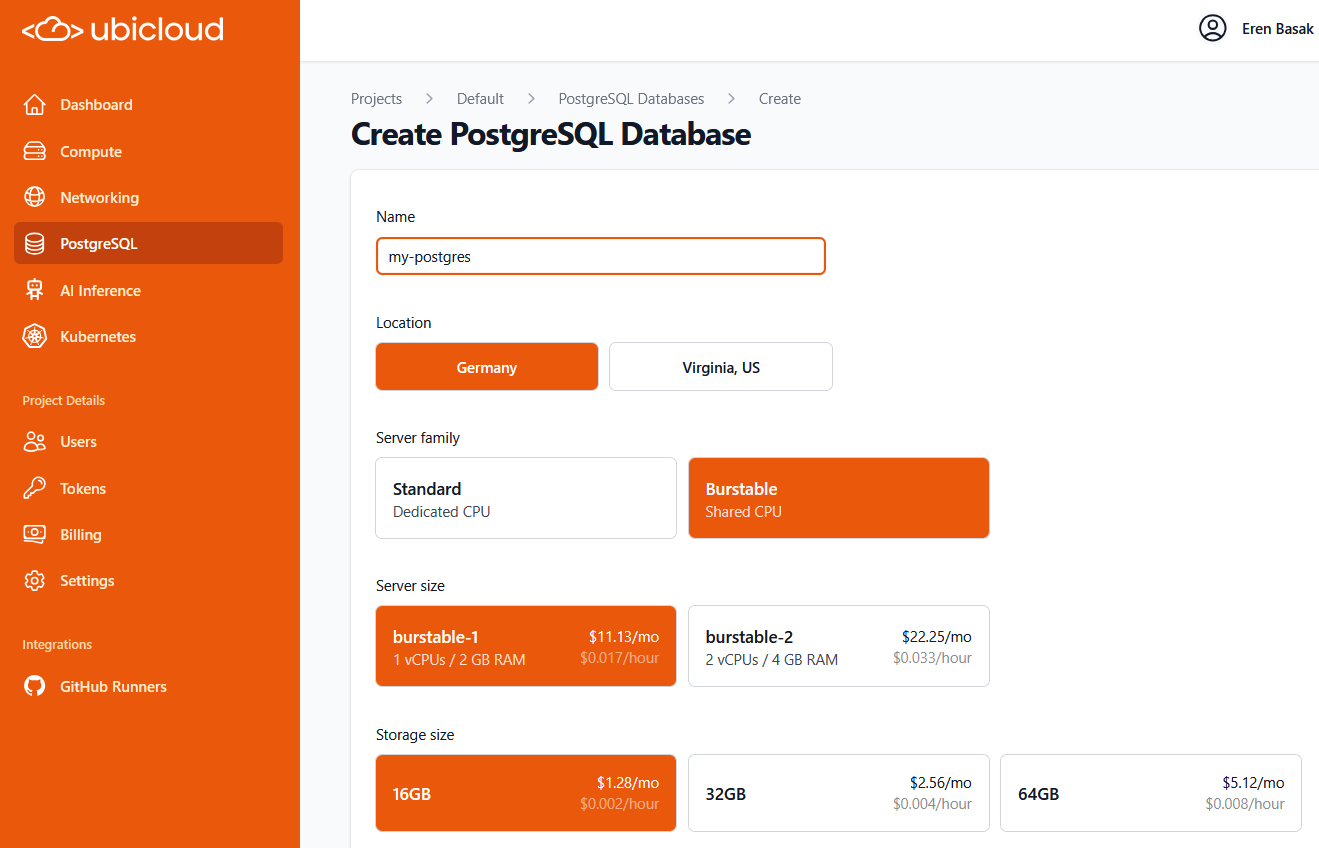 ## AI Inference Endpoints
### AI Playground displays reasoning tokens separately
Inference endpoints playground output has improved clarity now, showcasing reasoning processes distinctively in the AI Playground interface.
## AI Inference Endpoints
### AI Playground displays reasoning tokens separately
Inference endpoints playground output has improved clarity now, showcasing reasoning processes distinctively in the AI Playground interface.
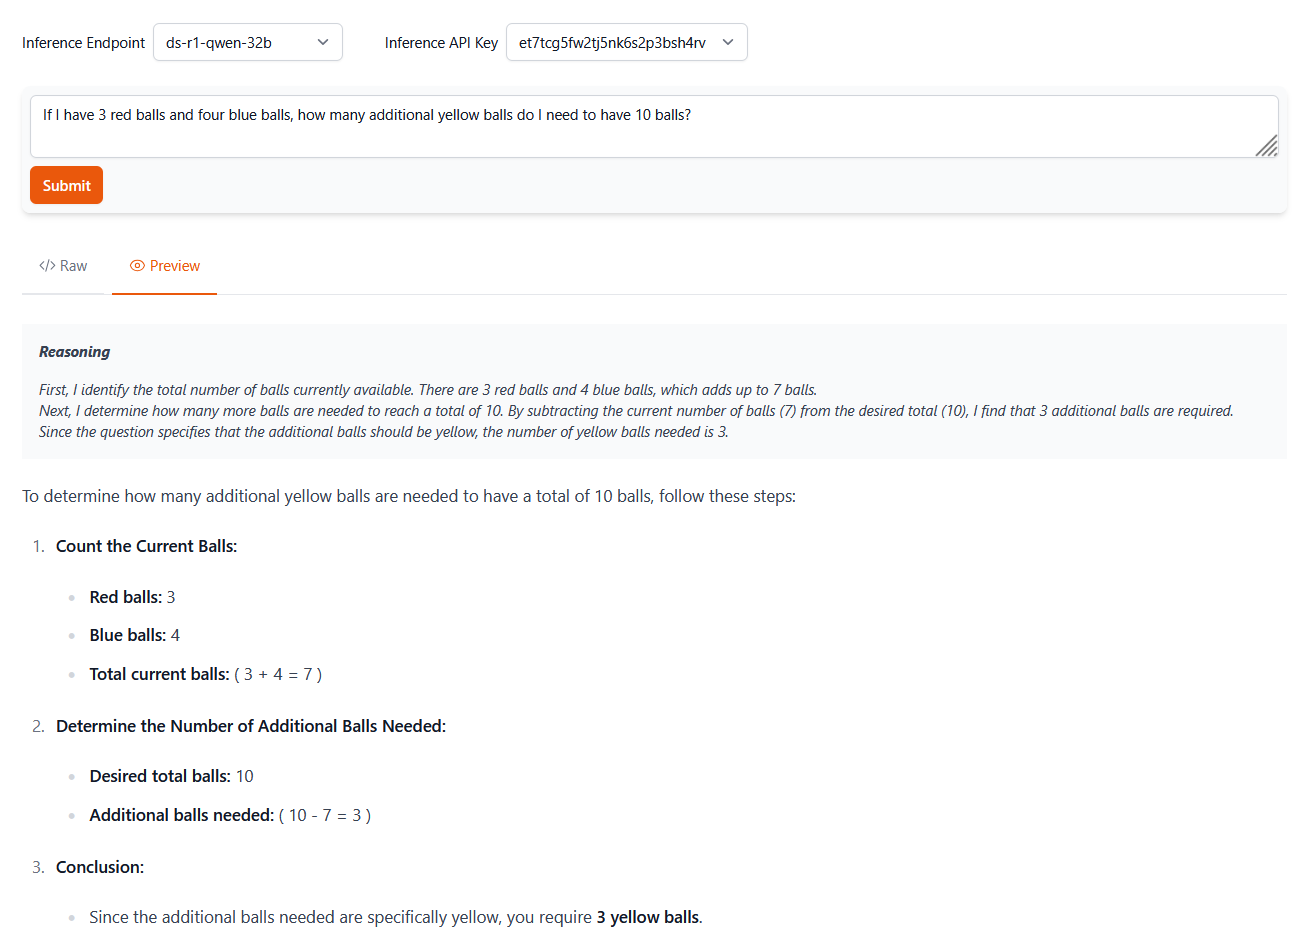 ### Speculative decoding for DeepSeek R1 32B for performance boost
New enhancements to our AI inference endpoints stack like speculative decoding improved the performance of Deepseek R1 32B model.
## Github Runners
### Force terminate jobs
We introduced new functionality to immediately stop ongoing tasks, ensuring better control over job management.
### Speculative decoding for DeepSeek R1 32B for performance boost
New enhancements to our AI inference endpoints stack like speculative decoding improved the performance of Deepseek R1 32B model.
## Github Runners
### Force terminate jobs
We introduced new functionality to immediately stop ongoing tasks, ensuring better control over job management.
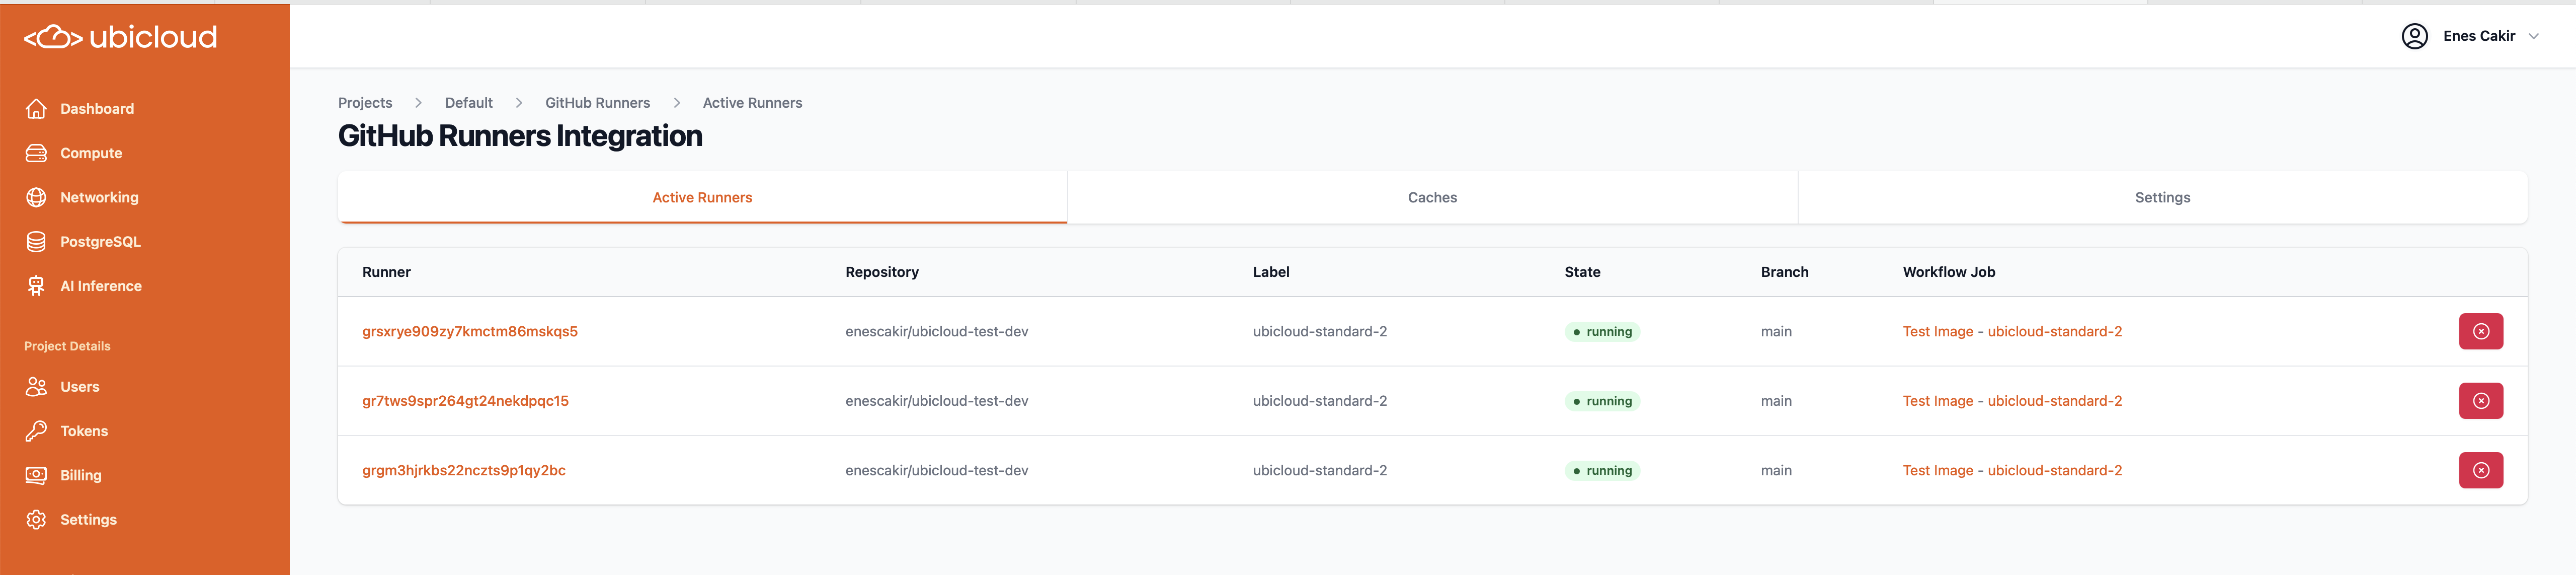 ### Cache storage beyond 30 GB now available
We are happy to share that transparent cache capacity can be extended beyond 30GB for smoother operations and quicker data retrieval.
## Billing
### VAT for customers in European Union
We started including the value-added tax rates in the invoice for customers in European Union countries.
### Simplified “Current Invoice” view
Our **Current Invoice** view is improved, providing a streamlined interface for accessing your ongoing invoice.
### Cache storage beyond 30 GB now available
We are happy to share that transparent cache capacity can be extended beyond 30GB for smoother operations and quicker data retrieval.
## Billing
### VAT for customers in European Union
We started including the value-added tax rates in the invoice for customers in European Union countries.
### Simplified “Current Invoice” view
Our **Current Invoice** view is improved, providing a streamlined interface for accessing your ongoing invoice.
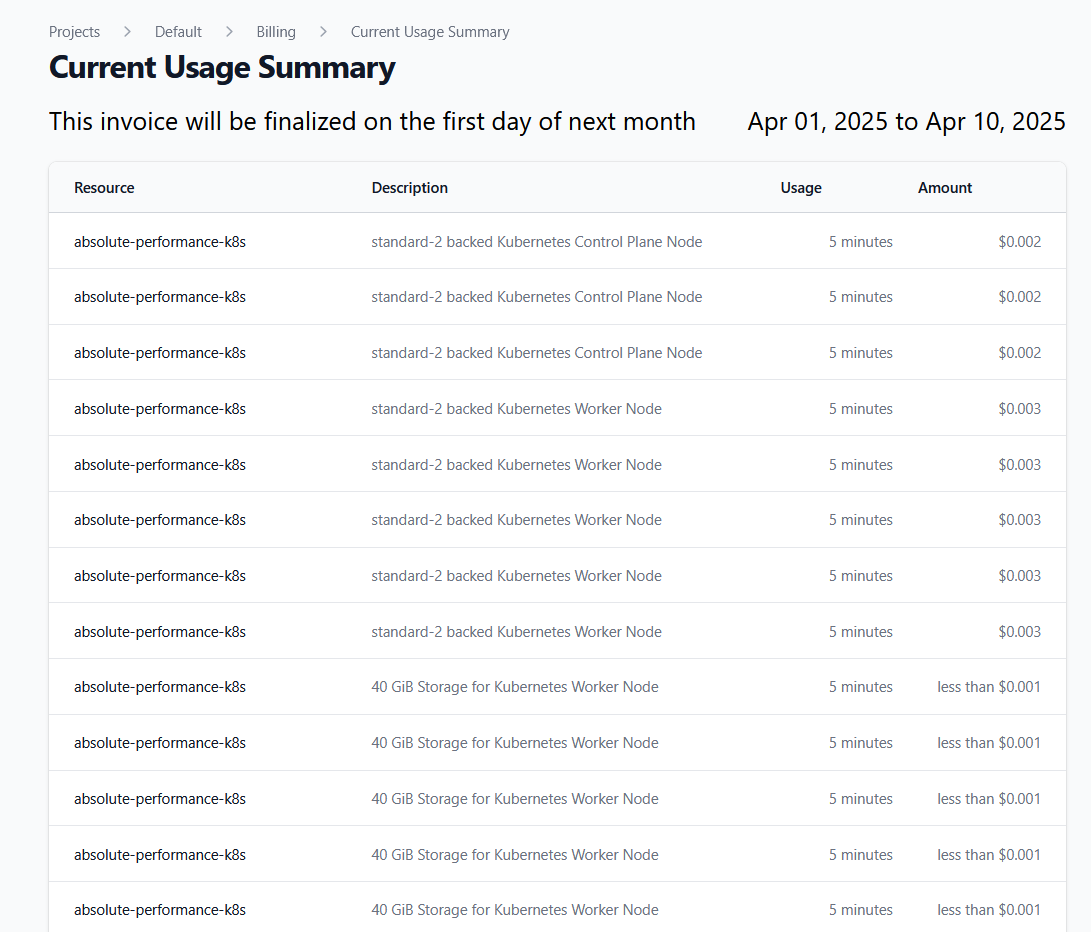 # April 2025
Source: https://ubicloud.com/docs/changelog/2025-04
export const PrList = ({ids}) =>
{ids.map((id, index) => <>
{index > 0 && ", "}
{index === 0 ? "PR " : ""}#{id}
)}
;
## Ubicloud Managed Kubernetes (new)
We are excited to announce our managed Kubernetes service, in preview, cutting your Kubernetes costs by 60-70%, and simplifying your setup. Ubicloud Kubernetes handles the creation, management, and maintenance of your Kubernetes clusters so you can focus on building and shipping your software.
# April 2025
Source: https://ubicloud.com/docs/changelog/2025-04
export const PrList = ({ids}) =>
{ids.map((id, index) => <>
{index > 0 && ", "}
{index === 0 ? "PR " : ""}#{id}
)}
;
## Ubicloud Managed Kubernetes (new)
We are excited to announce our managed Kubernetes service, in preview, cutting your Kubernetes costs by 60-70%, and simplifying your setup. Ubicloud Kubernetes handles the creation, management, and maintenance of your Kubernetes clusters so you can focus on building and shipping your software.
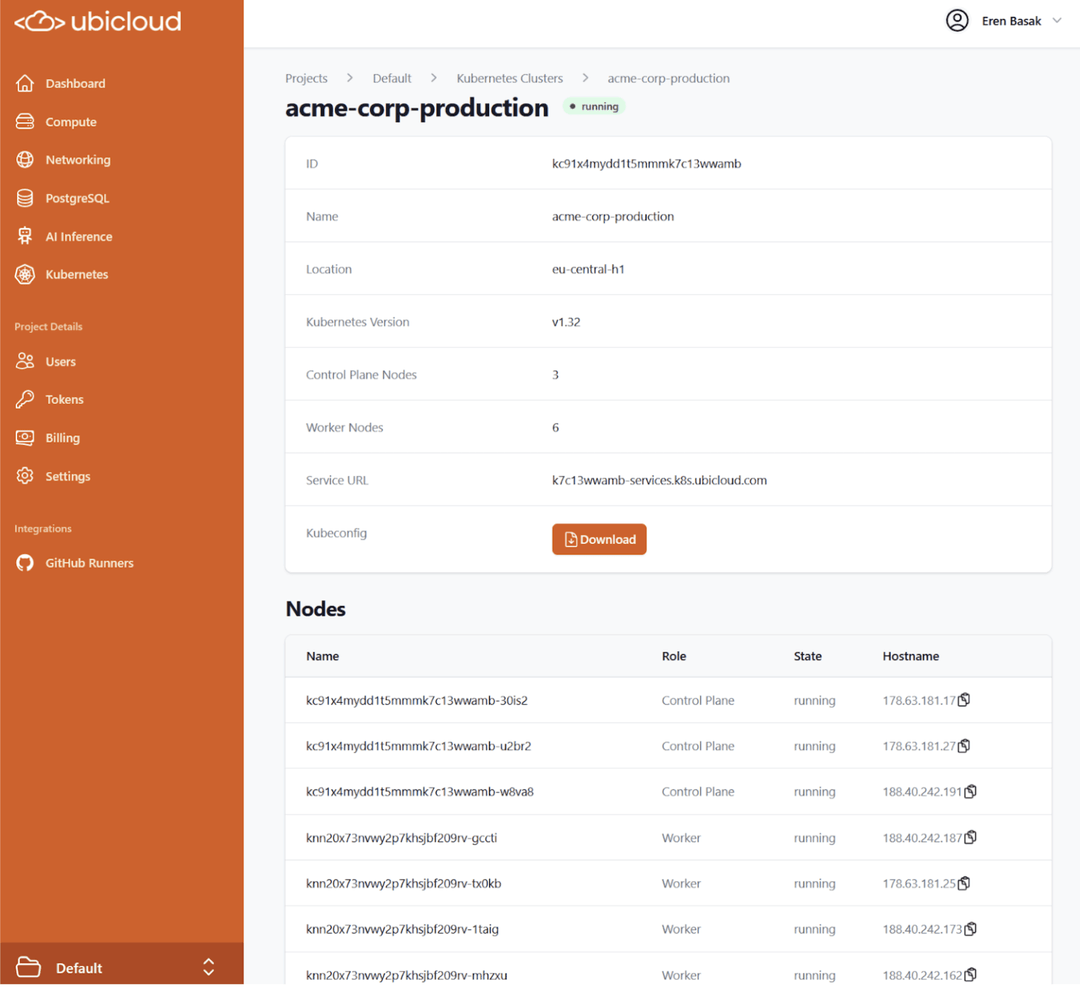 ## Ubicloud CLI (new)
We are happy to announce ubi, Ubicloud’s thin command line interface tool. The Thin CLIent approach allows you to use new features without updating your CLI installation, in a much smaller package in a secure way.
## Ubicloud CLI (new)
We are happy to announce ubi, Ubicloud’s thin command line interface tool. The Thin CLIent approach allows you to use new features without updating your CLI installation, in a much smaller package in a secure way.
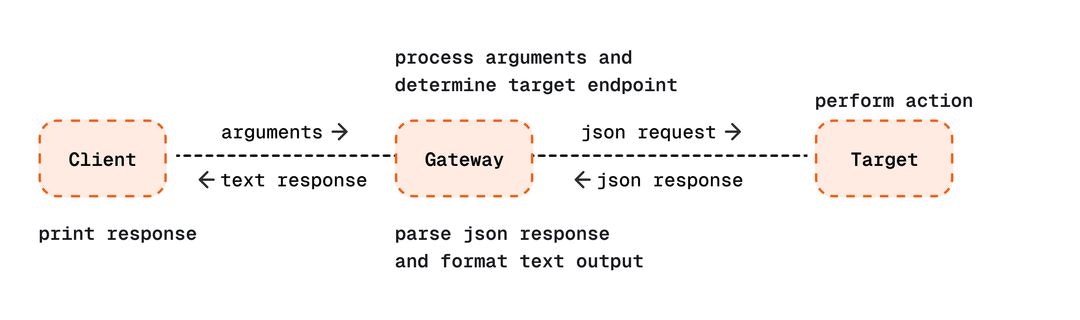 Available for Linux, Mac, Windows. MacOS users can install with:
```
brew install ubicloud/cli/ubi
```
## Managed PostgreSQL
### Read Replicas
Create as many read replicas for your PostgreSQL databases to balance read workloads. Promote them to standalone writable instances at any time.
### Manage your maintenance window
Select the 2-hour time window that is the least disruptive for your database where maintenance operations can be performed.
### High availability is now datacenter-aware
Standbys for high availability mode are now placed in different data centers in the eu-central-h1 region for improved durability.
### Multiple PGBouncer instances for faster transactions
Postgres instances are deployed with multiple pgbouncer instances, depending on the instance size, for improved parallelism in transactional workloads.
### PostgreSQL 17 is the default
Now Ubicloud Postgres defaults to PostgreSQL 17, with the option to select PostgreSQL 16.
## Github Runners
### Using GCR as image mirror
Our Github runners utilize Google Container Registry as an image mirror for avoiding Docker Hub quota limits.
## Compute
### Burstable compute option is available in Virginia, U.S. region
Start using Ubicloud VMs with the burstable option in the Virginia, U.S. region, starting from \$8.35/mo.
### Public key format is validated when creating virtual machines
We now validate the public key format when creating a virtual machine, ensuring user errors are caught before they cause issues.
# May 2025
Source: https://ubicloud.com/docs/changelog/2025-05
export const PrList = ({ids}) =>
{ids.map((id, index) => <>
{index > 0 && ", "}
{index === 0 ? "PR " : ""}#{id}
)}
;
## Managed PostgreSQL
### Built-in Metrics
Ubicloud PostgreSQL now provides built-in metrics accessible via the UI and API. Monitor key performance indicators, including CPU utilization, storage I/O, network activity, connection count, and more. [Read more in the Ubicloud PostgreSQL documentation.](https://www.ubicloud.com/docs/managed-postgresql/metrics)
Available for Linux, Mac, Windows. MacOS users can install with:
```
brew install ubicloud/cli/ubi
```
## Managed PostgreSQL
### Read Replicas
Create as many read replicas for your PostgreSQL databases to balance read workloads. Promote them to standalone writable instances at any time.
### Manage your maintenance window
Select the 2-hour time window that is the least disruptive for your database where maintenance operations can be performed.
### High availability is now datacenter-aware
Standbys for high availability mode are now placed in different data centers in the eu-central-h1 region for improved durability.
### Multiple PGBouncer instances for faster transactions
Postgres instances are deployed with multiple pgbouncer instances, depending on the instance size, for improved parallelism in transactional workloads.
### PostgreSQL 17 is the default
Now Ubicloud Postgres defaults to PostgreSQL 17, with the option to select PostgreSQL 16.
## Github Runners
### Using GCR as image mirror
Our Github runners utilize Google Container Registry as an image mirror for avoiding Docker Hub quota limits.
## Compute
### Burstable compute option is available in Virginia, U.S. region
Start using Ubicloud VMs with the burstable option in the Virginia, U.S. region, starting from \$8.35/mo.
### Public key format is validated when creating virtual machines
We now validate the public key format when creating a virtual machine, ensuring user errors are caught before they cause issues.
# May 2025
Source: https://ubicloud.com/docs/changelog/2025-05
export const PrList = ({ids}) =>
{ids.map((id, index) => <>
{index > 0 && ", "}
{index === 0 ? "PR " : ""}#{id}
)}
;
## Managed PostgreSQL
### Built-in Metrics
Ubicloud PostgreSQL now provides built-in metrics accessible via the UI and API. Monitor key performance indicators, including CPU utilization, storage I/O, network activity, connection count, and more. [Read more in the Ubicloud PostgreSQL documentation.](https://www.ubicloud.com/docs/managed-postgresql/metrics)
 ### Firewall Rule Enhancements
You can now add descriptions to your PostgreSQL firewall rules and edit both the range and description inline for better management.
### Firewall Rule Enhancements
You can now add descriptions to your PostgreSQL firewall rules and edit both the range and description inline for better management.
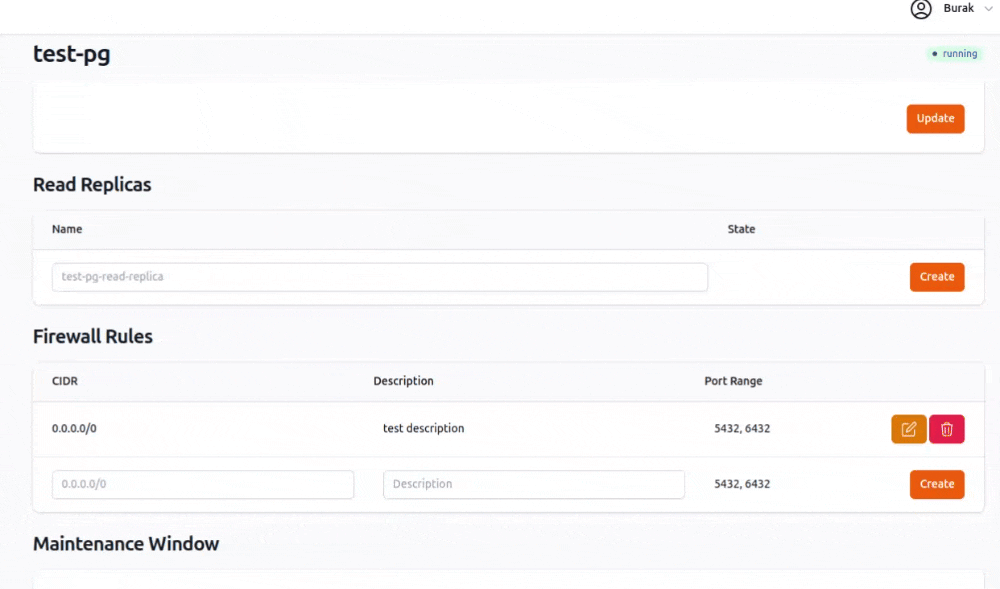 ### Maintenance Window Status Indication
When an instance is ready for a planned failover but awaiting its maintenance window, the status will now clearly indicate this condition.
## Github Runners
### Ubicloud Premium runners
We are excited to introduce **Ubicloud Premium Runners,** powered by AMD Ryzen 9 7950X3D CPUs, high-performance gaming processors optimized for single-thread execution and fast CI workloads. At just 1/5th the cost of GitHub-hosted runners, our premium runners deliver superior performance at a fraction of the price. [Read more about Ubicloud Premium Runners in our documentation.](https://www.ubicloud.com/docs/github-actions-integration/use-premium-runners)
### Maintenance Window Status Indication
When an instance is ready for a planned failover but awaiting its maintenance window, the status will now clearly indicate this condition.
## Github Runners
### Ubicloud Premium runners
We are excited to introduce **Ubicloud Premium Runners,** powered by AMD Ryzen 9 7950X3D CPUs, high-performance gaming processors optimized for single-thread execution and fast CI workloads. At just 1/5th the cost of GitHub-hosted runners, our premium runners deliver superior performance at a fraction of the price. [Read more about Ubicloud Premium Runners in our documentation.](https://www.ubicloud.com/docs/github-actions-integration/use-premium-runners)
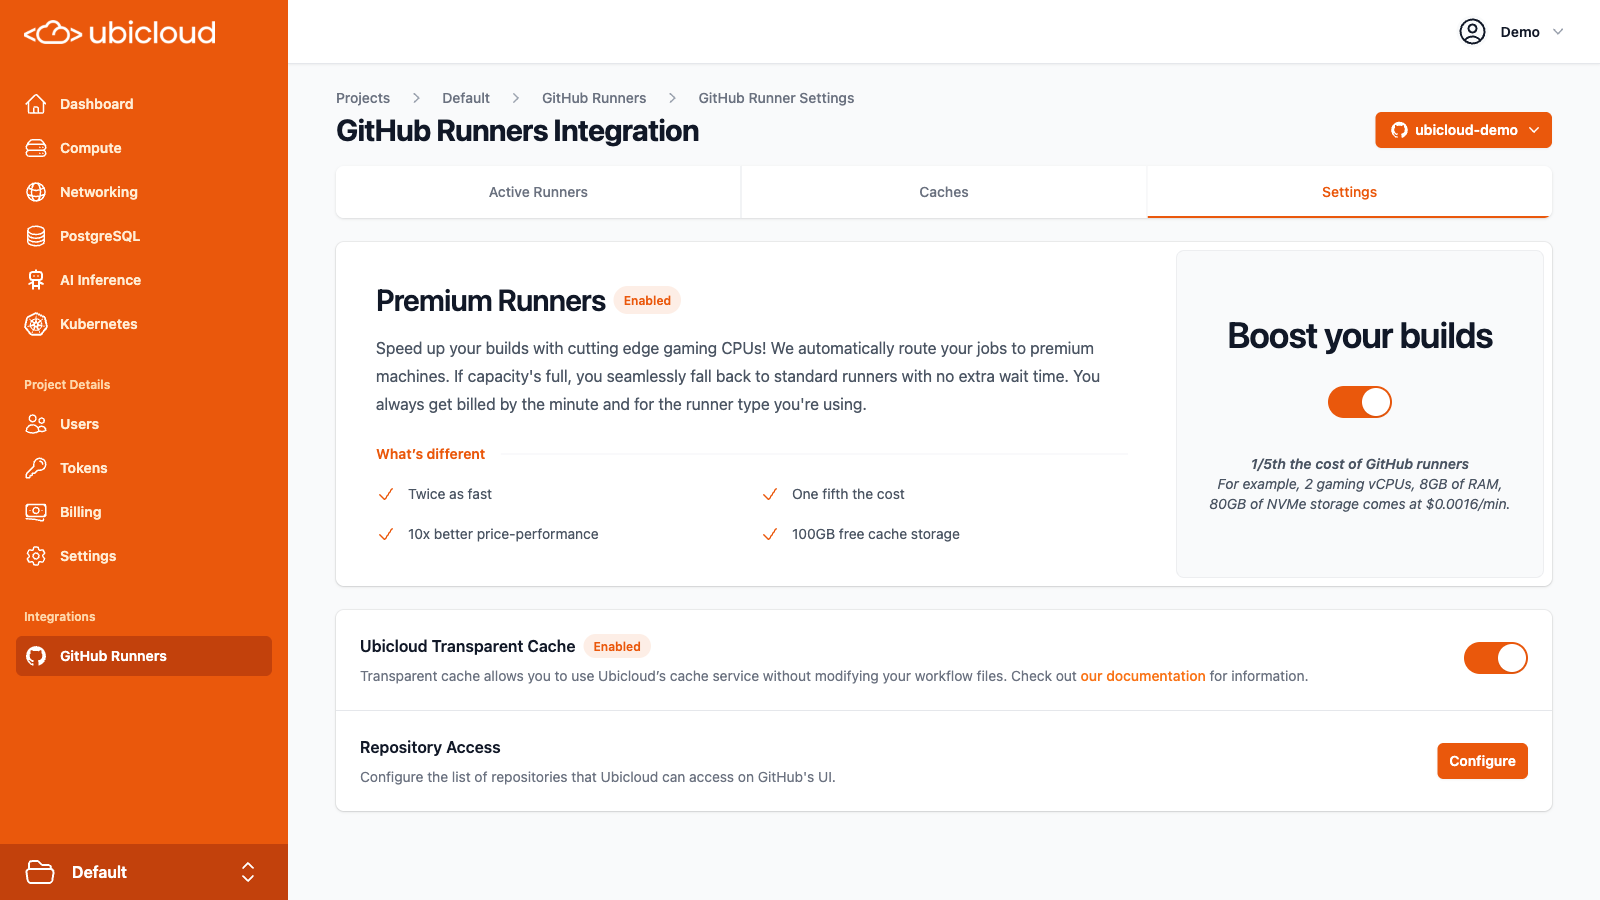 ### Refreshed Runners Dashboard
We've refreshed the runners dashboard to present key information more clearly, improving usability and visibility.
### Preferred Runner Location (Preview)
Opt-in to have your runners assigned to US-based machines. Reach out if you're interested in US-based runner deployments.
### Ubuntu 20.04 Deprecation
Following GitHub's deprecation of Ubuntu 20.04 runners in February 2025, we have also deprecated our Ubuntu 20.04 based images.
## Ubicloud Kubernetes
### Faster Cluster Provisioning
We have optimized cluster provisioning for Ubicloud Kubernetes, reducing deployment times to under 5 minutes.
### IPv6 Support
Ubicloud Kubernetes API servers now support IPv6 connectivity.
### Kubernetes v1.33 Now Available
Ubicloud Kubernetes now supports Kubernetes v1.33, enabling the latest features and improvements. [Read the Kubernetes blog for a full breakdown of the release highlights.](https://kubernetes.io/blog/2025/04/23/kubernetes-v1-33-release/)
### Larger worker Node Options
You can now deploy larger worker nodes, starting at **\$29.60 per node**, featuring **2 cores, 8GiB memory, 40GiB local NVMe storage, and public IPv4** address. Node sizes scale linearly up to 16 cores per node.
### Free Subdomain Routing for Ingress
Our Kubernetes offering now provides free subdomain routing `*.-services.k8s.com`, allowing seamless service URL mapping and SSL challenge validation.
### Automated Kubernetes Version Upgrades (Preview)
Ubicloud Kubernetes now supports automated major version upgrades with gradual rollouts in preview. Reach out to learn more.
## AI & GPUs
### API Key Management
Inference API keys can now be managed via the API, CLI, and Ruby SDK for streamlined access control.
### AI Playground Integration
Quickly test different AI models using the new “Try in Playground” buttons on the Inference Endpoints dashboard in Ubicloud console.
### Refreshed Runners Dashboard
We've refreshed the runners dashboard to present key information more clearly, improving usability and visibility.
### Preferred Runner Location (Preview)
Opt-in to have your runners assigned to US-based machines. Reach out if you're interested in US-based runner deployments.
### Ubuntu 20.04 Deprecation
Following GitHub's deprecation of Ubuntu 20.04 runners in February 2025, we have also deprecated our Ubuntu 20.04 based images.
## Ubicloud Kubernetes
### Faster Cluster Provisioning
We have optimized cluster provisioning for Ubicloud Kubernetes, reducing deployment times to under 5 minutes.
### IPv6 Support
Ubicloud Kubernetes API servers now support IPv6 connectivity.
### Kubernetes v1.33 Now Available
Ubicloud Kubernetes now supports Kubernetes v1.33, enabling the latest features and improvements. [Read the Kubernetes blog for a full breakdown of the release highlights.](https://kubernetes.io/blog/2025/04/23/kubernetes-v1-33-release/)
### Larger worker Node Options
You can now deploy larger worker nodes, starting at **\$29.60 per node**, featuring **2 cores, 8GiB memory, 40GiB local NVMe storage, and public IPv4** address. Node sizes scale linearly up to 16 cores per node.
### Free Subdomain Routing for Ingress
Our Kubernetes offering now provides free subdomain routing `*.-services.k8s.com`, allowing seamless service URL mapping and SSL challenge validation.
### Automated Kubernetes Version Upgrades (Preview)
Ubicloud Kubernetes now supports automated major version upgrades with gradual rollouts in preview. Reach out to learn more.
## AI & GPUs
### API Key Management
Inference API keys can now be managed via the API, CLI, and Ruby SDK for streamlined access control.
### AI Playground Integration
Quickly test different AI models using the new “Try in Playground” buttons on the Inference Endpoints dashboard in Ubicloud console.
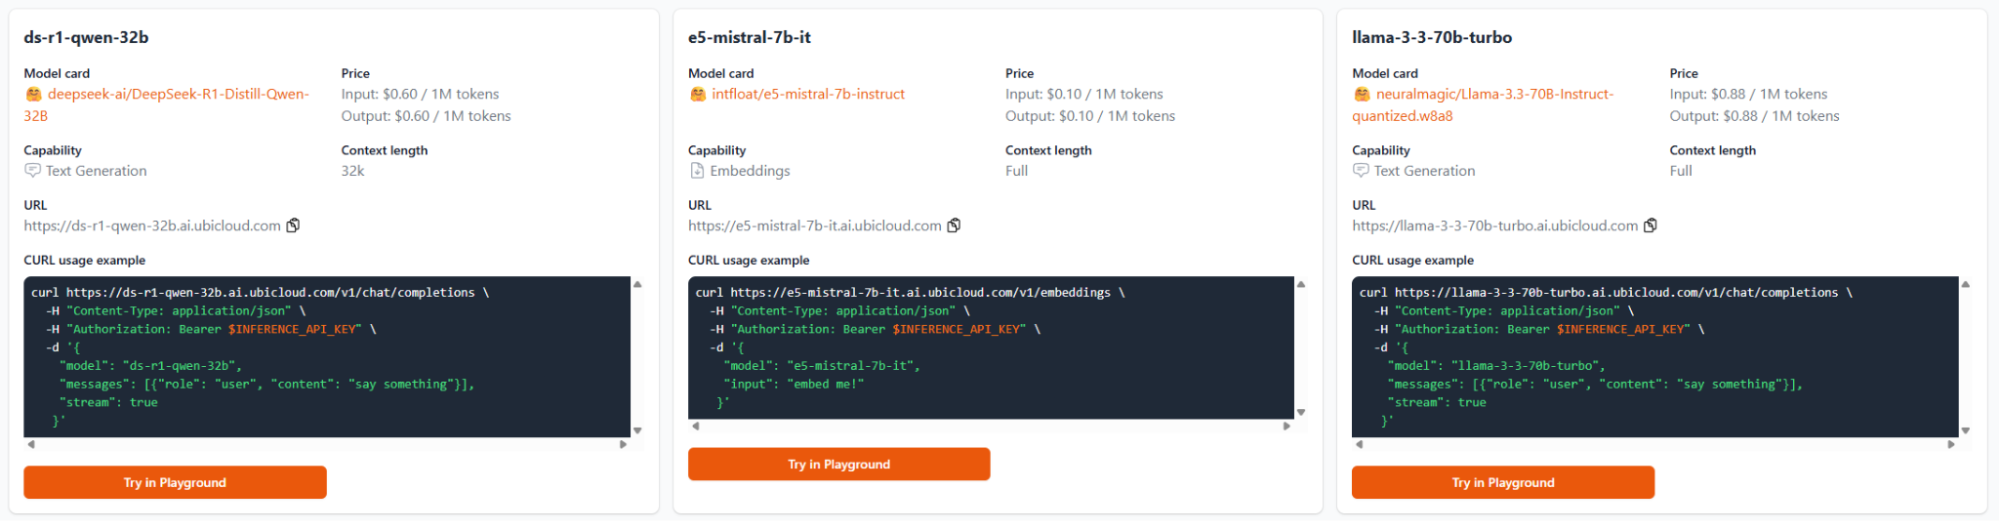 ### Ubicloud GPU VMs (preview)
Ubicloud GPU VMs are now available in Germany as part of our preview program. Reach out if you're interested in trying Ubicloud A100 GPU VMs.
## Faster Invoice PDFs
Invoices are now generated and stored as pdf upon first view, ensuring faster access while maintaining integrity.
# June 2025
Source: https://ubicloud.com/docs/changelog/2025-06
export const PrList = ({ids}) =>
{ids.map((id, index) => <>
{index > 0 && ", "}
{index === 0 ? "PR " : ""}#{id}
)}
;
## AI & GPUs
### DeepSeek V3 and R1 Available
We’ve added DeepSeek V3 and R1 models to our AI inference endpoints catalog, available now with competitive pricing.
### Ubicloud GPU VMs (preview)
Ubicloud GPU VMs are now available in Germany as part of our preview program. Reach out if you're interested in trying Ubicloud A100 GPU VMs.
## Faster Invoice PDFs
Invoices are now generated and stored as pdf upon first view, ensuring faster access while maintaining integrity.
# June 2025
Source: https://ubicloud.com/docs/changelog/2025-06
export const PrList = ({ids}) =>
{ids.map((id, index) => <>
{index > 0 && ", "}
{index === 0 ? "PR " : ""}#{id}
)}
;
## AI & GPUs
### DeepSeek V3 and R1 Available
We’ve added DeepSeek V3 and R1 models to our AI inference endpoints catalog, available now with competitive pricing.
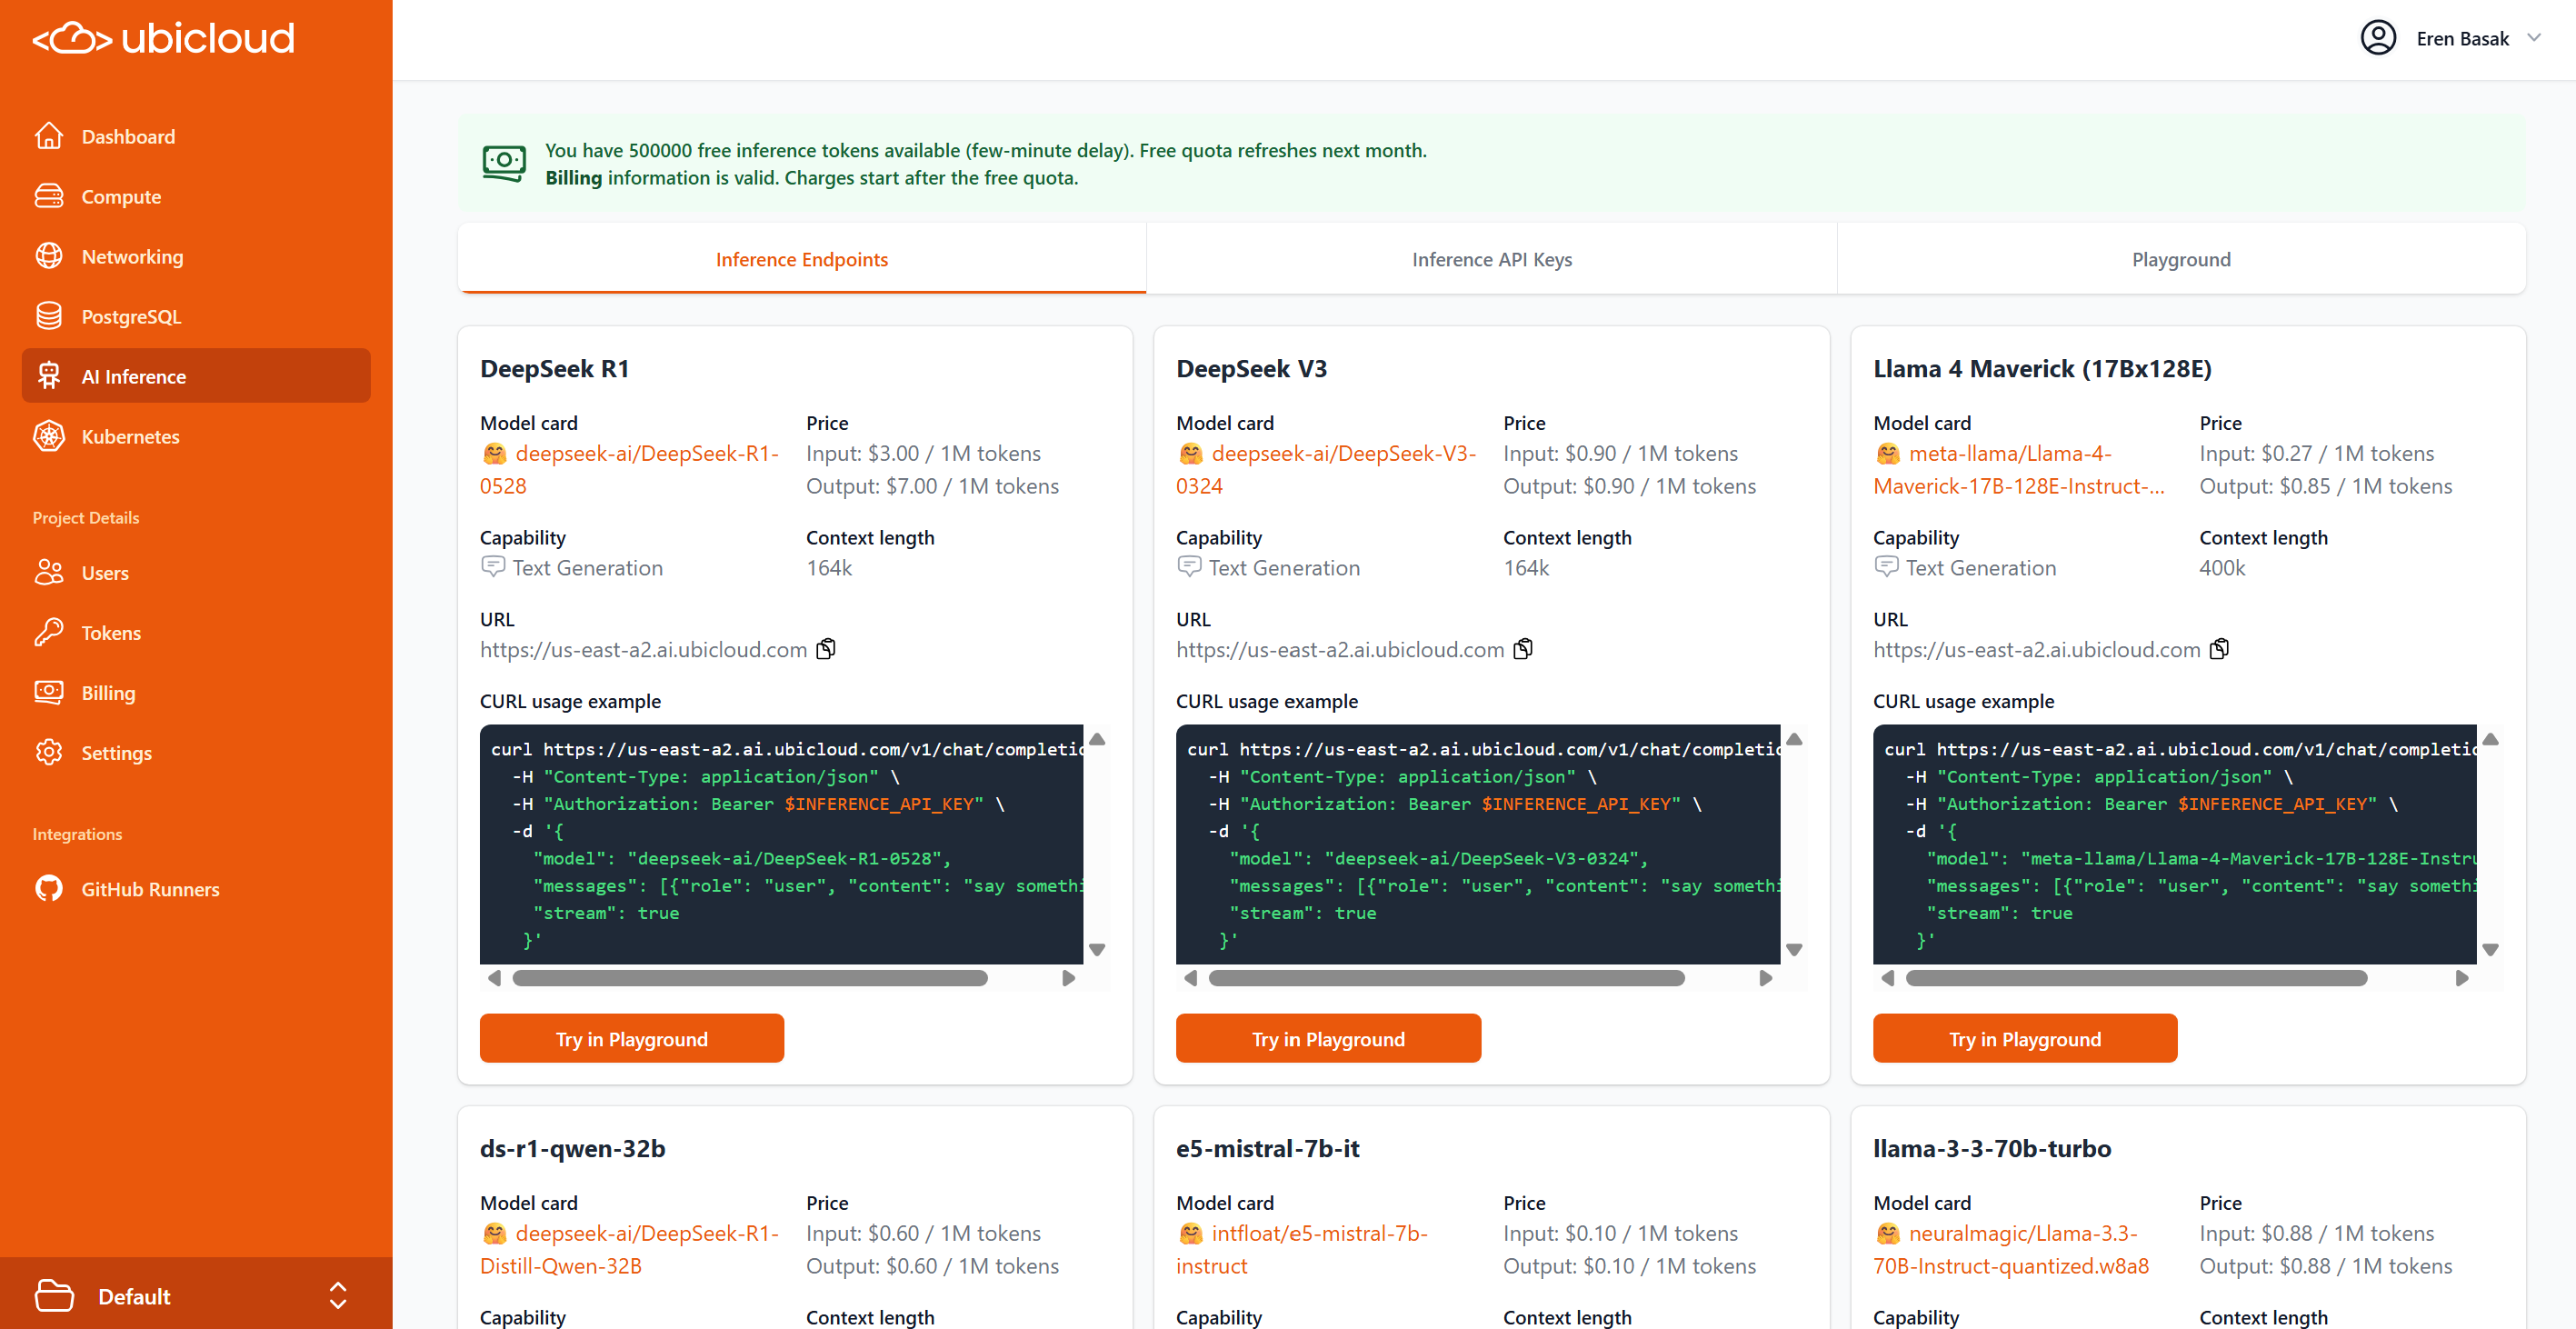 ### Enhanced Inference Playground
The inference playground has been significantly upgraded with multi-turn conversation support, system message configuration, and real-time response rendering. Users can now adjust temperature and top-P parameters while viewing token usage statistics.
### Enhanced Inference Playground
The inference playground has been significantly upgraded with multi-turn conversation support, system message configuration, and real-time response rendering. Users can now adjust temperature and top-P parameters while viewing token usage statistics.
 ### Revamped GPU VM Provisioning
Our GPU VM creation workflow (available behind a feature flag) now provides dedicated interfaces for GPU and non-GPU virtual machine provisioning to simplify the selection process for GPU instances.
## Managed PostgreSQL
### Redesigned Management User Interface
The PostgreSQL dashboard now features a fully refreshed UI, with dedicated pages for Overview, Connections, Backups, Charts, Networking, and Settings. The new layout enhances performance, simplifies navigation, and improves access to key functionality.
### Revamped GPU VM Provisioning
Our GPU VM creation workflow (available behind a feature flag) now provides dedicated interfaces for GPU and non-GPU virtual machine provisioning to simplify the selection process for GPU instances.
## Managed PostgreSQL
### Redesigned Management User Interface
The PostgreSQL dashboard now features a fully refreshed UI, with dedicated pages for Overview, Connections, Backups, Charts, Networking, and Settings. The new layout enhances performance, simplifies navigation, and improves access to key functionality.
 ### Performance Improvements up to 20% On Larger Instances
Ubicloud PostgreSQL now ships with improved memory management enabled by default. This reduces CPU usage and boosts performance, especially on large instance types.
## Github Runners
### Expanded Cache for Premium Runners
Ubicloud premium runners now include 100GB of free cache storage, a notable upgrade from the 30GB available for the standard runner family.
### Smarter Queueing for Premium Runners
Premium GitHub runners now support better VM pool utilization and provide more flexible labeling options for simplified configuration. Performance improvements include increased utilization limits and streamlined quota management for better resource allocation and reduced queue times.
### Ubuntu 20.04 Deprecation
Support for Ubuntu 20.04 runner images has been deprecated as part of our ongoing commitment to current LTS releases.
# July 2025
Source: https://ubicloud.com/docs/changelog/2025-07
export const PrList = ({ids}) =>
{ids.map((id, index) => <>
{index > 0 && ", "}
{index === 0 ? "PR " : ""}#{id}
)}
;
## Managed PostgreSQL
### PostgreSQL Settings via Console and API
You can now manage your PostgreSQL and PgBouncer configurations directly through the Ubicloud console, API & CLI. This feature allows you to view and edit settings from your `postgresql.conf` and `pgbouncer.ini` files, making it easier to fine-tune your database performance and connection pooling without manual file edits. The new UI provides a simple key-value editor with validation to prevent misconfigurations.
### Performance Improvements up to 20% On Larger Instances
Ubicloud PostgreSQL now ships with improved memory management enabled by default. This reduces CPU usage and boosts performance, especially on large instance types.
## Github Runners
### Expanded Cache for Premium Runners
Ubicloud premium runners now include 100GB of free cache storage, a notable upgrade from the 30GB available for the standard runner family.
### Smarter Queueing for Premium Runners
Premium GitHub runners now support better VM pool utilization and provide more flexible labeling options for simplified configuration. Performance improvements include increased utilization limits and streamlined quota management for better resource allocation and reduced queue times.
### Ubuntu 20.04 Deprecation
Support for Ubuntu 20.04 runner images has been deprecated as part of our ongoing commitment to current LTS releases.
# July 2025
Source: https://ubicloud.com/docs/changelog/2025-07
export const PrList = ({ids}) =>
{ids.map((id, index) => <>
{index > 0 && ", "}
{index === 0 ? "PR " : ""}#{id}
)}
;
## Managed PostgreSQL
### PostgreSQL Settings via Console and API
You can now manage your PostgreSQL and PgBouncer configurations directly through the Ubicloud console, API & CLI. This feature allows you to view and edit settings from your `postgresql.conf` and `pgbouncer.ini` files, making it easier to fine-tune your database performance and connection pooling without manual file edits. The new UI provides a simple key-value editor with validation to prevent misconfigurations.
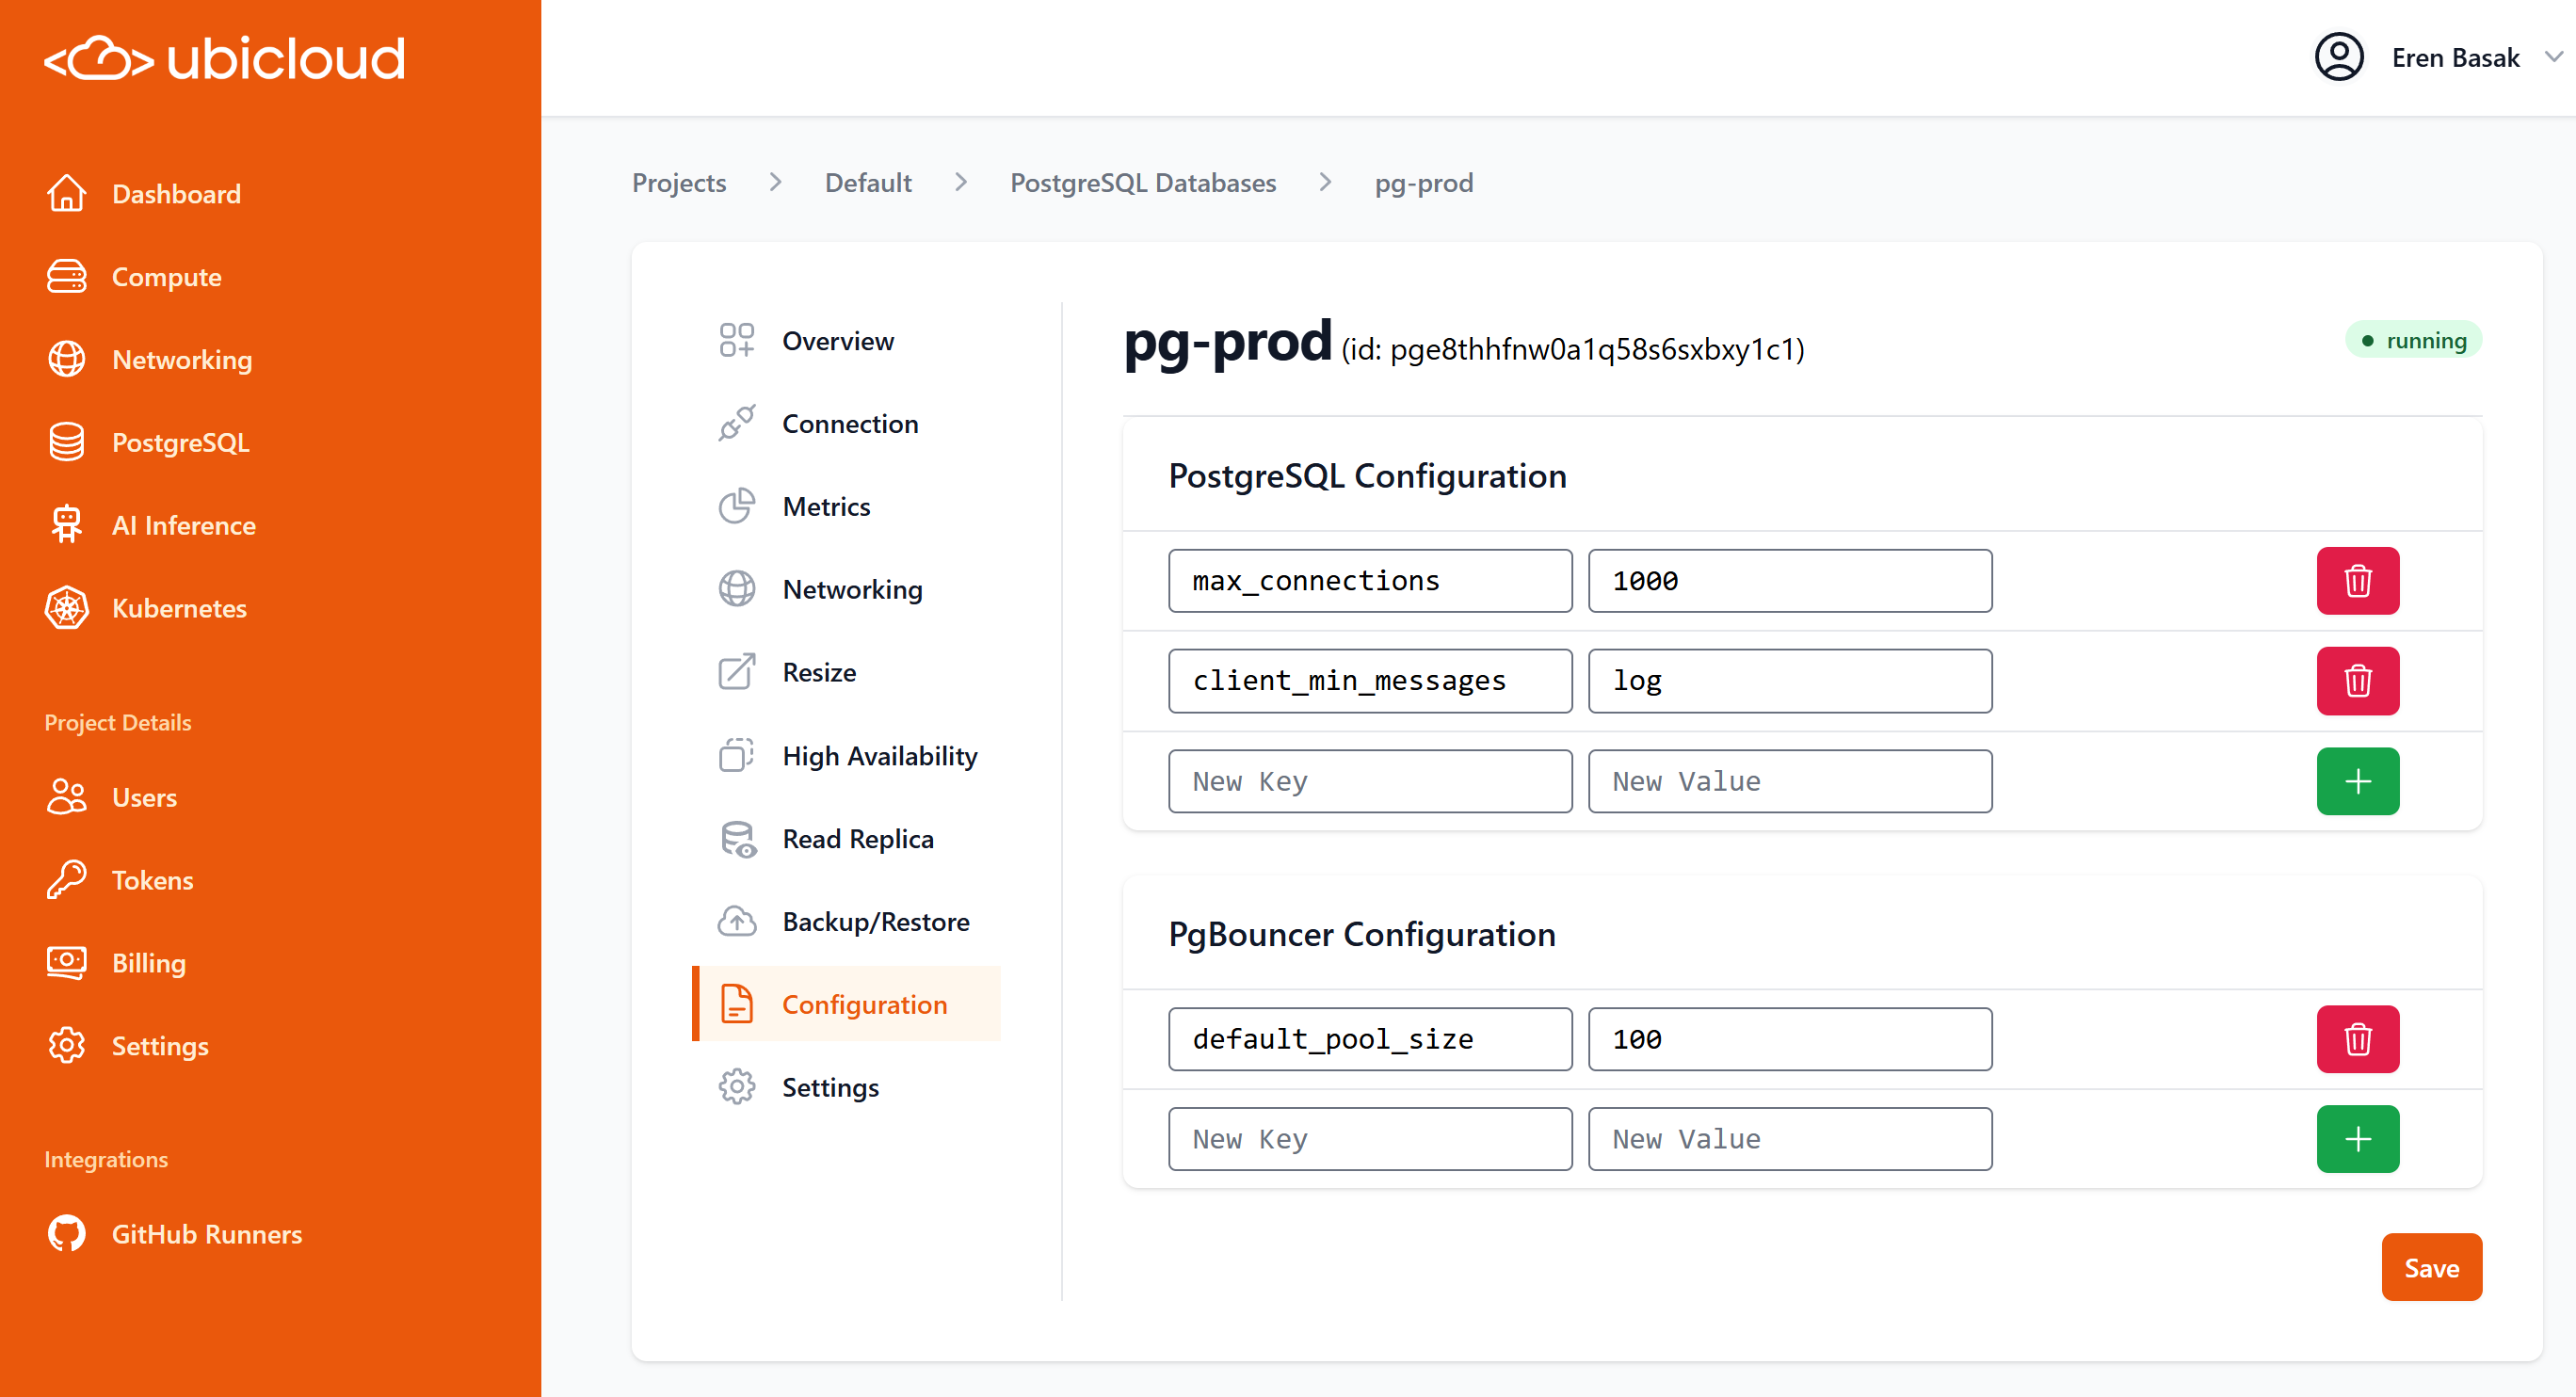 ### Granular API
To provide deeper insights into your database scaling activities, the PostgreSQL API now returns both the `current` and `target` sizes for your VM and storage volumes during a resize operation.
### More Metrics
We've enhanced the metrics dashboard to display `softirq` CPU usage, offering a more complete picture of your server's performance and helping you identify potential I/O bottlenecks.
## Ubicloud Kubernetes
### Expanded CLI Functionality
Managing your Kubernetes clusters from the command line is now more powerful. We've extended our `ubi` CLI with new commands to `list`, `show`, `create` `destroy`. These additions provide full CLI-based lifecycle management for your Kubernetes resources, streamlining automation and daily operations.
Additionally, you can safely retrieve the `kubeconfig` file for your cluster at any time, allowing you to connect to your cluster with `kubectl` or other Kubernetes tools without navigating to kubernetes dashboard.
```shell theme={null}
ubi kc eu-central-h1/my-cluster kubeconfig > ~/.kube/config
```
Check out the [API Reference](/api-reference/kubernetes-cluster) for more details.
### Built-in Persistent Volume Support with UbiCSI (preview)
Ubicloud now features a full implementation of the Container Storage Interface (CSI) for workloads that require persistent volumes (PVC) on our native infrastructure. This enables robust, standards-compliant, and dynamic persistent storage for containerized applications within Kubernetes. The new CSI driver manages local-disk-backed volumes with idempotent operations for reliable volume management.
### Metrics Server Installed by Default
New Kubernetes clusters now come with the Kubernetes Metrics Server installed automatically. This provides resource usage metrics for pods and nodes out-of-the-box, enabling you to use tools like `kubectl top` and Horizontal Pod Autoscalers (HPA) without any additional setup.
## Free Trial for Premium GitHub Runners
All new Ubicloud installations now receive a 7-day free trial of our premium GitHub Runners. This allows you to experience the performance benefits of our more powerful runner tiers at no cost. A badge in the UI will indicate your eligibility for the free upgrade.
## New AI Model Available
The `Qwen2.5-VL-72B` model is now available for AI inference workloads. This powerful, 72-billion parameter vision-language model is ideal for a wide range of multimodal tasks. Billing is set at \$0.80 per million tokens for both input and output.
### Granular API
To provide deeper insights into your database scaling activities, the PostgreSQL API now returns both the `current` and `target` sizes for your VM and storage volumes during a resize operation.
### More Metrics
We've enhanced the metrics dashboard to display `softirq` CPU usage, offering a more complete picture of your server's performance and helping you identify potential I/O bottlenecks.
## Ubicloud Kubernetes
### Expanded CLI Functionality
Managing your Kubernetes clusters from the command line is now more powerful. We've extended our `ubi` CLI with new commands to `list`, `show`, `create` `destroy`. These additions provide full CLI-based lifecycle management for your Kubernetes resources, streamlining automation and daily operations.
Additionally, you can safely retrieve the `kubeconfig` file for your cluster at any time, allowing you to connect to your cluster with `kubectl` or other Kubernetes tools without navigating to kubernetes dashboard.
```shell theme={null}
ubi kc eu-central-h1/my-cluster kubeconfig > ~/.kube/config
```
Check out the [API Reference](/api-reference/kubernetes-cluster) for more details.
### Built-in Persistent Volume Support with UbiCSI (preview)
Ubicloud now features a full implementation of the Container Storage Interface (CSI) for workloads that require persistent volumes (PVC) on our native infrastructure. This enables robust, standards-compliant, and dynamic persistent storage for containerized applications within Kubernetes. The new CSI driver manages local-disk-backed volumes with idempotent operations for reliable volume management.
### Metrics Server Installed by Default
New Kubernetes clusters now come with the Kubernetes Metrics Server installed automatically. This provides resource usage metrics for pods and nodes out-of-the-box, enabling you to use tools like `kubectl top` and Horizontal Pod Autoscalers (HPA) without any additional setup.
## Free Trial for Premium GitHub Runners
All new Ubicloud installations now receive a 7-day free trial of our premium GitHub Runners. This allows you to experience the performance benefits of our more powerful runner tiers at no cost. A badge in the UI will indicate your eligibility for the free upgrade.
## New AI Model Available
The `Qwen2.5-VL-72B` model is now available for AI inference workloads. This powerful, 72-billion parameter vision-language model is ideal for a wide range of multimodal tasks. Billing is set at \$0.80 per million tokens for both input and output.
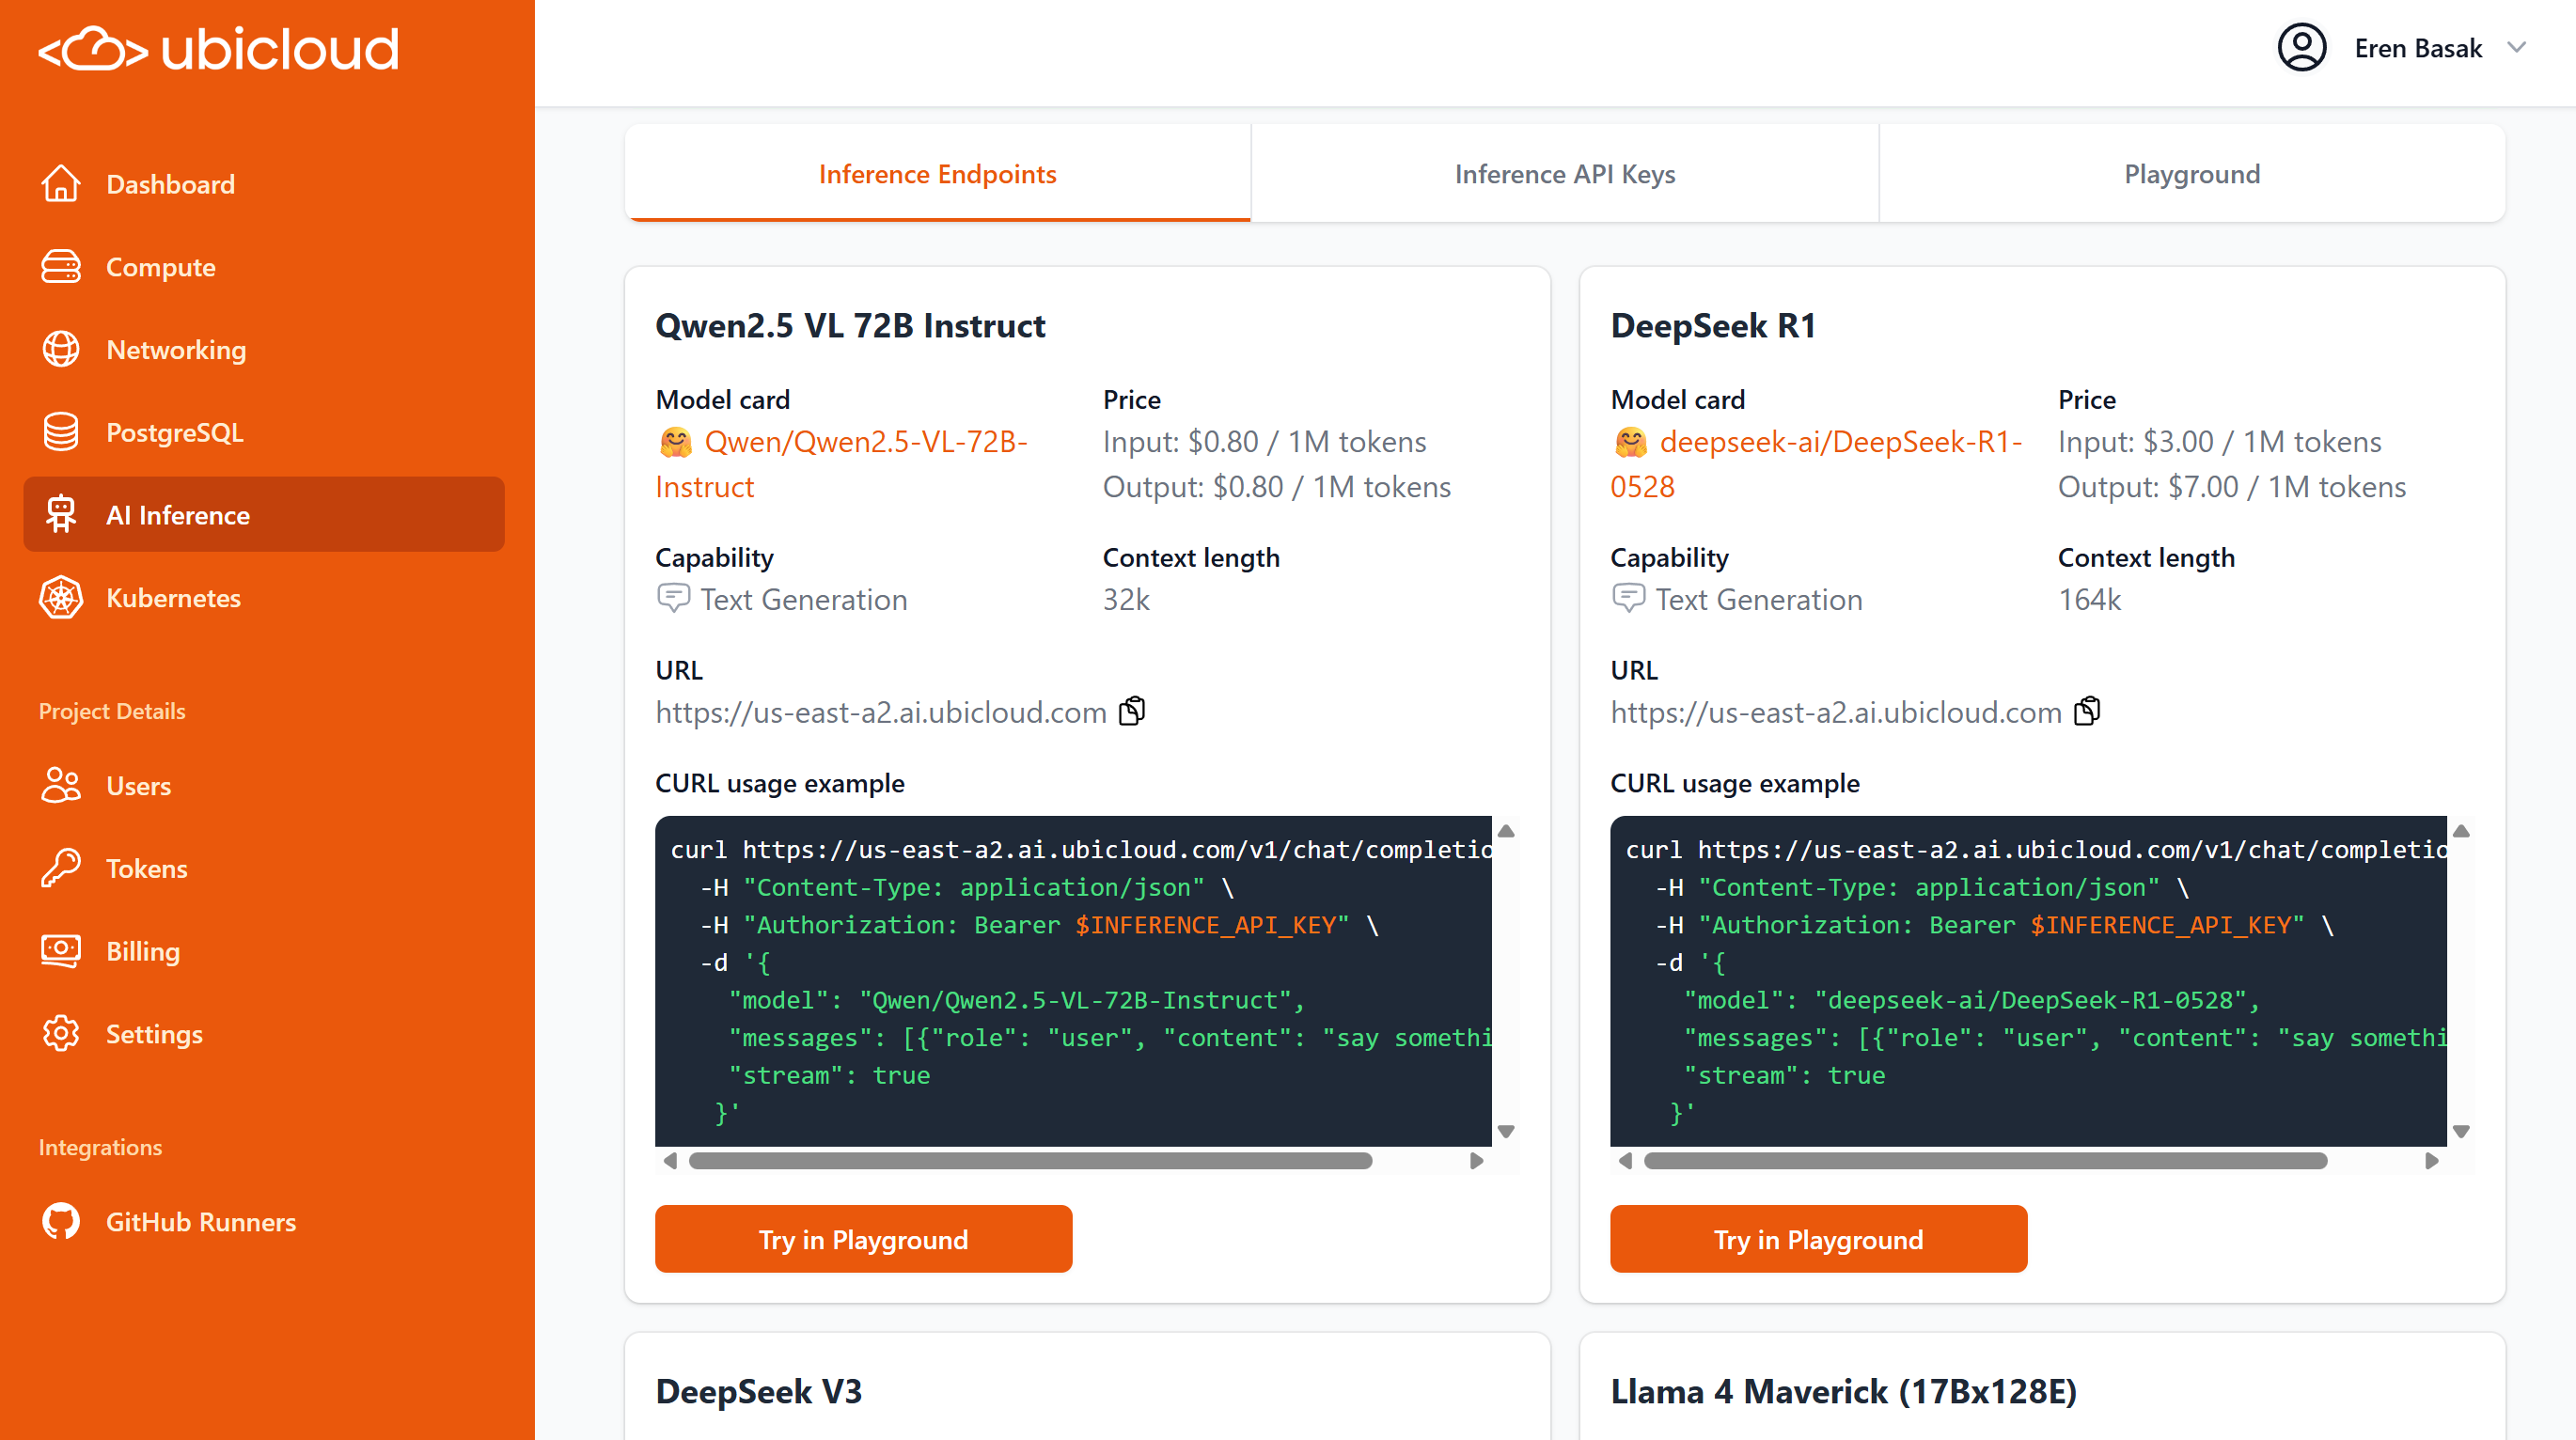 ## SSO authentication with OpenID Connect (OIDC)
You can now configure OpenID Connect (OIDC) to authenticate Ubicloud users with your preferred external identity provider. To support this, we have introduced a new multi-phase login flow, where users first enter their email and are then presented with the authentication methods available for their account (e.g., password, Google, or OIDC). For enhanced security, you can also lock specific email domains to an OIDC provider, enforcing corporate SSO policies.
### OTP Account Unlocking
We've added a self-service feature to unlock accounts that have been locked out due to failed Two-Factor Authentication (OTP) attempts. This feature requires three consecutive successful OTP entries to regain access. For security, you will receive email notifications for all OTP-related lockout and unlock events.
# August 2025
Source: https://ubicloud.com/docs/changelog/2025-08
export const PrList = ({ids}) =>
{ids.map((id, index) => <>
{index > 0 && ", "}
{index === 0 ? "PR " : ""}#{id}
)}
;
## Platform
### Web Shell
You can now run `ubi` CLI commands directly from your browser with the new Web Shell. This feature provides a convenient way to manage your resources without needing to install the CLI on your local machine. All commands are available, except for those that execute local programs (like `psql` or `ssh`). The Web Shell uses your existing web session for authentication, so there's no need to create a personal access token.
## SSO authentication with OpenID Connect (OIDC)
You can now configure OpenID Connect (OIDC) to authenticate Ubicloud users with your preferred external identity provider. To support this, we have introduced a new multi-phase login flow, where users first enter their email and are then presented with the authentication methods available for their account (e.g., password, Google, or OIDC). For enhanced security, you can also lock specific email domains to an OIDC provider, enforcing corporate SSO policies.
### OTP Account Unlocking
We've added a self-service feature to unlock accounts that have been locked out due to failed Two-Factor Authentication (OTP) attempts. This feature requires three consecutive successful OTP entries to regain access. For security, you will receive email notifications for all OTP-related lockout and unlock events.
# August 2025
Source: https://ubicloud.com/docs/changelog/2025-08
export const PrList = ({ids}) =>
{ids.map((id, index) => <>
{index > 0 && ", "}
{index === 0 ? "PR " : ""}#{id}
)}
;
## Platform
### Web Shell
You can now run `ubi` CLI commands directly from your browser with the new Web Shell. This feature provides a convenient way to manage your resources without needing to install the CLI on your local machine. All commands are available, except for those that execute local programs (like `psql` or `ssh`). The Web Shell uses your existing web session for authentication, so there's no need to create a personal access token.
 ### Retouched UI for All Resources
The modern tabbed user interface, previously available only for PostgreSQL, has now been rolled out to all other resources: Firewalls, Kubernetes Clusters, Load Balancers, Private Subnets, and VMs. This creates a consistent and organized experience for managing settings, networking, and overview information across the platform.
### Retouched UI for All Resources
The modern tabbed user interface, previously available only for PostgreSQL, has now been rolled out to all other resources: Firewalls, Kubernetes Clusters, Load Balancers, Private Subnets, and VMs. This creates a consistent and organized experience for managing settings, networking, and overview information across the platform.
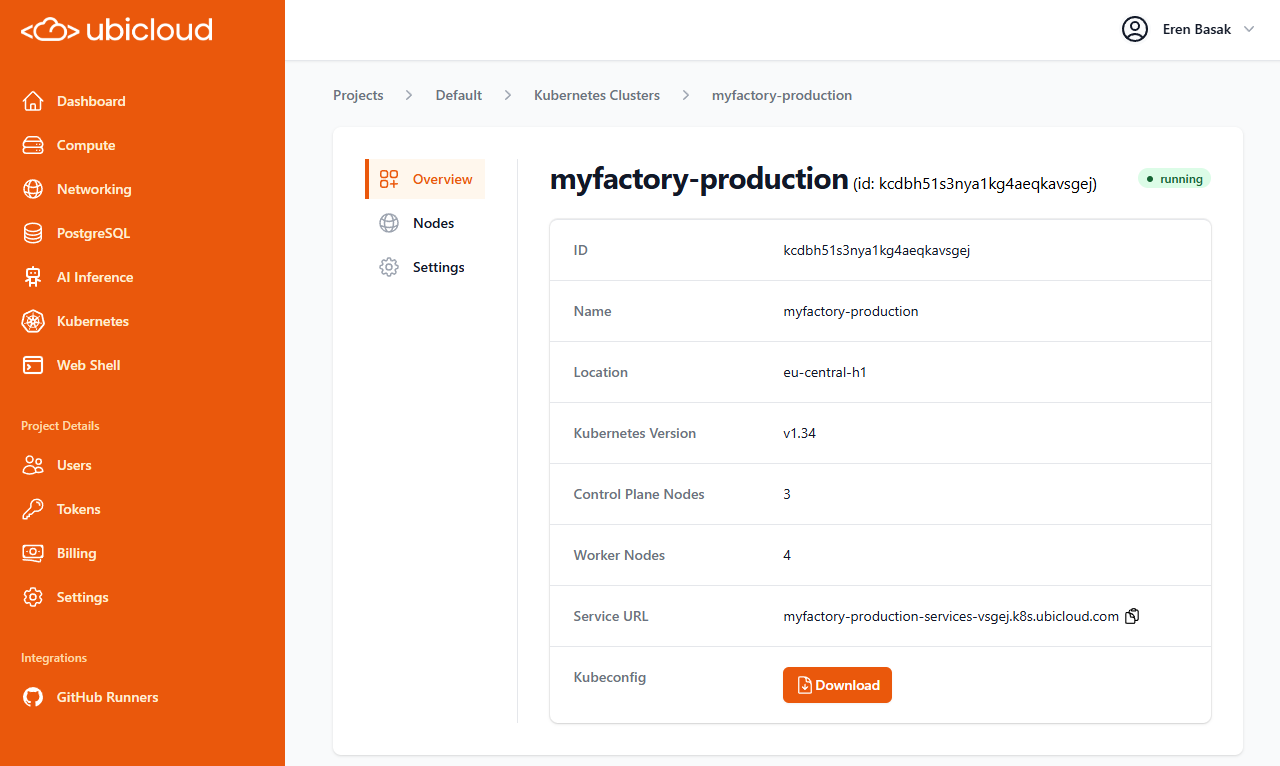 ### Rename Resources via API and CLI
You can now rename existing resources using the API and CLI. The new `rename` command is available for Firewalls, Kubernetes clusters, Load Balancers, PostgreSQL instances, Private Subnets, and VMs, making it easier to manage your infrastructure as code.
### Major CLI Usability Improvements
The `ubi` CLI is now more user-friendly and powerful for scripting. You can now use resource **names** instead of IDs for many commands (e.g., `lb attach-vm my-load-balancer --vm-name my-vm`), eliminating the need to parse output to get IDs. We have also fixed issues with interactive commands like `psql` and `ssh` and improved overall argument flexibility.
***
## Managed PostgreSQL
### Expanded CLI Functionality
The `ubi pg` command set has been significantly enhanced with support for new features. You can now manage read replicas (`create-read-replica`, `promote-read-replica`), modify database and PGBouncer configurations (`show-config`, `add-config-entries`), set maintenance windows, and manage firewall rules directly from the command line. For improved security, the CLI now uses the `PGPASSWORD` environment variable for command execution.
### Tagging
You can now add resource tags to your PostgreSQL instances via the API to help with organization and cost management.
***
## Ubicloud Kubernetes
### Kubernetes 1.34 Support
We now support Kubernetes v1.34 for new cluster deployments. When creating a new cluster, v1.34 will be available as an option. Support for v1.32 has been deprecated and removed.
### Dual-Stack Load Balancers for Services
The default load balancer created for Kubernetes services (`type: LoadBalancer`) now supports dual-stack (IPv4 and IPv6) networking, improving connectivity and future-proofing your applications.
# September 2025
Source: https://ubicloud.com/docs/changelog/2025-09
export const PrList = ({ids}) =>
{ids.map((id, index) => <>
{index > 0 && ", "}
{index === 0 ? "PR " : ""}#{id}
)}
;
## Ubicloud Kubernetes
### Nodepool Resizing
You can now resize your Kubernetes cluster directly from the Ubicloud Console, API or CLI. This allows you to dynamically adjust the number of worker nodes in your cluster to match workload demands.
### Rename Resources via API and CLI
You can now rename existing resources using the API and CLI. The new `rename` command is available for Firewalls, Kubernetes clusters, Load Balancers, PostgreSQL instances, Private Subnets, and VMs, making it easier to manage your infrastructure as code.
### Major CLI Usability Improvements
The `ubi` CLI is now more user-friendly and powerful for scripting. You can now use resource **names** instead of IDs for many commands (e.g., `lb attach-vm my-load-balancer --vm-name my-vm`), eliminating the need to parse output to get IDs. We have also fixed issues with interactive commands like `psql` and `ssh` and improved overall argument flexibility.
***
## Managed PostgreSQL
### Expanded CLI Functionality
The `ubi pg` command set has been significantly enhanced with support for new features. You can now manage read replicas (`create-read-replica`, `promote-read-replica`), modify database and PGBouncer configurations (`show-config`, `add-config-entries`), set maintenance windows, and manage firewall rules directly from the command line. For improved security, the CLI now uses the `PGPASSWORD` environment variable for command execution.
### Tagging
You can now add resource tags to your PostgreSQL instances via the API to help with organization and cost management.
***
## Ubicloud Kubernetes
### Kubernetes 1.34 Support
We now support Kubernetes v1.34 for new cluster deployments. When creating a new cluster, v1.34 will be available as an option. Support for v1.32 has been deprecated and removed.
### Dual-Stack Load Balancers for Services
The default load balancer created for Kubernetes services (`type: LoadBalancer`) now supports dual-stack (IPv4 and IPv6) networking, improving connectivity and future-proofing your applications.
# September 2025
Source: https://ubicloud.com/docs/changelog/2025-09
export const PrList = ({ids}) =>
{ids.map((id, index) => <>
{index > 0 && ", "}
{index === 0 ? "PR " : ""}#{id}
)}
;
## Ubicloud Kubernetes
### Nodepool Resizing
You can now resize your Kubernetes cluster directly from the Ubicloud Console, API or CLI. This allows you to dynamically adjust the number of worker nodes in your cluster to match workload demands.
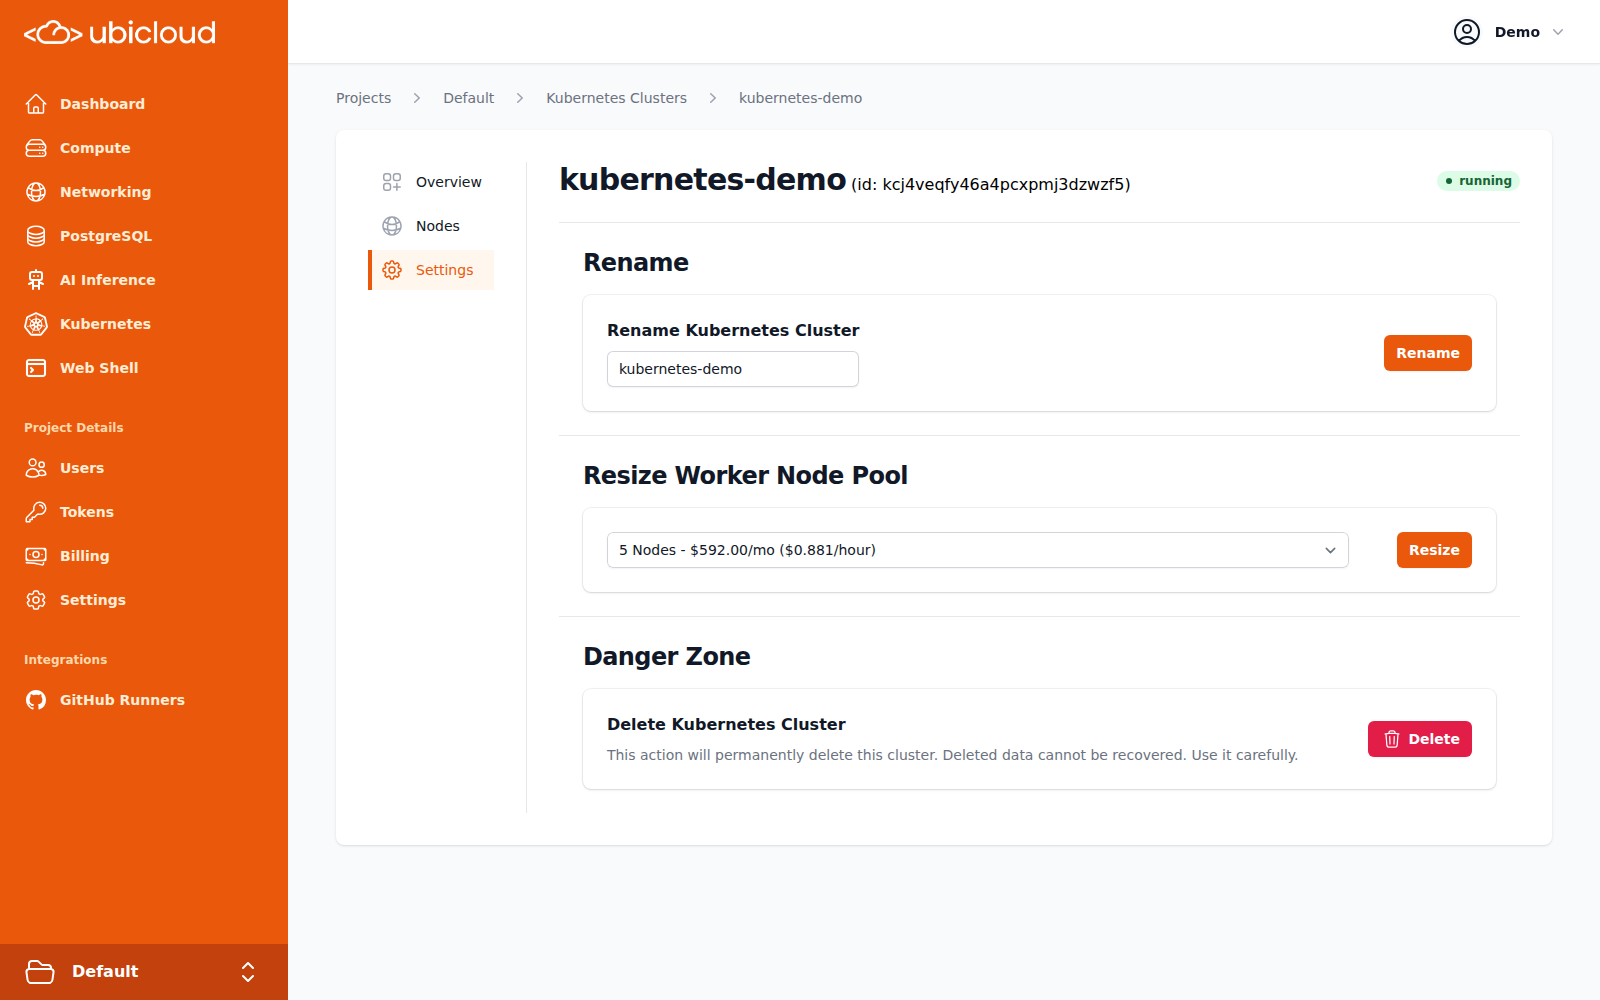 ## Managed PostgreSQL
### Default IPv6 Connectivity
PostgreSQL databases now support IPv6 connections by default. A firewall rule for `::/0` is automatically included, allowing you to connect to your databases over IPv6 without extra configuration.
### Advanced Firewall Configuration
You can now create a PostgreSQL database without any default firewall rules using the `--restrict-by-default` flag in the CLI or API. This allows for a more secure, locked-down setup where you can add only the specific access rules you need.
### ParadeDB Update
The ParadeDB extension has been updated to version 0.17.10, bringing the latest features and improvements for real-time search and analytics on PostgreSQL.
## Console & UI
### Rename Resources in the UI
You can now rename your resources—including VMs, PostgreSQL databases, Kubernetes Clusters, Load Balancers, and Firewalls directly from their settings page in the UI. When renaming a database or load balancer, DNS records and SSL certificates are automatically refreshed to ensure seamless service when needed.
## Managed PostgreSQL
### Default IPv6 Connectivity
PostgreSQL databases now support IPv6 connections by default. A firewall rule for `::/0` is automatically included, allowing you to connect to your databases over IPv6 without extra configuration.
### Advanced Firewall Configuration
You can now create a PostgreSQL database without any default firewall rules using the `--restrict-by-default` flag in the CLI or API. This allows for a more secure, locked-down setup where you can add only the specific access rules you need.
### ParadeDB Update
The ParadeDB extension has been updated to version 0.17.10, bringing the latest features and improvements for real-time search and analytics on PostgreSQL.
## Console & UI
### Rename Resources in the UI
You can now rename your resources—including VMs, PostgreSQL databases, Kubernetes Clusters, Load Balancers, and Firewalls directly from their settings page in the UI. When renaming a database or load balancer, DNS records and SSL certificates are automatically refreshed to ensure seamless service when needed.
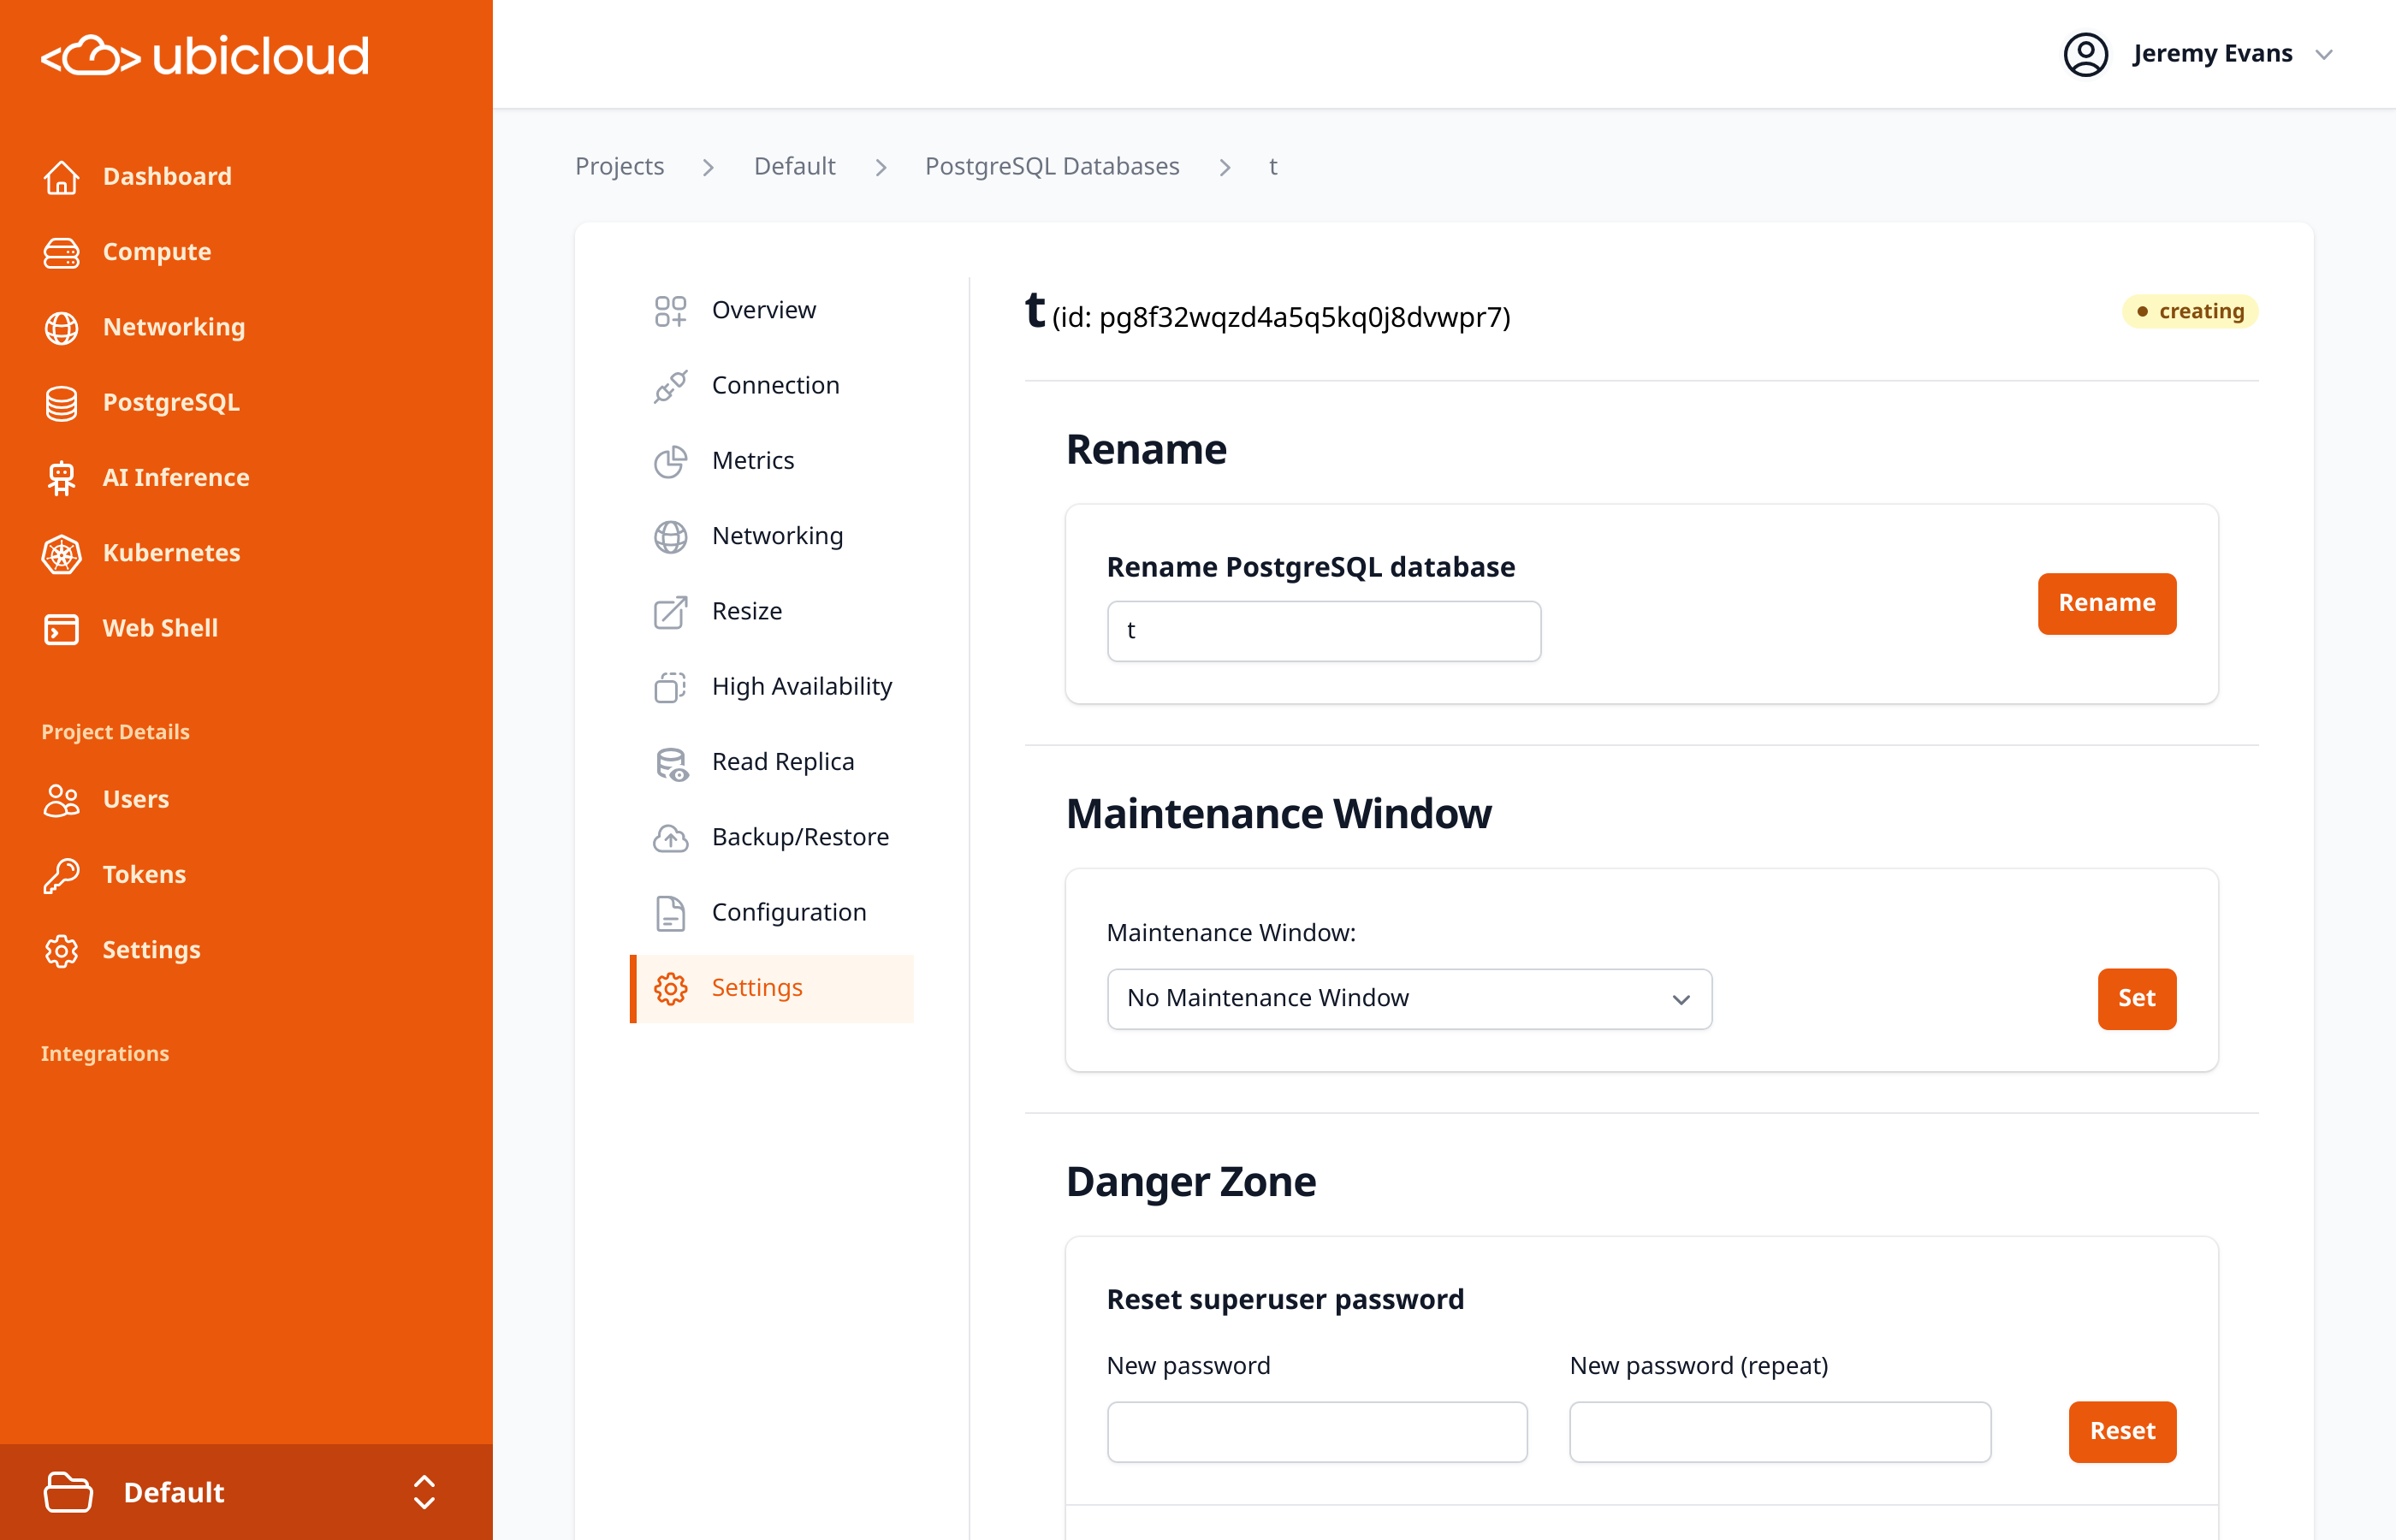 ## Compute & Networking
### Create Private Subnets During VM Launch
To streamline network setup, you can now create a new private subnet directly from the "Create Virtual Machine" form. Simply select "New Private Subnet" and provide a name to launch your VM into a new, isolated network.
## Compute & Networking
### Create Private Subnets During VM Launch
To streamline network setup, you can now create a new private subnet directly from the "Create Virtual Machine" form. Simply select "New Private Subnet" and provide a name to launch your VM into a new, isolated network.
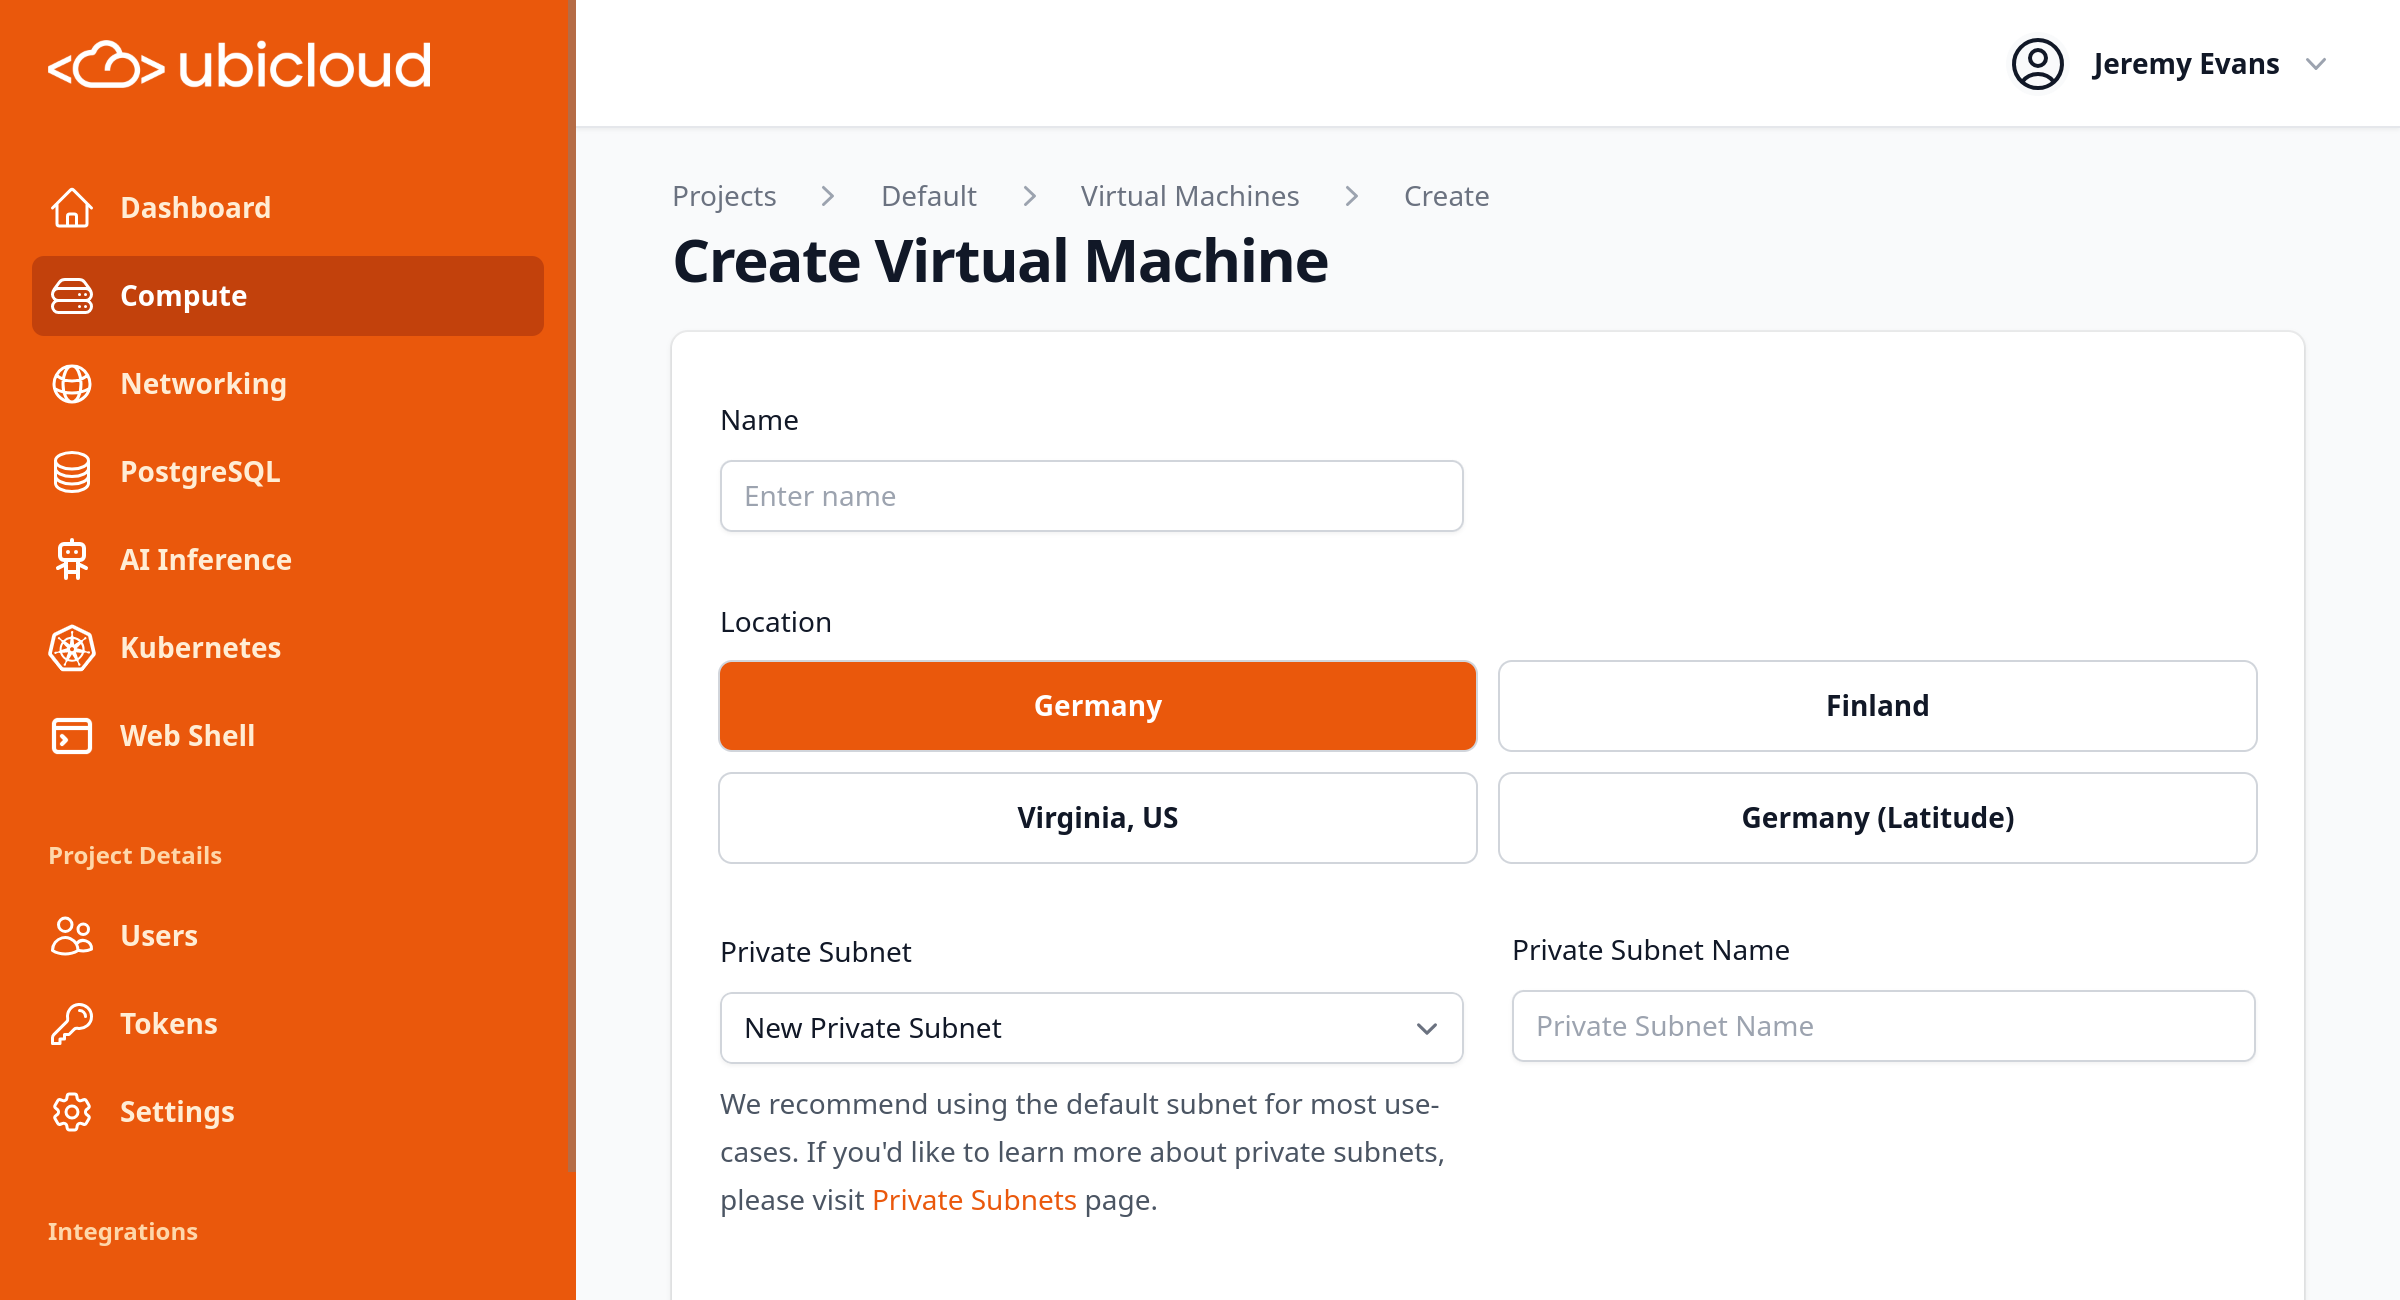 ### Simplified Load Balancer Creation
When creating a Load Balancer with the TCP health check protocol, the unnecessary "Health Check Endpoint" field is now automatically hidden from the UI, simplifying the configuration process.
## Billing & Account Management
### Add Notes to Invoices
You can now add custom notes to your invoices directly from the billing information page. This is useful for including purchase order (PO) numbers, special instructions, or other details for your accounting team.
### Pre-Authorization Charge Notice
To improve clarity, we've added a notice to the payment method success page explaining that a temporary pre-authorization charge may appear on your credit card and will be refunded.
# October 2025
Source: https://ubicloud.com/docs/changelog/2025-10
export const PrList = ({ids}) =>
{ids.map((id, index) => <>
{index > 0 && ", "}
{index === 0 ? "PR " : ""}#{id}
)}
;
## Managed PostgreSQL
### Support for PostgreSQL 18
You can now provision databases running on the latest major version, PostgreSQL 18. Take advantage of the newest features, performance enhancements, and security updates available in the PostgreSQL community.
### Simplified Load Balancer Creation
When creating a Load Balancer with the TCP health check protocol, the unnecessary "Health Check Endpoint" field is now automatically hidden from the UI, simplifying the configuration process.
## Billing & Account Management
### Add Notes to Invoices
You can now add custom notes to your invoices directly from the billing information page. This is useful for including purchase order (PO) numbers, special instructions, or other details for your accounting team.
### Pre-Authorization Charge Notice
To improve clarity, we've added a notice to the payment method success page explaining that a temporary pre-authorization charge may appear on your credit card and will be refunded.
# October 2025
Source: https://ubicloud.com/docs/changelog/2025-10
export const PrList = ({ids}) =>
{ids.map((id, index) => <>
{index > 0 && ", "}
{index === 0 ? "PR " : ""}#{id}
)}
;
## Managed PostgreSQL
### Support for PostgreSQL 18
You can now provision databases running on the latest major version, PostgreSQL 18. Take advantage of the newest features, performance enhancements, and security updates available in the PostgreSQL community.
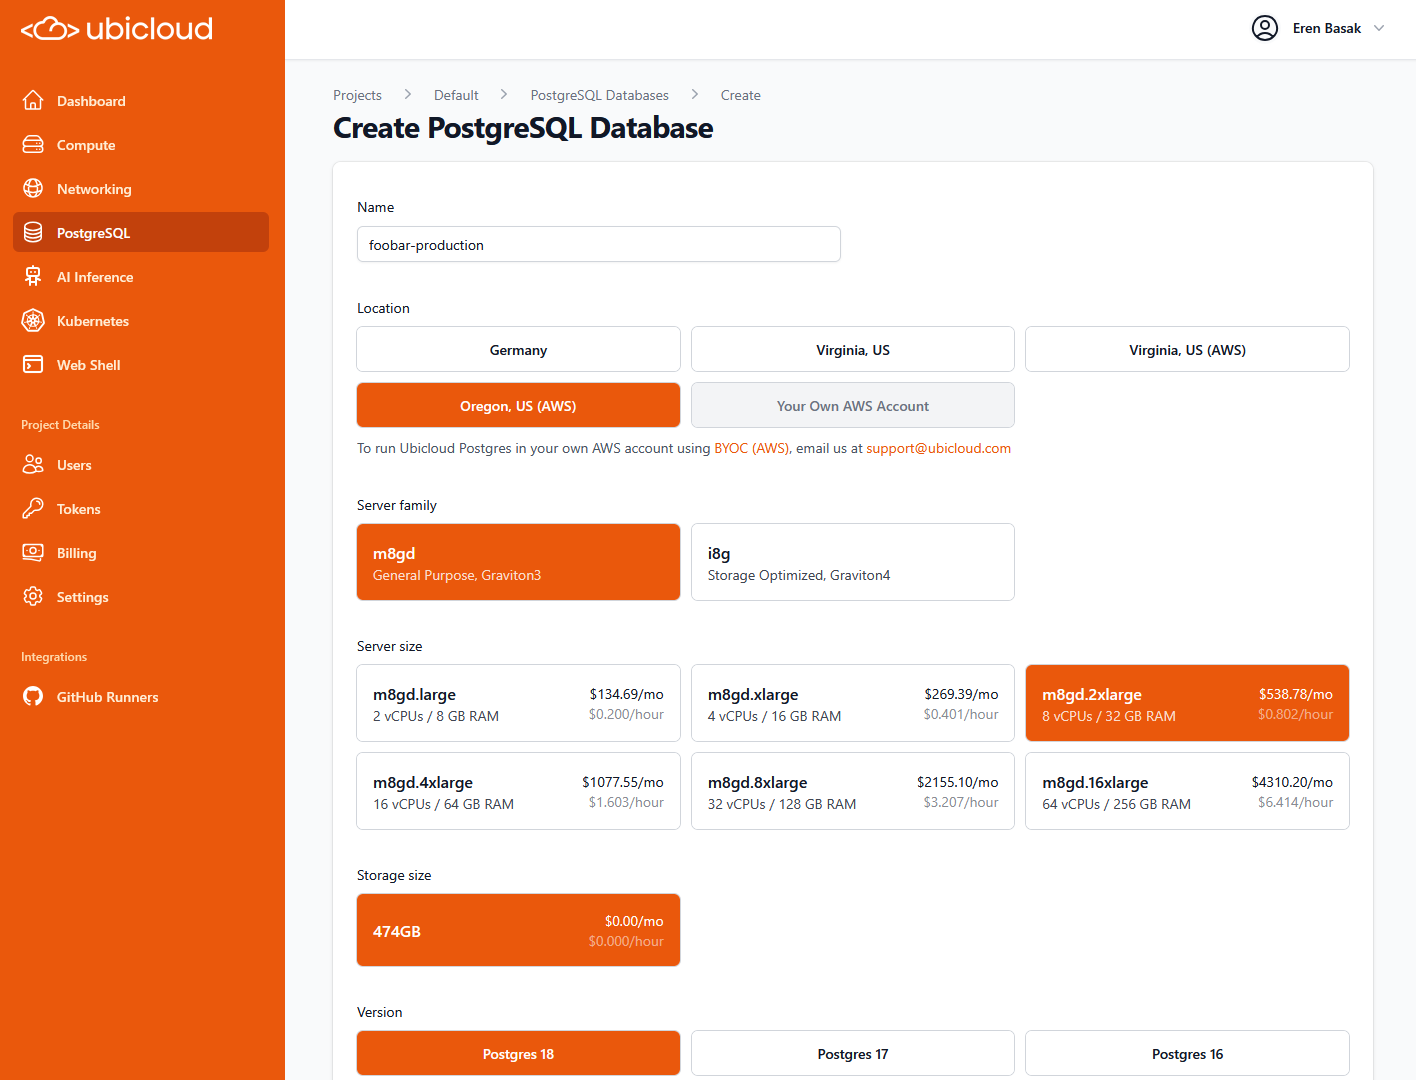 ### Major Version Upgrades
Seamlessly upgrade your PostgreSQL databases to newer major versions directly from the Ubicloud dashboard, API, and CLI. This update supports in-place upgrades with minimal downtime, allowing you to access the latest PostgreSQL features and performance improvements without complex manual migrations.
### Major Version Upgrades
Seamlessly upgrade your PostgreSQL databases to newer major versions directly from the Ubicloud dashboard, API, and CLI. This update supports in-place upgrades with minimal downtime, allowing you to access the latest PostgreSQL features and performance improvements without complex manual migrations.
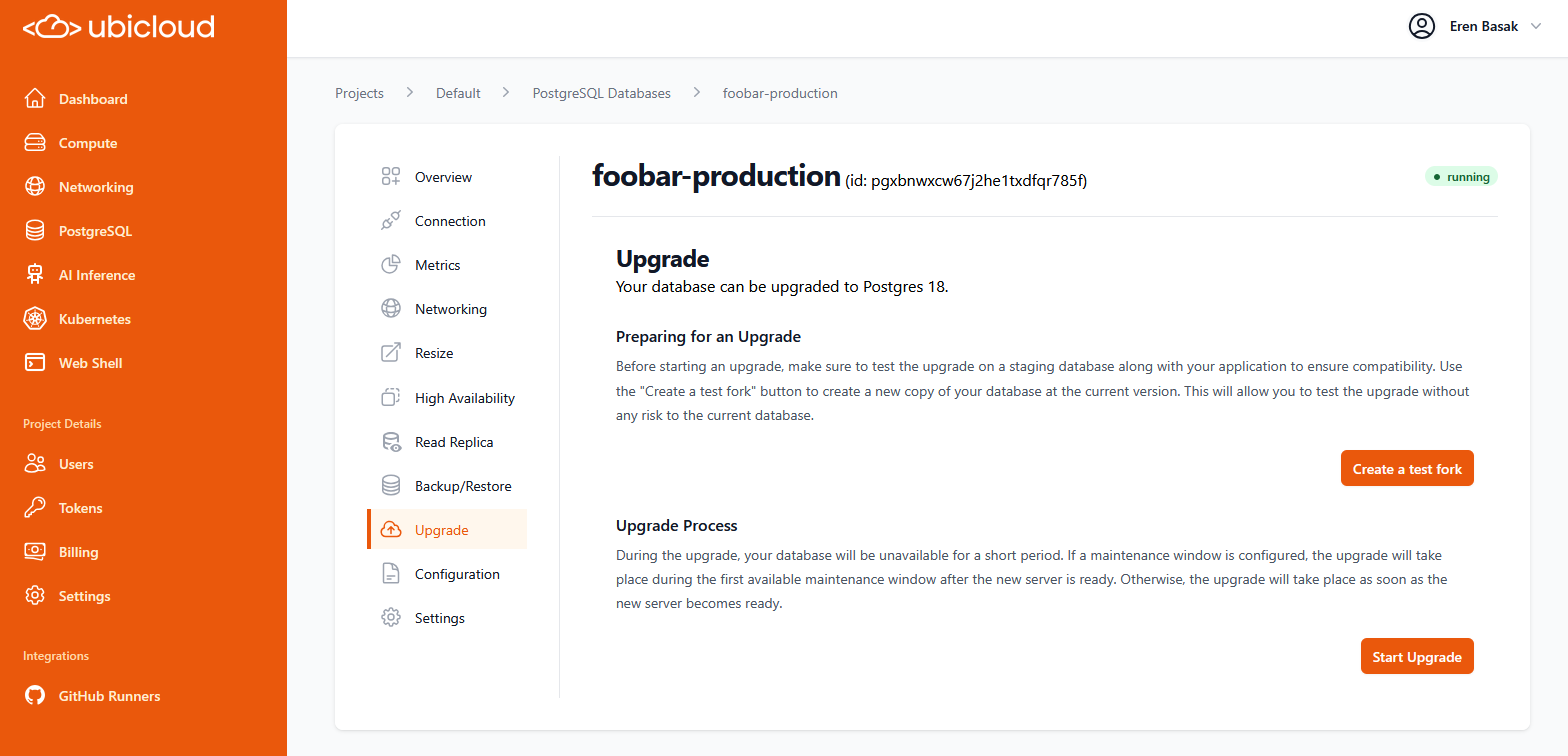
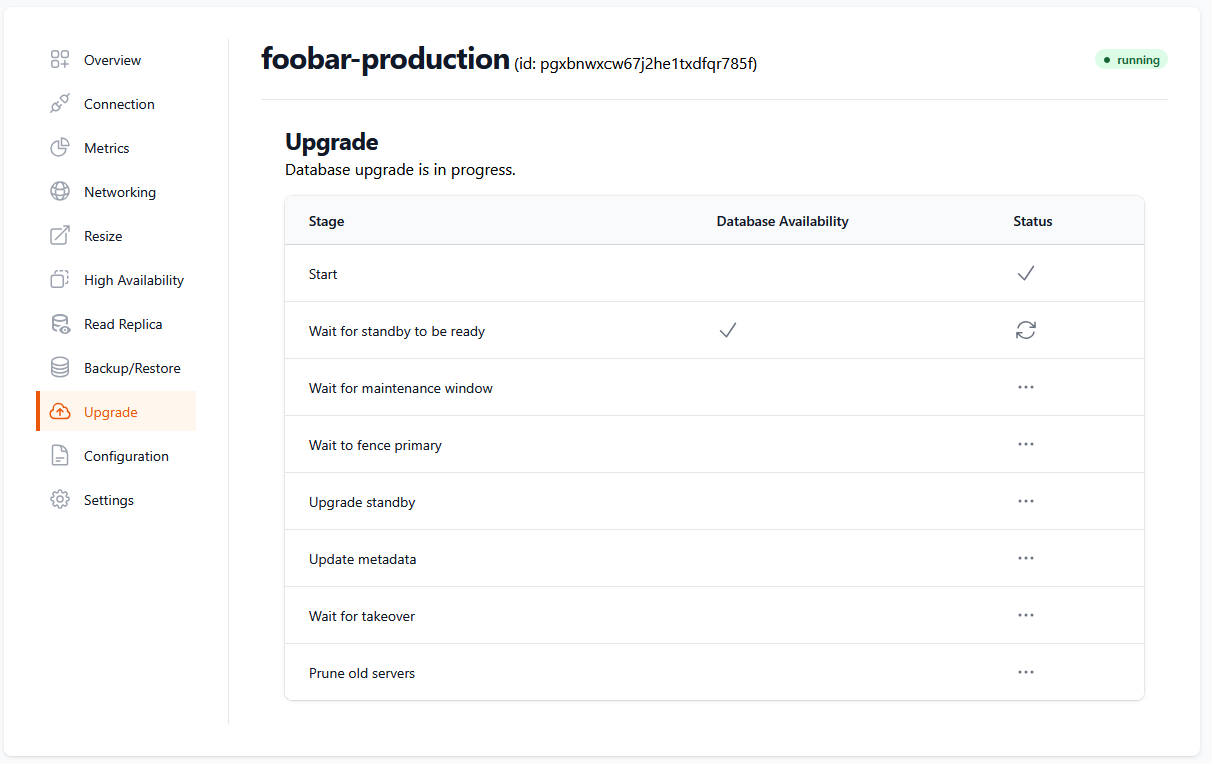 ### Ubicloud Postgres on AWS
Ubicloud managed Postgres is now available on AWS regions, including on your own account. This expansion allows you to deploy databases closer to your applications, reducing latency, improving performance with much lower cost. Read more at [ubicloud.com](https://www.ubicloud.com/postgresql-on-aws-high-iops).
### Ubicloud Postgres on AWS
Ubicloud managed Postgres is now available on AWS regions, including on your own account. This expansion allows you to deploy databases closer to your applications, reducing latency, improving performance with much lower cost. Read more at [ubicloud.com](https://www.ubicloud.com/postgresql-on-aws-high-iops).
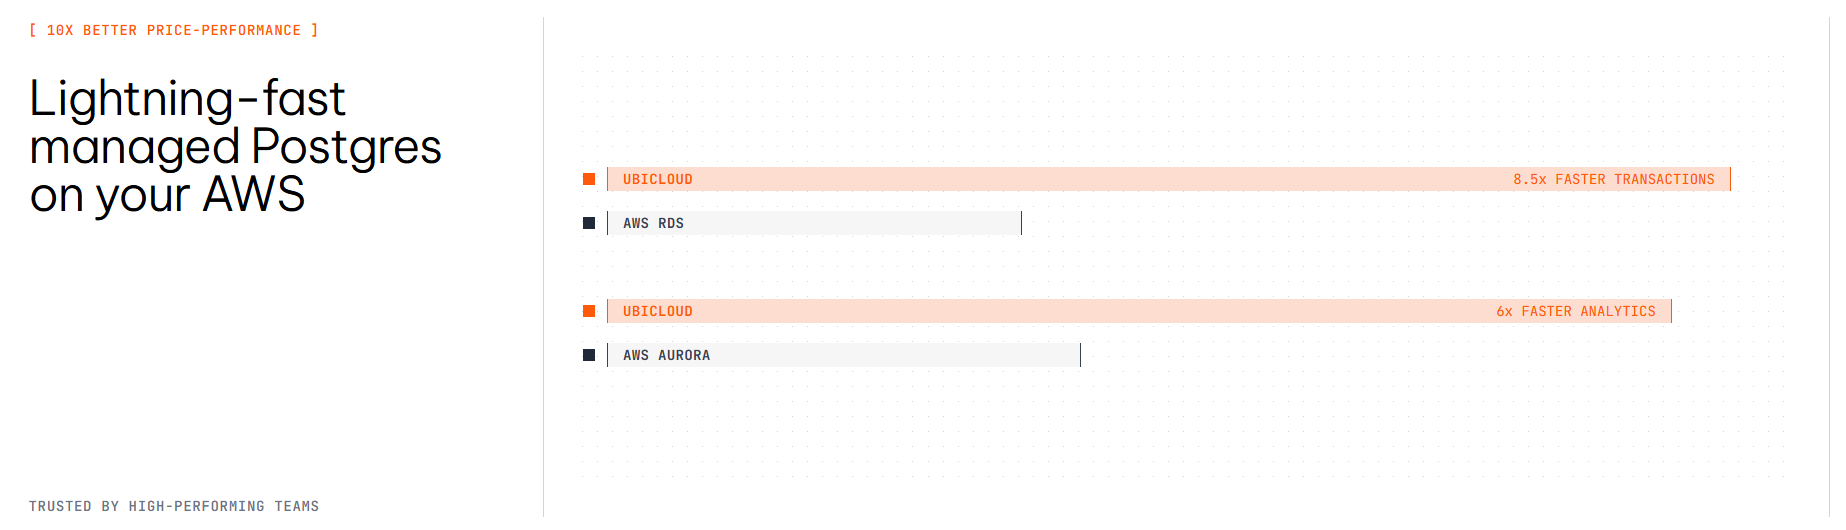 ### Improved Stability for Burstable Instances
Smaller, burstable PostgreSQL instances now automatically configure swap space and memory overcommit settings. This enhancement significantly reduces the risk of out-of-memory errors, improving the stability and reliability of your development and staging databases.
### Detailed Connection Information via API
The API can now return expanded connection details for your databases, including the username, password, and hostname as separate fields. This simplifies integration with applications and tools that require individual connection parameters instead of a single connection string.
## Compute & Networking
### Advanced Networking and Firewall Controls
We have changed our networking model to give you more control and flexibility. **PostgreSQL and Kubernetes managed services** now operate within your project's private subnets with dedicated, user-configurable firewalls. This allows you to connect managed services to your other private networks and manage firewall rules through the UI and API.
### Improved Stability for Burstable Instances
Smaller, burstable PostgreSQL instances now automatically configure swap space and memory overcommit settings. This enhancement significantly reduces the risk of out-of-memory errors, improving the stability and reliability of your development and staging databases.
### Detailed Connection Information via API
The API can now return expanded connection details for your databases, including the username, password, and hostname as separate fields. This simplifies integration with applications and tools that require individual connection parameters instead of a single connection string.
## Compute & Networking
### Advanced Networking and Firewall Controls
We have changed our networking model to give you more control and flexibility. **PostgreSQL and Kubernetes managed services** now operate within your project's private subnets with dedicated, user-configurable firewalls. This allows you to connect managed services to your other private networks and manage firewall rules through the UI and API.
 ### Centralized SSH Key Management
You can now register and manage SSH public keys at the project level. When creating new VMs, simply select a registered key instead of pasting the public key each time.
### Customizable VM Initialization Scripts
Automate the configuration of your new virtual machines using init scripts. You can now provide a shell script during VM creation via the UI, API, SDK, or CLI to install software, configure services, or perform other setup tasks automatically.
### Enhanced Load Balancer Management
Managing load balancer SSL certificates is now more flexible. You can enable or disable SSL termination independently of the health check protocol. The UI has also been improved to clearly display certificate status and health check information.
## AI & GPUs
### Support for NVIDIA B200 GPUs and Private Locations
Ubicloud now supports provisioning GPU VMs with powerful NVIDIA B200 chips in our new Türkiye (Istanbul) location. We also offer private managed locations for enterprises requiring dedicated GPU resources with enhanced security and compliance. Contact us at [support@ubicloud.com](mailto:support@ubicloud.com) for more information.
### New Inference Endpoint for Qwen3 VL Model
We've added support for Qwen3 VL in our inference endpoints, ready to support multi-modal applications. This model can process both text and images, enabling advanced AI capabilities such as image captioning, visual question answering, OCR tasks and more.
## GitHub Runners
### Custom Runner Labels for Granular Control
You can now create custom labels for your GitHub runners. This allows you to set workflow-level concurrency limits and route specific jobs to dedicated runner pools, giving you finer control over your CI/CD pipelines.
### Enhanced Management via API and CLI
Manage your GitHub integration programmatically with new API, SDK, and CLI commands. You can now list installations, repositories, and manage runner cache entries directly from your terminal or scripts, enabling better automation and oversight.
## Ubicloud Kubernetes
### Persistent Volumes Support with UbiCSI
The Ubicloud CSI driver is now enabled by default for all new Kubernetes clusters. This provides seamless, out-of-the-box support for persistent storage, allowing your stateful applications to easily provision and manage persistent volumes.
### Kubernetes vCPU Quota Visibility
Your project's vCPU quota specifically for Kubernetes clusters is now visible in the account settings page of the UI. This provides clearer insight into your resource allocation and usage for containerized workloads.
## Billing
### Pay Unpaid Invoices Manually
If an automated payment fails, you can now pay outstanding invoices directly from the billing page. A new "Pay Now" button securely redirects you to complete the payment, and you'll receive a confirmation email once it's successful.
# November 2025
Source: https://ubicloud.com/docs/changelog/2025-11
export const PrList = ({ids}) =>
{ids.map((id, index) => <>
{index > 0 && ", "}
{index === 0 ? "PR " : ""}#{id}
)}
;
## AI & GPUs
### Support for 4 & 8 GPU B200 Machines
We have expanded our GPU offerings to support virtual machines with 4 and 8 GPUs on B200 machines, allowing for more flexible and efficient resource usage for AI and machine learning workloads. Contact us at [support@ubicloud.com](mailto:support@ubicloud.com) for more information.
## Networking
### Dual-Stack Load Balancer Health Checks
Load balancers now perform separate health checks for IPv4 and IPv6 stacks. This ensures that traffic is routed intelligently based on the specific health of each IP stack on a node, significantly improving reliability for dual-stack network configurations.
### Private Subnet Firewall Rules
You can now create firewall rules that specifically target private subnets by name or ID via the web console, CLI, and API. This enhancement simplifies network security management within your Virtual Private Clouds (VPCs).
### Centralized SSH Key Management
You can now register and manage SSH public keys at the project level. When creating new VMs, simply select a registered key instead of pasting the public key each time.
### Customizable VM Initialization Scripts
Automate the configuration of your new virtual machines using init scripts. You can now provide a shell script during VM creation via the UI, API, SDK, or CLI to install software, configure services, or perform other setup tasks automatically.
### Enhanced Load Balancer Management
Managing load balancer SSL certificates is now more flexible. You can enable or disable SSL termination independently of the health check protocol. The UI has also been improved to clearly display certificate status and health check information.
## AI & GPUs
### Support for NVIDIA B200 GPUs and Private Locations
Ubicloud now supports provisioning GPU VMs with powerful NVIDIA B200 chips in our new Türkiye (Istanbul) location. We also offer private managed locations for enterprises requiring dedicated GPU resources with enhanced security and compliance. Contact us at [support@ubicloud.com](mailto:support@ubicloud.com) for more information.
### New Inference Endpoint for Qwen3 VL Model
We've added support for Qwen3 VL in our inference endpoints, ready to support multi-modal applications. This model can process both text and images, enabling advanced AI capabilities such as image captioning, visual question answering, OCR tasks and more.
## GitHub Runners
### Custom Runner Labels for Granular Control
You can now create custom labels for your GitHub runners. This allows you to set workflow-level concurrency limits and route specific jobs to dedicated runner pools, giving you finer control over your CI/CD pipelines.
### Enhanced Management via API and CLI
Manage your GitHub integration programmatically with new API, SDK, and CLI commands. You can now list installations, repositories, and manage runner cache entries directly from your terminal or scripts, enabling better automation and oversight.
## Ubicloud Kubernetes
### Persistent Volumes Support with UbiCSI
The Ubicloud CSI driver is now enabled by default for all new Kubernetes clusters. This provides seamless, out-of-the-box support for persistent storage, allowing your stateful applications to easily provision and manage persistent volumes.
### Kubernetes vCPU Quota Visibility
Your project's vCPU quota specifically for Kubernetes clusters is now visible in the account settings page of the UI. This provides clearer insight into your resource allocation and usage for containerized workloads.
## Billing
### Pay Unpaid Invoices Manually
If an automated payment fails, you can now pay outstanding invoices directly from the billing page. A new "Pay Now" button securely redirects you to complete the payment, and you'll receive a confirmation email once it's successful.
# November 2025
Source: https://ubicloud.com/docs/changelog/2025-11
export const PrList = ({ids}) =>
{ids.map((id, index) => <>
{index > 0 && ", "}
{index === 0 ? "PR " : ""}#{id}
)}
;
## AI & GPUs
### Support for 4 & 8 GPU B200 Machines
We have expanded our GPU offerings to support virtual machines with 4 and 8 GPUs on B200 machines, allowing for more flexible and efficient resource usage for AI and machine learning workloads. Contact us at [support@ubicloud.com](mailto:support@ubicloud.com) for more information.
## Networking
### Dual-Stack Load Balancer Health Checks
Load balancers now perform separate health checks for IPv4 and IPv6 stacks. This ensures that traffic is routed intelligently based on the specific health of each IP stack on a node, significantly improving reliability for dual-stack network configurations.
### Private Subnet Firewall Rules
You can now create firewall rules that specifically target private subnets by name or ID via the web console, CLI, and API. This enhancement simplifies network security management within your Virtual Private Clouds (VPCs).
 ### Public IP Ranges Endpoint
We introduced a new API endpoint at `api.ubicloud.com/ips-v4` that lists the IPv4 ranges used by Ubicloud services. This is particularly useful for configuring external firewalls to allow traffic from Ubicloud runners and resources.
### Enhanced Resource Visibility
The details page for VMs in private subnets now displays other attached resources, such as PostgreSQL databases and Kubernetes clusters. This provides a clearer view of your infrastructure dependencies directly within the UI.
### Public IP Ranges Endpoint
We introduced a new API endpoint at `api.ubicloud.com/ips-v4` that lists the IPv4 ranges used by Ubicloud services. This is particularly useful for configuring external firewalls to allow traffic from Ubicloud runners and resources.
### Enhanced Resource Visibility
The details page for VMs in private subnets now displays other attached resources, such as PostgreSQL databases and Kubernetes clusters. This provides a clearer view of your infrastructure dependencies directly within the UI.
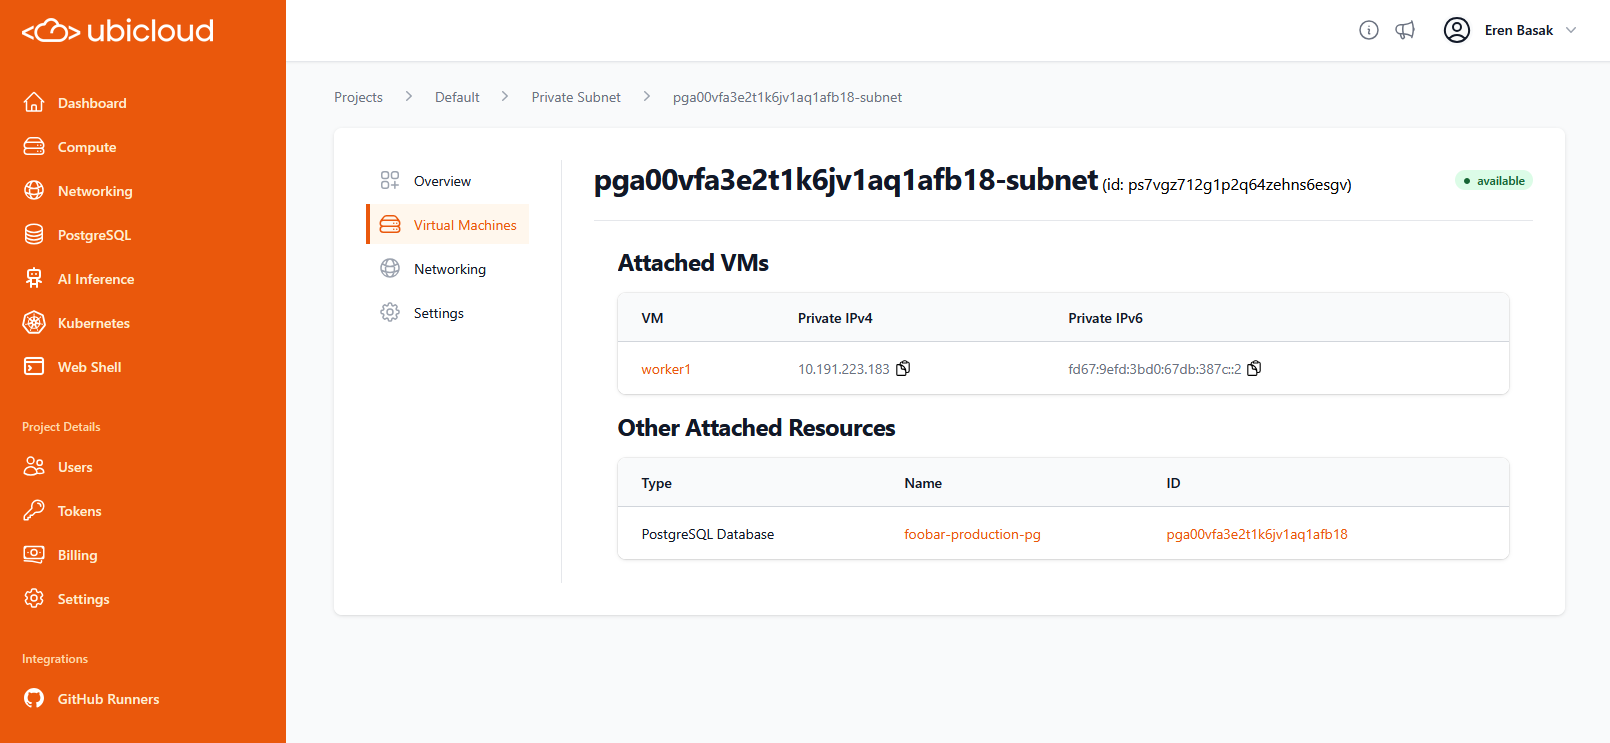 ## Managed PostgreSQL
### API Enhancements
We have expanded the PostgreSQL API with new capabilities. You can now specify custom `pg_config` parameters when creating a new PostgreSQL cluster, filter PostgreSQL resources by tags and access a dedicated endpoint to list backups, enabling better programmatic management and integration with your internal tools.
### Connection String Security Update
Connection strings for port 5432 have been updated to use `channel_binding=require` instead of `sslmode=require`. This change provides stronger security verification for clients connecting to your databases.
### Improved Point-in-Time Recovery
The backup restore picker now defaults to the next full minute. This UX improvement encourages restore targets that apply a full day's worth of WAL changes more efficiently, resulting in faster restoration times.
### Read Replica UI Improvements
The "Upgrade" tab is now hidden when viewing Read Replicas in the console. This clarifies that major version upgrades must be performed on the primary instance, preventing confusion during maintenance windows.
## GitHub Runners
### Ubuntu 24.04 Default Environment
The default operating system for Ubicloud GitHub Runners has been updated from Ubuntu 22.04 to Ubuntu 24.04. This ensures your CI/CD pipelines run on a modern, secure, and up-to-date environment.
### Concurrent Webhook Redelivery
We have improved the reliability of webhook delivery from GitHub. Failed deliveries are now processed and redelivered concurrently, significantly reducing delays during high-traffic periods or incidents to ensure your jobs trigger reliably.
### Clear Cache Capability
Added a new capability to remove all GitHub Actions cache entries for a specific repository via the CLI and API. This helps manage storage usage and ensures build freshness when dependencies change significantly.
## Billing
### Streamlined Bank Transfer Billing
We have improved the billing workflow for enterprise customers paying via bank transfer. Invoices now include specific transfer details, and the system automatically handles invoice delivery and status tracking for these payment methods.
## Console & UI
### Quick Access to Documentation and Changelog
Direct links to documentation and the changelog have been added to the console top bar. This makes it easier to access help resources and stay updated on the latest platform changes while working in the dashboard.
# Debug Workflow with SSH
Source: https://ubicloud.com/docs/github-actions-integration/debug-workflow-with-ssh
Debugging GitHub Actions workflows can be a frustrating experience. We've all been there - you push a change to fix your workflow, wait for minutes, only to see it fail again, with limited logs that don't fully explain the issue. This trial-and-error approach is not only time consuming but also inefficient. But what if there was a better way to debug your workflows in real-time?
Ubicloud introduces a game-changing solution: the ability to SSH into managed ephemeral Ubicloud runners during workflow execution. With the [ubicloud/ssh-runner](https://github.com/ubicloud/ssh-runner) action, you can set up SSH access and connect to the runner while your workflow is executing. No more guesswork or endless commit cycles. Simply attach, debug issues in real-time, and move on—all within the same workflow run.
## Usage
To use this feature, add the following step to your workflow as the first step:
```yaml theme={null}
- name: Setup SSH access
uses: ubicloud/ssh-runner@v1
with:
public-ssh-key: ${{ secrets.SSH_PUBLIC_KEY }}
wait-minutes: 30 # Optional, default is 10 minutes
```
That's it! This action will enable SSH access using the provided public key.
When you run this workflow, you'll see the following output in the logs:
```
Waiting for 30 minutes to allow SSH access...
SSH Connection Information:
User: runner
IPv4: 188.40.199.63
Command:
ssh runner@188.40.199.63
```
Simply copy the SSH command from the logs, open your favorite terminal, and connect. You’ll be in the same environment as your CI job, letting you inspect files, run commands, and debug issues in real time.
Remember that each Ubicloud runner is ephemeral. Once the `wait-minutes` duration is reached after the job is completed, the VM is destroyed, along with its disk data.
The [ubicloud/ssh-runner](https://github.com/ubicloud/ssh-runner) action is open source. Feel free to review, contribute, or open issues if you run into any snags.
You can also set up SSH access only for failed jobs:
```yaml theme={null}
- name: Setup SSH access
if: ${{ failure() }}
uses: ubicloud/ssh-runner@v1
with:
public-ssh-key: ${{ secrets.SSH_PUBLIC_KEY }}
wait-minutes: 30
```
Store your private SSH key securely. A short debugging session can save massive time, but best practices and security guidelines always apply.
## Conclusion
By allowing SSH access to your Ubicloud runners, you can debug your GitHub Actions workflows in real-time. This not only saves time but also provides a more comprehensive understanding of the issues at hand. Say goodbye to the days of blind debugging and repeated pushes. Embrace the future of efficient workflow debugging with Ubicloud.
For more information, visit the [ubicloud/ssh-runner](https://github.com/ubicloud/ssh-runner) repository.
# Migrate to Arm runners
Source: https://ubicloud.com/docs/github-actions-integration/migrate-to-arm-runners
GitHub Actions runs on x64 architectures. If you're building or testing for arm64 architectures and using QEMU emulation to do so, you can change your workflow file to natively use arm64.
For this, you simply need to change your platform and remove the QEMU step.
## Managed PostgreSQL
### API Enhancements
We have expanded the PostgreSQL API with new capabilities. You can now specify custom `pg_config` parameters when creating a new PostgreSQL cluster, filter PostgreSQL resources by tags and access a dedicated endpoint to list backups, enabling better programmatic management and integration with your internal tools.
### Connection String Security Update
Connection strings for port 5432 have been updated to use `channel_binding=require` instead of `sslmode=require`. This change provides stronger security verification for clients connecting to your databases.
### Improved Point-in-Time Recovery
The backup restore picker now defaults to the next full minute. This UX improvement encourages restore targets that apply a full day's worth of WAL changes more efficiently, resulting in faster restoration times.
### Read Replica UI Improvements
The "Upgrade" tab is now hidden when viewing Read Replicas in the console. This clarifies that major version upgrades must be performed on the primary instance, preventing confusion during maintenance windows.
## GitHub Runners
### Ubuntu 24.04 Default Environment
The default operating system for Ubicloud GitHub Runners has been updated from Ubuntu 22.04 to Ubuntu 24.04. This ensures your CI/CD pipelines run on a modern, secure, and up-to-date environment.
### Concurrent Webhook Redelivery
We have improved the reliability of webhook delivery from GitHub. Failed deliveries are now processed and redelivered concurrently, significantly reducing delays during high-traffic periods or incidents to ensure your jobs trigger reliably.
### Clear Cache Capability
Added a new capability to remove all GitHub Actions cache entries for a specific repository via the CLI and API. This helps manage storage usage and ensures build freshness when dependencies change significantly.
## Billing
### Streamlined Bank Transfer Billing
We have improved the billing workflow for enterprise customers paying via bank transfer. Invoices now include specific transfer details, and the system automatically handles invoice delivery and status tracking for these payment methods.
## Console & UI
### Quick Access to Documentation and Changelog
Direct links to documentation and the changelog have been added to the console top bar. This makes it easier to access help resources and stay updated on the latest platform changes while working in the dashboard.
# Debug Workflow with SSH
Source: https://ubicloud.com/docs/github-actions-integration/debug-workflow-with-ssh
Debugging GitHub Actions workflows can be a frustrating experience. We've all been there - you push a change to fix your workflow, wait for minutes, only to see it fail again, with limited logs that don't fully explain the issue. This trial-and-error approach is not only time consuming but also inefficient. But what if there was a better way to debug your workflows in real-time?
Ubicloud introduces a game-changing solution: the ability to SSH into managed ephemeral Ubicloud runners during workflow execution. With the [ubicloud/ssh-runner](https://github.com/ubicloud/ssh-runner) action, you can set up SSH access and connect to the runner while your workflow is executing. No more guesswork or endless commit cycles. Simply attach, debug issues in real-time, and move on—all within the same workflow run.
## Usage
To use this feature, add the following step to your workflow as the first step:
```yaml theme={null}
- name: Setup SSH access
uses: ubicloud/ssh-runner@v1
with:
public-ssh-key: ${{ secrets.SSH_PUBLIC_KEY }}
wait-minutes: 30 # Optional, default is 10 minutes
```
That's it! This action will enable SSH access using the provided public key.
When you run this workflow, you'll see the following output in the logs:
```
Waiting for 30 minutes to allow SSH access...
SSH Connection Information:
User: runner
IPv4: 188.40.199.63
Command:
ssh runner@188.40.199.63
```
Simply copy the SSH command from the logs, open your favorite terminal, and connect. You’ll be in the same environment as your CI job, letting you inspect files, run commands, and debug issues in real time.
Remember that each Ubicloud runner is ephemeral. Once the `wait-minutes` duration is reached after the job is completed, the VM is destroyed, along with its disk data.
The [ubicloud/ssh-runner](https://github.com/ubicloud/ssh-runner) action is open source. Feel free to review, contribute, or open issues if you run into any snags.
You can also set up SSH access only for failed jobs:
```yaml theme={null}
- name: Setup SSH access
if: ${{ failure() }}
uses: ubicloud/ssh-runner@v1
with:
public-ssh-key: ${{ secrets.SSH_PUBLIC_KEY }}
wait-minutes: 30
```
Store your private SSH key securely. A short debugging session can save massive time, but best practices and security guidelines always apply.
## Conclusion
By allowing SSH access to your Ubicloud runners, you can debug your GitHub Actions workflows in real-time. This not only saves time but also provides a more comprehensive understanding of the issues at hand. Say goodbye to the days of blind debugging and repeated pushes. Embrace the future of efficient workflow debugging with Ubicloud.
For more information, visit the [ubicloud/ssh-runner](https://github.com/ubicloud/ssh-runner) repository.
# Migrate to Arm runners
Source: https://ubicloud.com/docs/github-actions-integration/migrate-to-arm-runners
GitHub Actions runs on x64 architectures. If you're building or testing for arm64 architectures and using QEMU emulation to do so, you can change your workflow file to natively use arm64.
For this, you simply need to change your platform and remove the QEMU step.
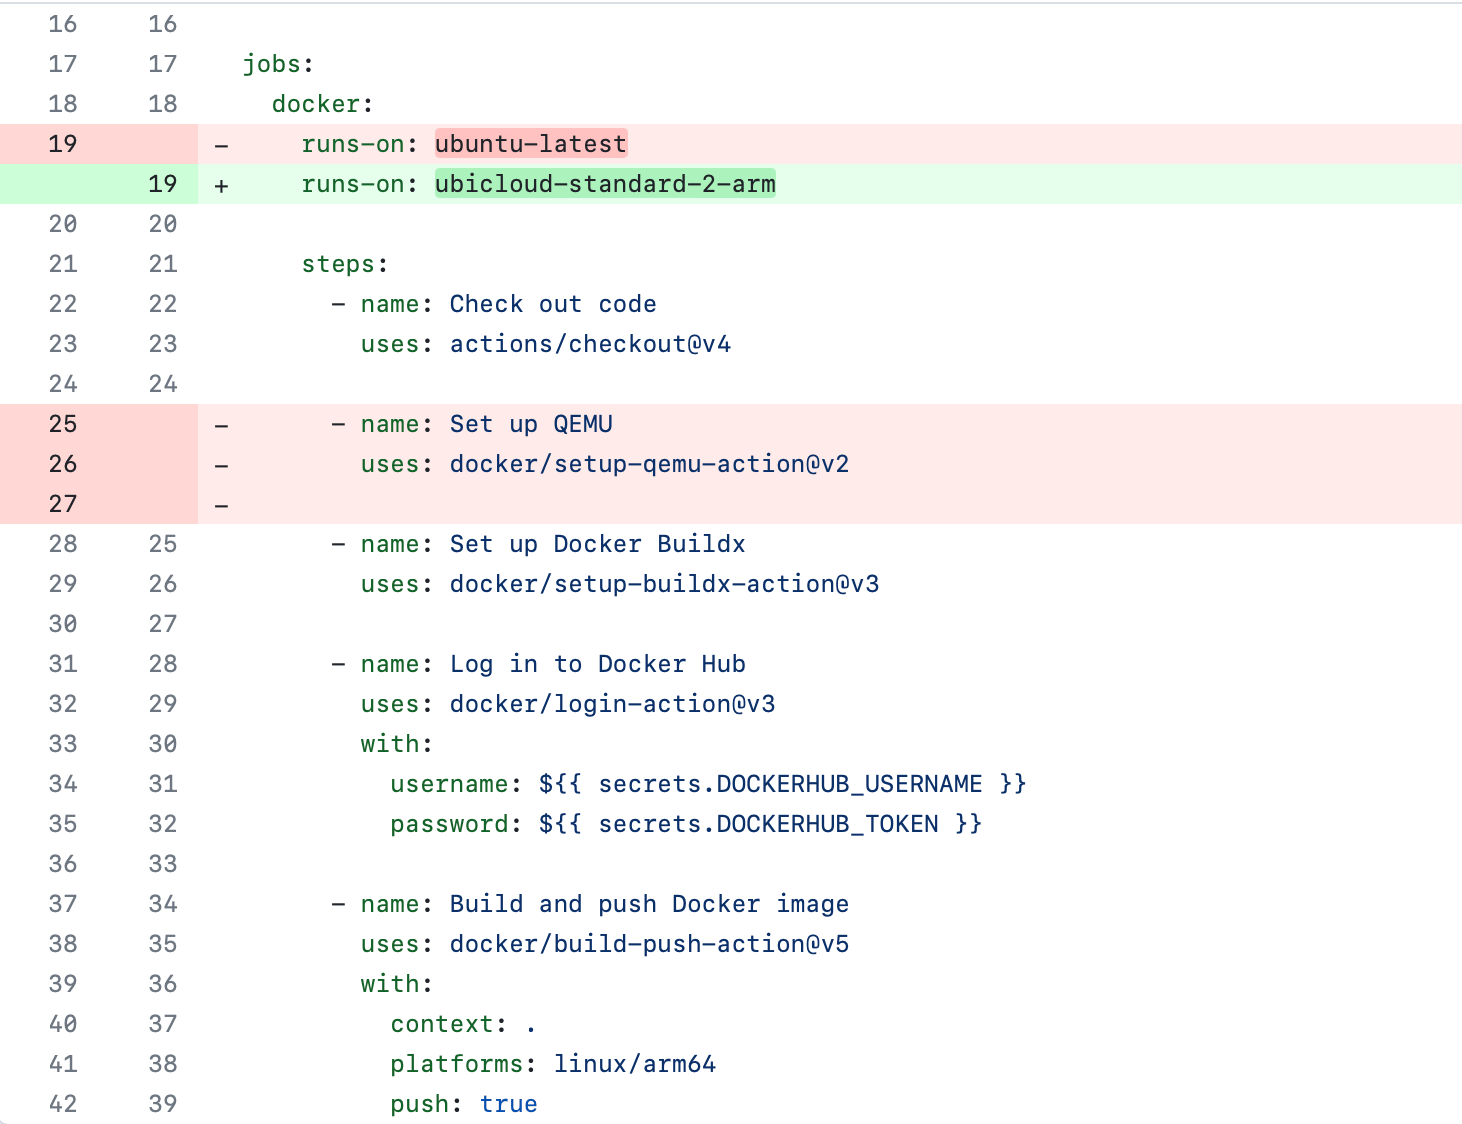 ## Arm image
GitHub Actions doesn't currently have an official Arm image available. As a result, Ubicloud builds its own Ubuntu image; and our Arm runners don't have all pre-installed packages that are available on x64.
If your workflow has a package dependency that doesn't exist on Ubicloud's arm image, we recommend installing the dependency manually for the time being.
If you're a large customer and need commonly used packages on arm64, you contact us [support@ubicloud.com](mailto:support@ubicloud.com).
# Price-Performance
Source: https://ubicloud.com/docs/github-actions-integration/price-performance
## Price
Ubicloud runners provide a number of price-performance advantages over GitHub runners. These include:
* Prices are 10x cheaper than GitHub Actions
* Ubicloud Runners outperform GitHub Runners even at this price point
* Ubicloud cloud services are open source under the AGPL v3 license, if you choose to manage your infrastructure yourself
We charge only for usage and at per minute granularity. Every account gets a \$1/month credit that's equivalent to 1,250 minutes of Ubicloud (2 vCPU) runner time. You can read more about our Linux x64 and Arm64 prices in the [general pricing page](/about/pricing#github-actions).
## Performance
In addition to being 10x more cost-effective, Ubicloud runners are also faster. This is because Ubicloud VMs run on newer hardware than those of GitHub's Azure VMs.
Below is a sample of run times across open source projects for GitHub and Ubicloud runners. We also display Ubicloud 4 vCore runner times. Since Ubicloud comes with a significant price advantage, we recommend trying more powerful runners for faster builds.
**Repo source:** [https://github.com/facebook/folly](https://github.com/facebook/folly) (C++ Build and Test)
## Arm image
GitHub Actions doesn't currently have an official Arm image available. As a result, Ubicloud builds its own Ubuntu image; and our Arm runners don't have all pre-installed packages that are available on x64.
If your workflow has a package dependency that doesn't exist on Ubicloud's arm image, we recommend installing the dependency manually for the time being.
If you're a large customer and need commonly used packages on arm64, you contact us [support@ubicloud.com](mailto:support@ubicloud.com).
# Price-Performance
Source: https://ubicloud.com/docs/github-actions-integration/price-performance
## Price
Ubicloud runners provide a number of price-performance advantages over GitHub runners. These include:
* Prices are 10x cheaper than GitHub Actions
* Ubicloud Runners outperform GitHub Runners even at this price point
* Ubicloud cloud services are open source under the AGPL v3 license, if you choose to manage your infrastructure yourself
We charge only for usage and at per minute granularity. Every account gets a \$1/month credit that's equivalent to 1,250 minutes of Ubicloud (2 vCPU) runner time. You can read more about our Linux x64 and Arm64 prices in the [general pricing page](/about/pricing#github-actions).
## Performance
In addition to being 10x more cost-effective, Ubicloud runners are also faster. This is because Ubicloud VMs run on newer hardware than those of GitHub's Azure VMs.
Below is a sample of run times across open source projects for GitHub and Ubicloud runners. We also display Ubicloud 4 vCore runner times. Since Ubicloud comes with a significant price advantage, we recommend trying more powerful runners for faster builds.
**Repo source:** [https://github.com/facebook/folly](https://github.com/facebook/folly) (C++ Build and Test)
**Run date:** 2025-01-07
**Repo source:** [https://github.com/google/xls](https://github.com/google/xls) (Bazel Test)
**Run date:** 2025-01-07
**Repo source:** [https://github.com/PeerDB-io/peerdb](https://github.com/PeerDB-io/peerdb) (Docker Build)
**Run date:** 2025-01-07
**Repo source:** [https://github.com/supabase/supabase](https://github.com/supabase/supabase) (Check code with Typescript)
**Run date:** 2025-01-07
**Repo source:** [https://github.com/nasa/astrobee](https://github.com/nasa/astrobee) (C++ Build and Test)
**Run date:** 2025-01-07
# Quickstart
Source: https://ubicloud.com/docs/github-actions-integration/quickstart
This guide describes how to integrate your GitHub Action workflows with Ubicloud runners. For this, you're going to sign up to Ubicloud, use our GitHub App to connect to your GitHub repo, and change one line in your GitHub workflow file. This will provide the following benefits:
* Reduce your GitHub Actions bill by 10x
* Native x64 and arm64 Linux runners
* Full compatibility with GitHub Actions
* Open source, if you choose to manage Ubicloud VMs yourself
The first time you use Ubicloud, you'll need to [create a new account](https://console.ubicloud.com/create-account). Once you do that and sign in, you'll be directed to Ubicloud's home page.
Ubicloud requires an active, valid credit card on file before you can create resources. This is primarily a means to prevent abuse and to ensure that we can collect payment at the end of the month.
Ubicloud also provides a billing credit of \$1/month for an account. This means you'll get 1,250 free minutes of GitHub runner credits each month.
From the navigation menu on the left, choose Billing. Then, enter your credit card information.
 On the navigation menu, choose GitHub Runners. Then, click on Connect New Account on the right. This will take you to GitHub.
 GitHub will ask you to install and authorize the Ubicloud Managed Runners app. Once you do this, you will be redirected to the Ubicloud cloud dashboard. Here, you should now see your GitHub repositories.
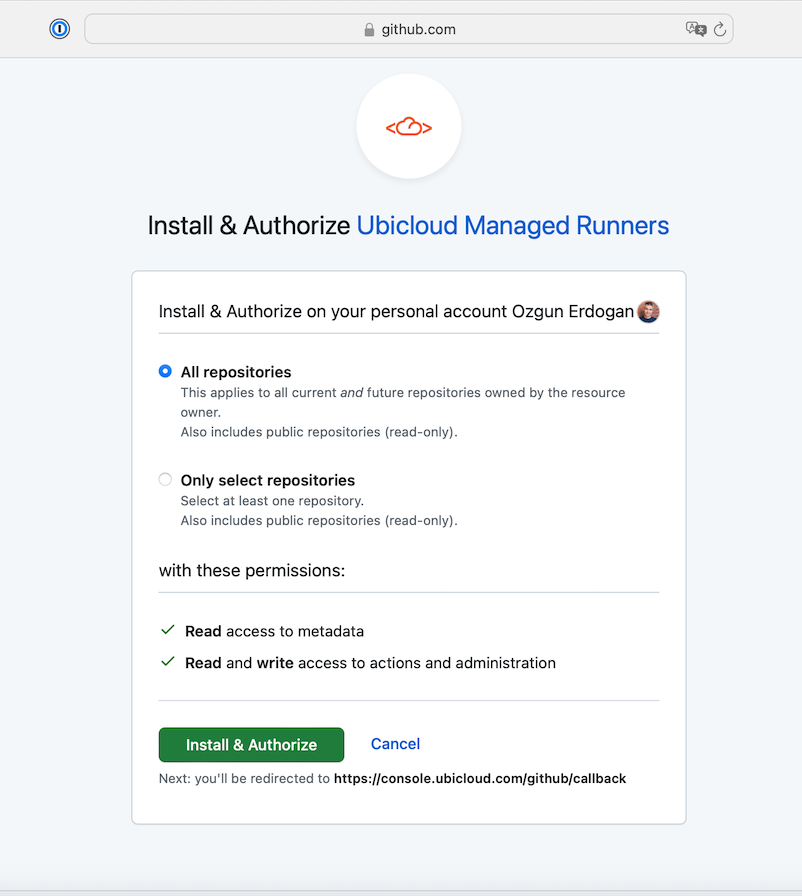 To use Ubicloud for GitHub Actions, you need to edit your `.github/workflows` file. In particular, you need to change the `ubuntu-latest` runner label to `ubicloud-standard-2`.
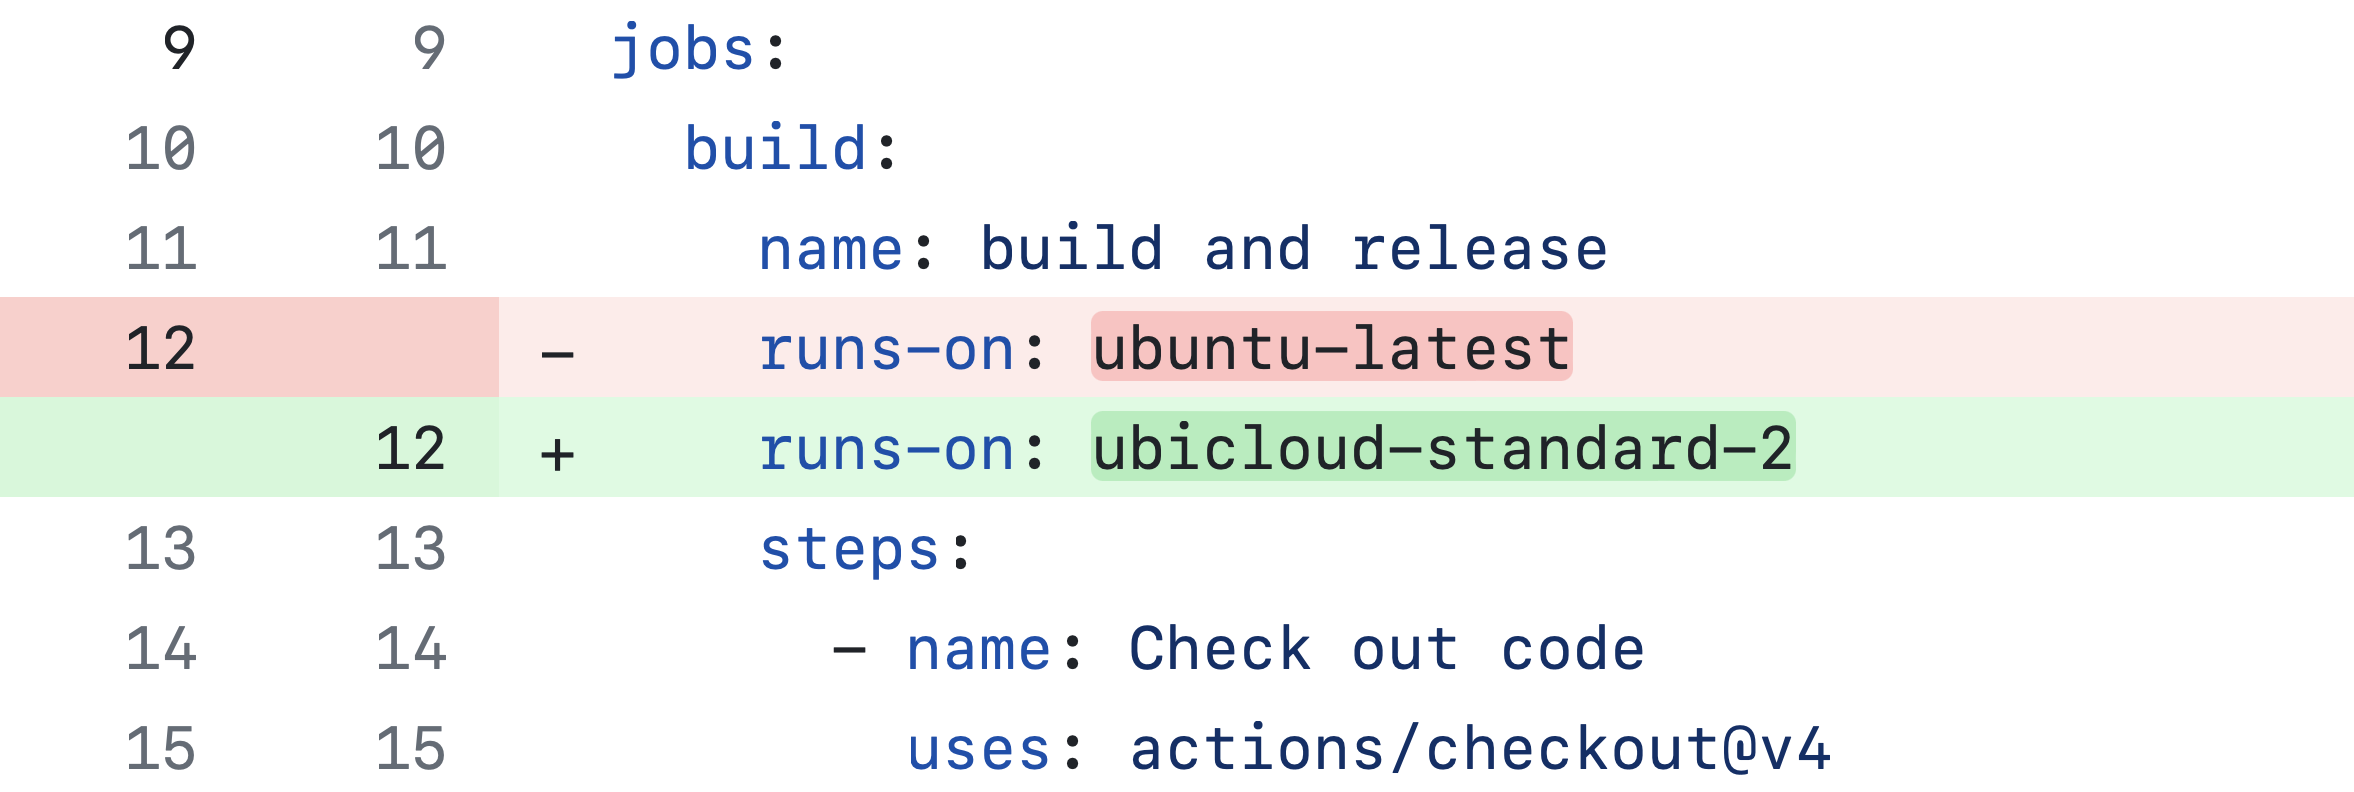 When you merge this change, GitHub Actions will start using Ubicloud runners. If your workflow file has builds configured on merging a change, you see your build start in your project's Actions tab. If not, you can manually start a build to see the change take effect.
By default, `ubicloud-standard-2` starts a VM with the same vCPU and memory configuration as paid GitHub runners. Given Ubicloud's 10x price advantage, you might want to pick a more powerful VM such as `ubicloud-standard-8` and see if your pipelines move faster. You can find the full list of runners and their prices in the [Pricing documents](/about/pricing#github-actions).
**Summary:** In this guide, you created a Ubicloud account and integrated that account with your GitHub Account. You then changed a single line in your workflow file to use Ubicloud runners.
This resulted in 10x lower prices and faster CI/CD, with Ubicloud's source code openly available under the AGPL license.
# Runner Types
Source: https://ubicloud.com/docs/github-actions-integration/runner-types
Ubicloud offers a wide variety of runner types and sizes, allowing you to choose based on your specific needs.
By default, using `runs-on: ubicloud` provisions a 2 vCPU x64 Ubuntu 24.04 runner. You can specify the runner size, for example, `runs-on: ubicloud-standard-8` provisions an 8 vCPU runner. You can even specify the operating system, such as `runs-on: ubicloud-standard-4-ubuntu-2204`, which provisions a 4 vCPU runner with Ubuntu 22.04.
## Available Labels
| Workflow label | OS | vCPU | Memory | Disk |
| -------------------------- | ------------ | ---- | ------ | ----- |
| `ubicloud-standard-2` | Ubuntu 24.04 | 2 | 8GB | 75GB |
| `ubicloud-standard-4` | Ubuntu 24.04 | 4 | 16GB | 150GB |
| `ubicloud-standard-8` | Ubuntu 24.04 | 8 | 32GB | 200GB |
| `ubicloud-standard-16` | Ubuntu 24.04 | 16 | 64GB | 300GB |
| `ubicloud-standard-30` | Ubuntu 24.04 | 30 | 120GB | 400GB |
| `ubicloud-standard-2-arm` | Ubuntu 24.04 | 2 | 6GB | 86GB |
| `ubicloud-standard-4-arm` | Ubuntu 24.04 | 4 | 12GB | 150GB |
| `ubicloud-standard-8-arm` | Ubuntu 24.04 | 8 | 24GB | 200GB |
| `ubicloud-standard-16-arm` | Ubuntu 24.04 | 16 | 48GB | 300GB |
| `ubicloud-standard-30-arm` | Ubuntu 24.04 | 30 | 90GB | 400GB |
You can append `-ubuntu-2204` or `-ubuntu-2404` to explicitly set the operating system.
Ubicloud runners support the following label patterns:
```yaml theme={null}
# x64 runners
runs-on: ubicloud-standard-{vcpu}-{os}
# ubicloud -> 2 vCPU x64 Ubuntu 24.04 runner
# ubicloud-standard-8 -> 8 vCPU x64 Ubuntu 24.04 runner
# ubicloud-standard-4-ubuntu-2204 -> 4 vCPU x64 Ubuntu 22.04 runner
# arm64 runners
runs-on: ubicloud-standard-{vcpu}-arm-{os}
# ubicloud-arm -> 2 vCPU arm64 Ubuntu 24.04 runner
# ubicloud-standard-8-arm -> 8 vCPU arm64 Ubuntu 24.04 runner
# ubicloud-standard-4-arm-ubuntu-2204 -> 4 vCPU arm64 Ubuntu 22.04 runner
```
The supported number of vCPUs are 2 (default), 4, 8, 16, and 30.
The operation system can be `ubuntu-2204`, `ubuntu-2404` (default).
You can find all the available labels [here](https://github.com/ubicloud/ubicloud/blob/main/config/github_runner_labels.yml).
**Deprecation of GPU runners**: We will be deprecating our GPU runners, effective December 31, 2025. After this date, GPU runners will no longer be available, and any jobs on these runners will need to be migrated to other runner types
## x64 Runners
Ubicloud x64 **standard runners** are powered by AMD EPYC 9454P processors, with every two x64 vCPUs corresponding to one physical core. All Ubicloud runners are equipped with modern hardware, including new generation processors, NVMe SSDs, and high-speed networking. This enables us to deliver better price-performance across our services.
For our customers who seek even higher performance, we offer **premium runners** powered by AMD Ryzen 9 7950X3D CPUs. These processors are optimized for single-thread speed and fast CI execution, making them ideal for large monorepos, test-heavy workflows, or any job that benefits from high CPU clock speeds. Learn how to enable premium runners [here](/github-actions-integration/use-premium-runners).
Our x64 runner images are fully compatible with default runners. We generate them using the official HashiCorp packer templates published by GitHub in the [actions/runner-images](https://github.com/actions/runner-images) repository.
We update the images monthly after GitHub releases a new version. We don't deploy new images on the same day as GitHub to avoid potential issues. In the past, GitHub has encountered problems with new images and had to quickly rollback.
To prevent any disruption to our customers, we typically deploy new images a few days after GitHub's deployment is complete.
If you notice any mismatches between Ubicloud x64 runners and the official GitHub runners, please reach out to us at [support@ubicloud.com](mailto:support@ubicloud.com).
If your workflow has a package dependency that doesn’t exist on Ubicloud’s image, we recommend installing the dependency manually for the time being or creating an issue at [actions/runner-images](https://github.com/actions/runner-images) repository.
## arm64 Runners
Ubicloud arm64 runners are powered by Ampere Altra Q80-30 processors, with each arm64 vCPU backed by a dedicated physical core. This ensures consistent, high-performance computing for your workloads.
GitHub launched official arm64 runners at the beginning of 2025. However, GitHub doesn't create arm64 images; their partner does. Unfortunately, they don't publish a packer template like the one for x64 images. As a result, Ubicloud builds its own Ubuntu arm64 image, and our arm64 runners don’t have all the pre-installed packages that are available on x64.
Arm shares a list of installed packages in the [actions/partner-runner-images](https://github.com/actions/partner-runner-images) repository, and we try to keep it similar. However, our images might not be identical to GitHub's arm64 images since they don't share the exact template and versions.
If your workflow has a package dependency that doesn’t exist on Ubicloud’s arm64 image, we recommend installing the dependency manually for the time being.
If you need commonly used packages on arm64 that are already installed on x64, please contact us at [support@ubicloud.com](mailto:support@ubicloud.com).
## Ubuntu 24.04 Migration
On November 23, 2025, we updated the default operating system for Ubicloud runners from Ubuntu 22.04 to Ubuntu 24.04.
GitHub changed the default version of the `ubuntu-latest` label from Ubuntu 22.04 to Ubuntu 24.04 in [early 2025](https://github.com/actions/runner-images/issues/10636). We waited for the Ubuntu 24 image to mature before making the switch.
All jobs using the labels `ubicloud`, `ubicloud-standard-2`, `ubicloud-standard-4`, `ubicloud-standard-8`, `ubicloud-standard-16`, `ubicloud-standard-30`, `ubicloud-standard-60`, `ubicloud-arm`, `ubicloud-standard-2-arm`, `ubicloud-standard-4-arm`, `ubicloud-standard-8-arm`, `ubicloud-standard-16-arm`, `ubicloud-standard-30-arm` or `ubicloud-standard-60-arm` now run on Ubuntu 24.04.
If your workflow depends on a specific Ubuntu version, we recommend explicitly specifying the operating system in the runner label.
To continue using Ubuntu 22.04, specify the version in the label. For example, use `ubicloud-standard-2-ubuntu-2204` instead of `ubicloud-standard-2`.
Ubuntu 22.04 and Ubuntu 24.04 include similar pre-installed software, but version differences may exist. You can find the lists of pre-installed software for [Ubuntu 22.04](https://github.com/actions/runner-images/blob/main/images/ubuntu/Ubuntu2204-Readme.md) and [Ubuntu 24.04](https://github.com/actions/runner-images/blob/main/images/ubuntu/Ubuntu2404-Readme.md) in GitHub’s repository.
# Ubicloud Cache
Source: https://ubicloud.com/docs/github-actions-integration/ubicloud-cache
This guide describes how to integrate your GitHub Action workflows with Ubicloud Cache.
Ubicloud starts a clean and ephemeral VM for each new workflow job for security purposes. Fresh VMs need to download job dependencies, leading to increased network usage, longer runtimes, and higher costs. GitHub Actions cache allows to share dependencies and other commonly reused files between workflow jobs.
Ubicloud Cache improves on the GitHub Actions cache by storing cached files closer to Ubicloud runners, making cache downloading/uploading more reliable and up to 4x faster. Ubicloud Cache offers 30 GB of free storage per repository per week, at 3x of GitHub’s default cache size. If you exceed this limit, the oldest caches are automatically deleted to make space for new ones. Additionally, caches that haven't been accessed in the past seven days are automatically removed.
There are two ways to use Ubicloud Cache:
1. [Ubicloud Transparent Cache](#ubicloud-transparent-cache) (Recommended)
2. [Ubicloud Cache Actions](#ubicloud-cache-actions)
## Ubicloud Transparent Cache
It is the recommended way to use Ubicloud's cache infrastructure. Transparent cache gives you immense flexibility when using Ubicloud’s runners, allowing you to switch between Ubicloud’s runners and GitHub’s default runners without modifying your workflow files.
Transparent cache is enabled by default. If you need to disable it, you can do so in the Ubicloud console.
Transparent cache supports all actions caching files, including:
* **File/Folder Caching** with `actions/cache`: Cache specific files or directories like dependencies or build outputs to speed up workflows.
* **Package Manager Caching** with `actions/setup-*`: Automatically caches dependencies for languages such as Python (`actions/setup-python`), Node.js (`actions/setup-node`), and Go (`actions/setup-go`). 3rd party actions are also supported for some languages like Rust (`Swatinem/rust-cache`).
* **Docker Layer Caching** with `docker/build-push-action`: Speeds up container builds by caching unchanged layers using `type=gha`:
```yaml theme={null}
- name: Build and push Docker images
uses: docker/build-push-action
with:
cache-from: type=gha
cache-to: type=gha
```
Transparent cache improves download performance by 4x and upload performance by 3x on Ubicloud runners, with ongoing efforts to enhance upload speeds even further.
For a deep dive into its implementation and detailed performance metrics, check out the [GitHub Actions Transparent Cache Blog Post](https://www.ubicloud.com/blog/github-actions-transparent-cache).
## Ubicloud Cache Actions
Ubicloud Cache Actions are drop-in replacements for `actions/cache` as `ubicloud/cache` and `actions/setup-*` as `ubicloud/setup-*`.
It requires you to change the action names in your workflow files. It also doesn't support docker layer caching. Only advantage of using Ubicloud Cache Actions over Transparent Cache is that it has 65% better save performance as it is optimized to increase concurrency during file uploads. We are working on improving Transparent Cache's upload performance to match it.
### Migrating to `ubicloud/cache`
Replace `actions/cache` with `ubicloud/cache` in your workflows. Ubicloud Cache fully supports GitHub Actions Cache functionality.
```yaml theme={null}
- uses: actions/cache@v4
+ uses: ubicloud/cache@v4
with:
path: ~/.cache/pip
key: ${{ runner.os }}-pip-${{ hashFiles('**/requirements.txt') }}
restore-keys: |
${{ runner.os }}-pip-
```
### Migrating to Ubicloud's Language-Specific Cache Actions
Ubicloud offers optimized replacements for `actions/setup-*`. To migrate, replace `actions/setup-*` with `ubicloud/setup-*` in your workflows.
### Java
```yaml theme={null}
- uses: actions/setup-java@v4
+ uses: ubicloud/setup-java@v4
```
### .Net
```yaml theme={null}
- uses: actions/setup-dotnet@v4
+ uses: ubicloud/setup-dotnet@v4
```
### Python
```yaml theme={null}
- uses: actions/setup-python@v5
+ uses: ubicloud/setup-python@v5
```
### Go
```yaml theme={null}
- uses: actions/setup-go@v5
+ uses: ubicloud/setup-go@v5
```
### NodeJS
```yaml theme={null}
- uses: actions/setup-node@v4
+ uses: ubicloud/setup-node@v4
```
Some other popular languages have their own setup-\* actions, not maintained by GitHub. Ubicloud offers replacements for some of the most popular ones.
### Ruby
```yaml theme={null}
- uses: actions/setup-ruby@v1
+ uses: ubicloud/setup-ruby@v1
```
### Rust
```yaml theme={null}
- uses: Swatinem/rust-cache@v2
+ uses: ubicloud/rust-cache@v2
```
# Use Premium Runners
Source: https://ubicloud.com/docs/github-actions-integration/use-premium-runners
Ubicloud Premium Runners are powered by AMD Ryzen 9 7950X3D CPUs, high-performance gaming processors optimized for single-thread speed and fast CI execution, priced at just 1/5th the cost of GitHub-hosted runners.
They're ideal for large monorepos, test-heavy workflows, or any job that benefits from high CPU clock speeds.
When you merge this change, GitHub Actions will start using Ubicloud runners. If your workflow file has builds configured on merging a change, you see your build start in your project's Actions tab. If not, you can manually start a build to see the change take effect.
By default, `ubicloud-standard-2` starts a VM with the same vCPU and memory configuration as paid GitHub runners. Given Ubicloud's 10x price advantage, you might want to pick a more powerful VM such as `ubicloud-standard-8` and see if your pipelines move faster. You can find the full list of runners and their prices in the [Pricing documents](/about/pricing#github-actions).
**Summary:** In this guide, you created a Ubicloud account and integrated that account with your GitHub Account. You then changed a single line in your workflow file to use Ubicloud runners.
This resulted in 10x lower prices and faster CI/CD, with Ubicloud's source code openly available under the AGPL license.
# Runner Types
Source: https://ubicloud.com/docs/github-actions-integration/runner-types
Ubicloud offers a wide variety of runner types and sizes, allowing you to choose based on your specific needs.
By default, using `runs-on: ubicloud` provisions a 2 vCPU x64 Ubuntu 24.04 runner. You can specify the runner size, for example, `runs-on: ubicloud-standard-8` provisions an 8 vCPU runner. You can even specify the operating system, such as `runs-on: ubicloud-standard-4-ubuntu-2204`, which provisions a 4 vCPU runner with Ubuntu 22.04.
## Available Labels
| Workflow label | OS | vCPU | Memory | Disk |
| -------------------------- | ------------ | ---- | ------ | ----- |
| `ubicloud-standard-2` | Ubuntu 24.04 | 2 | 8GB | 75GB |
| `ubicloud-standard-4` | Ubuntu 24.04 | 4 | 16GB | 150GB |
| `ubicloud-standard-8` | Ubuntu 24.04 | 8 | 32GB | 200GB |
| `ubicloud-standard-16` | Ubuntu 24.04 | 16 | 64GB | 300GB |
| `ubicloud-standard-30` | Ubuntu 24.04 | 30 | 120GB | 400GB |
| `ubicloud-standard-2-arm` | Ubuntu 24.04 | 2 | 6GB | 86GB |
| `ubicloud-standard-4-arm` | Ubuntu 24.04 | 4 | 12GB | 150GB |
| `ubicloud-standard-8-arm` | Ubuntu 24.04 | 8 | 24GB | 200GB |
| `ubicloud-standard-16-arm` | Ubuntu 24.04 | 16 | 48GB | 300GB |
| `ubicloud-standard-30-arm` | Ubuntu 24.04 | 30 | 90GB | 400GB |
You can append `-ubuntu-2204` or `-ubuntu-2404` to explicitly set the operating system.
Ubicloud runners support the following label patterns:
```yaml theme={null}
# x64 runners
runs-on: ubicloud-standard-{vcpu}-{os}
# ubicloud -> 2 vCPU x64 Ubuntu 24.04 runner
# ubicloud-standard-8 -> 8 vCPU x64 Ubuntu 24.04 runner
# ubicloud-standard-4-ubuntu-2204 -> 4 vCPU x64 Ubuntu 22.04 runner
# arm64 runners
runs-on: ubicloud-standard-{vcpu}-arm-{os}
# ubicloud-arm -> 2 vCPU arm64 Ubuntu 24.04 runner
# ubicloud-standard-8-arm -> 8 vCPU arm64 Ubuntu 24.04 runner
# ubicloud-standard-4-arm-ubuntu-2204 -> 4 vCPU arm64 Ubuntu 22.04 runner
```
The supported number of vCPUs are 2 (default), 4, 8, 16, and 30.
The operation system can be `ubuntu-2204`, `ubuntu-2404` (default).
You can find all the available labels [here](https://github.com/ubicloud/ubicloud/blob/main/config/github_runner_labels.yml).
**Deprecation of GPU runners**: We will be deprecating our GPU runners, effective December 31, 2025. After this date, GPU runners will no longer be available, and any jobs on these runners will need to be migrated to other runner types
## x64 Runners
Ubicloud x64 **standard runners** are powered by AMD EPYC 9454P processors, with every two x64 vCPUs corresponding to one physical core. All Ubicloud runners are equipped with modern hardware, including new generation processors, NVMe SSDs, and high-speed networking. This enables us to deliver better price-performance across our services.
For our customers who seek even higher performance, we offer **premium runners** powered by AMD Ryzen 9 7950X3D CPUs. These processors are optimized for single-thread speed and fast CI execution, making them ideal for large monorepos, test-heavy workflows, or any job that benefits from high CPU clock speeds. Learn how to enable premium runners [here](/github-actions-integration/use-premium-runners).
Our x64 runner images are fully compatible with default runners. We generate them using the official HashiCorp packer templates published by GitHub in the [actions/runner-images](https://github.com/actions/runner-images) repository.
We update the images monthly after GitHub releases a new version. We don't deploy new images on the same day as GitHub to avoid potential issues. In the past, GitHub has encountered problems with new images and had to quickly rollback.
To prevent any disruption to our customers, we typically deploy new images a few days after GitHub's deployment is complete.
If you notice any mismatches between Ubicloud x64 runners and the official GitHub runners, please reach out to us at [support@ubicloud.com](mailto:support@ubicloud.com).
If your workflow has a package dependency that doesn’t exist on Ubicloud’s image, we recommend installing the dependency manually for the time being or creating an issue at [actions/runner-images](https://github.com/actions/runner-images) repository.
## arm64 Runners
Ubicloud arm64 runners are powered by Ampere Altra Q80-30 processors, with each arm64 vCPU backed by a dedicated physical core. This ensures consistent, high-performance computing for your workloads.
GitHub launched official arm64 runners at the beginning of 2025. However, GitHub doesn't create arm64 images; their partner does. Unfortunately, they don't publish a packer template like the one for x64 images. As a result, Ubicloud builds its own Ubuntu arm64 image, and our arm64 runners don’t have all the pre-installed packages that are available on x64.
Arm shares a list of installed packages in the [actions/partner-runner-images](https://github.com/actions/partner-runner-images) repository, and we try to keep it similar. However, our images might not be identical to GitHub's arm64 images since they don't share the exact template and versions.
If your workflow has a package dependency that doesn’t exist on Ubicloud’s arm64 image, we recommend installing the dependency manually for the time being.
If you need commonly used packages on arm64 that are already installed on x64, please contact us at [support@ubicloud.com](mailto:support@ubicloud.com).
## Ubuntu 24.04 Migration
On November 23, 2025, we updated the default operating system for Ubicloud runners from Ubuntu 22.04 to Ubuntu 24.04.
GitHub changed the default version of the `ubuntu-latest` label from Ubuntu 22.04 to Ubuntu 24.04 in [early 2025](https://github.com/actions/runner-images/issues/10636). We waited for the Ubuntu 24 image to mature before making the switch.
All jobs using the labels `ubicloud`, `ubicloud-standard-2`, `ubicloud-standard-4`, `ubicloud-standard-8`, `ubicloud-standard-16`, `ubicloud-standard-30`, `ubicloud-standard-60`, `ubicloud-arm`, `ubicloud-standard-2-arm`, `ubicloud-standard-4-arm`, `ubicloud-standard-8-arm`, `ubicloud-standard-16-arm`, `ubicloud-standard-30-arm` or `ubicloud-standard-60-arm` now run on Ubuntu 24.04.
If your workflow depends on a specific Ubuntu version, we recommend explicitly specifying the operating system in the runner label.
To continue using Ubuntu 22.04, specify the version in the label. For example, use `ubicloud-standard-2-ubuntu-2204` instead of `ubicloud-standard-2`.
Ubuntu 22.04 and Ubuntu 24.04 include similar pre-installed software, but version differences may exist. You can find the lists of pre-installed software for [Ubuntu 22.04](https://github.com/actions/runner-images/blob/main/images/ubuntu/Ubuntu2204-Readme.md) and [Ubuntu 24.04](https://github.com/actions/runner-images/blob/main/images/ubuntu/Ubuntu2404-Readme.md) in GitHub’s repository.
# Ubicloud Cache
Source: https://ubicloud.com/docs/github-actions-integration/ubicloud-cache
This guide describes how to integrate your GitHub Action workflows with Ubicloud Cache.
Ubicloud starts a clean and ephemeral VM for each new workflow job for security purposes. Fresh VMs need to download job dependencies, leading to increased network usage, longer runtimes, and higher costs. GitHub Actions cache allows to share dependencies and other commonly reused files between workflow jobs.
Ubicloud Cache improves on the GitHub Actions cache by storing cached files closer to Ubicloud runners, making cache downloading/uploading more reliable and up to 4x faster. Ubicloud Cache offers 30 GB of free storage per repository per week, at 3x of GitHub’s default cache size. If you exceed this limit, the oldest caches are automatically deleted to make space for new ones. Additionally, caches that haven't been accessed in the past seven days are automatically removed.
There are two ways to use Ubicloud Cache:
1. [Ubicloud Transparent Cache](#ubicloud-transparent-cache) (Recommended)
2. [Ubicloud Cache Actions](#ubicloud-cache-actions)
## Ubicloud Transparent Cache
It is the recommended way to use Ubicloud's cache infrastructure. Transparent cache gives you immense flexibility when using Ubicloud’s runners, allowing you to switch between Ubicloud’s runners and GitHub’s default runners without modifying your workflow files.
Transparent cache is enabled by default. If you need to disable it, you can do so in the Ubicloud console.
Transparent cache supports all actions caching files, including:
* **File/Folder Caching** with `actions/cache`: Cache specific files or directories like dependencies or build outputs to speed up workflows.
* **Package Manager Caching** with `actions/setup-*`: Automatically caches dependencies for languages such as Python (`actions/setup-python`), Node.js (`actions/setup-node`), and Go (`actions/setup-go`). 3rd party actions are also supported for some languages like Rust (`Swatinem/rust-cache`).
* **Docker Layer Caching** with `docker/build-push-action`: Speeds up container builds by caching unchanged layers using `type=gha`:
```yaml theme={null}
- name: Build and push Docker images
uses: docker/build-push-action
with:
cache-from: type=gha
cache-to: type=gha
```
Transparent cache improves download performance by 4x and upload performance by 3x on Ubicloud runners, with ongoing efforts to enhance upload speeds even further.
For a deep dive into its implementation and detailed performance metrics, check out the [GitHub Actions Transparent Cache Blog Post](https://www.ubicloud.com/blog/github-actions-transparent-cache).
## Ubicloud Cache Actions
Ubicloud Cache Actions are drop-in replacements for `actions/cache` as `ubicloud/cache` and `actions/setup-*` as `ubicloud/setup-*`.
It requires you to change the action names in your workflow files. It also doesn't support docker layer caching. Only advantage of using Ubicloud Cache Actions over Transparent Cache is that it has 65% better save performance as it is optimized to increase concurrency during file uploads. We are working on improving Transparent Cache's upload performance to match it.
### Migrating to `ubicloud/cache`
Replace `actions/cache` with `ubicloud/cache` in your workflows. Ubicloud Cache fully supports GitHub Actions Cache functionality.
```yaml theme={null}
- uses: actions/cache@v4
+ uses: ubicloud/cache@v4
with:
path: ~/.cache/pip
key: ${{ runner.os }}-pip-${{ hashFiles('**/requirements.txt') }}
restore-keys: |
${{ runner.os }}-pip-
```
### Migrating to Ubicloud's Language-Specific Cache Actions
Ubicloud offers optimized replacements for `actions/setup-*`. To migrate, replace `actions/setup-*` with `ubicloud/setup-*` in your workflows.
### Java
```yaml theme={null}
- uses: actions/setup-java@v4
+ uses: ubicloud/setup-java@v4
```
### .Net
```yaml theme={null}
- uses: actions/setup-dotnet@v4
+ uses: ubicloud/setup-dotnet@v4
```
### Python
```yaml theme={null}
- uses: actions/setup-python@v5
+ uses: ubicloud/setup-python@v5
```
### Go
```yaml theme={null}
- uses: actions/setup-go@v5
+ uses: ubicloud/setup-go@v5
```
### NodeJS
```yaml theme={null}
- uses: actions/setup-node@v4
+ uses: ubicloud/setup-node@v4
```
Some other popular languages have their own setup-\* actions, not maintained by GitHub. Ubicloud offers replacements for some of the most popular ones.
### Ruby
```yaml theme={null}
- uses: actions/setup-ruby@v1
+ uses: ubicloud/setup-ruby@v1
```
### Rust
```yaml theme={null}
- uses: Swatinem/rust-cache@v2
+ uses: ubicloud/rust-cache@v2
```
# Use Premium Runners
Source: https://ubicloud.com/docs/github-actions-integration/use-premium-runners
Ubicloud Premium Runners are powered by AMD Ryzen 9 7950X3D CPUs, high-performance gaming processors optimized for single-thread speed and fast CI execution, priced at just 1/5th the cost of GitHub-hosted runners.
They're ideal for large monorepos, test-heavy workflows, or any job that benefits from high CPU clock speeds.
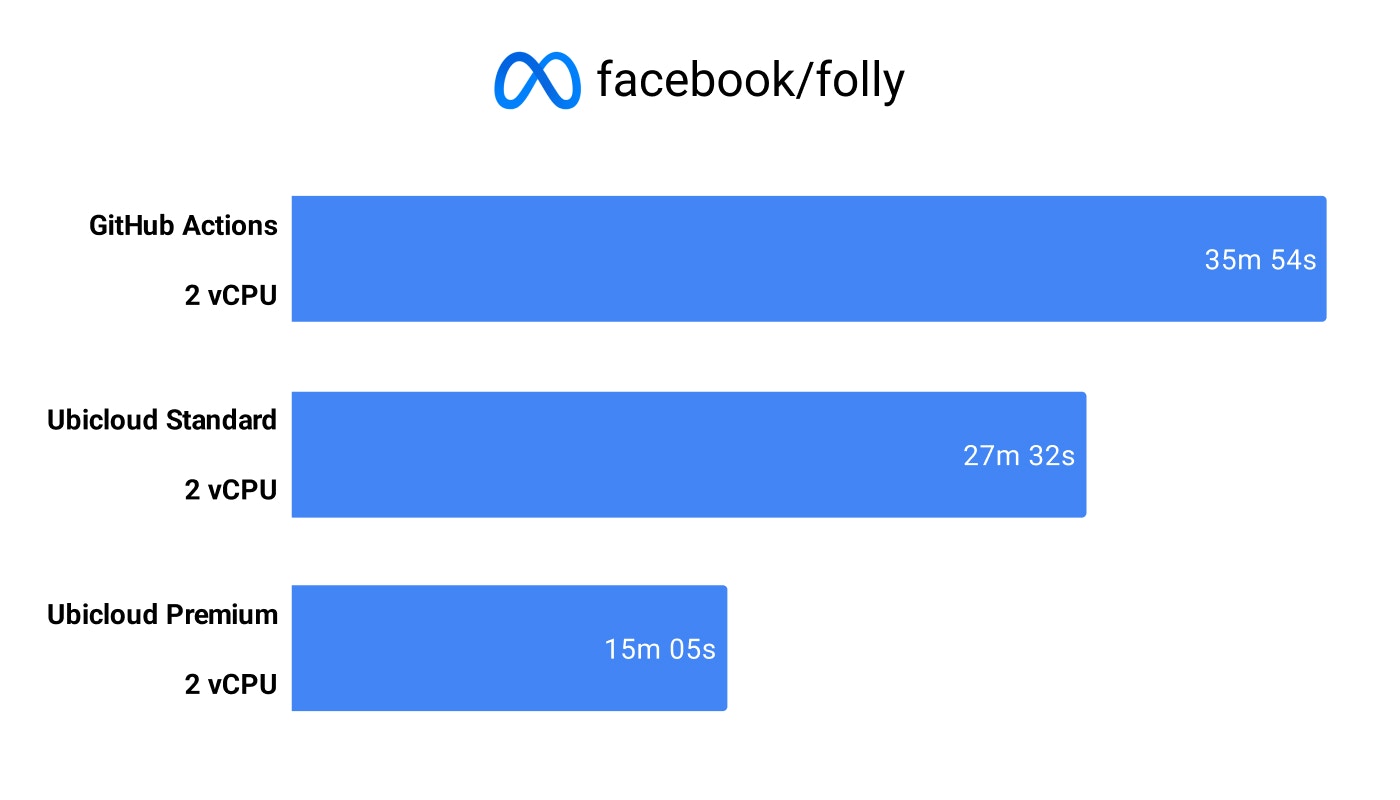 ## How to enable Premium Runners
Premium Runners are enabled at the account level. Once enabled, we'll start routing your jobs to our premium fleet automatically. No changes needed in your workflow files.
1. Go to the [Ubicloud Console](https://console.ubicloud.com/)
2. Navigate to **GitHub Runners** → **Settings**
3. Toggle on **Enable Premium Runners**
That's it. Your jobs will now run on high-performance CPUs.
## How to enable Premium Runners
Premium Runners are enabled at the account level. Once enabled, we'll start routing your jobs to our premium fleet automatically. No changes needed in your workflow files.
1. Go to the [Ubicloud Console](https://console.ubicloud.com/)
2. Navigate to **GitHub Runners** → **Settings**
3. Toggle on **Enable Premium Runners**
That's it. Your jobs will now run on high-performance CPUs.
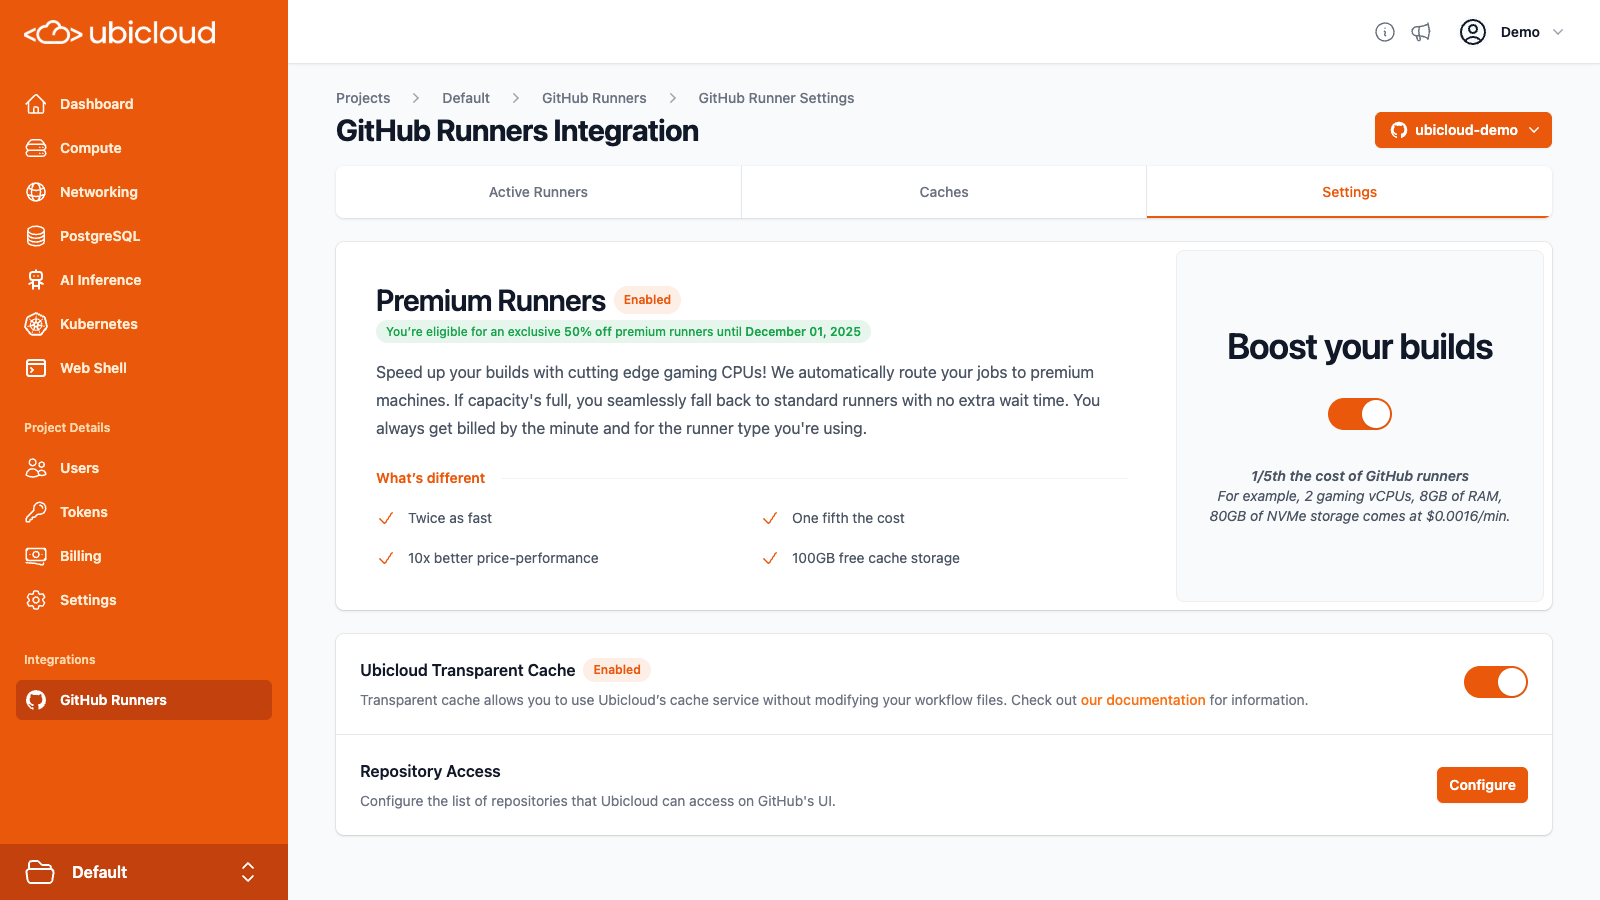 ## Why Faster Builds Matter
Build and test jobs don't just consume compute, they block developer time.
When a developer pushes code and waits 15–20 minutes for CI to complete, that's time spent:
* Waiting to merge a pull request
* Context-switching to other work
* Losing momentum on the task at hand
Now multiply that across an engineering team. Even **saving 3–5 minutes per job** adds up to:
* Dozens of hours per week in recovered dev time
* Fewer PRs left idle due to slow feedback
* Faster iteration on features and bug fixes
* Higher team velocity, fewer productivity stalls
> **Example**: If your team runs 1,000 jobs/week and Premium Runners cut job time by 4 minutes on average, that's over **66 hours of developer time saved every month**.
Ubicloud Premium Runners aren't just about faster CI, they're about giving your engineers back their time so they can build, ship, and move faster.
# Inference API Keys
Source: https://ubicloud.com/docs/inference/api-key
Securely manage and control access to inference endpoints with API keys.
Inference API keys act as secure authentication tokens, validating requests to inference endpoints. They ensure that only authorized users and applications can access and interact with inference endpoints. Users can generate, view, and revoke API keys, providing flexible control over access.
## Why Faster Builds Matter
Build and test jobs don't just consume compute, they block developer time.
When a developer pushes code and waits 15–20 minutes for CI to complete, that's time spent:
* Waiting to merge a pull request
* Context-switching to other work
* Losing momentum on the task at hand
Now multiply that across an engineering team. Even **saving 3–5 minutes per job** adds up to:
* Dozens of hours per week in recovered dev time
* Fewer PRs left idle due to slow feedback
* Faster iteration on features and bug fixes
* Higher team velocity, fewer productivity stalls
> **Example**: If your team runs 1,000 jobs/week and Premium Runners cut job time by 4 minutes on average, that's over **66 hours of developer time saved every month**.
Ubicloud Premium Runners aren't just about faster CI, they're about giving your engineers back their time so they can build, ship, and move faster.
# Inference API Keys
Source: https://ubicloud.com/docs/inference/api-key
Securely manage and control access to inference endpoints with API keys.
Inference API keys act as secure authentication tokens, validating requests to inference endpoints. They ensure that only authorized users and applications can access and interact with inference endpoints. Users can generate, view, and revoke API keys, providing flexible control over access.
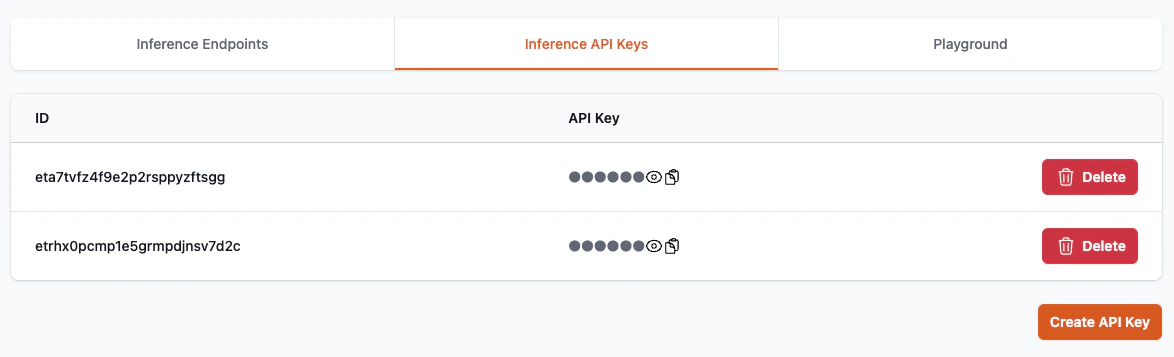 # Tutorial: Chat Completion (Python)
Source: https://ubicloud.com/docs/inference/chat-completion-python
A Python tutorial for using Ubicloud’s managed AI Inference Endpoints.
The following is a step-by-step Python tutorial on using Ubicloud’s managed AI Inference Endpoints.
This guide focuses on Python notebook environments like Google Colab or Jupyter Notebook but also works for a standard pip environment for running Python scripts locally.
All scripts and examples are available in this [Google Colab Notebook](https://colab.research.google.com/drive/1jKedtEzpAJx5Tzn7KuYZUoM0ti5UJkXK?usp=sharing).
## Overview of Concepts
* Ubicloud AI Inference Endpoints: These endpoints host AI models that are compatible with the OpenAI API. This means you can use the familiar OpenAI Python SDK to interact with these models.
* OpenAI Python SDK:
The OpenAI SDK simplifies sending requests to an AI model and processing the responses. You’ll use it to send chat prompts, receive streaming or full responses, and even request structured (JSON) outputs.
* API Key and Base URL:
To authenticate and send requests to Ubicloud’s endpoints, you need your API key and the endpoint’s base URL (both available from your Ubicloud Dashboard).
* Chat Completion modes: Ubicloud supports several ways to interact with the AI models:
* Non-Streaming: Returns the full response in one go.
* Streaming: Returns the response incrementally, which is useful for long answers or real-time processing.
* JSON Output: Formats the response as a JSON object for structured data extraction.
* Tool Calling: Invokes tools when needed.
## Install the OpenAI Python Package
In your Jupyter Notebook or Colab, start by installing (or upgrading) the openai package. You can do this using a cell with the following command:
`%pip install openai --upgrade --quiet`
This command installs the latest version of the OpenAI SDK, which is fully compatible with Ubicloud’s endpoints.
If you are using a terminal or a vanilla Python environment, you can run:
`pip install openai --upgrade`
## Import Libraries and Setup Your Environment
Import the necessary libraries and set up your environment. Here we use Colab’s built-in methods for retrieving stored user data. If you’re on another notebook platform, adjust the API key retrieval accordingly.
```python theme={null}
from google.colab import userdata # This is specific to Colab; adjust if using another environment.
import json
import openai
# Retrieve your Ubicloud API key (replace with your method of storing or retrieving credentials)
INFERENCE_API_KEY = userdata.get("UBICLOUD_API_KEY") # or simply: INFERENCE_API_KEY = "your_api_key_here"
# Define the model name and base URL from your Ubicloud Dashboard
MODEL = "llama-3-3-70b-turbo" # Example model; update as needed.
BASE_URL = f"https://{MODEL}.ai.ubicloud.com/v1"
# Create the OpenAI client instance configured for Ubicloud endpoints.
client = openai.OpenAI(
api_key=INFERENCE_API_KEY,
base_url=BASE_URL
)
```
The `INFERENCE_API_KEY` is used to authenticate your requests.
The `MODEL` and `BASE_URL` are specific to your chosen model and Ubicloud deployment.
## Example 1: Non-Streaming Chat Completion
In this example, you will send a simple chat message to the model and print the full response at once.
```python theme={null}
# Non-streaming chat completion: Send a simple message and get the full response.
completion = client.chat.completions.create(
model=MODEL,
messages=[
{
"role": "user",
"content": "Say this is a test",
},
],
)
# Print the response message from the model.
print(completion.choices[0].message.content)
```
The messages parameter is a list of dictionaries representing the conversation.
The response is accessed through `completion.choices[0].message.content`.
## Example 2: Streaming Chat Completion
This example demonstrates how to receive the model’s output in a streaming manner (chunk by chunk). This is especially useful when dealing with long responses or when you want to start processing output before the entire response is ready.
```python theme={null}
# Streaming chat completion: The response is returned in chunks.
stream = client.chat.completions.create(
model=MODEL,
messages=[
{
"role": "user",
"content": "How do I print hello world in Python?",
},
],
stream=True, # Enable streaming mode.
)
# Iterate over the response chunks and print them as they are received.
for chunk in stream:
if not chunk.choices:
continue # Skip if there are no choices in this chunk.
# Print each piece of content without a newline until the full message is complete.
print(chunk.choices[0].delta.content, end="")
# Finally, print a newline after the streaming output.
print()
```
Setting `stream=True` tells the API to return partial results as they become available.
The loop iterates over each chunk and prints the delta (the latest addition) of the message.
## Example 3: Chat Completion with JSON Output
In some cases, you might want the model to produce a structured output, such as a JSON object. This example shows how to request JSON output directly from the model.
```python theme={null}
json_completion = client.chat.completions.create(
model=MODEL,
messages=[
{
"role": "user",
"content": """
I have three apples and two bananas.
Generate a JSON object with two fields: apple and banana.
Each field should represent the respective count of the mentioned fruits.
""",
},
],
response_format={"type": "json_object"}, # Request JSON output.
)
# Load the JSON string into a Python dictionary.
result = json.loads(json_completion.choices[0].message.content)
print(result)
```
The prompt instructs the model to output a JSON object.
The response\_format parameter specifies that the expected output is a JSON object.
The `json.loads()` function converts the JSON-formatted string into a Python dictionary for further manipulation.
## Example 4: Chat Completion with Tool Calling
You can define tools (functions) that the model can invoke to perform specific tasks. Here’s how you can set up a calculator function and integrate it using the model’s function calling capabilities:
```python theme={null}
# Define the calculator function
def calculator(expression: str):
try:
result = eval(expression) # Warning: using eval is unsafe!
return {"result": result}
except Exception as e:
return {"error": str(e)}
# Define the task
TASK = "Calculate 123*456+789"
# Define the tools
TOOLS = [{
"type": "function",
"function": {
"name": "calculator",
"description": "Evaluate a basic arithmetic expression",
"parameters": {
"type": "object",
"properties": {
"expression": {
"type": "string",
"description": "The arithmetic expression to evaluate, e.g., '2+2'"
}
},
"required": ["expression"]
}
}
}]
# Create a chat completion with tool calling
tool_completion = client.chat.completions.create(
model="gpt-3.5-turbo",
messages=[{"role": "user", "content": TASK}],
tools=TOOLS,
tool_choice="auto"
)
# Process the tool call
message = tool_completion.choices[0].message
if message.tool_calls:
tool_call = message.tool_calls[0].function
arguments = json.loads(tool_call.arguments)
tool_result = calculator(**arguments)
print(f"Function called: {tool_call.name}")
print(f"Arguments: {arguments}")
print(f"Result: {tool_result}")
else:
print("No tool call detected in the response.")
```
When making a chat completion request, we include the tool and set tool\_choice="auto" so the model can decide whether to call it. If a tool call occurs, we extract the function name and arguments, execute the calculator, and print the result. If further interaction with the model is needed, we can construct a new message based on the result from the calculator.
## Summary
By following these steps, you have learned how to:
* Set up your environment: Install the OpenAI Python SDK and import required libraries.
* Configure the client: Use your Ubicloud API key, model name, and base URL.
* Perform chat completions: Both in non-streaming and streaming modes.
* Handle structured outputs: Request and process JSON output from the model.
* Invoke tools: Enable the model to call tools when needed.
This tutorial provides a foundation for using Ubicloud’s managed AI inference endpoints in your Python projects, leveraging the familiar OpenAI API interface.
Feel free to customize the prompts, model names, and other parameters based on your specific use case and the models available in your Ubicloud Dashboard. Enjoy building with Ubicloud’s AI inference endpoints!
# Inference Endpoints
Source: https://ubicloud.com/docs/inference/endpoint
Access a curated suite of advanced generative AI models through standardized APIs, designed for data privacy, transparency, and performance.
Inference Endpoints offer OpenAI-compatible APIs, enabling effortless integration with existing systems while reducing the likelihood of vendor lock-in.
Privacy is a top priority for inference endpoints, as they neither store nor reuse user data.
Built on open-source, inference endpoints provide transparency in their operations and functionality.
The Inference Endpoints tab offers insights into usage, pricing, and the capabilities of each available endpoint.
# Tutorial: Chat Completion (Python)
Source: https://ubicloud.com/docs/inference/chat-completion-python
A Python tutorial for using Ubicloud’s managed AI Inference Endpoints.
The following is a step-by-step Python tutorial on using Ubicloud’s managed AI Inference Endpoints.
This guide focuses on Python notebook environments like Google Colab or Jupyter Notebook but also works for a standard pip environment for running Python scripts locally.
All scripts and examples are available in this [Google Colab Notebook](https://colab.research.google.com/drive/1jKedtEzpAJx5Tzn7KuYZUoM0ti5UJkXK?usp=sharing).
## Overview of Concepts
* Ubicloud AI Inference Endpoints: These endpoints host AI models that are compatible with the OpenAI API. This means you can use the familiar OpenAI Python SDK to interact with these models.
* OpenAI Python SDK:
The OpenAI SDK simplifies sending requests to an AI model and processing the responses. You’ll use it to send chat prompts, receive streaming or full responses, and even request structured (JSON) outputs.
* API Key and Base URL:
To authenticate and send requests to Ubicloud’s endpoints, you need your API key and the endpoint’s base URL (both available from your Ubicloud Dashboard).
* Chat Completion modes: Ubicloud supports several ways to interact with the AI models:
* Non-Streaming: Returns the full response in one go.
* Streaming: Returns the response incrementally, which is useful for long answers or real-time processing.
* JSON Output: Formats the response as a JSON object for structured data extraction.
* Tool Calling: Invokes tools when needed.
## Install the OpenAI Python Package
In your Jupyter Notebook or Colab, start by installing (or upgrading) the openai package. You can do this using a cell with the following command:
`%pip install openai --upgrade --quiet`
This command installs the latest version of the OpenAI SDK, which is fully compatible with Ubicloud’s endpoints.
If you are using a terminal or a vanilla Python environment, you can run:
`pip install openai --upgrade`
## Import Libraries and Setup Your Environment
Import the necessary libraries and set up your environment. Here we use Colab’s built-in methods for retrieving stored user data. If you’re on another notebook platform, adjust the API key retrieval accordingly.
```python theme={null}
from google.colab import userdata # This is specific to Colab; adjust if using another environment.
import json
import openai
# Retrieve your Ubicloud API key (replace with your method of storing or retrieving credentials)
INFERENCE_API_KEY = userdata.get("UBICLOUD_API_KEY") # or simply: INFERENCE_API_KEY = "your_api_key_here"
# Define the model name and base URL from your Ubicloud Dashboard
MODEL = "llama-3-3-70b-turbo" # Example model; update as needed.
BASE_URL = f"https://{MODEL}.ai.ubicloud.com/v1"
# Create the OpenAI client instance configured for Ubicloud endpoints.
client = openai.OpenAI(
api_key=INFERENCE_API_KEY,
base_url=BASE_URL
)
```
The `INFERENCE_API_KEY` is used to authenticate your requests.
The `MODEL` and `BASE_URL` are specific to your chosen model and Ubicloud deployment.
## Example 1: Non-Streaming Chat Completion
In this example, you will send a simple chat message to the model and print the full response at once.
```python theme={null}
# Non-streaming chat completion: Send a simple message and get the full response.
completion = client.chat.completions.create(
model=MODEL,
messages=[
{
"role": "user",
"content": "Say this is a test",
},
],
)
# Print the response message from the model.
print(completion.choices[0].message.content)
```
The messages parameter is a list of dictionaries representing the conversation.
The response is accessed through `completion.choices[0].message.content`.
## Example 2: Streaming Chat Completion
This example demonstrates how to receive the model’s output in a streaming manner (chunk by chunk). This is especially useful when dealing with long responses or when you want to start processing output before the entire response is ready.
```python theme={null}
# Streaming chat completion: The response is returned in chunks.
stream = client.chat.completions.create(
model=MODEL,
messages=[
{
"role": "user",
"content": "How do I print hello world in Python?",
},
],
stream=True, # Enable streaming mode.
)
# Iterate over the response chunks and print them as they are received.
for chunk in stream:
if not chunk.choices:
continue # Skip if there are no choices in this chunk.
# Print each piece of content without a newline until the full message is complete.
print(chunk.choices[0].delta.content, end="")
# Finally, print a newline after the streaming output.
print()
```
Setting `stream=True` tells the API to return partial results as they become available.
The loop iterates over each chunk and prints the delta (the latest addition) of the message.
## Example 3: Chat Completion with JSON Output
In some cases, you might want the model to produce a structured output, such as a JSON object. This example shows how to request JSON output directly from the model.
```python theme={null}
json_completion = client.chat.completions.create(
model=MODEL,
messages=[
{
"role": "user",
"content": """
I have three apples and two bananas.
Generate a JSON object with two fields: apple and banana.
Each field should represent the respective count of the mentioned fruits.
""",
},
],
response_format={"type": "json_object"}, # Request JSON output.
)
# Load the JSON string into a Python dictionary.
result = json.loads(json_completion.choices[0].message.content)
print(result)
```
The prompt instructs the model to output a JSON object.
The response\_format parameter specifies that the expected output is a JSON object.
The `json.loads()` function converts the JSON-formatted string into a Python dictionary for further manipulation.
## Example 4: Chat Completion with Tool Calling
You can define tools (functions) that the model can invoke to perform specific tasks. Here’s how you can set up a calculator function and integrate it using the model’s function calling capabilities:
```python theme={null}
# Define the calculator function
def calculator(expression: str):
try:
result = eval(expression) # Warning: using eval is unsafe!
return {"result": result}
except Exception as e:
return {"error": str(e)}
# Define the task
TASK = "Calculate 123*456+789"
# Define the tools
TOOLS = [{
"type": "function",
"function": {
"name": "calculator",
"description": "Evaluate a basic arithmetic expression",
"parameters": {
"type": "object",
"properties": {
"expression": {
"type": "string",
"description": "The arithmetic expression to evaluate, e.g., '2+2'"
}
},
"required": ["expression"]
}
}
}]
# Create a chat completion with tool calling
tool_completion = client.chat.completions.create(
model="gpt-3.5-turbo",
messages=[{"role": "user", "content": TASK}],
tools=TOOLS,
tool_choice="auto"
)
# Process the tool call
message = tool_completion.choices[0].message
if message.tool_calls:
tool_call = message.tool_calls[0].function
arguments = json.loads(tool_call.arguments)
tool_result = calculator(**arguments)
print(f"Function called: {tool_call.name}")
print(f"Arguments: {arguments}")
print(f"Result: {tool_result}")
else:
print("No tool call detected in the response.")
```
When making a chat completion request, we include the tool and set tool\_choice="auto" so the model can decide whether to call it. If a tool call occurs, we extract the function name and arguments, execute the calculator, and print the result. If further interaction with the model is needed, we can construct a new message based on the result from the calculator.
## Summary
By following these steps, you have learned how to:
* Set up your environment: Install the OpenAI Python SDK and import required libraries.
* Configure the client: Use your Ubicloud API key, model name, and base URL.
* Perform chat completions: Both in non-streaming and streaming modes.
* Handle structured outputs: Request and process JSON output from the model.
* Invoke tools: Enable the model to call tools when needed.
This tutorial provides a foundation for using Ubicloud’s managed AI inference endpoints in your Python projects, leveraging the familiar OpenAI API interface.
Feel free to customize the prompts, model names, and other parameters based on your specific use case and the models available in your Ubicloud Dashboard. Enjoy building with Ubicloud’s AI inference endpoints!
# Inference Endpoints
Source: https://ubicloud.com/docs/inference/endpoint
Access a curated suite of advanced generative AI models through standardized APIs, designed for data privacy, transparency, and performance.
Inference Endpoints offer OpenAI-compatible APIs, enabling effortless integration with existing systems while reducing the likelihood of vendor lock-in.
Privacy is a top priority for inference endpoints, as they neither store nor reuse user data.
Built on open-source, inference endpoints provide transparency in their operations and functionality.
The Inference Endpoints tab offers insights into usage, pricing, and the capabilities of each available endpoint.
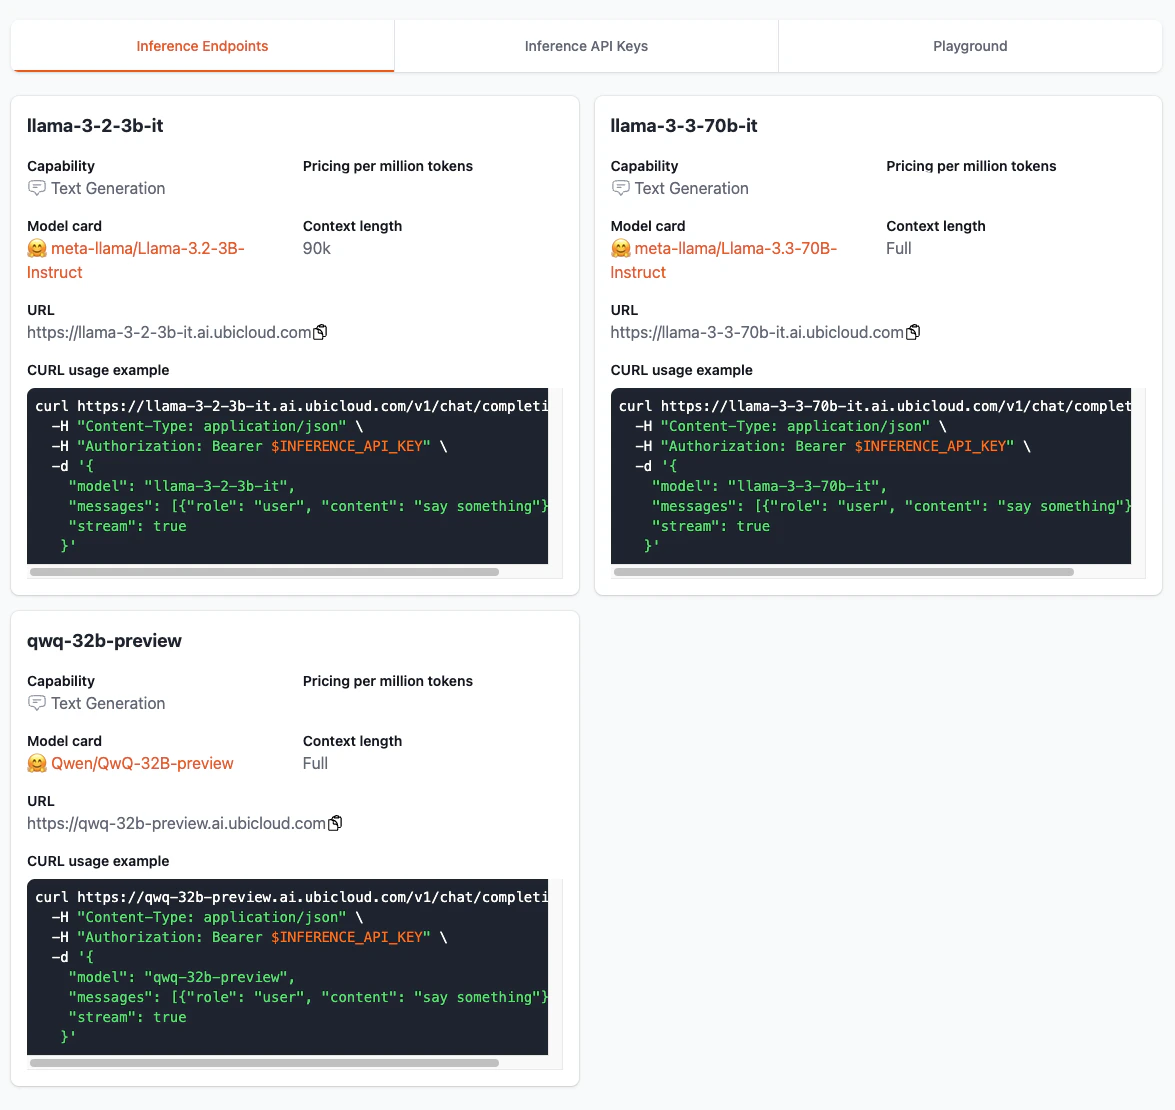 # Playground
Source: https://ubicloud.com/docs/inference/playground
The Playground provides an interactive environment for testing and exploring inference endpoints.
The Playground is a space for users to interact with inference endpoints, enabling real-time exploration and testing. Users can select specific inference endpoints, send prompts, and instantly view model responses to better understand their capabilities and performance.
# Playground
Source: https://ubicloud.com/docs/inference/playground
The Playground provides an interactive environment for testing and exploring inference endpoints.
The Playground is a space for users to interact with inference endpoints, enabling real-time exploration and testing. Users can select specific inference endpoints, send prompts, and instantly view model responses to better understand their capabilities and performance.
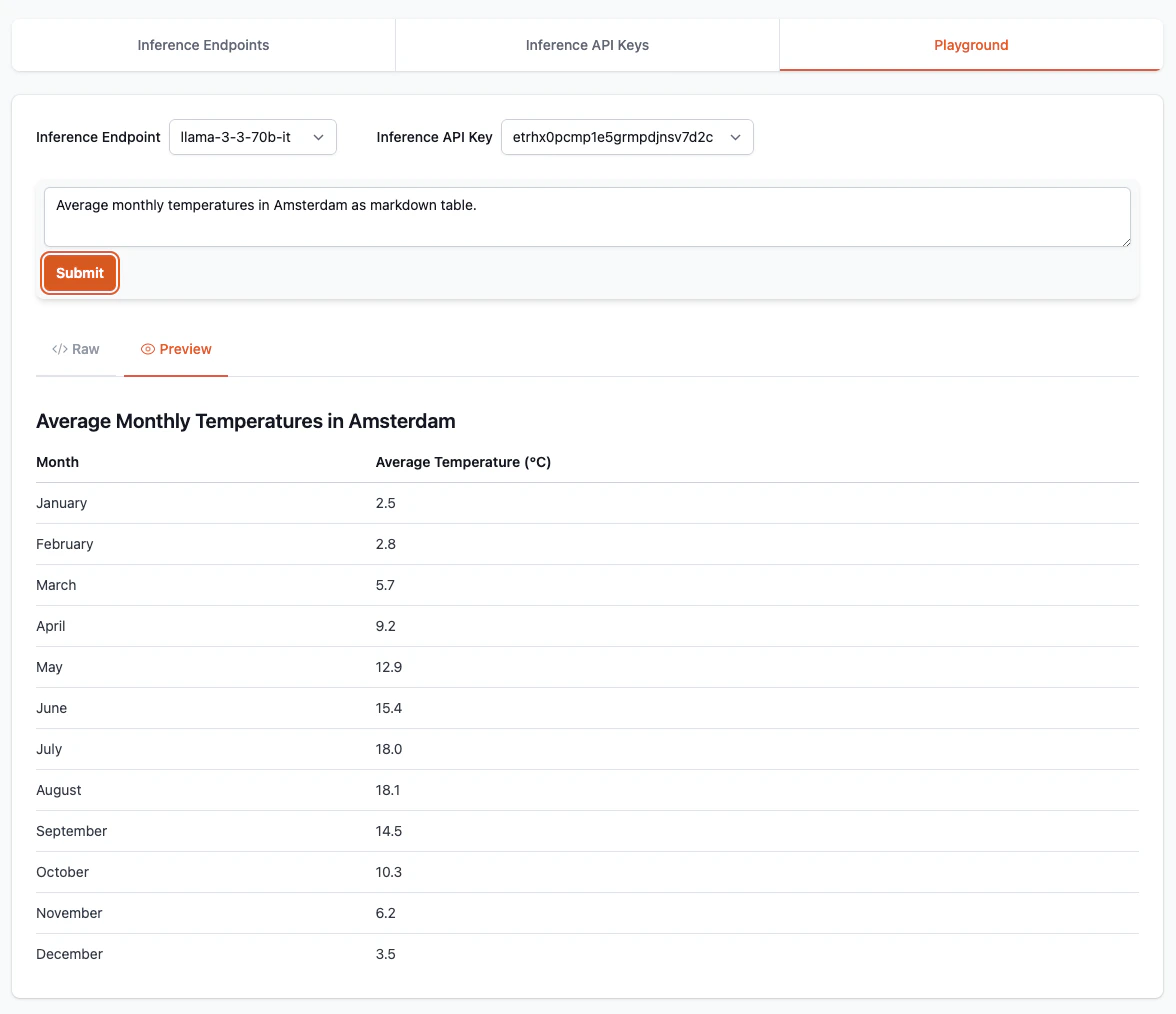 # Autoscaling
Source: https://ubicloud.com/docs/managed-kubernetes/autoscale
Autoscaling in Kubernetes is essential for running resilient, cost-efficient, and performance-optimized cloud-native applications. Kubernetes autoscaling lets your infrastructure adapt to changing demand by automatically adjusting resources. By enabling methods like Horizontal Pod Autoscaling and Vertical Pod Autoscaling, Ubicloud Kubernetes ensures performance and efficiency for your applications..
## Horizontal Pod Autoscaling (HPA)
Horizontal pod autoscaling is a built-in feature in Kubernetes. It allows you to automatically scale the number of pods in a deployment based on usage.
HPA requires `metrics-server` to be installed in K8s clusters, which is handled by Ubicloud Kubernetes by default for you.
Here's a quick walkthrough about seeing HPA in action, taken from [Kubernetes documentation](https://kubernetes.io/docs/tasks/run-application/horizontal-pod-autoscale-walkthrough/), assuming you have a Ubicloud Kubernetes cluster booted up and set your terminal with the kubeconfig file:
**Deploy a sample web application**
```bash theme={null}
kubectl apply -f https://k8s.io/examples/application/php-apache.yaml
```
This will create a sample web application and a service to expose it within the cluster.
**Create a horizontal pod autoscaler rule**
```bash theme={null}
kubectl autoscale deployment php-apache --cpu-percent=50 --min=1 --max=10
```
**Observe the horizontal pod autoscaling behavior**
```bash theme={null}
kubectl get hpa --watch
```
**Generate load**
On a different terminal window, run the following command to generate load on the web application and see the horizontal pod autoscaler increasing the number of replicas in a few minutes
```bash theme={null}
kubectl run -i --tty load-generator --rm --image=busybox:1.28 --restart=Never -- /bin/sh -c "while sleep 0.01; do wget -q -O- http://php-apache; done"
```
As you generate the load, the CPU usage of the pods should increase as well as the number of replicas.
When you cancel the load generator command, you can observe that the number of replicas will be automatically reduced by the HPA.\`
## Vertical Pod Autoscaling (VPA)
Vertical Pod Autoscaler (VPA) in Kubernetes automatically adjusts CPU and memory requests for pods based on observed usage. It’s ideal for workloads with unpredictable resource needs or those that don’t scale well horizontally, helping ensure stability and efficient utilization without manual tuning. Unlike HPA, Vertical Pod Autoscaler isn’t bundled with Kubernetes out of the box and needs to be installed separately via the [official VPA repository](https://github.com/kubernetes/autoscaler/tree/9f87b78df0f1d6e142234bb32e8acbd71295585a/vertical-pod-autoscaler).
```bash theme={null}
# Obtain VPA
git clone https://github.com/kubernetes/autoscaler.git
cd autoscaler/vertical-pod-autoscaler
# Install VPA components in your cluster
./hack/vpa-up.sh
# Verify VPA installation
kubectl get pods -n kube-system | grep vpa
```
At this point you should see three VPA components running in the `kube-system` namespace: `vpa-admission-controller`, `vpa-recommender`, and `vpa-updater`.
**Create sample application**
```bash theme={null}
kubectl apply -f https://k8s.io/examples/application/php-apache.yaml
kubectl scale deployment php-apache --replicas=2
```
**Create a VPA object for the sample application**
```bash theme={null}
kubectl apply -f <(cat <
## Limitations
While Ubicloud Kubernetes offers numerous advantages, it currently has the following limitations:
* **Preview**: Ubicloud Kubernetes is currently in public beta. For feedback, feature requests, or support inquiries, please contact us at [support@ubicloud.com](mailto:support@ubicloud.com).
* **Persistent Volumes**: Persistent volumes utilizing the local NVMe SSDs are available in preview with our container storage interface implementation (UbiCSI).
* **Single Load Balancer**: Each Kubernetes cluster is limited to one load balancer for exposing services to the internet. This means multiple services cannot share the same port.
# Persistent Volumes
Source: https://ubicloud.com/docs/managed-kubernetes/persistent-volumes
## Overview
This document describes how PersistentVolumeClaims (PVCs) work in Ubicloud Managed Kubernetes, including usage, limitations and behavior during failures.
All Ubicloud Kubernetes nodes include bundled local NVMe storage. Persistent volumes are supported in preview via the UbiCSI implementation using the local NVMe storage. Generic ephemeral volumes are also available for temporary storage tied to pod lifecycles.
## Quickstart
For a quickstart example, we will install [prometheus-stack](https://prometheus-community.github.io/helm-charts/) using its helm chart.
```bash theme={null}
helm repo add prometheus-community https://prometheus-community.github.io/helm-charts
helm repo update
kubectl create namespace monitoring
helm install prometheus prometheus-community/prometheus --namespace monitoring
```
Once the installation is complete, run the following command to list the PVCs:
```bash theme={null}
$ kubectl -n monitoring get pvc
NAME STATUS VOLUME CAPACITY ACCESS MODES STORAGECLASS VOLUMEATTRIBUTESCLASS AGE
prometheus-server Bound pvc-6c92f4d4-7db2-4229-be1a-8826739322df 8Gi RWO ubicloud-standard 70s
storage-prometheus-alertmanager-0 Bound pvc-4d6d879d-0961-4b29-a0d7-d4954a8c9476 2Gi RWO ubicloud-standard 69s
```
## Limitations and Considerations
* UbiCSI is in **preview**, so features and behavior may evolve over time.
* PVCs are limited to 10 GB by default to ensure reliable data migration and avoid network strain. Larger volumes can be requested via [support@ubicloud.com](mailto:support@ubicloud.com).
* Data is stored locally and not replicated. If a node is permanently lost due to critical hardware failure, any data on that node is also lost.
* Volume Expansion is not supported yet.
Every Ubicloud Kubernetes Cluster comes with the UbiCSI add-on pre-installed and a StorageClass is defined for creating PVCs:
```bash theme={null}
$ kubectl get storageclass
NAME PROVISIONER RECLAIMPOLICY VOLUMEBINDINGMODE ALLOWVOLUMEEXPANSION AGE
ubicloud-standard (default) csi.ubicloud.com Delete WaitForFirstConsumer false 2h
```
All UbiCSI components are deployed in the `ubicsi` namespace to separate them from other workloads. The source code for UbiCSI is available in [Ubicloud repository](https://github.com/ubicloud/ubicloud/tree/main/kubernetes/csi).
## How it works
UbiCSI driver provisions PersistentVolumeClaims on local volumes for speed and automatically migrating data when a node becomes unschedulable. This combines the performance of local storage with the reliability of managed persistence.
By using node affinities on the PersistentVolume, the PVC stays bound to that node, ensuring the pod always runs on the same node during normal restarts and as long as the node remains schedulable.
## Data Durability and Migration
For data durability, UbiCSI continuously monitors node health. When a pod’s node becomes unschedulable, UbiCSI automatically reschedules the pod onto a healthy node and transfers its data. This process ensures workloads stay available and data persists even when nodes fail or are taken out of service.
When migration begins, data is copied in the background to the new node. During this time, the pod may temporarily return errors such as "Old PV data is not copied yet" - these indicate that migration is still in progress. Users should not force delete or restart the pod, as this can interrupt the copy. Once migration completes, the pod resumes normal operation with its data fully restored on the new node.
# Quickstart
Source: https://ubicloud.com/docs/managed-kubernetes/quickstart
In this guide, you’re going to, create a Kubernetes cluster, connect to your cluster using `kubectl`, deploy a sample app and expose it to public. For this dedicated cluster, you’ll pay about 3x lower than you would with AWS or Azure.
### Navigate to Kubernetes Service
From the left menu on the console and select the **Kubernetes** option and click on the **Create Kubernetes Cluster** button. This will take you to a new page where you can select the cluster details.
### Configure the Cluster
* Enter your desired cluster name.
* Select the preferred location.
* Choose the specifications for the control plane and worker node pools.
### Launch the Cluster
After completing the configuration, click the **Create** button. Your Kubernetes cluster will be up and running in a few minutes based on the specified size.
# Autoscaling
Source: https://ubicloud.com/docs/managed-kubernetes/autoscale
Autoscaling in Kubernetes is essential for running resilient, cost-efficient, and performance-optimized cloud-native applications. Kubernetes autoscaling lets your infrastructure adapt to changing demand by automatically adjusting resources. By enabling methods like Horizontal Pod Autoscaling and Vertical Pod Autoscaling, Ubicloud Kubernetes ensures performance and efficiency for your applications..
## Horizontal Pod Autoscaling (HPA)
Horizontal pod autoscaling is a built-in feature in Kubernetes. It allows you to automatically scale the number of pods in a deployment based on usage.
HPA requires `metrics-server` to be installed in K8s clusters, which is handled by Ubicloud Kubernetes by default for you.
Here's a quick walkthrough about seeing HPA in action, taken from [Kubernetes documentation](https://kubernetes.io/docs/tasks/run-application/horizontal-pod-autoscale-walkthrough/), assuming you have a Ubicloud Kubernetes cluster booted up and set your terminal with the kubeconfig file:
**Deploy a sample web application**
```bash theme={null}
kubectl apply -f https://k8s.io/examples/application/php-apache.yaml
```
This will create a sample web application and a service to expose it within the cluster.
**Create a horizontal pod autoscaler rule**
```bash theme={null}
kubectl autoscale deployment php-apache --cpu-percent=50 --min=1 --max=10
```
**Observe the horizontal pod autoscaling behavior**
```bash theme={null}
kubectl get hpa --watch
```
**Generate load**
On a different terminal window, run the following command to generate load on the web application and see the horizontal pod autoscaler increasing the number of replicas in a few minutes
```bash theme={null}
kubectl run -i --tty load-generator --rm --image=busybox:1.28 --restart=Never -- /bin/sh -c "while sleep 0.01; do wget -q -O- http://php-apache; done"
```
As you generate the load, the CPU usage of the pods should increase as well as the number of replicas.
When you cancel the load generator command, you can observe that the number of replicas will be automatically reduced by the HPA.\`
## Vertical Pod Autoscaling (VPA)
Vertical Pod Autoscaler (VPA) in Kubernetes automatically adjusts CPU and memory requests for pods based on observed usage. It’s ideal for workloads with unpredictable resource needs or those that don’t scale well horizontally, helping ensure stability and efficient utilization without manual tuning. Unlike HPA, Vertical Pod Autoscaler isn’t bundled with Kubernetes out of the box and needs to be installed separately via the [official VPA repository](https://github.com/kubernetes/autoscaler/tree/9f87b78df0f1d6e142234bb32e8acbd71295585a/vertical-pod-autoscaler).
```bash theme={null}
# Obtain VPA
git clone https://github.com/kubernetes/autoscaler.git
cd autoscaler/vertical-pod-autoscaler
# Install VPA components in your cluster
./hack/vpa-up.sh
# Verify VPA installation
kubectl get pods -n kube-system | grep vpa
```
At this point you should see three VPA components running in the `kube-system` namespace: `vpa-admission-controller`, `vpa-recommender`, and `vpa-updater`.
**Create sample application**
```bash theme={null}
kubectl apply -f https://k8s.io/examples/application/php-apache.yaml
kubectl scale deployment php-apache --replicas=2
```
**Create a VPA object for the sample application**
```bash theme={null}
kubectl apply -f <(cat <
## Limitations
While Ubicloud Kubernetes offers numerous advantages, it currently has the following limitations:
* **Preview**: Ubicloud Kubernetes is currently in public beta. For feedback, feature requests, or support inquiries, please contact us at [support@ubicloud.com](mailto:support@ubicloud.com).
* **Persistent Volumes**: Persistent volumes utilizing the local NVMe SSDs are available in preview with our container storage interface implementation (UbiCSI).
* **Single Load Balancer**: Each Kubernetes cluster is limited to one load balancer for exposing services to the internet. This means multiple services cannot share the same port.
# Persistent Volumes
Source: https://ubicloud.com/docs/managed-kubernetes/persistent-volumes
## Overview
This document describes how PersistentVolumeClaims (PVCs) work in Ubicloud Managed Kubernetes, including usage, limitations and behavior during failures.
All Ubicloud Kubernetes nodes include bundled local NVMe storage. Persistent volumes are supported in preview via the UbiCSI implementation using the local NVMe storage. Generic ephemeral volumes are also available for temporary storage tied to pod lifecycles.
## Quickstart
For a quickstart example, we will install [prometheus-stack](https://prometheus-community.github.io/helm-charts/) using its helm chart.
```bash theme={null}
helm repo add prometheus-community https://prometheus-community.github.io/helm-charts
helm repo update
kubectl create namespace monitoring
helm install prometheus prometheus-community/prometheus --namespace monitoring
```
Once the installation is complete, run the following command to list the PVCs:
```bash theme={null}
$ kubectl -n monitoring get pvc
NAME STATUS VOLUME CAPACITY ACCESS MODES STORAGECLASS VOLUMEATTRIBUTESCLASS AGE
prometheus-server Bound pvc-6c92f4d4-7db2-4229-be1a-8826739322df 8Gi RWO ubicloud-standard 70s
storage-prometheus-alertmanager-0 Bound pvc-4d6d879d-0961-4b29-a0d7-d4954a8c9476 2Gi RWO ubicloud-standard 69s
```
## Limitations and Considerations
* UbiCSI is in **preview**, so features and behavior may evolve over time.
* PVCs are limited to 10 GB by default to ensure reliable data migration and avoid network strain. Larger volumes can be requested via [support@ubicloud.com](mailto:support@ubicloud.com).
* Data is stored locally and not replicated. If a node is permanently lost due to critical hardware failure, any data on that node is also lost.
* Volume Expansion is not supported yet.
Every Ubicloud Kubernetes Cluster comes with the UbiCSI add-on pre-installed and a StorageClass is defined for creating PVCs:
```bash theme={null}
$ kubectl get storageclass
NAME PROVISIONER RECLAIMPOLICY VOLUMEBINDINGMODE ALLOWVOLUMEEXPANSION AGE
ubicloud-standard (default) csi.ubicloud.com Delete WaitForFirstConsumer false 2h
```
All UbiCSI components are deployed in the `ubicsi` namespace to separate them from other workloads. The source code for UbiCSI is available in [Ubicloud repository](https://github.com/ubicloud/ubicloud/tree/main/kubernetes/csi).
## How it works
UbiCSI driver provisions PersistentVolumeClaims on local volumes for speed and automatically migrating data when a node becomes unschedulable. This combines the performance of local storage with the reliability of managed persistence.
By using node affinities on the PersistentVolume, the PVC stays bound to that node, ensuring the pod always runs on the same node during normal restarts and as long as the node remains schedulable.
## Data Durability and Migration
For data durability, UbiCSI continuously monitors node health. When a pod’s node becomes unschedulable, UbiCSI automatically reschedules the pod onto a healthy node and transfers its data. This process ensures workloads stay available and data persists even when nodes fail or are taken out of service.
When migration begins, data is copied in the background to the new node. During this time, the pod may temporarily return errors such as "Old PV data is not copied yet" - these indicate that migration is still in progress. Users should not force delete or restart the pod, as this can interrupt the copy. Once migration completes, the pod resumes normal operation with its data fully restored on the new node.
# Quickstart
Source: https://ubicloud.com/docs/managed-kubernetes/quickstart
In this guide, you’re going to, create a Kubernetes cluster, connect to your cluster using `kubectl`, deploy a sample app and expose it to public. For this dedicated cluster, you’ll pay about 3x lower than you would with AWS or Azure.
### Navigate to Kubernetes Service
From the left menu on the console and select the **Kubernetes** option and click on the **Create Kubernetes Cluster** button. This will take you to a new page where you can select the cluster details.
### Configure the Cluster
* Enter your desired cluster name.
* Select the preferred location.
* Choose the specifications for the control plane and worker node pools.
### Launch the Cluster
After completing the configuration, click the **Create** button. Your Kubernetes cluster will be up and running in a few minutes based on the specified size.
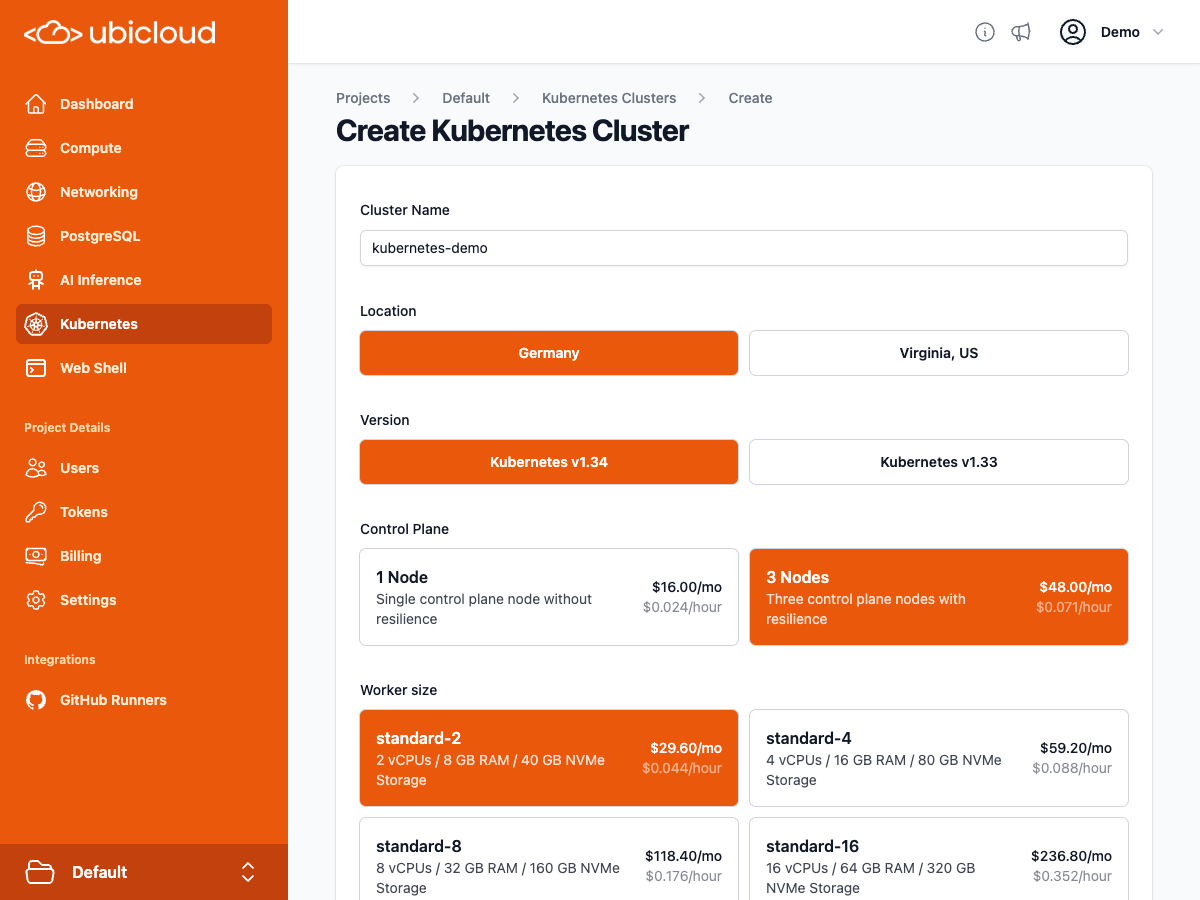 ### Download the kubeconfig
Once the `Download` button appears, click it to download the kubeconfig file. Then, run the following command to start using it:
```bash theme={null}
export KUBECONFIG=/path/to/kubeconfig
```
Kubernetes clients like [kubectl](https://kubernetes.io/docs/tasks/tools/#kubectl) will automatically use this file to connect to your cluster. Check the connection with the following command:
```bash theme={null}
kubectl get nodes
```
### Create an Nginx deployment
Use the following command to deploy the Nginx application
```yaml theme={null}
kubectl apply -f - <
## Resize via Web Interface
1. Navigate to the Kubernetes page in the [Ubicloud Console](https://console.ubicloud.com).
2. Click on the name of the cluster you want to resize.
3. Click the **Settings** tab.
4. In the **Resize Worker Node Pool** section, select the desired number of nodes and click the **Resize** button.
### Download the kubeconfig
Once the `Download` button appears, click it to download the kubeconfig file. Then, run the following command to start using it:
```bash theme={null}
export KUBECONFIG=/path/to/kubeconfig
```
Kubernetes clients like [kubectl](https://kubernetes.io/docs/tasks/tools/#kubectl) will automatically use this file to connect to your cluster. Check the connection with the following command:
```bash theme={null}
kubectl get nodes
```
### Create an Nginx deployment
Use the following command to deploy the Nginx application
```yaml theme={null}
kubectl apply -f - <
## Resize via Web Interface
1. Navigate to the Kubernetes page in the [Ubicloud Console](https://console.ubicloud.com).
2. Click on the name of the cluster you want to resize.
3. Click the **Settings** tab.
4. In the **Resize Worker Node Pool** section, select the desired number of nodes and click the **Resize** button.
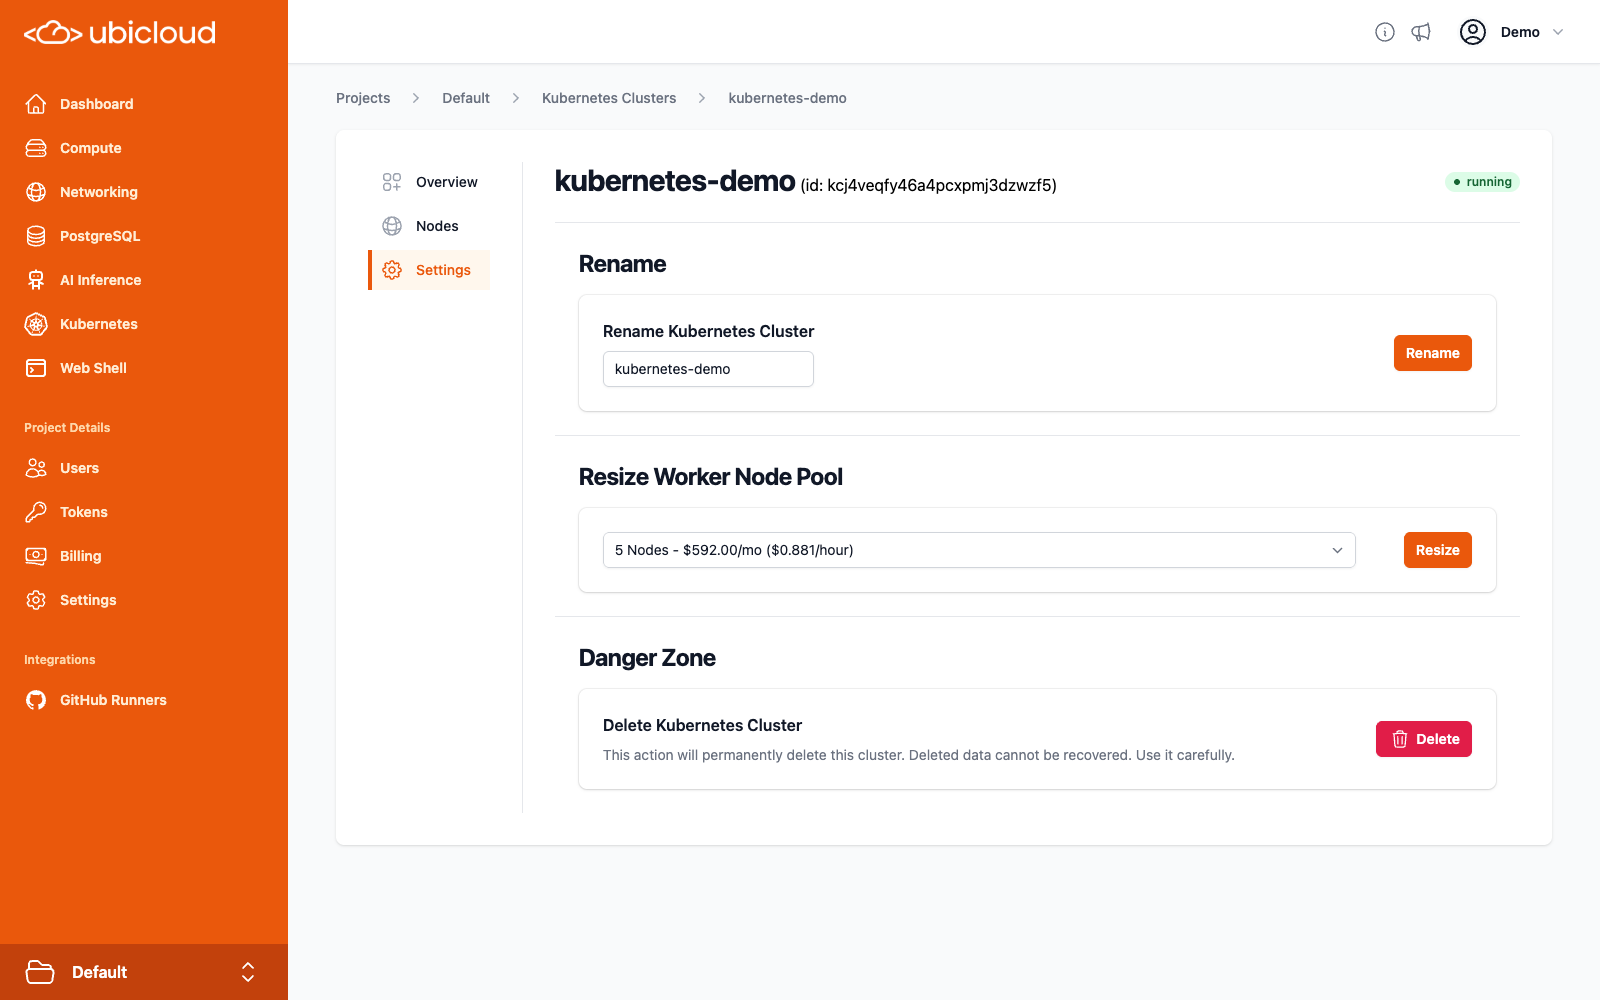 ## Resize via CLI
You can also resize your cluster using the [`ubi`](https://www.ubicloud.com/docs/quick-start/cli) CLI tool with the `resize-nodepool` command:
```bash theme={null}
ubi kc (location/kc-name | kc-id) resize-nodepool (np-name | np-id) node-count
```
## Resize via API
To resize your cluster using the API, send a `POST` request to the `kubernetes-cluster/{cluster_ref}/nodepool/{nodepool_ref}/resize` endpoint with the desired number of nodes in the request body:
```http theme={null}
POST https://api.ubicloud.com/project/{project_id}/location/{location}/kubernetes-cluster/{kubernetes_cluster_reference}/nodepool/{kubernetes_nodepool_reference}/resize
Content-Type: application/json
{
"node_count":
}
```
You can find more information in the API documentation: [Change number of nodes of a Kubernetes Nodepool](https://www.ubicloud.com/docs/api-reference/kubernetes-cluster/change-number-of-nodes-of-a-kubernetes-nodepool).
# Tutorial: Self-Hosting Windmill on Ubicloud for Production
Source: https://ubicloud.com/docs/managed-kubernetes/windmill-tutorial
[Windmill](https://www.windmill.dev/) is an open-source platform that transforms scripts into UIs, APIs, and workflows. Supporting languages like Python and TypeScript, it simplifies internal tool creation, automation, and scaling for teams. This guide will help you set up Windmill on Ubicloud, with Ubicloud managed Kubernetes and PostgreSQL services.
## Preparing the Ubicloud Environment
To prepare the Ubicloud environment for running Windmill, follow the steps outlined in the Ubicloud documentation:
* [Setup your Ubicloud account](https://www.ubicloud.com/docs/quick-start/managed-services) and enter your billing details.
* [Create a Managed PostgreSQL server](https://www.ubicloud.com/docs/managed-postgresql/overview#create-managed-postgresql): Start with a burstable compute option and scale your database as needed.
* [Set up a Managed Kubernetes cluster](https://www.ubicloud.com/docs/managed-kubernetes/quickstart): Configure one control plane node and three worker nodes as a good initial setup.
## Preparing Your Environment
### Step 0: Ensure that your shell environment has [kubectl](https://kubernetes.io/docs/tasks/tools/#kubectl) and [helm](https://helm.sh/) installed.
Use the commands to verify that `kubectl` and `helm` are installed:
```bash theme={null}
kubectl version
helm version
```
### Step 1: Obtain the kubeconfig File
* [Download the kubeconfig](https://www.ubicloud.com/docs/managed-kubernetes/quickstart#download-the-kubeconfig): Access the Kubernetes cluster in the Ubicloud console and download the kubeconfig file.
* Copy the file to the default kubeconfig location (`$HOME/.kube/config`) or set the `KUBECONFIG` environment variable to [configure your Kubernetes client](https://kubernetes.io/docs/concepts/configuration/organize-cluster-access-kubeconfig/) (e.g., kubectl).
### Step 2: Create a Namespace for Windmill
Create a namespace for the Windmill deployment:
```bash theme={null}
kubectl create namespace windmill
```
### Step 3: Store the Database Connection String in a Secret
[Retrieve the connection string for your PostgreSQL database](https://www.ubicloud.com/docs/managed-postgresql/overview#connect-to-managed-postgresql) from the Ubicloud console and create a secret:
```bash theme={null}
kubectl create secret generic -n windmill pg-db-credentials \
--from-literal=url=''
```
## Deploying Windmill
Add Windmill Helm repo:
```bash theme={null}
helm repo add windmill https://windmill-labs.github.io/windmill-helm-charts/
```
Download the `values.yaml` file for the Windmill chart:
```bash theme={null}
curl -O https://raw.githubusercontent.com/windmill-labs/windmill-helm-charts/refs/heads/main/charts/windmill/values.yaml
```
Disable the built-in PostgreSQL database in `values.yaml`:
```yaml theme={null}
postgresql:
enabled: false
```
Set the secret name for the database connection string:
```yaml theme={null}
windmill:
...
databaseUrlSecretName: "pg-db-credentials"
```
Install the Windmill chart with the modified values.yaml file:
```bash theme={null}
helm -n windmill install my-windmill windmill/windmill -f values.yaml
```
Wait for all pods to start running:
```bash theme={null}
kubectl -n windmill get pods
```
## Exposing Windmill to the Internet
By default, Windmill chart restricts the windmill-app service to internal cluster access. To access the Windmill UI via a browser, expose the service externally using a load balancer:
```bash theme={null}
kubectl -n windmill patch svc windmill-app -p '{"spec": {"type": "LoadBalancer"}}'
```
Wait for the service to get an external host assigned:
```bash theme={null}
kubectl -n windmill get service windmill-app
```
## Connecting to Windmill
The application will be accessible via your cluster's load balancer URL at port 8000 a few minutes after the `EXTERNAL-IP` is assigned. Run the following command to retrieve the address for your Windmill deployment.
```bash theme={null}
echo "http://$(kubectl -n windmill get service windmill-app --output jsonpath='{.status.loadBalancer.ingress[0].hostname}'):8000"
```
Congratulations—Windmill is now running on Ubicloud!
## Configuring TLS for Secure Access
To expose Windmill securely via HTTPS, we'll employ `cert-manager`, `ingress-nginx`, and Let's Encrypt.
### Installing and Setting Up `ingress-nginx` & `cert-manager`
Use the following commands to install `ingress-nginx` and `cert-manager`:
```bash theme={null}
helm repo add ingress-nginx https://kubernetes.github.io/ingress-nginx
helm repo add jetstack https://charts.jetstack.io
helm repo update
helm install ingress-nginx ingress-nginx/ingress-nginx -n ingress-nginx --create-namespace --set controller.service.ipFamilyPolicy=RequireDualStack
helm install cert-manager jetstack/cert-manager --namespace cert-manager --create-namespace --set crds.enabled=true
```
Next, create an issuer in the `windmill` namespace to obtain certificates from Let's Encrypt:
```bash theme={null}
kubectl apply -n windmill -f <(cat <
privateKeySecretRef:
name: letsencrypt
solvers:
- http01:
ingress:
class: nginx
EOF
)
```
### Setting Up DNS Records for Traffic Routing
Retrieve the external IP address of the ingress-nginx controller service:
```bash theme={null}
kubectl -n ingress-nginx get service ingress-nginx-controller
```
You should get a result in the form `u8ic10u08e-services.k8s.ubicloud.com`. We will use this address in the following step to route traffic to the cluster securely.
If you want to use your your domain such as `windmill.yourdomain.com`, create a CNAME record with your DNS provider to route `windmill.yourdomain.com` to the `EXTERNAL-IP` associated with the `ingress-nginx-controller` service and use that address in the following steps.
### Updating Windmill Chart Values for TLS
Modify `values.yaml` file as follows:
```yaml theme={null}
windmill:
baseDomain: xxxxxxxxxx-services.k8s.ubicloud.com # Replace with your service URL or domain
baseProtocol: https
ingress:
className: "nginx"
annotations:
cert-manager.io/issuer: "letsencrypt-windmill"
nginx.ingress.kubernetes.io/affinity: "cookie"
nginx.ingress.kubernetes.io/affinity-mode: "persistent"
nginx.ingress.kubernetes.io/session-cookie-name: "route"
tls:
- hosts:
- "xxxxxxxxxx-services.k8s.ubicloud.com" # Replace with your service URL or domain
secretName: windmill-tls-cert
```
Apply the updated values to the Windmill installation:
```bash theme={null}
helm -n windmill upgrade my-windmill windmill/windmill -f values.yaml
```
### Verifying the Certificate Status
Check the readiness of the TLS certificate for the Windmill application:
```bash theme={null}
kubectl -n windmill describe cert windmill-tls-cert
```
Once the certificate is ready, you can access your Windmill application securely at [https://xxxxxxxxxx-services.k8s.ubicloud.com](https://xxxxxxxxxx-services.k8s.ubicloud.com) or [https://windmill.yourdomain.com](https://windmill.yourdomain.com).
# Backup and Restore
Source: https://ubicloud.com/docs/managed-postgresql/backup-and-restore
## Backups
Ubicloud ensures the safety and availability of your data through robust backup and restore processes. Backups are replicated across four servers using erasure coding. This means backups remain accessible even if two of those servers become unavailable.
**Daily Backups:** We take daily full backups. We also store Write-Ahead Log (WAL) files every 60 seconds or 16 MB of WAL updates, whichever comes first. Ubicloud stores these backup files in an internal blob storage service.
Storage for backups are isolated at the bucket level. We create separate buckets for each PostgreSQL server in our blob storage. The credentials provided to each PostgreSQL server only allow access to its own bucket.
**Backup Duration:** We retain backups for a period of 7 days, offering a sufficient window for recovery in case of data loss. If you need a longer backup retention period, feel free to contact us at [support@ubicloud.com](mailto:support@ubicloud.com).
## Restore
To restore a database, use the "Fork" functionality available in the Backup/Restore view.
## Resize via CLI
You can also resize your cluster using the [`ubi`](https://www.ubicloud.com/docs/quick-start/cli) CLI tool with the `resize-nodepool` command:
```bash theme={null}
ubi kc (location/kc-name | kc-id) resize-nodepool (np-name | np-id) node-count
```
## Resize via API
To resize your cluster using the API, send a `POST` request to the `kubernetes-cluster/{cluster_ref}/nodepool/{nodepool_ref}/resize` endpoint with the desired number of nodes in the request body:
```http theme={null}
POST https://api.ubicloud.com/project/{project_id}/location/{location}/kubernetes-cluster/{kubernetes_cluster_reference}/nodepool/{kubernetes_nodepool_reference}/resize
Content-Type: application/json
{
"node_count":
}
```
You can find more information in the API documentation: [Change number of nodes of a Kubernetes Nodepool](https://www.ubicloud.com/docs/api-reference/kubernetes-cluster/change-number-of-nodes-of-a-kubernetes-nodepool).
# Tutorial: Self-Hosting Windmill on Ubicloud for Production
Source: https://ubicloud.com/docs/managed-kubernetes/windmill-tutorial
[Windmill](https://www.windmill.dev/) is an open-source platform that transforms scripts into UIs, APIs, and workflows. Supporting languages like Python and TypeScript, it simplifies internal tool creation, automation, and scaling for teams. This guide will help you set up Windmill on Ubicloud, with Ubicloud managed Kubernetes and PostgreSQL services.
## Preparing the Ubicloud Environment
To prepare the Ubicloud environment for running Windmill, follow the steps outlined in the Ubicloud documentation:
* [Setup your Ubicloud account](https://www.ubicloud.com/docs/quick-start/managed-services) and enter your billing details.
* [Create a Managed PostgreSQL server](https://www.ubicloud.com/docs/managed-postgresql/overview#create-managed-postgresql): Start with a burstable compute option and scale your database as needed.
* [Set up a Managed Kubernetes cluster](https://www.ubicloud.com/docs/managed-kubernetes/quickstart): Configure one control plane node and three worker nodes as a good initial setup.
## Preparing Your Environment
### Step 0: Ensure that your shell environment has [kubectl](https://kubernetes.io/docs/tasks/tools/#kubectl) and [helm](https://helm.sh/) installed.
Use the commands to verify that `kubectl` and `helm` are installed:
```bash theme={null}
kubectl version
helm version
```
### Step 1: Obtain the kubeconfig File
* [Download the kubeconfig](https://www.ubicloud.com/docs/managed-kubernetes/quickstart#download-the-kubeconfig): Access the Kubernetes cluster in the Ubicloud console and download the kubeconfig file.
* Copy the file to the default kubeconfig location (`$HOME/.kube/config`) or set the `KUBECONFIG` environment variable to [configure your Kubernetes client](https://kubernetes.io/docs/concepts/configuration/organize-cluster-access-kubeconfig/) (e.g., kubectl).
### Step 2: Create a Namespace for Windmill
Create a namespace for the Windmill deployment:
```bash theme={null}
kubectl create namespace windmill
```
### Step 3: Store the Database Connection String in a Secret
[Retrieve the connection string for your PostgreSQL database](https://www.ubicloud.com/docs/managed-postgresql/overview#connect-to-managed-postgresql) from the Ubicloud console and create a secret:
```bash theme={null}
kubectl create secret generic -n windmill pg-db-credentials \
--from-literal=url=''
```
## Deploying Windmill
Add Windmill Helm repo:
```bash theme={null}
helm repo add windmill https://windmill-labs.github.io/windmill-helm-charts/
```
Download the `values.yaml` file for the Windmill chart:
```bash theme={null}
curl -O https://raw.githubusercontent.com/windmill-labs/windmill-helm-charts/refs/heads/main/charts/windmill/values.yaml
```
Disable the built-in PostgreSQL database in `values.yaml`:
```yaml theme={null}
postgresql:
enabled: false
```
Set the secret name for the database connection string:
```yaml theme={null}
windmill:
...
databaseUrlSecretName: "pg-db-credentials"
```
Install the Windmill chart with the modified values.yaml file:
```bash theme={null}
helm -n windmill install my-windmill windmill/windmill -f values.yaml
```
Wait for all pods to start running:
```bash theme={null}
kubectl -n windmill get pods
```
## Exposing Windmill to the Internet
By default, Windmill chart restricts the windmill-app service to internal cluster access. To access the Windmill UI via a browser, expose the service externally using a load balancer:
```bash theme={null}
kubectl -n windmill patch svc windmill-app -p '{"spec": {"type": "LoadBalancer"}}'
```
Wait for the service to get an external host assigned:
```bash theme={null}
kubectl -n windmill get service windmill-app
```
## Connecting to Windmill
The application will be accessible via your cluster's load balancer URL at port 8000 a few minutes after the `EXTERNAL-IP` is assigned. Run the following command to retrieve the address for your Windmill deployment.
```bash theme={null}
echo "http://$(kubectl -n windmill get service windmill-app --output jsonpath='{.status.loadBalancer.ingress[0].hostname}'):8000"
```
Congratulations—Windmill is now running on Ubicloud!
## Configuring TLS for Secure Access
To expose Windmill securely via HTTPS, we'll employ `cert-manager`, `ingress-nginx`, and Let's Encrypt.
### Installing and Setting Up `ingress-nginx` & `cert-manager`
Use the following commands to install `ingress-nginx` and `cert-manager`:
```bash theme={null}
helm repo add ingress-nginx https://kubernetes.github.io/ingress-nginx
helm repo add jetstack https://charts.jetstack.io
helm repo update
helm install ingress-nginx ingress-nginx/ingress-nginx -n ingress-nginx --create-namespace --set controller.service.ipFamilyPolicy=RequireDualStack
helm install cert-manager jetstack/cert-manager --namespace cert-manager --create-namespace --set crds.enabled=true
```
Next, create an issuer in the `windmill` namespace to obtain certificates from Let's Encrypt:
```bash theme={null}
kubectl apply -n windmill -f <(cat <
privateKeySecretRef:
name: letsencrypt
solvers:
- http01:
ingress:
class: nginx
EOF
)
```
### Setting Up DNS Records for Traffic Routing
Retrieve the external IP address of the ingress-nginx controller service:
```bash theme={null}
kubectl -n ingress-nginx get service ingress-nginx-controller
```
You should get a result in the form `u8ic10u08e-services.k8s.ubicloud.com`. We will use this address in the following step to route traffic to the cluster securely.
If you want to use your your domain such as `windmill.yourdomain.com`, create a CNAME record with your DNS provider to route `windmill.yourdomain.com` to the `EXTERNAL-IP` associated with the `ingress-nginx-controller` service and use that address in the following steps.
### Updating Windmill Chart Values for TLS
Modify `values.yaml` file as follows:
```yaml theme={null}
windmill:
baseDomain: xxxxxxxxxx-services.k8s.ubicloud.com # Replace with your service URL or domain
baseProtocol: https
ingress:
className: "nginx"
annotations:
cert-manager.io/issuer: "letsencrypt-windmill"
nginx.ingress.kubernetes.io/affinity: "cookie"
nginx.ingress.kubernetes.io/affinity-mode: "persistent"
nginx.ingress.kubernetes.io/session-cookie-name: "route"
tls:
- hosts:
- "xxxxxxxxxx-services.k8s.ubicloud.com" # Replace with your service URL or domain
secretName: windmill-tls-cert
```
Apply the updated values to the Windmill installation:
```bash theme={null}
helm -n windmill upgrade my-windmill windmill/windmill -f values.yaml
```
### Verifying the Certificate Status
Check the readiness of the TLS certificate for the Windmill application:
```bash theme={null}
kubectl -n windmill describe cert windmill-tls-cert
```
Once the certificate is ready, you can access your Windmill application securely at [https://xxxxxxxxxx-services.k8s.ubicloud.com](https://xxxxxxxxxx-services.k8s.ubicloud.com) or [https://windmill.yourdomain.com](https://windmill.yourdomain.com).
# Backup and Restore
Source: https://ubicloud.com/docs/managed-postgresql/backup-and-restore
## Backups
Ubicloud ensures the safety and availability of your data through robust backup and restore processes. Backups are replicated across four servers using erasure coding. This means backups remain accessible even if two of those servers become unavailable.
**Daily Backups:** We take daily full backups. We also store Write-Ahead Log (WAL) files every 60 seconds or 16 MB of WAL updates, whichever comes first. Ubicloud stores these backup files in an internal blob storage service.
Storage for backups are isolated at the bucket level. We create separate buckets for each PostgreSQL server in our blob storage. The credentials provided to each PostgreSQL server only allow access to its own bucket.
**Backup Duration:** We retain backups for a period of 7 days, offering a sufficient window for recovery in case of data loss. If you need a longer backup retention period, feel free to contact us at [support@ubicloud.com](mailto:support@ubicloud.com).
## Restore
To restore a database, use the "Fork" functionality available in the Backup/Restore view.
 Two input boxes, one textbox for server name of restored database and the other is a date time picker for target restore time.
You can select the target date for the restore at per minute granularity; and specify the name for the new database server. This restore operation creates a new instance with the state of your database as it was at the selected point in time.
## Restoring a Deleted Database
Even if you delete your database, we still keep backups for 7 days. You can restore a deleted database by opening a support ticket.
# Configuration and Settings
Source: https://ubicloud.com/docs/managed-postgresql/configuration-and-settings
You can change the configuration parameters of your Ubicloud PostgreSQL instance
by using the Configuration view. Here, you can configure both PostgreSQL and
PgBouncer parameters.
Two input boxes, one textbox for server name of restored database and the other is a date time picker for target restore time.
You can select the target date for the restore at per minute granularity; and specify the name for the new database server. This restore operation creates a new instance with the state of your database as it was at the selected point in time.
## Restoring a Deleted Database
Even if you delete your database, we still keep backups for 7 days. You can restore a deleted database by opening a support ticket.
# Configuration and Settings
Source: https://ubicloud.com/docs/managed-postgresql/configuration-and-settings
You can change the configuration parameters of your Ubicloud PostgreSQL instance
by using the Configuration view. Here, you can configure both PostgreSQL and
PgBouncer parameters.
 ## Changing Configuration Parameters
To configure a new parameter, enter the paramter name and value in the new key
and value input fields. Confirm the addition by clicking the "Save" button. You
can add multiple parameters in one go by using the "+" button.
To change a configuration parameter, change the key or value in the input
fields. You can also reset a parameter to its default value by clicking the
"Delete" button next to it. Confirm your changes by clicking the "Save" button.
We support configuring basically all PostgreSQL and PgBouncer parameters. For a
list of supported parameters, see the [PostgreSQL documentation](https://www.postgresql.org/docs/current/runtime-config.html)
and the [PgBouncer documentation](https://www.pgbouncer.org/config.html).
All changes made to the configuration parameters are typically persisted to the
instance within one minute. If modifying a parameter requires a restart of the
database server, the change will be applied after the next restart. You
can trigger a restart manually from the Settings view, described below.
## Instance Settings
The Settings view allows you to setup maintenance windows, update superuser
password, restart or delete the Ubicloud PostgreSQL instance.
## Changing Configuration Parameters
To configure a new parameter, enter the paramter name and value in the new key
and value input fields. Confirm the addition by clicking the "Save" button. You
can add multiple parameters in one go by using the "+" button.
To change a configuration parameter, change the key or value in the input
fields. You can also reset a parameter to its default value by clicking the
"Delete" button next to it. Confirm your changes by clicking the "Save" button.
We support configuring basically all PostgreSQL and PgBouncer parameters. For a
list of supported parameters, see the [PostgreSQL documentation](https://www.postgresql.org/docs/current/runtime-config.html)
and the [PgBouncer documentation](https://www.pgbouncer.org/config.html).
All changes made to the configuration parameters are typically persisted to the
instance within one minute. If modifying a parameter requires a restart of the
database server, the change will be applied after the next restart. You
can trigger a restart manually from the Settings view, described below.
## Instance Settings
The Settings view allows you to setup maintenance windows, update superuser
password, restart or delete the Ubicloud PostgreSQL instance.
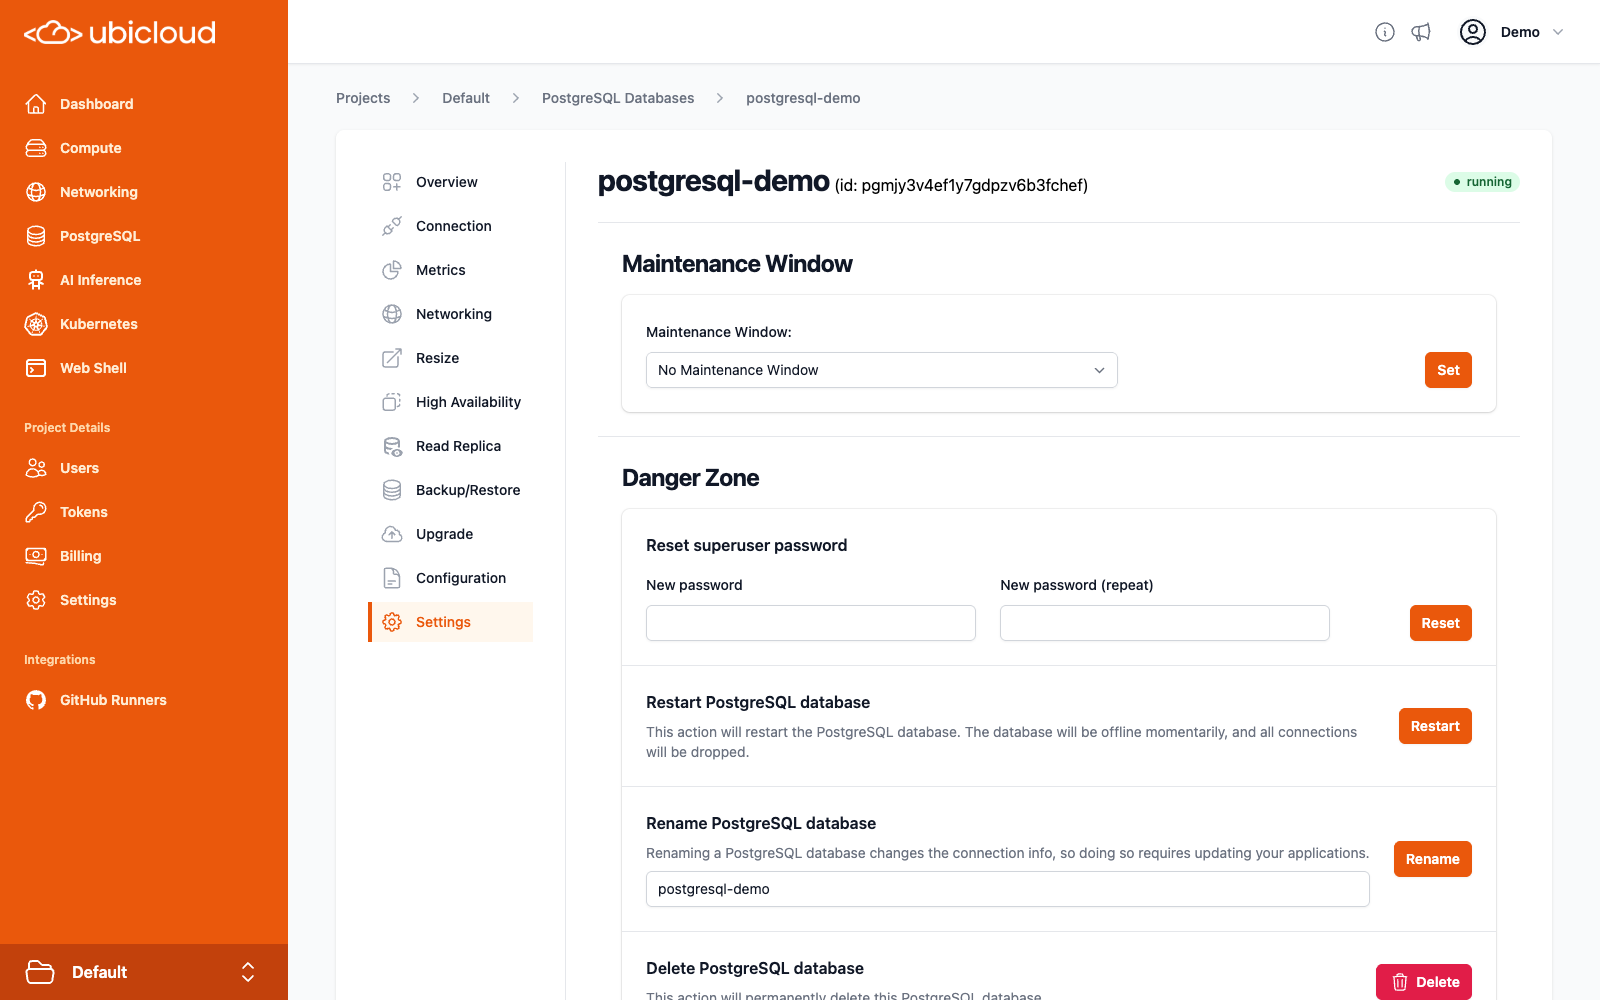 ### Maintenance Windows
Maintenance Windows are periods during which Ubicloud can perform maintenance
tasks on your instance. This can be used to decrease the impact of maintenance
tasks like resizing on your database.
You can set up a maintenance window by selecting a 2-hour window from the
provided dropdown. The time window uses the UTC timezone.
# Connection
Source: https://ubicloud.com/docs/managed-postgresql/connection
To connect your applications to Ubicloud PostgreSQL, find the connection details
in the Connection view.
Ubicloud Managed PostgreSQL provides superuser access to users. This connection
string provided is for accessing the database as a superuser. You can use it to
create new users.
### Maintenance Windows
Maintenance Windows are periods during which Ubicloud can perform maintenance
tasks on your instance. This can be used to decrease the impact of maintenance
tasks like resizing on your database.
You can set up a maintenance window by selecting a 2-hour window from the
provided dropdown. The time window uses the UTC timezone.
# Connection
Source: https://ubicloud.com/docs/managed-postgresql/connection
To connect your applications to Ubicloud PostgreSQL, find the connection details
in the Connection view.
Ubicloud Managed PostgreSQL provides superuser access to users. This connection
string provided is for accessing the database as a superuser. You can use it to
create new users.
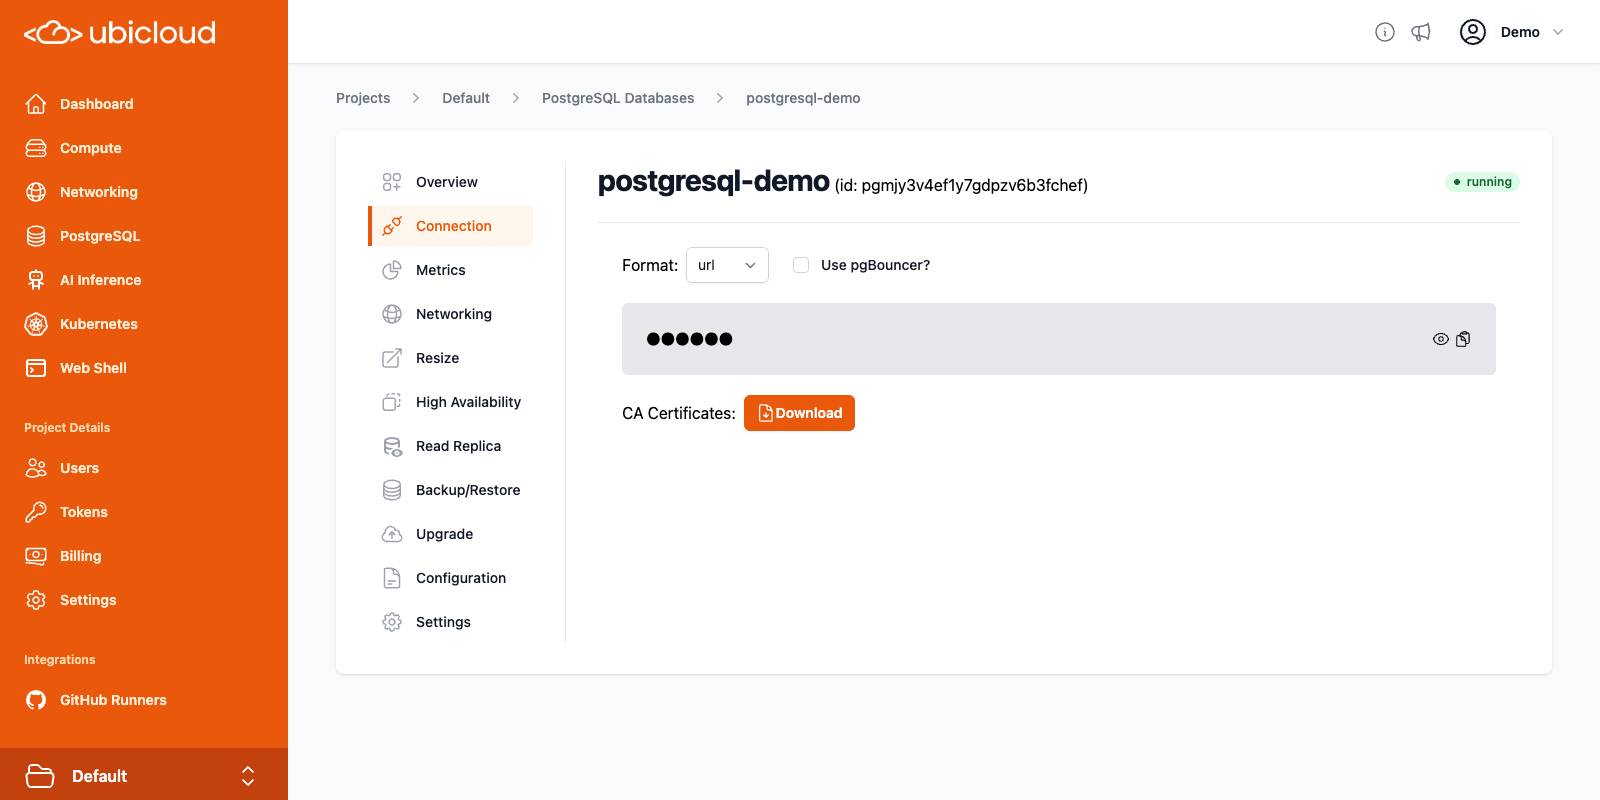 ## Connection string
For security reasons, the connection string is masked by default. You can reveal
it or copy it to your clipboard directly. You can view the connection string in
different formats by selecting the desired format from the dropdown.
Supported formats are:
* **URL**: connection URL, in the format `postgres://:@:/`.
* **psql**: `psql` command which can be used in the command line to connect to the databse.
* **env**: connection details as environment variables, useful for connecting
`libpq` based clients.
* **yaml**: connection details in the YAML format.
* **jdbc**: connection details in the JDBC format, for connecting with
Java-based clients.
## PgBouncer
Ubicloud PostgreSQL provides a bundled [PgBouncer](https://www.pgbouncer.org/) instance for server side
connection pooling. PgBouncer helps improve connection management, performance,
and resource utilization for your instance, especially those handling a high
number of connections. To use PgBouncer for your PostgreSQL connections, check
the "Use pgBouncer?" checkbox to obtain the connection string for PgBouncer.
## TLS
Ubicloud PostgreSQL instances are secured with TLS. By default, **TLS v1.3** is
the minimum supported version.
For production workloads, it is recommened that you connect to your instance
using a verified TLS connection. To do this, download the CA certificate bundle
from the Connection view, and add them to your database client's trusted
certificates.
For example, to connect to your PostgreSQL instance with "psql" using a verified
TLS connection, you can add `sslmode=verify-full` and
`sslrootcert=` to the connection string provided:
```bash theme={null}
psql 'postgres://postgres:s3cret@test-pg.postgres.ubicloud.com?sslmode=verify-full&sslrootcert=/home/user/Downloads/postgresql-demo.pem'
```
The CA certificates are valid for 10 years. If you need to renew them, you can
download the new certificates from the database details view.
# Extensions
Source: https://ubicloud.com/docs/managed-postgresql/extensions
Ubicloud Managed PostgreSQL comes with an ever growing list of extensions to be used along with your database. Below you can find an up-to-date list of extensions we support along with their versions.
| name | version |
| ------------------------------- | ------- |
| address\_standardizer | 3.5.1 |
| address\_standardizer\_data\_us | 3.5.1 |
| adminpack | 2.1 |
| amcheck | 1.3 |
| autoinc | 1.0 |
| bloom | 1.0 |
| bool\_plperl | 1.0 |
| bool\_plperlu | 1.0 |
| btree\_gin | 1.3 |
| btree\_gist | 1.7 |
| citext | 1.6 |
| cube | 1.5 |
| dblink | 1.2 |
| dict\_int | 1.0 |
| dict\_xsyn | 1.0 |
| earthdistance | 1.1 |
| file\_fdw | 1.0 |
| fuzzystrmatch | 1.2 |
| h3 | 4.1.4 |
| h3\_postgis | 4.1.4 |
| hll | 2.18 |
| hstore | 1.8 |
| hstore\_plperl | 1.0 |
| hstore\_plperlu | 1.0 |
| hstore\_plpython3u | 1.0 |
| hypopg | 1.4.1 |
| insert\_username | 1.0 |
| intagg | 1.1 |
| intarray | 1.5 |
| isn | 1.2 |
| jsonb\_plperl | 1.0 |
| jsonb\_plperlu | 1.0 |
| jsonb\_plpython3u | 1.0 |
| lo | 1.1 |
| ltree | 1.2 |
| ltree\_plpython3u | 1.0 |
| moddatetime | 1.0 |
| mysql\_fdw | 1.2 |
| old\_snapshot | 1.0 |
| orafce | 4.14 |
| pageinspect | 1.12 |
| pg\_buffercache | 1.4 |
| pg\_cron | 1.6 |
| pg\_freespacemap | 1.2 |
| pg\_partman | 5.2.2 |
| pg\_prewarm | 1.2 |
| pg\_repack | 1.5.2 |
| pg\_similarity | 1.0 |
| pg\_stat\_statements | 1.10 |
| pg\_surgery | 1.0 |
| pg\_trgm | 1.6 |
| pg\_visibility | 1.2 |
| pg\_walinspect | 1.1 |
| pgaudit | 16.0 |
| pgcrypto | 1.3 |
| pglogical | 2.4.5 |
| pglogical\_origin | 1.0.0 |
| pgrouting | 3.7.0 |
| pgrowlocks | 1.2 |
| pgstattuple | 1.5 |
| pgtap | 1.3.3 |
| plperl | 1.0 |
| plperlu | 1.0 |
| plpgsql | 1.0 |
| plpython3u | 1.0 |
| postgis | 3.5.1 |
| postgis\_raster | 3.5.1 |
| postgis\_sfcgal | 3.5.1 |
| postgis\_tiger\_geocoder | 3.5.1 |
| postgis\_topology | 3.5.1 |
| postgres\_fdw | 1.1 |
| refint | 1.0 |
| seg | 1.4 |
| sslinfo | 1.2 |
| tablefunc | 1.0 |
| tcn | 1.0 |
| tds\_fdw | 2.0.4 |
| tsm\_system\_rows | 1.0 |
| tsm\_system\_time | 1.0 |
| unaccent | 1.1 |
| uuid-ossp | 1.1 |
| vector | 0.8.0 |
| xml2 | 1.1 |
# High Availability
Source: https://ubicloud.com/docs/managed-postgresql/high-availability
Ubicloud Managed PostgreSQL offers different levels of high availability. Depending on your needs, you can add one or two of high availability standbys during the provisioning of your database. Simply select the number standbys you want to have from the High Availability view.
## Connection string
For security reasons, the connection string is masked by default. You can reveal
it or copy it to your clipboard directly. You can view the connection string in
different formats by selecting the desired format from the dropdown.
Supported formats are:
* **URL**: connection URL, in the format `postgres://:@:/`.
* **psql**: `psql` command which can be used in the command line to connect to the databse.
* **env**: connection details as environment variables, useful for connecting
`libpq` based clients.
* **yaml**: connection details in the YAML format.
* **jdbc**: connection details in the JDBC format, for connecting with
Java-based clients.
## PgBouncer
Ubicloud PostgreSQL provides a bundled [PgBouncer](https://www.pgbouncer.org/) instance for server side
connection pooling. PgBouncer helps improve connection management, performance,
and resource utilization for your instance, especially those handling a high
number of connections. To use PgBouncer for your PostgreSQL connections, check
the "Use pgBouncer?" checkbox to obtain the connection string for PgBouncer.
## TLS
Ubicloud PostgreSQL instances are secured with TLS. By default, **TLS v1.3** is
the minimum supported version.
For production workloads, it is recommened that you connect to your instance
using a verified TLS connection. To do this, download the CA certificate bundle
from the Connection view, and add them to your database client's trusted
certificates.
For example, to connect to your PostgreSQL instance with "psql" using a verified
TLS connection, you can add `sslmode=verify-full` and
`sslrootcert=` to the connection string provided:
```bash theme={null}
psql 'postgres://postgres:s3cret@test-pg.postgres.ubicloud.com?sslmode=verify-full&sslrootcert=/home/user/Downloads/postgresql-demo.pem'
```
The CA certificates are valid for 10 years. If you need to renew them, you can
download the new certificates from the database details view.
# Extensions
Source: https://ubicloud.com/docs/managed-postgresql/extensions
Ubicloud Managed PostgreSQL comes with an ever growing list of extensions to be used along with your database. Below you can find an up-to-date list of extensions we support along with their versions.
| name | version |
| ------------------------------- | ------- |
| address\_standardizer | 3.5.1 |
| address\_standardizer\_data\_us | 3.5.1 |
| adminpack | 2.1 |
| amcheck | 1.3 |
| autoinc | 1.0 |
| bloom | 1.0 |
| bool\_plperl | 1.0 |
| bool\_plperlu | 1.0 |
| btree\_gin | 1.3 |
| btree\_gist | 1.7 |
| citext | 1.6 |
| cube | 1.5 |
| dblink | 1.2 |
| dict\_int | 1.0 |
| dict\_xsyn | 1.0 |
| earthdistance | 1.1 |
| file\_fdw | 1.0 |
| fuzzystrmatch | 1.2 |
| h3 | 4.1.4 |
| h3\_postgis | 4.1.4 |
| hll | 2.18 |
| hstore | 1.8 |
| hstore\_plperl | 1.0 |
| hstore\_plperlu | 1.0 |
| hstore\_plpython3u | 1.0 |
| hypopg | 1.4.1 |
| insert\_username | 1.0 |
| intagg | 1.1 |
| intarray | 1.5 |
| isn | 1.2 |
| jsonb\_plperl | 1.0 |
| jsonb\_plperlu | 1.0 |
| jsonb\_plpython3u | 1.0 |
| lo | 1.1 |
| ltree | 1.2 |
| ltree\_plpython3u | 1.0 |
| moddatetime | 1.0 |
| mysql\_fdw | 1.2 |
| old\_snapshot | 1.0 |
| orafce | 4.14 |
| pageinspect | 1.12 |
| pg\_buffercache | 1.4 |
| pg\_cron | 1.6 |
| pg\_freespacemap | 1.2 |
| pg\_partman | 5.2.2 |
| pg\_prewarm | 1.2 |
| pg\_repack | 1.5.2 |
| pg\_similarity | 1.0 |
| pg\_stat\_statements | 1.10 |
| pg\_surgery | 1.0 |
| pg\_trgm | 1.6 |
| pg\_visibility | 1.2 |
| pg\_walinspect | 1.1 |
| pgaudit | 16.0 |
| pgcrypto | 1.3 |
| pglogical | 2.4.5 |
| pglogical\_origin | 1.0.0 |
| pgrouting | 3.7.0 |
| pgrowlocks | 1.2 |
| pgstattuple | 1.5 |
| pgtap | 1.3.3 |
| plperl | 1.0 |
| plperlu | 1.0 |
| plpgsql | 1.0 |
| plpython3u | 1.0 |
| postgis | 3.5.1 |
| postgis\_raster | 3.5.1 |
| postgis\_sfcgal | 3.5.1 |
| postgis\_tiger\_geocoder | 3.5.1 |
| postgis\_topology | 3.5.1 |
| postgres\_fdw | 1.1 |
| refint | 1.0 |
| seg | 1.4 |
| sslinfo | 1.2 |
| tablefunc | 1.0 |
| tcn | 1.0 |
| tds\_fdw | 2.0.4 |
| tsm\_system\_rows | 1.0 |
| tsm\_system\_time | 1.0 |
| unaccent | 1.1 |
| uuid-ossp | 1.1 |
| vector | 0.8.0 |
| xml2 | 1.1 |
# High Availability
Source: https://ubicloud.com/docs/managed-postgresql/high-availability
Ubicloud Managed PostgreSQL offers different levels of high availability. Depending on your needs, you can add one or two of high availability standbys during the provisioning of your database. Simply select the number standbys you want to have from the High Availability view.
 ## Differences between High Availability options
#### No Standby
In this option, we only provision a primary node in the size of your preference. No standby node is provisioned. We still monitor your primary node against possible failures, however recovery might take a long time depending on the nature of the problem.
#### 1 Standby
In this option, we provision a standby node along with your primary node. The standby node will be in the same size with the primary and it waits ready to take over the place of the primary node in case of a failure.
By default, in this option, the data will be replicated to the standby node with asynchronous replication. This means writes can be committed to the primary node without needing acknowledgement from the standby node. This ensures that having high availability does not slow down your writes due to additional network hop. However, it also means that the standby might not have a chance to see the most recent data at the time of the primary failure. For most applications, additional risk is worth the performance gain, however if this is not the case for you, you can also opt-in to use synchronous replication.
#### 2 Standbys
In this option, we provision two standby nodes along with your primary node. The standby nodes will be in the same size with the primary and they wait ready to take over the place of the primary node in case of a failure.
By default, in this option, the data will be replicated to the standby node with synchronous replication and the primary node will wait for acknowledgement from at least one of the standbys. This provides higher durability guarantees than the asynchronous replication. Also since one acknowledgement is enough, it suffers less from the performance penalty of additional network hop (compared to using synchronous replication with just one standby). Still, if you prefer using asynchronous replication, you can change the default configuration.
## Handling Failures
We monitor all the PostgreSQL servers in our fleet, no matter if high availability is enabled or not. In all cases, our system tries to heal from failures automatically.
However, if there is a standby available, automatic healing is faster and more straightforward. In such cases, the system usually recovers itself in the matter of a few minutes. In cases where high availability is not enabled, healing might require operator intervention and that would significantly increase the unavailable duration.
# Metrics
Source: https://ubicloud.com/docs/managed-postgresql/metrics
The Metrics view of your Ubicloud PostgreSQL instance provides various signals
for monitoring the performance and health of your PostgreSQL instances.
## Differences between High Availability options
#### No Standby
In this option, we only provision a primary node in the size of your preference. No standby node is provisioned. We still monitor your primary node against possible failures, however recovery might take a long time depending on the nature of the problem.
#### 1 Standby
In this option, we provision a standby node along with your primary node. The standby node will be in the same size with the primary and it waits ready to take over the place of the primary node in case of a failure.
By default, in this option, the data will be replicated to the standby node with asynchronous replication. This means writes can be committed to the primary node without needing acknowledgement from the standby node. This ensures that having high availability does not slow down your writes due to additional network hop. However, it also means that the standby might not have a chance to see the most recent data at the time of the primary failure. For most applications, additional risk is worth the performance gain, however if this is not the case for you, you can also opt-in to use synchronous replication.
#### 2 Standbys
In this option, we provision two standby nodes along with your primary node. The standby nodes will be in the same size with the primary and they wait ready to take over the place of the primary node in case of a failure.
By default, in this option, the data will be replicated to the standby node with synchronous replication and the primary node will wait for acknowledgement from at least one of the standbys. This provides higher durability guarantees than the asynchronous replication. Also since one acknowledgement is enough, it suffers less from the performance penalty of additional network hop (compared to using synchronous replication with just one standby). Still, if you prefer using asynchronous replication, you can change the default configuration.
## Handling Failures
We monitor all the PostgreSQL servers in our fleet, no matter if high availability is enabled or not. In all cases, our system tries to heal from failures automatically.
However, if there is a standby available, automatic healing is faster and more straightforward. In such cases, the system usually recovers itself in the matter of a few minutes. In cases where high availability is not enabled, healing might require operator intervention and that would significantly increase the unavailable duration.
# Metrics
Source: https://ubicloud.com/docs/managed-postgresql/metrics
The Metrics view of your Ubicloud PostgreSQL instance provides various signals
for monitoring the performance and health of your PostgreSQL instances.
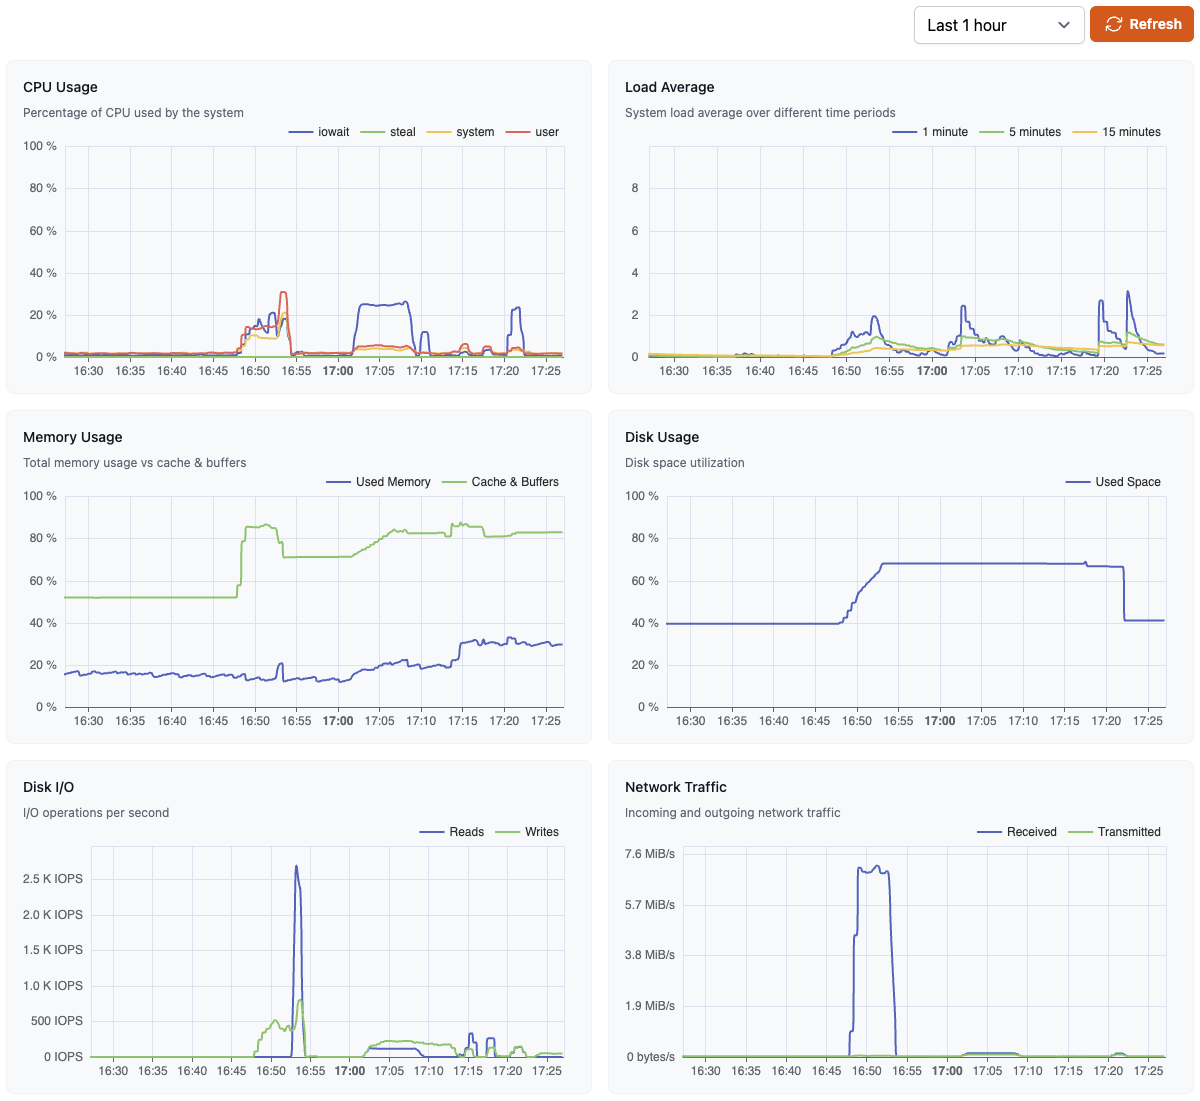 The time-range dropdown allows you to choose a time-frame for the graphs,
ranging from 30 minutes to 30 days. Each graph displays about 480 datapoints.
The graphs auto-update every 5 minutes. You can also manually update the graphs
with the refresh button.
If you recently provisioned the PostgreSQL database, it might take a few minutes
for the metrics to become available. For databases with HA enabled, the metrics
from the primary node are displayed.
Here are some of the key metrics provided and details on how to interpret them.
## Resource Usage Metrics
### CPU Usage
This shows the CPU usage, broken down into percentage of CPU time
spent in `user`, `system`, `iowait`, `softirq` and `steal` modes. The `user` time
reflects processing in the Postgres instance, while the `system` time reflects
operating system (i.e., kernel) operations.
### Load average
Load Average shows average CPU usage over the last 1, 5, and 15 minutes.
Typically, a load average equal to the number of CPU cores indicates full
utilization of all CPUs. A load average higher than the number of CPU cores
indicates that the system is overloaded, and processes are waiting for CPU time.
If you are consistently seeing high load averages, you might want to consider
upgrading to a larger database size.
### Memory Usage
This shows the memory usage, broken down into Used, Cached & Buffered memory. A
high amount of memory usage for Cache & Buffers is normal and indicates that the
database is using the available memory efficiently. A consistently high (> 90%)
value for Used memory indicates that the database might be running low on
available memory, which can lead to performance issues.
### Disk Usage
Disk Usage is the disk space utilization for the database, specifically the
Postgres `data_directory`. This includes the database contents, log files, and
WAL files, among other things. If your instance is approaching 100% disk usage,
you might want to consider upgrading to a larger database size.
### Disk I/O
This metric shows the disk read and write operations per second for the database
instance. High values for this metric can indicate that the database is
experiencing high I/O load, which can lead to performance issues.
### Network Traffic
This metric shows the incoming and outgoing network traffic for the database
instance. Generally, this should match the behavior of other metrics for the
instance. Unusual activity in this metric might indicate a problem with the
network or the database instance itself.
## Database Performance Metrics
The time-range dropdown allows you to choose a time-frame for the graphs,
ranging from 30 minutes to 30 days. Each graph displays about 480 datapoints.
The graphs auto-update every 5 minutes. You can also manually update the graphs
with the refresh button.
If you recently provisioned the PostgreSQL database, it might take a few minutes
for the metrics to become available. For databases with HA enabled, the metrics
from the primary node are displayed.
Here are some of the key metrics provided and details on how to interpret them.
## Resource Usage Metrics
### CPU Usage
This shows the CPU usage, broken down into percentage of CPU time
spent in `user`, `system`, `iowait`, `softirq` and `steal` modes. The `user` time
reflects processing in the Postgres instance, while the `system` time reflects
operating system (i.e., kernel) operations.
### Load average
Load Average shows average CPU usage over the last 1, 5, and 15 minutes.
Typically, a load average equal to the number of CPU cores indicates full
utilization of all CPUs. A load average higher than the number of CPU cores
indicates that the system is overloaded, and processes are waiting for CPU time.
If you are consistently seeing high load averages, you might want to consider
upgrading to a larger database size.
### Memory Usage
This shows the memory usage, broken down into Used, Cached & Buffered memory. A
high amount of memory usage for Cache & Buffers is normal and indicates that the
database is using the available memory efficiently. A consistently high (> 90%)
value for Used memory indicates that the database might be running low on
available memory, which can lead to performance issues.
### Disk Usage
Disk Usage is the disk space utilization for the database, specifically the
Postgres `data_directory`. This includes the database contents, log files, and
WAL files, among other things. If your instance is approaching 100% disk usage,
you might want to consider upgrading to a larger database size.
### Disk I/O
This metric shows the disk read and write operations per second for the database
instance. High values for this metric can indicate that the database is
experiencing high I/O load, which can lead to performance issues.
### Network Traffic
This metric shows the incoming and outgoing network traffic for the database
instance. Generally, this should match the behavior of other metrics for the
instance. Unusual activity in this metric might indicate a problem with the
network or the database instance itself.
## Database Performance Metrics
 ### Connection Count
This shows the Active and Total number of connected Postgres clients. Total
connection count refers to all currently connected clients, while Active
connection count refers to clients that are currently executing a query. By
default, the maximum number of connections is set to 500. If your database is
consistently at or near this limit, you might want to consider increasing this
limit or using connection pooling via PgBouncer.
### Cache Hit Ratio
This metric indicates how many content requests were served from the cache. For
normal workloads, this should typically be above 99%. If this value is low, it
might indicate that the database performance might improve with a larger
instance with more memory.
### Operation Throughput
This graph shows the rate of row fetches, inserts, updates, and deletes per
second. This can be useful for identifying unexpected changes in usage patterns
and their effects on database performance.
### Deadlocks
This metric shows the rate of deadlocks detected per second in the database.
Deadlocks occur when two or more transactions are waiting on resources held by
others, resulting in a situation where none of them can proceed. A non-zero or
high value indicates bad transaction design, which can lead to degraded
performance.
### Database Size
This graph shows the size of the 5 largest databases in the instance. This can
be useful in identifying databases that are growing unexpectedly or are due for
cleanup or archiving.
### Transactions
This graph shows the rate of transactions committed and rolled back per second.
This can be useful for identifying unexpected changes in usage patterns and
their effects on database performance.
## Metric destinations
It is possible to send various metrics such as CPU usage, disk IO, database
locks from your database to external targets. Metrics destinations use
Prometheus' remote-write protocol to send metrics. Any destination that supports
remote-write protocol, can be used as a destination of Ubicloud PostgreSQL
metrics. You can find destinations that support remote-write protocol
[here](https://prometheus.io/docs/operating/integrations/#remote-endpoints-and-storage).
### Setting Up
Setting up a metric destination is easy. Just open the PostgreSQL server details
page. You can enter connection details of the remote destination in the “Metric
Destinations” section.
### Connection Count
This shows the Active and Total number of connected Postgres clients. Total
connection count refers to all currently connected clients, while Active
connection count refers to clients that are currently executing a query. By
default, the maximum number of connections is set to 500. If your database is
consistently at or near this limit, you might want to consider increasing this
limit or using connection pooling via PgBouncer.
### Cache Hit Ratio
This metric indicates how many content requests were served from the cache. For
normal workloads, this should typically be above 99%. If this value is low, it
might indicate that the database performance might improve with a larger
instance with more memory.
### Operation Throughput
This graph shows the rate of row fetches, inserts, updates, and deletes per
second. This can be useful for identifying unexpected changes in usage patterns
and their effects on database performance.
### Deadlocks
This metric shows the rate of deadlocks detected per second in the database.
Deadlocks occur when two or more transactions are waiting on resources held by
others, resulting in a situation where none of them can proceed. A non-zero or
high value indicates bad transaction design, which can lead to degraded
performance.
### Database Size
This graph shows the size of the 5 largest databases in the instance. This can
be useful in identifying databases that are growing unexpectedly or are due for
cleanup or archiving.
### Transactions
This graph shows the rate of transactions committed and rolled back per second.
This can be useful for identifying unexpected changes in usage patterns and
their effects on database performance.
## Metric destinations
It is possible to send various metrics such as CPU usage, disk IO, database
locks from your database to external targets. Metrics destinations use
Prometheus' remote-write protocol to send metrics. Any destination that supports
remote-write protocol, can be used as a destination of Ubicloud PostgreSQL
metrics. You can find destinations that support remote-write protocol
[here](https://prometheus.io/docs/operating/integrations/#remote-endpoints-and-storage).
### Setting Up
Setting up a metric destination is easy. Just open the PostgreSQL server details
page. You can enter connection details of the remote destination in the “Metric
Destinations” section.
 We need 3 pieces of information; URL for sending metrics to, and also
username/password for authentication. We only accept https\:// endpoints. In this
way we ensure that the data we are sending is encrypted at transit.
### Type of Metrics
We are sending two types of metrics:
* **Metrics from the database itself:** Database metrics are collected by
[postgres\_exporter](https://github.com/prometheus-community/postgres_exporter).
It contains information about database size, active connections, write/read
activity, replication, WAL archival, autovacuum and many more.
* **Metrics from the underlying virtual machine:** Virtual machine metrics are
collected by [node\_exporter](https://github.com/prometheus/node_exporter). It
contains information about CPU usage, disk IO, filesystem usage, memory
consumption and network transfe
# Networking
Source: https://ubicloud.com/docs/managed-postgresql/networking
Ubicloud PostgreSQL instances are accessible over the internet by default. To
restrict connections to your database based on the IP address of the client, you
can set up Firewall Rules in the Networking view.
We need 3 pieces of information; URL for sending metrics to, and also
username/password for authentication. We only accept https\:// endpoints. In this
way we ensure that the data we are sending is encrypted at transit.
### Type of Metrics
We are sending two types of metrics:
* **Metrics from the database itself:** Database metrics are collected by
[postgres\_exporter](https://github.com/prometheus-community/postgres_exporter).
It contains information about database size, active connections, write/read
activity, replication, WAL archival, autovacuum and many more.
* **Metrics from the underlying virtual machine:** Virtual machine metrics are
collected by [node\_exporter](https://github.com/prometheus/node_exporter). It
contains information about CPU usage, disk IO, filesystem usage, memory
consumption and network transfe
# Networking
Source: https://ubicloud.com/docs/managed-postgresql/networking
Ubicloud PostgreSQL instances are accessible over the internet by default. To
restrict connections to your database based on the IP address of the client, you
can set up Firewall Rules in the Networking view.
 ## Adding and Modifying Firewall Rules
Firewall rules define a range of IP addresses that are allowed to connect to your
database. You can add multiple firewall rules to allow connections from different
IP ranges.
To modify an existing firewall rule, click the "Edit" button next to it, change
the IP range and description as needed and confirm the change.
You can also delete a firewall rule by clicking the "Delete" button next to it.
To add a new firewall rule, enter the IP range and description and click the
"Create" button.
Any changes made to the firewall rules should typically take effect within a minute.
# Overview
Source: https://ubicloud.com/docs/managed-postgresql/overview
Ubicloud PostgreSQL handles backups, high availability,
health monitoring, and many other aspects of managing a database for you, so
that you can focus on your application.
With Ubicloud PostgreSQL you will get the following benefits depending on the context.
* [10x price-performance](https://www.ubicloud.com/blog/time-to-rethink-postgresql-storage) than comparable public cloud solutions
* Available on Hetzner data centers
* Open source, if you choose to manage Ubicloud Managed PostgreSQL yourself
## Create managed PostgreSQL
**Navigate to PostgreSQL Service:** From the left menu on the dashboard, select the "PostgreSQL" option.
## Adding and Modifying Firewall Rules
Firewall rules define a range of IP addresses that are allowed to connect to your
database. You can add multiple firewall rules to allow connections from different
IP ranges.
To modify an existing firewall rule, click the "Edit" button next to it, change
the IP range and description as needed and confirm the change.
You can also delete a firewall rule by clicking the "Delete" button next to it.
To add a new firewall rule, enter the IP range and description and click the
"Create" button.
Any changes made to the firewall rules should typically take effect within a minute.
# Overview
Source: https://ubicloud.com/docs/managed-postgresql/overview
Ubicloud PostgreSQL handles backups, high availability,
health monitoring, and many other aspects of managing a database for you, so
that you can focus on your application.
With Ubicloud PostgreSQL you will get the following benefits depending on the context.
* [10x price-performance](https://www.ubicloud.com/blog/time-to-rethink-postgresql-storage) than comparable public cloud solutions
* Available on Hetzner data centers
* Open source, if you choose to manage Ubicloud Managed PostgreSQL yourself
## Create managed PostgreSQL
**Navigate to PostgreSQL Service:** From the left menu on the dashboard, select the "PostgreSQL" option.
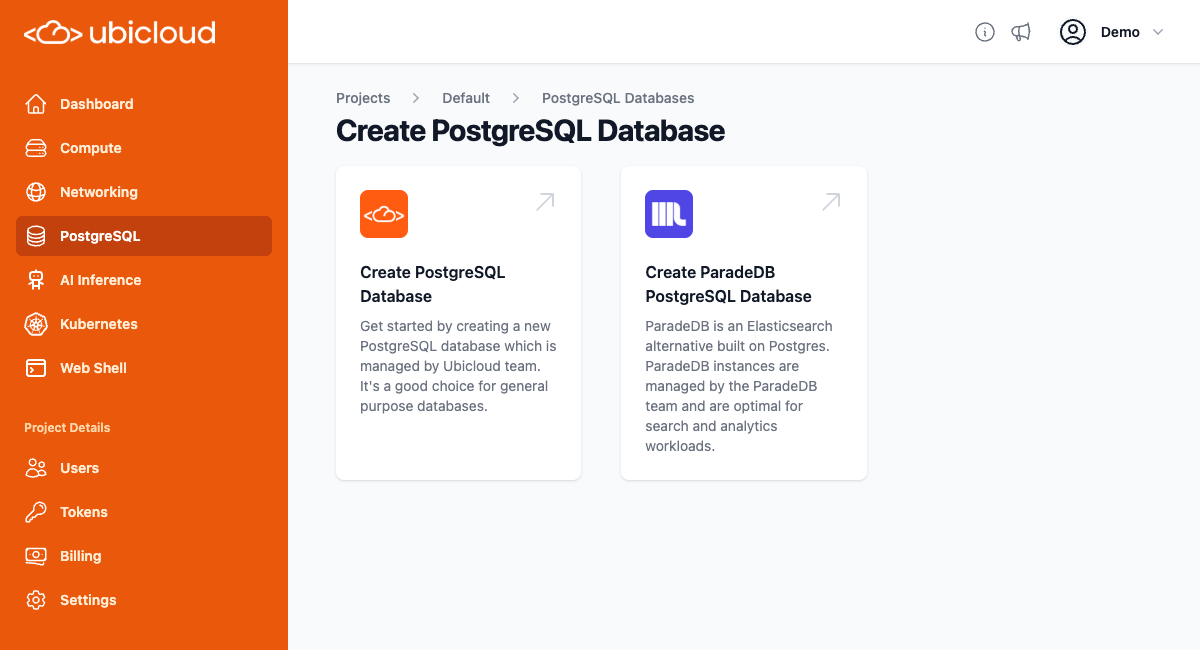 **Create PostgreSQL Database:** Click on the "+ New PostgreSQL database" button. This will take you to a new page where you can select the instance type based on your needs.
 **Instance Configuration:** Type the desired database server name and choose the desired instance type. You don't need to set anything else. A secure password will be automatically generated.
**Instance Creation:** After selecting the instance type, click the "Create" button. Your managed PostgreSQL instance will be set up and ready for use in a few minutes.
## Instance overview
The Instance overview page shows the status of your PostgreSQL instance,
including the instance type, location, HA configuration along with a summary of
the CPU and disk usage metrics.
**Instance Configuration:** Type the desired database server name and choose the desired instance type. You don't need to set anything else. A secure password will be automatically generated.
**Instance Creation:** After selecting the instance type, click the "Create" button. Your managed PostgreSQL instance will be set up and ready for use in a few minutes.
## Instance overview
The Instance overview page shows the status of your PostgreSQL instance,
including the instance type, location, HA configuration along with a summary of
the CPU and disk usage metrics.
 # ParadeDB on Ubicloud
Source: https://ubicloud.com/docs/managed-postgresql/paradedb-on-ubicloud
## Getting Started
ParadeDB is an Elasticsearch alternative built on Postgres. It provides powerful search and analytics capabilities built on top of PostgreSQL and now it is available on Ubicloud as a managed service.
Our managed ParadeDB service combines the unique expertise of both Ubicloud and ParadeDB teams. Underlying infrastructure is managed by the Ubicloud team and the ParadeDB instances are managed by the ParadeDB team. This allows you to access both teams' technical expertise as needed.
ParadeDB is a good fit for:
* Developers who trust Postgres and don't want to operate a non-Postgres database / query engine
* Elasticsearch users who want to consolidate their data stack on Postgres
* Full-text, similarity, or hybrid search over large volumes of operational data with zero ETL
* Building rich search experiences with analytical queries and facets
**Navigate to ParadeDB Service:** To create a ParadeDB instance, start by clicking to the "PostgreSQL" option from the left menu on the dashboard and then click “Create ParadeDB PostgreSQL Database”.
**Instance Configuration:** Type the desired database server name and choose the desired instance type. Since this database will be managed by the ParadeDB team as well, you will need to accept terms of service and privacy policy of ParadeDB. You don't need to set anything else. A secure password will be automatically generated.
**Instance Creation:** After selecting the instance type, click the "Create" button. Your managed PostgreSQL instance will be set up and ready for use in a few minutes.
## Connect to managed ParadeDB instance
**Get Connection Details:** Once your ParadeDB instance is ready, go to the database details view to find the connection string. The connection string will be masked. You can reveal it or copy it to your clipboard directly.
**Use Connection String:** You can use `psql` or any other database client to establish a connection to your PostgreSQL instance.
Ubicloud managed ParadeDB service provides superuser access to users. This connection string is for accessing the database as a superuser. You can use it to create new users.
## Getting most out of your ParadeDB instance
You can learn more about ParadeDB's capabilities and how to use them in [this quick start guide](https://docs.paradedb.com/documentation/getting-started/quickstart).
# Price-Performance
Source: https://ubicloud.com/docs/managed-postgresql/price-performance
Ubicloud Managed PostgreSQL provides **10x** better price-performance compared to similar managed PostgreSQL services thanks to its unique architecture based on NVMe SSD storage. The following benchmarks compare Ubicloud PostgreSQL with AWS Aurora and AWS RDS PostgreSQL.
## TPC-C Benchmark
Ubicloud PostgreSQL runs **1.4x** more transactions than AWS Aurora and costs **5.8x** less. Similarly, Ubicloud Postgres runs **4.6x** more transactions than AWS RDS and costs **2.8x** less. Ubicloud PostgreSQL also has **1.91x** lower latency compared to AWS Aurora and **7.65x** lower latency than AWS RDS PostgreSQL.
Benchmark Configuration:
* **Ubicloud**: standard-8 (8 vCPUs, 32 GB RAM) instance with 1 TB SSD storage
* **AWS Aurora**: db.r8g.2xlarge (8 vCPUs, 64 GB RAM) instance with 1 TB SSD storage
* **AWS RDS**: db.m7g.2xlarge (8 vCPUs, 32 GB RAM) instance with I/O optimized storage
* **Tables**: 32
* **Number of Warehouses**: 256
* **Number of Clients**: 64
| | Ubicloud | Aurora | RDS |
| :--------------------: | :------: | :-----: | :-----: |
| **TPS** | 873.25 | 636.31 | 188.31 |
| **Latency** | 314.45 | 601.29 | 2405.65 |
| **Price** | 259.92 | 1501.00 | 725.02 |
| **TPS Difference** | - | 1.37x | 4.64x |
| **Price-TPS** | - | 7.93x | 12.94x |
| **Latency Difference** | - | 1.91x | 7.65x |
| **Price-Latency** | - | 11.04x | 21.34x |
## TPC-H Benchmark
Ubicloud PostgreSQL runs 22 TPC-H queries **2.42x** faster than AWS Aurora and **2.96x** faster than AWS RDS PostgreSQL, while costing **6.40x** less than AWS Aurora and **3.00x** less than AWS RDS PostgreSQL.
Benchmark Configuration:
* **Ubicloud**: standard-8 (8 vCPUs, 32 GB RAM) instance with 512 GB SSD storage
* **AWS Aurora**: db.r8g.2xlarge (8 vCPUs, 64 GB RAM) instance with 512 GB SSD storage
* **AWS RDS**: db.m7g.2xlarge (8 vCPUs, 32 GB RAM) instance with I/O optimized storage
* **Scale Factor**: 100
| | Ubicloud | Aurora | RDS |
| :--------------------------: | -------- | -------- | :-----: |
| **Q01** | 75.40 | 170.40 | 174.80 |
| **Q02** | 108.65 | 238.86 | 129.69 |
| **Q03** | 60.95 | 101.40 | 223.59 |
| **Q04** | 119.65 | 552.57 | 355.73 |
| **Q05** | 63.19 | 83.69 | 223.53 |
| **Q06** | 45.91 | 61.42 | 179.26 |
| **Q07** | 60.96 | 76.28 | 223.72 |
| **Q08** | 69.92 | 92.86 | 254.33 |
| **Q09** | 84.94 | 1596.24 | 275.71 |
| **Q10** | 91.38 | 123.96 | 314.85 |
| **Q11** | 35.29 | 76.76 | 102.38 |
| **Q12** | 65.72 | 119.75 | 240.15 |
| **Q13** | 48.66 | 80.44 | 83.23 |
| **Q14** | 46.74 | 74.11 | 181.50 |
| **Q15** | 97.94 | 161.96 | 365.75 |
| **Q16** | 100.05 | 107.41 | 107.35 |
| **Q17** | 235.25 | 542.08 | 559.31 |
| **Q18** | 225.73 | 605.84 | 2142.52 |
| **Q19** | 23.17 | 161.77 | 111.90 |
| **Q20** | 1825.97 | 10666.92 | 9866.06 |
| **Q21** | 103.87 | 729.29 | 213.65 |
| **Q22** | 9.88 | 30.37 | 10.49 |
| **Geometric Mean (seconds)** | 79.72 | 193.23 | 235.61 |
| **Price (\$)** | 218.96 | 1401.57 | 654.87 |
| **Performance Difference** | - | 2.42x | 2.96x |
| **Price-Performance** | - | 15.48x | 8.88x |
# Read Replicas
Source: https://ubicloud.com/docs/managed-postgresql/read-replicas
Read replicas allow you to create one or more copies of your primary PostgreSQL database instance. These replicas continuously follow your primary database using replication mechanisms of PostgreSQL to stay up to date with changes. With Ubicloud, you can now spin up read replicas with a single click from the Read Replica view of your PostgreSQL instance.
## Why Read Replicas Matter?
* **Scalability:** Read replicas allow you to scale your database horizontally, distributing read-heavy workloads-such as reporting, analytics, and real-time dashboards-across multiple dedicated replicas.
* **Isolation:** By directing analytical and business intelligence queries to these replicas, you keep your primary instance focused and responsive for write operations and critical transactional workloads. This separation not only boosts overall system performance and predictability but also ensures that you don't need to give write access to analytical or reporting tools.
* **Business continuity and disaster recovery (BCDR):** Read replicas can play a critical role in case of a primary database failure, a read replica can be promoted to primary, ensuring minimal downtime and data loss.
# Resizing
Source: https://ubicloud.com/docs/managed-postgresql/resize
Resizing your Ubicloud PostgreSQL instance allows you to adjust the resources
allocated to your database to better meet your performance and cost
requirements. You can resize your instance by changing to a different
configuration of server family, server size and storage size.
# ParadeDB on Ubicloud
Source: https://ubicloud.com/docs/managed-postgresql/paradedb-on-ubicloud
## Getting Started
ParadeDB is an Elasticsearch alternative built on Postgres. It provides powerful search and analytics capabilities built on top of PostgreSQL and now it is available on Ubicloud as a managed service.
Our managed ParadeDB service combines the unique expertise of both Ubicloud and ParadeDB teams. Underlying infrastructure is managed by the Ubicloud team and the ParadeDB instances are managed by the ParadeDB team. This allows you to access both teams' technical expertise as needed.
ParadeDB is a good fit for:
* Developers who trust Postgres and don't want to operate a non-Postgres database / query engine
* Elasticsearch users who want to consolidate their data stack on Postgres
* Full-text, similarity, or hybrid search over large volumes of operational data with zero ETL
* Building rich search experiences with analytical queries and facets
**Navigate to ParadeDB Service:** To create a ParadeDB instance, start by clicking to the "PostgreSQL" option from the left menu on the dashboard and then click “Create ParadeDB PostgreSQL Database”.
**Instance Configuration:** Type the desired database server name and choose the desired instance type. Since this database will be managed by the ParadeDB team as well, you will need to accept terms of service and privacy policy of ParadeDB. You don't need to set anything else. A secure password will be automatically generated.
**Instance Creation:** After selecting the instance type, click the "Create" button. Your managed PostgreSQL instance will be set up and ready for use in a few minutes.
## Connect to managed ParadeDB instance
**Get Connection Details:** Once your ParadeDB instance is ready, go to the database details view to find the connection string. The connection string will be masked. You can reveal it or copy it to your clipboard directly.
**Use Connection String:** You can use `psql` or any other database client to establish a connection to your PostgreSQL instance.
Ubicloud managed ParadeDB service provides superuser access to users. This connection string is for accessing the database as a superuser. You can use it to create new users.
## Getting most out of your ParadeDB instance
You can learn more about ParadeDB's capabilities and how to use them in [this quick start guide](https://docs.paradedb.com/documentation/getting-started/quickstart).
# Price-Performance
Source: https://ubicloud.com/docs/managed-postgresql/price-performance
Ubicloud Managed PostgreSQL provides **10x** better price-performance compared to similar managed PostgreSQL services thanks to its unique architecture based on NVMe SSD storage. The following benchmarks compare Ubicloud PostgreSQL with AWS Aurora and AWS RDS PostgreSQL.
## TPC-C Benchmark
Ubicloud PostgreSQL runs **1.4x** more transactions than AWS Aurora and costs **5.8x** less. Similarly, Ubicloud Postgres runs **4.6x** more transactions than AWS RDS and costs **2.8x** less. Ubicloud PostgreSQL also has **1.91x** lower latency compared to AWS Aurora and **7.65x** lower latency than AWS RDS PostgreSQL.
Benchmark Configuration:
* **Ubicloud**: standard-8 (8 vCPUs, 32 GB RAM) instance with 1 TB SSD storage
* **AWS Aurora**: db.r8g.2xlarge (8 vCPUs, 64 GB RAM) instance with 1 TB SSD storage
* **AWS RDS**: db.m7g.2xlarge (8 vCPUs, 32 GB RAM) instance with I/O optimized storage
* **Tables**: 32
* **Number of Warehouses**: 256
* **Number of Clients**: 64
| | Ubicloud | Aurora | RDS |
| :--------------------: | :------: | :-----: | :-----: |
| **TPS** | 873.25 | 636.31 | 188.31 |
| **Latency** | 314.45 | 601.29 | 2405.65 |
| **Price** | 259.92 | 1501.00 | 725.02 |
| **TPS Difference** | - | 1.37x | 4.64x |
| **Price-TPS** | - | 7.93x | 12.94x |
| **Latency Difference** | - | 1.91x | 7.65x |
| **Price-Latency** | - | 11.04x | 21.34x |
## TPC-H Benchmark
Ubicloud PostgreSQL runs 22 TPC-H queries **2.42x** faster than AWS Aurora and **2.96x** faster than AWS RDS PostgreSQL, while costing **6.40x** less than AWS Aurora and **3.00x** less than AWS RDS PostgreSQL.
Benchmark Configuration:
* **Ubicloud**: standard-8 (8 vCPUs, 32 GB RAM) instance with 512 GB SSD storage
* **AWS Aurora**: db.r8g.2xlarge (8 vCPUs, 64 GB RAM) instance with 512 GB SSD storage
* **AWS RDS**: db.m7g.2xlarge (8 vCPUs, 32 GB RAM) instance with I/O optimized storage
* **Scale Factor**: 100
| | Ubicloud | Aurora | RDS |
| :--------------------------: | -------- | -------- | :-----: |
| **Q01** | 75.40 | 170.40 | 174.80 |
| **Q02** | 108.65 | 238.86 | 129.69 |
| **Q03** | 60.95 | 101.40 | 223.59 |
| **Q04** | 119.65 | 552.57 | 355.73 |
| **Q05** | 63.19 | 83.69 | 223.53 |
| **Q06** | 45.91 | 61.42 | 179.26 |
| **Q07** | 60.96 | 76.28 | 223.72 |
| **Q08** | 69.92 | 92.86 | 254.33 |
| **Q09** | 84.94 | 1596.24 | 275.71 |
| **Q10** | 91.38 | 123.96 | 314.85 |
| **Q11** | 35.29 | 76.76 | 102.38 |
| **Q12** | 65.72 | 119.75 | 240.15 |
| **Q13** | 48.66 | 80.44 | 83.23 |
| **Q14** | 46.74 | 74.11 | 181.50 |
| **Q15** | 97.94 | 161.96 | 365.75 |
| **Q16** | 100.05 | 107.41 | 107.35 |
| **Q17** | 235.25 | 542.08 | 559.31 |
| **Q18** | 225.73 | 605.84 | 2142.52 |
| **Q19** | 23.17 | 161.77 | 111.90 |
| **Q20** | 1825.97 | 10666.92 | 9866.06 |
| **Q21** | 103.87 | 729.29 | 213.65 |
| **Q22** | 9.88 | 30.37 | 10.49 |
| **Geometric Mean (seconds)** | 79.72 | 193.23 | 235.61 |
| **Price (\$)** | 218.96 | 1401.57 | 654.87 |
| **Performance Difference** | - | 2.42x | 2.96x |
| **Price-Performance** | - | 15.48x | 8.88x |
# Read Replicas
Source: https://ubicloud.com/docs/managed-postgresql/read-replicas
Read replicas allow you to create one or more copies of your primary PostgreSQL database instance. These replicas continuously follow your primary database using replication mechanisms of PostgreSQL to stay up to date with changes. With Ubicloud, you can now spin up read replicas with a single click from the Read Replica view of your PostgreSQL instance.
## Why Read Replicas Matter?
* **Scalability:** Read replicas allow you to scale your database horizontally, distributing read-heavy workloads-such as reporting, analytics, and real-time dashboards-across multiple dedicated replicas.
* **Isolation:** By directing analytical and business intelligence queries to these replicas, you keep your primary instance focused and responsive for write operations and critical transactional workloads. This separation not only boosts overall system performance and predictability but also ensures that you don't need to give write access to analytical or reporting tools.
* **Business continuity and disaster recovery (BCDR):** Read replicas can play a critical role in case of a primary database failure, a read replica can be promoted to primary, ensuring minimal downtime and data loss.
# Resizing
Source: https://ubicloud.com/docs/managed-postgresql/resize
Resizing your Ubicloud PostgreSQL instance allows you to adjust the resources
allocated to your database to better meet your performance and cost
requirements. You can resize your instance by changing to a different
configuration of server family, server size and storage size.
 After selecting the desired configuration, click the "Update" button to start
the resizing process. The resizing process may take some time to complete,
depending on the size of your database and the resources allocated to your
instance.
Once the process is complete, your instance will failover to the desired
configuration. This involves a brief interruption during which the database will
be unavailable. If a [maintenance window](/managed-postgresql/configuration-and-settings#maintenance-windows) is configured, the failover will be
scheduled for the next available maintenance window, otherwise it will be
done immediately.
There will be no changes to the connection information after resizing.
# Version Upgrades
Source: https://ubicloud.com/docs/managed-postgresql/upgrade
You can upgrade your Ubicloud PostgreSQL instance to the next major
version by using the Upgrade view.
After selecting the desired configuration, click the "Update" button to start
the resizing process. The resizing process may take some time to complete,
depending on the size of your database and the resources allocated to your
instance.
Once the process is complete, your instance will failover to the desired
configuration. This involves a brief interruption during which the database will
be unavailable. If a [maintenance window](/managed-postgresql/configuration-and-settings#maintenance-windows) is configured, the failover will be
scheduled for the next available maintenance window, otherwise it will be
done immediately.
There will be no changes to the connection information after resizing.
# Version Upgrades
Source: https://ubicloud.com/docs/managed-postgresql/upgrade
You can upgrade your Ubicloud PostgreSQL instance to the next major
version by using the Upgrade view.
 ## Preparing for a Major Version Upgrade
Before starting an upgrade, it is recommended to test the upgrade on a
staging database along with your application to ensure compatibility.
Use the "Create a test fork" button to create a new copy of your
database at the current version. This will allow you to test the upgrade
without any risk to the current database.
## Upgrade Process
For performing the upgrade, click on the "Upgrade" button. During the upgrade,
your database will be unavailable for a short period. If a maintenance window
is configured, the upgrade will take place during the first available
maintenance window after the new server is ready. Otherwise, the upgrade will
be performed as soon as the new server becomes ready. While the upgrade is
ongoing, you can monitor the progress and the database availability status from
the Upgrade view.
## Preparing for a Major Version Upgrade
Before starting an upgrade, it is recommended to test the upgrade on a
staging database along with your application to ensure compatibility.
Use the "Create a test fork" button to create a new copy of your
database at the current version. This will allow you to test the upgrade
without any risk to the current database.
## Upgrade Process
For performing the upgrade, click on the "Upgrade" button. During the upgrade,
your database will be unavailable for a short period. If a maintenance window
is configured, the upgrade will take place during the first available
maintenance window after the new server is ready. Otherwise, the upgrade will
be performed as soon as the new server becomes ready. While the upgrade is
ongoing, you can monitor the progress and the database availability status from
the Upgrade view.
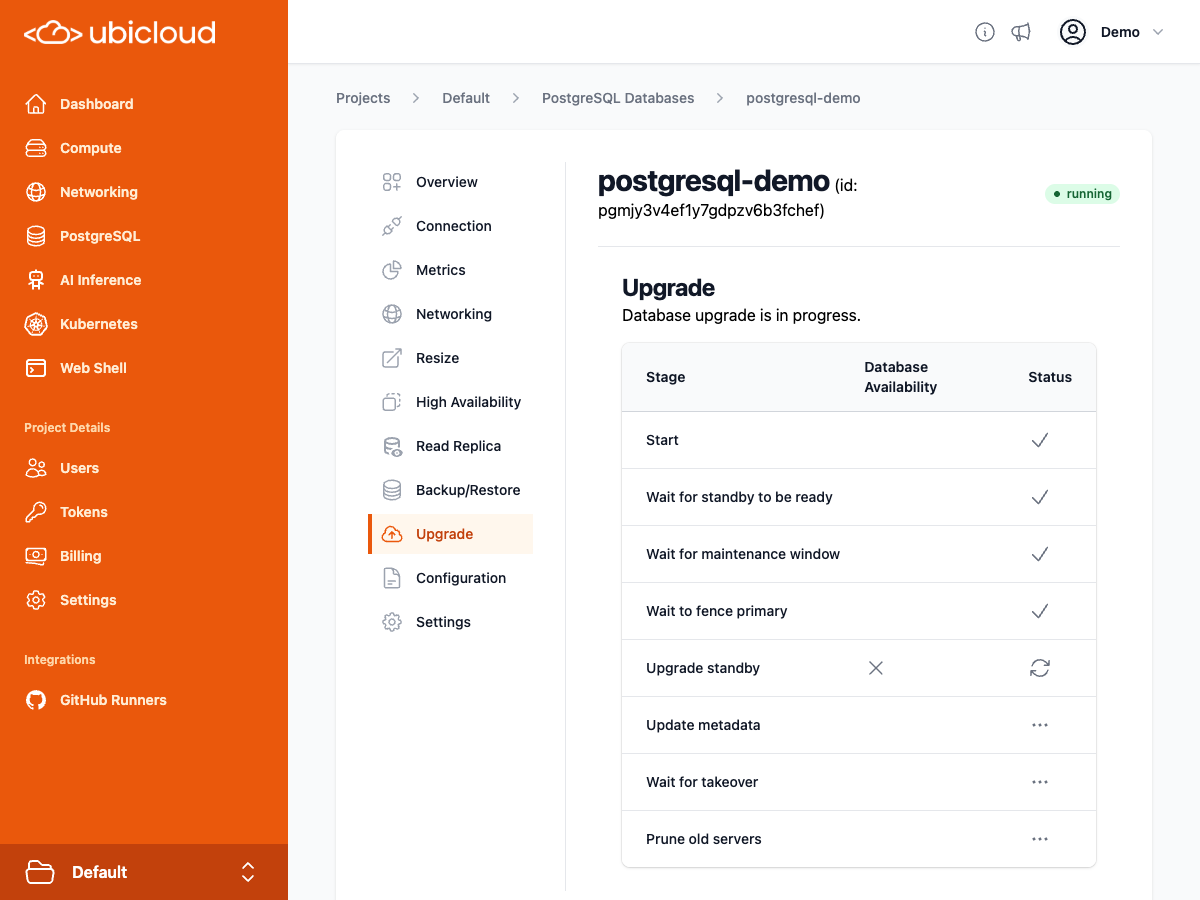 # Firewall
Source: https://ubicloud.com/docs/networking/firewall
This guide provides detailed instructions on configuring and managing firewalls
for your private subnets within Ubicloud. Ubicloud firewalls are designed to
enhance the security of your virtual machines (VMs) by controlling inbound
traffic based on predefined rules. These firewalls are stateful and apply
exclusively to the entire private subnet, ensuring a robust security perimeter
for your whole private subnet.
## Key Features
* **Stateful Inspection:** Ubicloud firewalls remember the state of network
connections (TCP/UDP) and can make decisions based on the connection state,
which adds an extra layer of security. That said, if you add a rule that
blocks a certain IP address, the existing connections would continue to stay
alive until shutdown deliberately.
* **Ingress Filtering:** Firewalls in Ubicloud only allow inbound traffic based
on explicitly defined rules. If no rules are specified, all inbound traffic is
blocked except for communication within the private subnet. We currently do
not support outbound rules.
* **Simplified Management:** Attach or detach one or more firewalls to your
private subnet with ease, directly from the Ubicloud console.
## Getting Started with Firewalls
### Creating a Firewall
On the dashboard, select the "Networking" option from the left menu. Then,
select the "Firewalls" tab.
Click on the "+ New Firewall" button. You will be prompted to enter details
such as the firewall's name, description and the subnet you wish to attach.
After filling the details, click “Create”.
### Configuring Firewall Rules
**Specify Ingress Rules:** Define which incoming traffic is allowed into your
private subnet. You can specify rules based on IP addresses and port numbers.
You can input a CIDR range and define the continuous port range to be allowed.
After specifying CIDR and Port ranges, you simply hit “Create”. Some example CIDR
and Port range usage can be like the following;
| Case | CIDR | Port Range |
| :---------------------------------------------: | :-------------: | :--------: |
| Allow all IP and port ranges | 0.0.0.0/0 | |
| Allow all IP and port ranges | 0.0.0.0/0 | 0..65536 |
| Allow a specific IP and ports between 80 and 90 | 123.123.123.123 | 80..90 |
| Allow a subnet for a specific port | 1.1.1.0/24 | 22 |
**Default Deny Rule:** Remember, if no rules are set, the firewall will deny all
incoming traffic, including traffic within the private subnet.
### Attaching a Firewall to a Private Subnet
From the dashboard, select "Networking", choose the "Firewall" tab. Select the
firewall you want to attach.
Click on the "Select a Subnet" option, choose the private subnet and click
“Attach”. This action applies the firewall rules to all incoming traffic in
the subnet.
### Best Practices
**Regularly Update Firewall Rules:** As your network requirements change,
regularly review and update your firewall rules to ensure they accurately
reflect the desired traffic flow and security posture.
**Restrictive Rule Configuration:** Start with a restrictive approach by denying
all traffic and then selectively allow specific traffic as needed. This
minimizes potential exposure to unanticipated threats. By default, Ubicloud adds
allow all traffic rule to minimize the initial configuration efforts.
## How Does Ubicloud implement Firewalls?
Ubicloud firewalls are implemented using linux nftables. Please refer to our
blog post [here](https://www.ubicloud.com/blog/ubicloud-firewalls-how-linux-nftables-enables-flexible-rules)
for more details.
# Load Balancer
Source: https://ubicloud.com/docs/networking/load-balancer
The Ubicloud Load Balancer distributes traffic across multiple virtual machines
(VMs) and ensures high availability for your applications. The load balancer
operates at Layer 4 of the Open Systems Interconnection (OSI) model.
Ubicloud Load Balancers offer a DNS name that's the single point of contact for
clients. This DNS name maps to the public IPv4 and IPv6 addresses of the VMs
attached to the load balancer. Incoming traffic is distributed across VMs based on
load balancing algorithms and health probes.
When traffic reaches the load balancer's network namespace, it directs traffic
to the appropriate VM by evaluating the load balancing algorithm, VM health
status, and connection state. This redirection uses IPSec Tunnels in tunnel mode,
ensuring that all inter-VM traffic is fully encrypted.
The following diagram shows the overall structure of the Ubicloud Load
Balancers;
# Firewall
Source: https://ubicloud.com/docs/networking/firewall
This guide provides detailed instructions on configuring and managing firewalls
for your private subnets within Ubicloud. Ubicloud firewalls are designed to
enhance the security of your virtual machines (VMs) by controlling inbound
traffic based on predefined rules. These firewalls are stateful and apply
exclusively to the entire private subnet, ensuring a robust security perimeter
for your whole private subnet.
## Key Features
* **Stateful Inspection:** Ubicloud firewalls remember the state of network
connections (TCP/UDP) and can make decisions based on the connection state,
which adds an extra layer of security. That said, if you add a rule that
blocks a certain IP address, the existing connections would continue to stay
alive until shutdown deliberately.
* **Ingress Filtering:** Firewalls in Ubicloud only allow inbound traffic based
on explicitly defined rules. If no rules are specified, all inbound traffic is
blocked except for communication within the private subnet. We currently do
not support outbound rules.
* **Simplified Management:** Attach or detach one or more firewalls to your
private subnet with ease, directly from the Ubicloud console.
## Getting Started with Firewalls
### Creating a Firewall
On the dashboard, select the "Networking" option from the left menu. Then,
select the "Firewalls" tab.
Click on the "+ New Firewall" button. You will be prompted to enter details
such as the firewall's name, description and the subnet you wish to attach.
After filling the details, click “Create”.
### Configuring Firewall Rules
**Specify Ingress Rules:** Define which incoming traffic is allowed into your
private subnet. You can specify rules based on IP addresses and port numbers.
You can input a CIDR range and define the continuous port range to be allowed.
After specifying CIDR and Port ranges, you simply hit “Create”. Some example CIDR
and Port range usage can be like the following;
| Case | CIDR | Port Range |
| :---------------------------------------------: | :-------------: | :--------: |
| Allow all IP and port ranges | 0.0.0.0/0 | |
| Allow all IP and port ranges | 0.0.0.0/0 | 0..65536 |
| Allow a specific IP and ports between 80 and 90 | 123.123.123.123 | 80..90 |
| Allow a subnet for a specific port | 1.1.1.0/24 | 22 |
**Default Deny Rule:** Remember, if no rules are set, the firewall will deny all
incoming traffic, including traffic within the private subnet.
### Attaching a Firewall to a Private Subnet
From the dashboard, select "Networking", choose the "Firewall" tab. Select the
firewall you want to attach.
Click on the "Select a Subnet" option, choose the private subnet and click
“Attach”. This action applies the firewall rules to all incoming traffic in
the subnet.
### Best Practices
**Regularly Update Firewall Rules:** As your network requirements change,
regularly review and update your firewall rules to ensure they accurately
reflect the desired traffic flow and security posture.
**Restrictive Rule Configuration:** Start with a restrictive approach by denying
all traffic and then selectively allow specific traffic as needed. This
minimizes potential exposure to unanticipated threats. By default, Ubicloud adds
allow all traffic rule to minimize the initial configuration efforts.
## How Does Ubicloud implement Firewalls?
Ubicloud firewalls are implemented using linux nftables. Please refer to our
blog post [here](https://www.ubicloud.com/blog/ubicloud-firewalls-how-linux-nftables-enables-flexible-rules)
for more details.
# Load Balancer
Source: https://ubicloud.com/docs/networking/load-balancer
The Ubicloud Load Balancer distributes traffic across multiple virtual machines
(VMs) and ensures high availability for your applications. The load balancer
operates at Layer 4 of the Open Systems Interconnection (OSI) model.
Ubicloud Load Balancers offer a DNS name that's the single point of contact for
clients. This DNS name maps to the public IPv4 and IPv6 addresses of the VMs
attached to the load balancer. Incoming traffic is distributed across VMs based on
load balancing algorithms and health probes.
When traffic reaches the load balancer's network namespace, it directs traffic
to the appropriate VM by evaluating the load balancing algorithm, VM health
status, and connection state. This redirection uses IPSec Tunnels in tunnel mode,
ensuring that all inter-VM traffic is fully encrypted.
The following diagram shows the overall structure of the Ubicloud Load
Balancers;
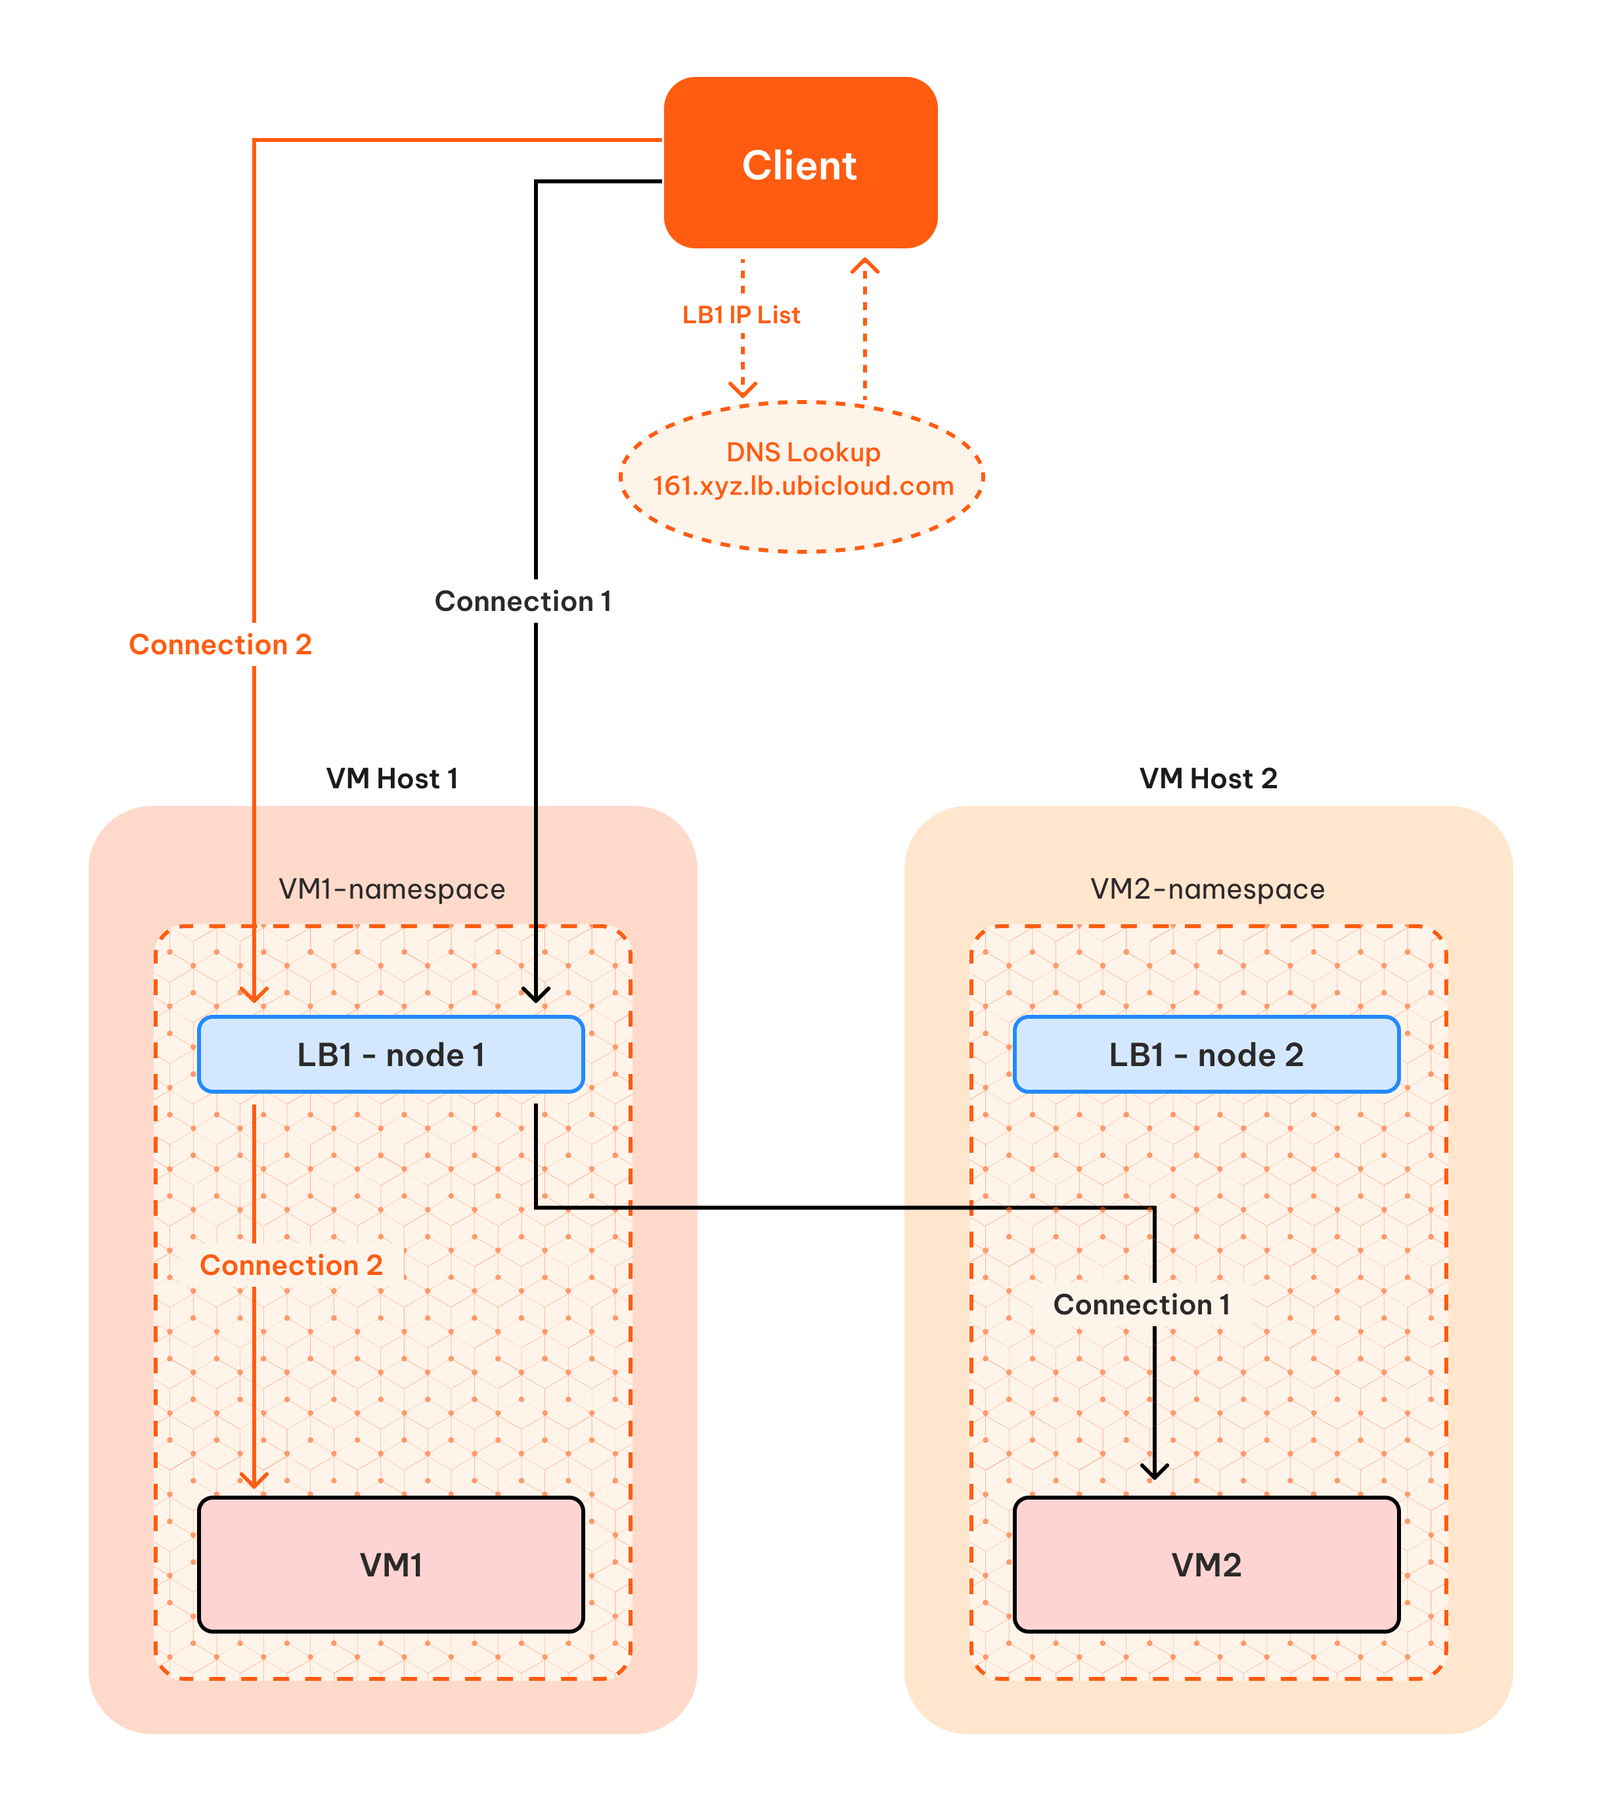 If a VM becomes unhealthy, Ubicloud Load Balancer stops sending traffic to the
VM until it becomes healthy again. These health probes and load balancer updates
are managed by external and fault tolerant processes. This way, clients can
continue to connect to their VMs even if one or multiple of their VMs are
unavailable. If you remove a VM from the load balancer, Ubicloud updates the DNS
entries and keeps the load balancer node in place until the TTL expires. This
ensures a graceful removal.
## Key Features
* **DNS Integration:** Provides a stable hostname and seamless connectivity even when underlying IP addresses change.
* **High Availability:** Increases availability by distributing traffic across Ubicloud VMs.
* **Health Probes:** Monitors load-balanced VMs and updates the load balancer to route traffic only to healthy instances.
* **IPv4 / IPv6:** Supports diverse network configurations, including load balancing of IPv6.
* **Security:** Ubicloud Load Balancers live and operate inside your Ubicloud Private Subnet. Therefore, the traffic that is managed by the load balancer is fully encrypted and secure.
* **Multiple Algorithms:** Supports round-robin and hash based load balancing.
* **SSL Certificates:** We provision ZeroSSL certificates for the load balancer hostname that you can directly use for your HTTPS enabled web apps.
## Getting Started
### Creating a Load Balancer
**Navigate to Load Balancers:** On the dashboard, select the "Networking" option from the left menu. And then choose the “Load Balancers” from the upper tab
**Create a New Load Balancer:** Click on the "+ New Load Balancer" button. You will be prompted to enter the following fields. After filling the details, click “Create”.
* **Name:** The name of the load balancer, which will also be used in the hostname.
* **Private Subnet:** Select the private subnet that the load balancer will operate in. Note that VMs from different private subnets cannot be mixed within a single load balancer.
* **Load Balancing Algorithm:** Choose between round\_robin and hash\_based algorithms. For hash-based load balancing, the following fields are used:
* Source IP address
* Source Port number
* Destination IP address
* Destination Port number
* **Load Balancer Port:** Configure the port (e.g., Port 80) that the load balancer will accept connections from.
* **Application Port:** The port that the backend VM serves connections from.
* **Health Check Endpoint:** The HTTP endpoint that is used for health checks, such as /up. Make sure your application sends a response code 200 to this URL.
### Attaching a VM to a Load Balancer
**Access Load Balancer Details:** From the dashboard, select "Networking" and choose the “Load Balancers” tab.
The overview page of your Private Subnet provides a comprehensive view of your subnet's configuration and resources. Here, you'll find:
**Attach a VM to the Load Balancer:** At the bottom of the detailed Load Balancer page, you will see the “Attached VMs” section. You will click to the VM picker and choose the VM and then click the “Attach” button at the right hand side.
### Detaching a VM from a Load Balancer
After the VM is attached, you can detach it back from the same page, at the “Attached VMs” section, you will need to click to the “Detach” button on the right hand side of the VM that you want to be detached.
### SSL Certificates
Ubicloud load balancers do not support SSL termination. However, we automatically generate public SSL certificates for the load balancer hostname. Attached VMs can easily download the `cert` and `key` files using the following commands:
```
sudo curl -f -L3 [FD00:0B1C:100D:5afe:CE::]/load-balancer/cert.pem
sudo curl -f -L3 [FD00:0B1C:100D:5afe:CE::]/load-balancer/key.pem
```
Once you have these files stored in the VM, you can use them to serve your HTTPS enabled web applications.
Ubicloud automatically renews certificates every 2 to 3 months and make the new ones available in the same endpoint. Therefore, it is suggested to create a script that downloads the new certificates and stores it in the VM as a systemctl service.
# Private Subnet
Source: https://ubicloud.com/docs/networking/private-subnet
This guide is designed to assist you in creating and managing your private
subnets within Ubicloud. Private subnets offer a secure environment for your
virtual machines (VMs), ensuring private and secure internal communication
without the need for public IP addresses.
Ubicloud imagines private subnets as security perimeters, where every resource
within the subnet can communicate with each other using their private IPv4 or
IPv6 addresses. Firewalls are attached to the whole private subnet and they are
applied to the private networking as well to further enhance security.
## Key Features
* **Fully Encrypted Communication:** Every resource within a subnet is connected
through IPSec tunnels, ensuring secure communication.
* **Supports both IPv4 and IPv6:** IPv4 and IPv6 support ensures scalable
security solutions for Ubicloud's private subnets. We use /26 subnet size for
IPv4 and /80 for IPv6, allowing up to 63 resources in a single subnet.
* **Automatic Key Rotation:** IPSec tunnels are automatically rekeyed every 24
hours, ensuring continuous secure communication without traffic disruption.
* **Firewall Integration:** Attach and detach multiple firewalls to control
access to resources within your private subnet.
## Getting Started
### Creating a Private Subnet
On the dashboard, select the "Networking" option from the left menu and then
choose the "Private Subnet" tab.
Click on the "+ New Private Subnet" button. You will be directed to a new
page, where you can specify the subnet's name and its cloud region.
### Creating a New VM in a Private Subnet
When creating a new VM, choose an existing private subnet to provision the
resource in.
Start connecting to other VMs within the same private subnet using their
private IPv4 or IPv6 addresses, visible on the Overview page.
Upon successful VM creation, Ubicloud automatically establishes IPSec
tunnels to and from every other resource in the subnet.
## Private Subnet Details
### Viewing Resources in a Private Subnet
From the dashboard's left menu, select the "Networking" option and then
choose the "Private Subnet" tab.
Click to the name of the desired private subnet to view its details,
including name, region, private IP blocks, and attached VMs and firewalls.
### Overview Page
The overview page of your Private Subnet provides a comprehensive view of your
subnet's configuration and resources. Here, you'll find:
* **Subnet Name and Region:** Easily identify your subnet and its Ubicloud
region.
* **IP Blocks:** View the assigned private IPv4 and IPv6 blocks for your subnet.
* **Attached Resources:** See a list of all VMs and firewalls currently attached
to the subnet.
## How Does Ubicloud Implement Private Networking?
Ubicloud leverages IPSec tunnels to ensure secure and private communication
between virtual machines (VMs) within its private subnets. This section provides
a detailed overview of how Ubicloud uses IPSec tunnels, focusing on their
creation, management, and encryption processes.
### Overview of IPSec Tunnels in Ubicloud
IPSec (Internet Protocol Security) is a suite of protocols designed to secure
Internet Protocol (IP) communications by authenticating and encrypting each IP
packet of a session. Ubicloud employs IPSec tunnels in tunnel mode, which
encapsulates the entire IP packet within an Encapsulation Security Payload (ESP)
packet. This encapsulation is crucial for maintaining the confidentiality and
integrity of data as it moves between VMs within a private subnet. Essentially,
all traffic is public traffic, if you are not operating in the same LAN. Any
cloud VM lives in a public data center. Therefore, we need to find a way to
address these VMs in a secure, encrypted way to call it private. Ubicloud has to
do that because we do not have our own data centers, we do not have absolute
control over the network.
### Key Components of Ubicloud's IPSec Implementation
#### ESP Packet Creation and Encryption
In Ubicloud's environment, ESP packets are generated using the ip xfrm command,
which establishes specific rules and policies for packet handling. These ESP
packets encapsulate the original IP packet in its entirety. The encapsulation
process involves encrypting the data, thereby ensuring that the packet's
contents are secure from unauthorized access or eavesdropping. The whole
encapsulation happens in the dedicated network namespace of the VM and it gets
decrypted only when it arrives at the destination network namespace. So, the
whole traffic is private, end to end.
#### Automatic Key Management
Security keys for the IPSec tunnels are automatically generated and refreshed
daily. This practice of frequent key rotation significantly enhances the
security posture by minimizing the risk of key compromise. We only generate the
keys and we keep them in Ubicloud Control Plane until the rekeying process is
completed. We clean up the old tunnels and any key material that is no longer
in use.
#### Use of Public IPv6 Addresses
Ubicloud uniquely uses internally allocated public IPv6 addresses to manage and
route IPSec tunnels. This approach not only leverages the extensive address
space provided by IPv6 but also enhances the security and efficiency of data
transmission within the private subnet. Our VMs get a public IPv6 prefix, and
we allocate the same size sister subnet for our own internal use. This way, we
can address our VMs using the public IPv6 addresses.
# Overview
Source: https://ubicloud.com/docs/overview
export const Callout = ({text}) =>
If a VM becomes unhealthy, Ubicloud Load Balancer stops sending traffic to the
VM until it becomes healthy again. These health probes and load balancer updates
are managed by external and fault tolerant processes. This way, clients can
continue to connect to their VMs even if one or multiple of their VMs are
unavailable. If you remove a VM from the load balancer, Ubicloud updates the DNS
entries and keeps the load balancer node in place until the TTL expires. This
ensures a graceful removal.
## Key Features
* **DNS Integration:** Provides a stable hostname and seamless connectivity even when underlying IP addresses change.
* **High Availability:** Increases availability by distributing traffic across Ubicloud VMs.
* **Health Probes:** Monitors load-balanced VMs and updates the load balancer to route traffic only to healthy instances.
* **IPv4 / IPv6:** Supports diverse network configurations, including load balancing of IPv6.
* **Security:** Ubicloud Load Balancers live and operate inside your Ubicloud Private Subnet. Therefore, the traffic that is managed by the load balancer is fully encrypted and secure.
* **Multiple Algorithms:** Supports round-robin and hash based load balancing.
* **SSL Certificates:** We provision ZeroSSL certificates for the load balancer hostname that you can directly use for your HTTPS enabled web apps.
## Getting Started
### Creating a Load Balancer
**Navigate to Load Balancers:** On the dashboard, select the "Networking" option from the left menu. And then choose the “Load Balancers” from the upper tab
**Create a New Load Balancer:** Click on the "+ New Load Balancer" button. You will be prompted to enter the following fields. After filling the details, click “Create”.
* **Name:** The name of the load balancer, which will also be used in the hostname.
* **Private Subnet:** Select the private subnet that the load balancer will operate in. Note that VMs from different private subnets cannot be mixed within a single load balancer.
* **Load Balancing Algorithm:** Choose between round\_robin and hash\_based algorithms. For hash-based load balancing, the following fields are used:
* Source IP address
* Source Port number
* Destination IP address
* Destination Port number
* **Load Balancer Port:** Configure the port (e.g., Port 80) that the load balancer will accept connections from.
* **Application Port:** The port that the backend VM serves connections from.
* **Health Check Endpoint:** The HTTP endpoint that is used for health checks, such as /up. Make sure your application sends a response code 200 to this URL.
### Attaching a VM to a Load Balancer
**Access Load Balancer Details:** From the dashboard, select "Networking" and choose the “Load Balancers” tab.
The overview page of your Private Subnet provides a comprehensive view of your subnet's configuration and resources. Here, you'll find:
**Attach a VM to the Load Balancer:** At the bottom of the detailed Load Balancer page, you will see the “Attached VMs” section. You will click to the VM picker and choose the VM and then click the “Attach” button at the right hand side.
### Detaching a VM from a Load Balancer
After the VM is attached, you can detach it back from the same page, at the “Attached VMs” section, you will need to click to the “Detach” button on the right hand side of the VM that you want to be detached.
### SSL Certificates
Ubicloud load balancers do not support SSL termination. However, we automatically generate public SSL certificates for the load balancer hostname. Attached VMs can easily download the `cert` and `key` files using the following commands:
```
sudo curl -f -L3 [FD00:0B1C:100D:5afe:CE::]/load-balancer/cert.pem
sudo curl -f -L3 [FD00:0B1C:100D:5afe:CE::]/load-balancer/key.pem
```
Once you have these files stored in the VM, you can use them to serve your HTTPS enabled web applications.
Ubicloud automatically renews certificates every 2 to 3 months and make the new ones available in the same endpoint. Therefore, it is suggested to create a script that downloads the new certificates and stores it in the VM as a systemctl service.
# Private Subnet
Source: https://ubicloud.com/docs/networking/private-subnet
This guide is designed to assist you in creating and managing your private
subnets within Ubicloud. Private subnets offer a secure environment for your
virtual machines (VMs), ensuring private and secure internal communication
without the need for public IP addresses.
Ubicloud imagines private subnets as security perimeters, where every resource
within the subnet can communicate with each other using their private IPv4 or
IPv6 addresses. Firewalls are attached to the whole private subnet and they are
applied to the private networking as well to further enhance security.
## Key Features
* **Fully Encrypted Communication:** Every resource within a subnet is connected
through IPSec tunnels, ensuring secure communication.
* **Supports both IPv4 and IPv6:** IPv4 and IPv6 support ensures scalable
security solutions for Ubicloud's private subnets. We use /26 subnet size for
IPv4 and /80 for IPv6, allowing up to 63 resources in a single subnet.
* **Automatic Key Rotation:** IPSec tunnels are automatically rekeyed every 24
hours, ensuring continuous secure communication without traffic disruption.
* **Firewall Integration:** Attach and detach multiple firewalls to control
access to resources within your private subnet.
## Getting Started
### Creating a Private Subnet
On the dashboard, select the "Networking" option from the left menu and then
choose the "Private Subnet" tab.
Click on the "+ New Private Subnet" button. You will be directed to a new
page, where you can specify the subnet's name and its cloud region.
### Creating a New VM in a Private Subnet
When creating a new VM, choose an existing private subnet to provision the
resource in.
Start connecting to other VMs within the same private subnet using their
private IPv4 or IPv6 addresses, visible on the Overview page.
Upon successful VM creation, Ubicloud automatically establishes IPSec
tunnels to and from every other resource in the subnet.
## Private Subnet Details
### Viewing Resources in a Private Subnet
From the dashboard's left menu, select the "Networking" option and then
choose the "Private Subnet" tab.
Click to the name of the desired private subnet to view its details,
including name, region, private IP blocks, and attached VMs and firewalls.
### Overview Page
The overview page of your Private Subnet provides a comprehensive view of your
subnet's configuration and resources. Here, you'll find:
* **Subnet Name and Region:** Easily identify your subnet and its Ubicloud
region.
* **IP Blocks:** View the assigned private IPv4 and IPv6 blocks for your subnet.
* **Attached Resources:** See a list of all VMs and firewalls currently attached
to the subnet.
## How Does Ubicloud Implement Private Networking?
Ubicloud leverages IPSec tunnels to ensure secure and private communication
between virtual machines (VMs) within its private subnets. This section provides
a detailed overview of how Ubicloud uses IPSec tunnels, focusing on their
creation, management, and encryption processes.
### Overview of IPSec Tunnels in Ubicloud
IPSec (Internet Protocol Security) is a suite of protocols designed to secure
Internet Protocol (IP) communications by authenticating and encrypting each IP
packet of a session. Ubicloud employs IPSec tunnels in tunnel mode, which
encapsulates the entire IP packet within an Encapsulation Security Payload (ESP)
packet. This encapsulation is crucial for maintaining the confidentiality and
integrity of data as it moves between VMs within a private subnet. Essentially,
all traffic is public traffic, if you are not operating in the same LAN. Any
cloud VM lives in a public data center. Therefore, we need to find a way to
address these VMs in a secure, encrypted way to call it private. Ubicloud has to
do that because we do not have our own data centers, we do not have absolute
control over the network.
### Key Components of Ubicloud's IPSec Implementation
#### ESP Packet Creation and Encryption
In Ubicloud's environment, ESP packets are generated using the ip xfrm command,
which establishes specific rules and policies for packet handling. These ESP
packets encapsulate the original IP packet in its entirety. The encapsulation
process involves encrypting the data, thereby ensuring that the packet's
contents are secure from unauthorized access or eavesdropping. The whole
encapsulation happens in the dedicated network namespace of the VM and it gets
decrypted only when it arrives at the destination network namespace. So, the
whole traffic is private, end to end.
#### Automatic Key Management
Security keys for the IPSec tunnels are automatically generated and refreshed
daily. This practice of frequent key rotation significantly enhances the
security posture by minimizing the risk of key compromise. We only generate the
keys and we keep them in Ubicloud Control Plane until the rekeying process is
completed. We clean up the old tunnels and any key material that is no longer
in use.
#### Use of Public IPv6 Addresses
Ubicloud uniquely uses internally allocated public IPv6 addresses to manage and
route IPSec tunnels. This approach not only leverages the extensive address
space provided by IPv6 but also enhances the security and efficiency of data
transmission within the private subnet. Our VMs get a public IPv6 prefix, and
we allocate the same size sister subnet for our own internal use. This way, we
can address our VMs using the public IPv6 addresses.
# Overview
Source: https://ubicloud.com/docs/overview
export const Callout = ({text}) =>
{text}
;
## What is Ubicloud?
Ubicloud is an open, free, and portable cloud. Think of it as an alternative to public cloud providers, like what Linux is to proprietary operating systems.
Ubicloud offers infrastructure-as-a-service (IaaS) features on providers that lease bare metal instances, such as Hetzner, Leaseweb, and Latitude.sh. It’s also available as a managed service.
The low cost of the bare metal instances we use in our managed service allows us to pass those low prices to you, reducing cloud costs by 3x - 10x.
## Why Ubicloud?
Cloud services like AWS, Azure, and Google Cloud made life easier for start-ups and enterprises. But they are closed source, have you rent computers at a huge premium, and lock you in. Ubicloud offers an open alternative, reduces your costs, and returns control of your infrastructure back to you. All without sacrificing the cloud's convenience.
Today, AWS offers about two hundred cloud services. Ultimately, we will implement 10% of the cloud services that make up 80% of total consumption.
Example workloads/reasons to use Ubicloud today include:
* You're using GitHub Actions. Ubicloud supports managed x64 and arm64 runners; and reduces your bill by 10x. To get started, you just need to change 1 line in your workflow file.
* You need managed PostgreSQL. Ubicloud is open source and portable. This way, you can see how we operate and avoid cloud vendor lock-in. Our managed Postgres is also fast thanks to its use of local NVMe and costs 3x less than comparable solutions.
* You have batch processing workloads that are compute/memory intensive. For example, you're doing scientific computing or video processing. You need secure virtual machines (VMs), encryption in-transit and at-rest; and you'd like to pay 3x less.
## Licenses
Our GitHub repo is here: [https://github.com/ubicloud/ubicloud](https://github.com/ubicloud/ubicloud) available to use for free under the GNU Affero General Public License version 3 (AGPL v3).
## Product
Existing cloud services and additional components include the following:
* Elastic Compute - Provision, use, and delete isolated VMs on bare metal
* Block Storage (non-replicated) - Block devices with encryption at rest
* Virtual Networking - Public and private networking. IPv4 and IPv6. Encryption in transit
* Load Balancer - Distributes traffic across VMs, built-in health checks
* Managed PostgreSQL - Postgres with backup/restore, high availability, and extensions
* Authorization - Define roles for different sets of users, and grant those roles support for specific actions on specific objects
* Control plane - Communicates with the data plane using SSH and manages resources
* Cloud console - A dashboard for users to use cloud services
You can provide us with feedback, get help, or ask us to support your bare metal provider by sending us an email at [support@ubicloud.com](mailto:support@ubicloud.com)
# Build Your Own Cloud
Source: https://ubicloud.com/docs/quick-start/build-your-own-cloud
In this guide, you're going to build your own cloud on a bare metal provider. You're going to set up Ubicloud's control plane, lease bare metal instance(s) for the data plane, and cloudify those bare metal instances. Once cloudified, you can use elastic compute, virtual networking, and (local) block storage services.
## Create your control plane
Ubicloud follows an established architectural pattern in building public cloud services. A control plane manages a data plane, where the data plane leverages open-source software.
First, clone the Ubicloud project and initialize the control plane on your local environment. Then, connect to the cloud console.
```bash theme={null}
git clone git@github.com:ubicloud/ubicloud.git
# Generate secrets for demo
./demo/generate_env
# Run containers: db-migrator, app (web & respirate), postgresql
docker-compose -f demo/docker-compose.yml up
# Visit localhost:3000
```
Once you've initialized the control plane, create a new user and sign into the cloud console.
## Lease bare metal instance(s) for data plane
You'll now need to lease instance(s) for the data plane. The easiest way to do this is to lease an instance from a bare metal provider. Hetzner has server auctions available, where you pay monthly for bare metal: [https://www.hetzner.com/sb](https://www.hetzner.com/sb)
Once you lease instance(s), update the `.env` file with the following environment
variables:
* `HETZNER_USER`
* `HETZNER_PASSWORD`
* `HETZNER_SSH_PUBLIC_KEY`
* `HETZNER_SSH_PRIVATE_KEY`
## Cloudify your instance(s)
Run the following script for each instance you'd like to cloudify. Currently, the script cloudifies bare metal instances leased from Hetzner only. After you cloudify your instance(s), you can provision and manage resources on these machines.
```bash theme={null}
docker exec -it ubicloud-app ./demo/cloudify_server
```
## Create Virtual Machine (VM)
Now, you can log into the console at localhost:3000 and create VMs. Ubicloud will create each VM in a virtual network and assign it private IPv4/IPv6 addresses. It will also assign a public IPv6 address to the VM.
If your ISP doesn't support IPv6, please use a VPN or tunnel broker such Mullvad or Hurricane Electric's [https://tunnelbroker.net](https://tunnelbroker.net). Alternatively, you could lease IPv4 addresses from your provider and add them to your control plane.
**Summary:** You built your own cloud on a bare metal provider in this quick start guide. You could then use standard cloud services that come with Ubicloud, such as compute, virtual networking, and local block storage.
# Command Line Interface
Source: https://ubicloud.com/docs/quick-start/cli
Ubicloud provides a command line interface named `ubi`, which allows you to interact with Ubicloud directly from the command line.
This guide shows you how to download, setup, and use the `ubi` command line program.
### Download
You can download the latest release of `ubi` from [the ubicloud/cli releases page on GitHub](https://github.com/ubicloud/cli/releases). We offer downloads of `ubi` for the following operating systems and platforms:
* Linux: amd64/x86\_64/x64, 386/x86, arm64/aarch64
* macOS/Darwin: arm64(Apple silicon), amd64(Intel)
* Windows: amd64/x86\_64/x64, arm64
The Linux/macOS/Windows downloads are tar.gz or zip files, each containing a single-file executable named `ubi`, which can be run directly without installation.
If you are a MacOS user, you can also install with homebrew by running:
```
brew install ubicloud/cli/ubi
```
As `ubi` is part of Ubicloud, it is open source, and [available for review](https://github.com/ubicloud/ubicloud/blob/main/cli/ubi.go). It is a small program is written in [Go](https://go.dev), and if we do not already provide builds for your platform, you can build `ubi` yourself using the Source Code download on the GitHub release page. You can also contact us at [support@ubicloud.com](mailto:support@ubicloud.com) and ask us to provide builds for your operating system and platform.
`ubi` does not automatically update itself. It is a simple program that transmits your command to Ubicloud. As Ubicloud adds support for additional command line capabilities, `ubi` can automatically take advantage of them. However, there may potentially be cases where you need a newer version of `ubi` to take advantage of the additional command line capabilities. In that case, please download the newest version of `ubi` using the link above.
### Setup Personal Access Token
In order to work, `ubi` requires a personal access token be provided via the `UBI_TOKEN` environment variable. If you have not already created a personal access token for your project, you can create one by going to the `Tokens` page for your project, and clicking the `Create Token` button:
That will create a personal access token. Click on the clipboard icon under the token heading to copy the token to your clipboard:
You can choose how you want to store this access token. As mentioned above, `ubi` requires it be provided via the `UBI_TOKEN` environment variable. If you have a password manager or other secure secret storage vault, you can store the token in there. If security is not your primary concern, you could store the access token in your shell startup files, so it is available for all programs.
As there a myriad number of ways that users may want to store the token, `ubi` does not provide integrations for specific token storage. You can use any storage method you want as long as the `UBI_TOKEN` environment variable is present when you execute the `ubi` program.
### Using `ubi`
If you execute `ubi` with no arguments, it displays an error, followed by the program usage
```
$ ubi
! No subcommand provided
CLI to interact with Ubicloud
Usage:
ubi command [command-options] ...
Examples:
ubi vm list # List virtual machines
ubi help vm # Get help for vm subcommand
Commands:
ai Manage AI features
fw Manage firewalls
help Get command help
kc Manage Kubernetes clusters
lb Manage load balancers
pg Manage PostgreSQL databases
ps Manage private subnets
version Display CLI program version
vm Manage virtual machines
```
`ubi` will prefix errors with `! ` and print errors to stderr instead of stdout. In this case, you get an error because you did not provide a subcommand when calling the program. `ubi` helpfully shows you the available subcommands in this case.
One of the subcommands is `help`. You can use `ubi help` to get usage information for various commands. For example, to see what is supported by the `ps` subcommand, you can run `ubi help ps`:
```
$ ubi help ps
Manage private subnets
Usage:
ubi ps command [...]
ubi ps (location/ps-name | ps-id) post-command [...]
Commands:
list List private subnets
Post Commands:
connect Connect a private subnet to another private subnet
create Create a private subnet
destroy Destroy a private subnet
disconnect Disconnect a private subnet from another private subnet
show Show details for a private subnet
```
This shows you there are two ways of using the `ps` subcommand. One way has subcommands that directly follow `ps`. The only supported subcommand in this case is `ps list`. So let's use `ubi help ps list`
```
$ ubi help ps list
List private subnets
Usage:
ubi ps list [options]
Options:
-f, --fields=fields show specific fields (comma separated)
-l, --location=location only show private subnets in given location
-N, --no-headers do not show headers
Allowed Option Values:
Fields: location name id net4 net6
```
This shows you the usage and options for the `ps list` command. You can then try running the `ubi ps list` command:
```
$ ubi ps list
location name id net4 net6
eu-central-h1 default-eu-central-h1 psaw09mq9ea21pc5d30b5x1t16 172.31.34.64/26 fd9e:2db6:b05:bf0c::/64
```
You can get help for the `help` subcommand by asking for it:
```
$ ubi help help
Get command help
Usage:
ubi help [options] [command [subcommand]]
Options:
-r, --recursive also show documentation for all subcommands of command
-u, --usage only show usage
```
This describes the `-r`/`--recursive` and `-u`/`--usage` options. It's useful to combine those together to get a recursive display of usage for subcommands:
```
$ ubi help -ru
ubi command [command-options] ...
ubi ai [command] ...
ubi ai api-key [command] ...
ubi ai api-key api-key-id [post-command] ...
ubi ai api-key create
ubi ai api-key list [options]
ubi ai api-key api-key-id destroy [options]
ubi ai api-key api-key-id show
ubi fw command [...]
ubi fw (location/fw-name | fw-id) post-command [...]
ubi fw list [options]
ubi fw (location/fw-name | fw-id) add-rule [options] cidr
ubi fw (location/fw-name | fw-id) attach-subnet ps-id
ubi fw location/fw-name create [options]
ubi fw (location/fw-name | fw-id) delete-rule rule-id
ubi fw (location/fw-name | fw-id) destroy [options]
ubi fw (location/fw-name | fw-id) detach-subnet ps-id
ubi fw (location/fw-name | fw-id) show [options]
ubi help [options] [command [subcommand]]
ubi kc command [...]
ubi kc (location/kc-name | kc-id) post-command [...]
ubi kc list [options]
ubi kc location/kc-name create [options]
ubi kc (location/kc-name | kc-id) destroy [options]
ubi kc (location/kc-name | kc-id) kubeconfig
ubi kc (location/kc-name | kc-id) show [options]
ubi lb command [...]
ubi lb (location/lb-name | lb-id) post-command [...]
ubi lb list [options]
ubi lb (location/lb-name | lb-id) attach-vm vm-id
ubi lb location/lb-name create [options] ps-id src-port dst-port
ubi lb (location/lb-name | lb-id) destroy [options]
ubi lb (location/lb-name | lb-id) detach-vm vm-id
ubi lb (location/lb-name | lb-id) show [options]
ubi lb (location/lb-name | lb-id) update algorithm src-port dst-port health-check-endpoint [vm-id [...]]
ubi pg command [...]
ubi pg (location/pg-name | pg-id) [post-options] post-command [...]
ubi pg list [options]
ubi pg (location/pg-name | pg-id) add-firewall-rule cidr
ubi pg (location/pg-name | pg-id) add-metric-destination username password url
ubi pg location/pg-name create [options]
ubi pg (location/pg-name | pg-id) delete-firewall-rule rule-id
ubi pg (location/pg-name | pg-id) delete-metric-destination md-id
ubi pg (location/pg-name | pg-id) destroy [options]
ubi pg (location/pg-name | pg-id) [options] pg_dump [pg_dump-options]
ubi pg (location/pg-name | pg-id) [options] pg_dumpall [pg_dumpall-options]
ubi pg (location/pg-name | pg-id) [options] psql [psql-options]
ubi pg (location/pg-name | pg-id) reset-superuser-password new-password
ubi pg (location/pg-name | pg-id) restart
ubi pg (location/pg-name | pg-id) restore new-db-name restore-time
ubi pg (location/pg-name | pg-id) show [options]
ubi ps command [...]
ubi ps (location/ps-name | ps-id) post-command [...]
ubi ps list [options]
ubi ps (location/ps-name | ps-id) connect ps-id
ubi ps location/ps-name create [options]
ubi ps (location/ps-name | ps-id) destroy [options]
ubi ps (location/ps-name | ps-id) disconnect ps-id
ubi ps (location/ps-name | ps-id) show [options]
ubi version
ubi vm command [...]
ubi vm (location/vm-name | vm-id) [post-options] post-command [...]
ubi vm list [options]
ubi vm location/vm-name create [options] public_key
ubi vm (location/vm-name | vm-id) destroy [options]
ubi vm (location/vm-name | vm-id) restart
ubi vm (location/vm-name | vm-id) [options] scp [scp-options] (local-path :remote-path | :remote-path local-path)
ubi vm (location/vm-name | vm-id) [options] sftp [sftp-options]
ubi vm (location/vm-name | vm-id) show [options]
ubi vm (location/vm-name | vm-id) [options] ssh [ssh-options --] [remote-cmd [remote-cmd-arg ...]]
```
Some command types are present for all objects:
* `list`: display a subset of information for multiple objects of the same type
* `show`: display detailed information about a specific object
* `create`: create an object
* `destroy`: destroy an object (asks for confirmation by default before destruction)
Other commands are object-specific.
### Running Programs
There are currently 6 commands that execute programs:
* `vm ssh`: connects to a virtual machine via `ssh`
* `vm sftp`: connects to a virtual machine via `sftp`
* `vm scp`: copy file/directory from the local computer to a virtual machine or from a virtual machine to the local computer via `scp`
* `pg psql`: connect to a PostgreSQL database via `psql`
* `pg pg_dump`: dump a single PostgreSQL database using `pg_dump`
* `pg pg_dumpall`: dump an entire PostgreSQL database cluster using `pg_dumpall`
If you want to configure which program is executed, set the appropriate environment variable (e.g. `UBI_SSH` for `ssh`, `UBI_SFTP` for `sftp`).
### Command Line Interface Architecture
The above instructions should be all you need in order to use `ubi`. However, if you are interested in how `ubi` works and why it works the way it does, you can read this section.
`ubi` is different than many other similar command line programs in that it does no parsing of arguments (`argv`) it is called with. It just takes the arguments and sends them to Ubicloud. Ubicloud parses the arguments, and determines what action to take, and returns the output to `ubi`, which displays the output for the user (or in some cases, runs a supported program or asks for comfirmation). At Ubicloud, we call this a Thin CLIent approach to command line interface design.
The advantage of implementing `ubi` this way is that Ubicloud can improve the command line interface at any time to add new features, and have users of `ubi` automatically benefit from those features without having to update their program. With traditional command line programs, that do their own argument parsing, adding new features requires that each machine running the program be updated to use those features. By having `ubi` pass the arguments to Ubicloud without parsing them, Ubicloud brings the advantages of web distribution to the command line, so that all users can immediately benefit from new features.
There are a couple disadvantages of implementing `ubi` this way:
* All commands require contacting the server, so even getting `help` output takes some time.
* It requires extra care in regards to security when executing programs, so that a rogue server cannot result in a remote code execution vulnerability on machines running `ubi`.
To mitigate potential security issues with the Thin CLIent approach, `ubi` does the following checks:
* Only the 6 commands explicitly whitelisted can be executed.
* A command cannot be executed unless it appears in the `argv` passed to `ubi`.
* The arguments for the command to execute:
* Must include `--` to separate arguments from options (except for `pg_dumpall`, which does not support this).
* Must only include one new argument not in the `argv` passed to `ubi`.
* The new argument must come after `--` (for non-`pg_dumpall`) or must start with `-d` (for `pg_dumpall`)
In other words, Ubicloud's command line processing can rearrange arguments, and add one new argument, but that argument should be an argument and not an option for the executed program.
# Managed Services
Source: https://ubicloud.com/docs/quick-start/managed-services
In this guide, you're going to sign up to Ubicloud, create a virtual machine (VM) and virtual network, and connect to your VM using SSH. For this dedicated VM, you'll pay about 3x lower than you would with AWS or Azure.
## Sign up and sign in
You can use Ubicloud without installing anything: [https://console.ubicloud.com/create-account](https://console.ubicloud.com/create-account). The first time you use Ubicloud, you'll need to create a new account. Once you do that and sign in, you'll be directed to Ubicloud's home page.
## Enter billing details
Ubicloud console's homepage shows you available cloud services. It also lets you collaborate with others using Projects, where you can invite new users and define fine-grained permissions.
By default, Ubicloud projects use Hetzner as the bare metal hosting provider. Each hosting provider has different prices, instance types, and geolocation availability.
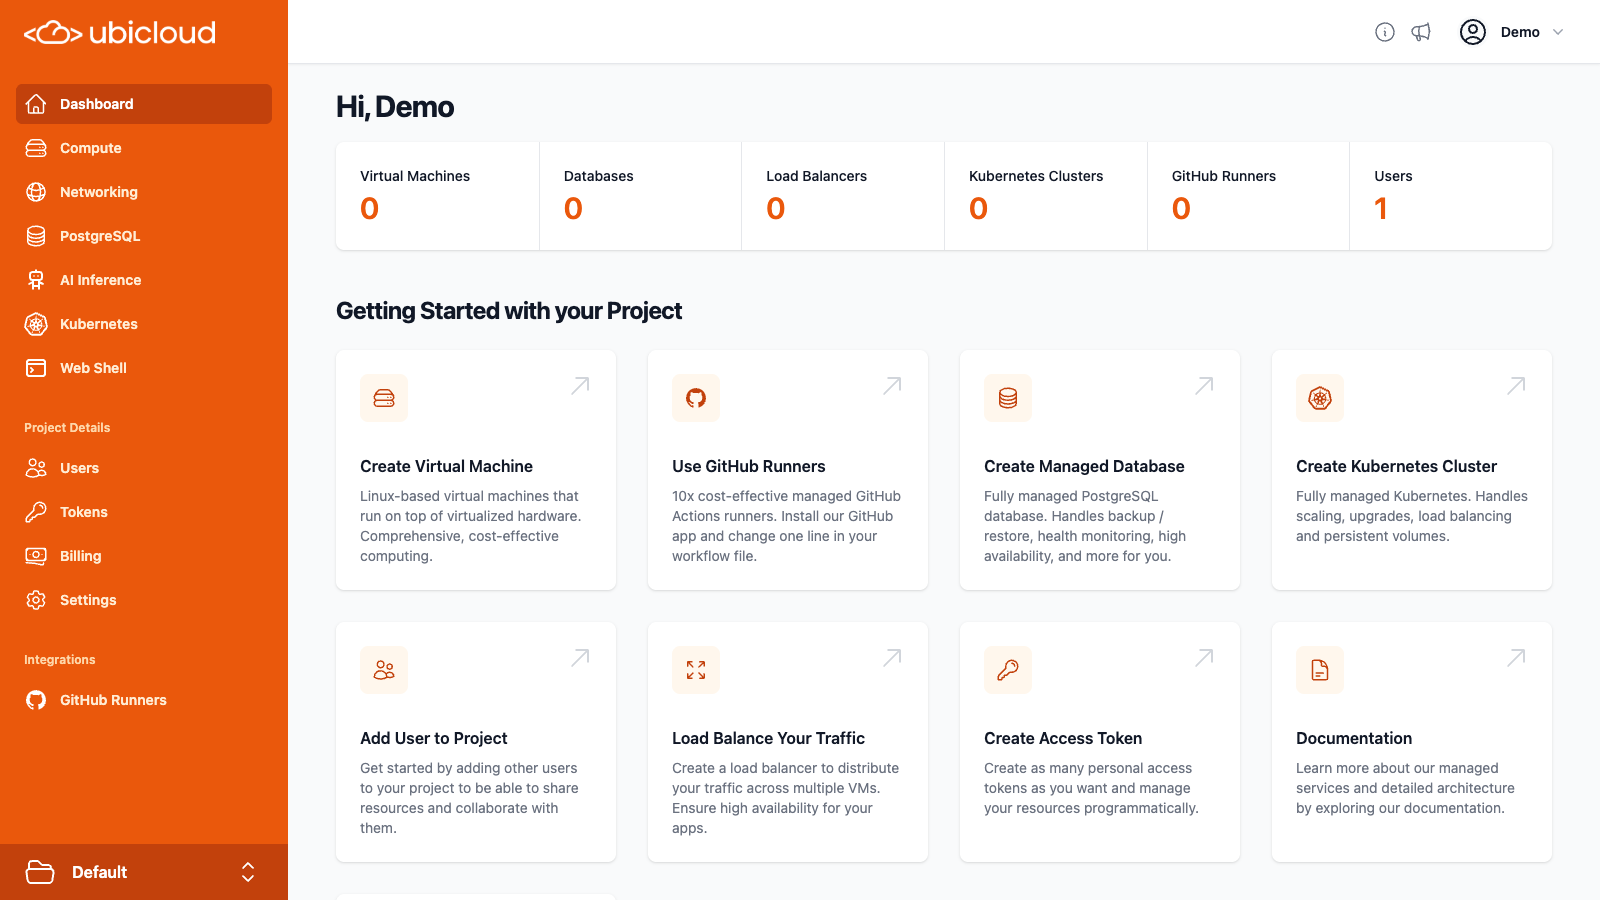 We require an active, valid credit card on file before you can create resources.
Pre-authorization up to \$5 is required to verify your card. This amount will not be charged and will be canceled after verification. Depending on your bank, it may take up to two weeks to refund the money.
This is primarily a means to prevent abuse and ensure that we can collect payment at the end of the month. From the navigation menu on the left, choose Billing. Then, enter your credit card information.
## Create Virtual Machine (VM)
On the navigation menu, choose Compute service and then click on New Virtual Machine. This will take you to the VM creation page.
Here, you can choose your region, server family and size, and Linux distribution. You also need to add your public SSH key so that you can connect to the VM after creation.
We offer two server families - Standard and Burstable. Standard provides a dedicated CPU and 4GB of memory per vCPU. It is best suited for your general purpose and the most demanding workloads. Burstable provides a shared CPU with 2GB of memory per vCPU. It works best for variable workloads, low-traffic websites, development and testing workloads, and AI agents.
By default, we create a private subnet for each VM. If you have an existing private subnet, you can also choose to create your VM in that subnet. Each VM gets a private IPv4 and IPv6 address in your virtual network. The VM also gets a public IPv6 address for free and by default gets a public IPv4 address for a small fee.
Once you've completed all required fields, click Create to create your VM. In 1-2 minutes, your VM should be ready to connect.
We require an active, valid credit card on file before you can create resources.
Pre-authorization up to \$5 is required to verify your card. This amount will not be charged and will be canceled after verification. Depending on your bank, it may take up to two weeks to refund the money.
This is primarily a means to prevent abuse and ensure that we can collect payment at the end of the month. From the navigation menu on the left, choose Billing. Then, enter your credit card information.
## Create Virtual Machine (VM)
On the navigation menu, choose Compute service and then click on New Virtual Machine. This will take you to the VM creation page.
Here, you can choose your region, server family and size, and Linux distribution. You also need to add your public SSH key so that you can connect to the VM after creation.
We offer two server families - Standard and Burstable. Standard provides a dedicated CPU and 4GB of memory per vCPU. It is best suited for your general purpose and the most demanding workloads. Burstable provides a shared CPU with 2GB of memory per vCPU. It works best for variable workloads, low-traffic websites, development and testing workloads, and AI agents.
By default, we create a private subnet for each VM. If you have an existing private subnet, you can also choose to create your VM in that subnet. Each VM gets a private IPv4 and IPv6 address in your virtual network. The VM also gets a public IPv6 address for free and by default gets a public IPv4 address for a small fee.
Once you've completed all required fields, click Create to create your VM. In 1-2 minutes, your VM should be ready to connect.
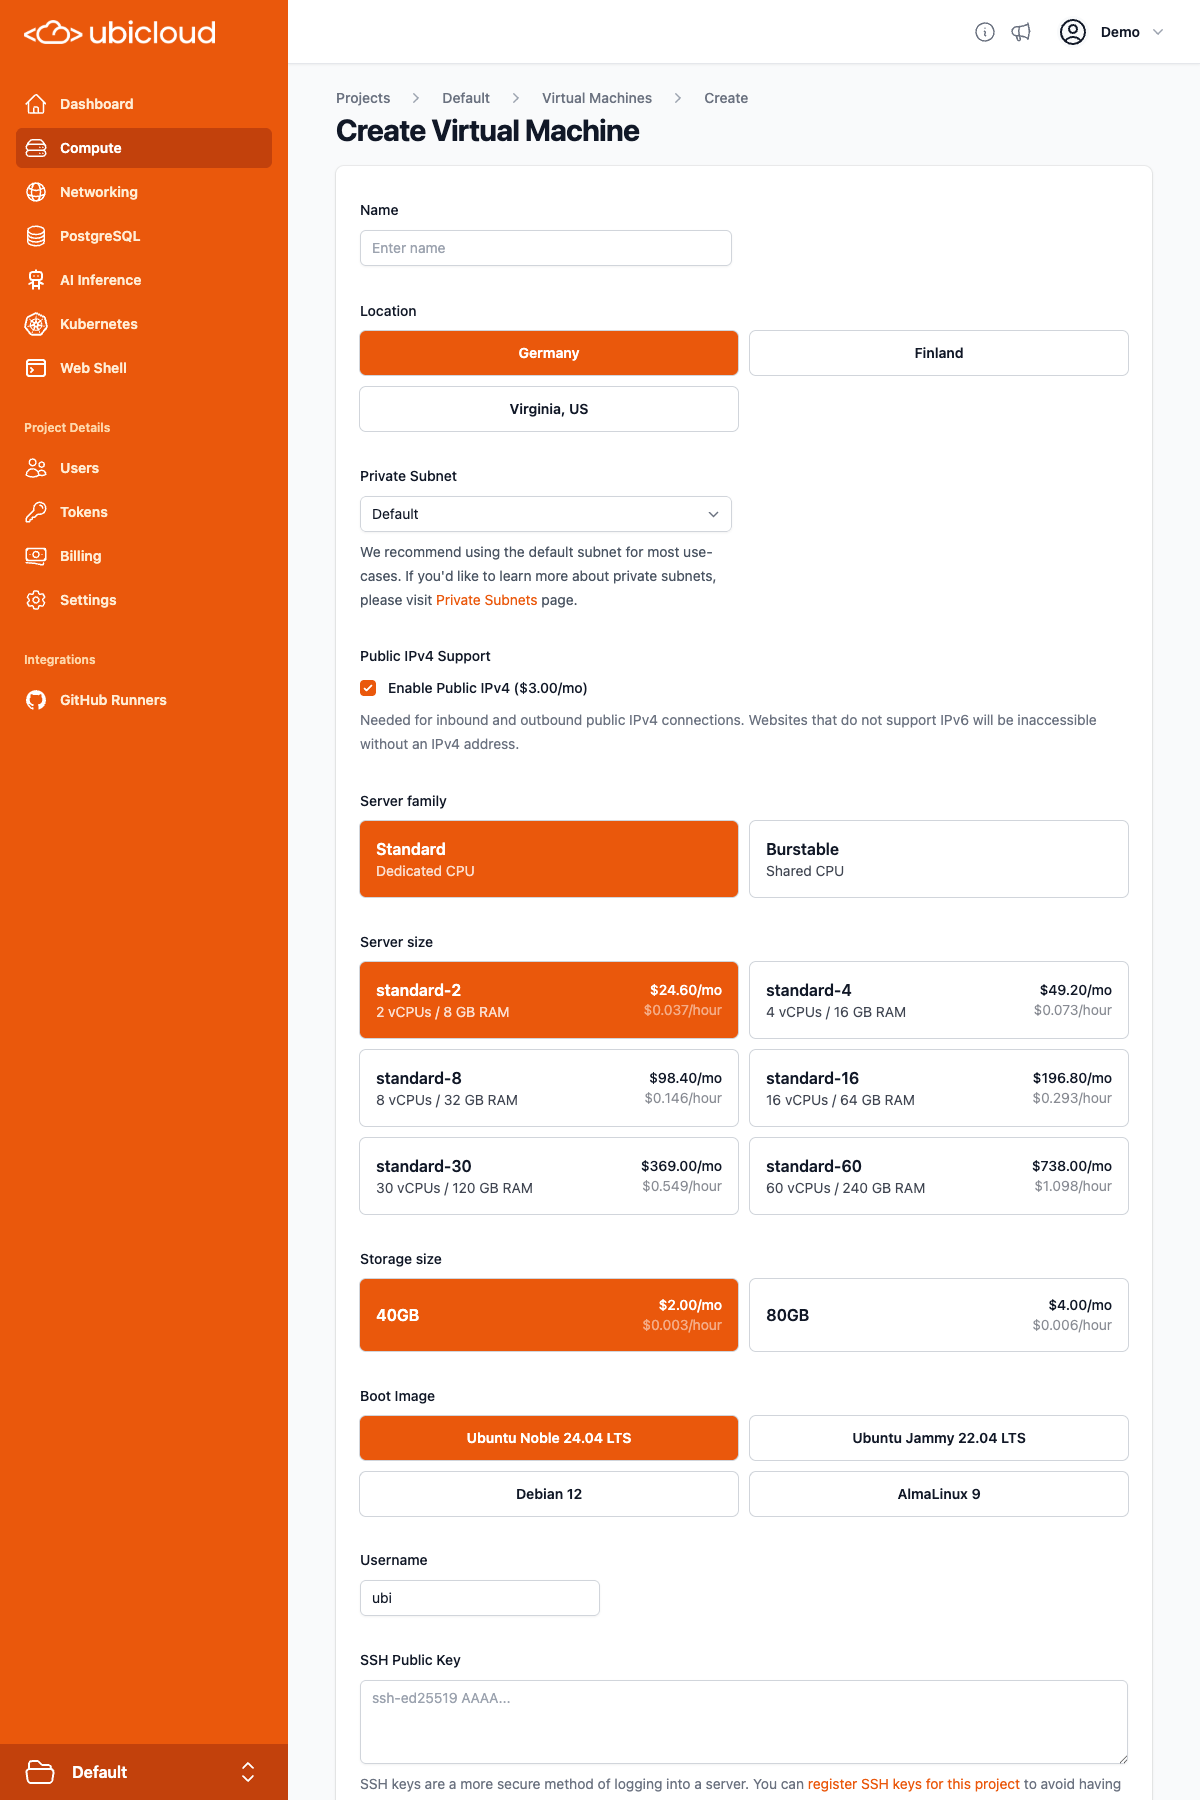 ## Connect to your VM
After your VM gets created, you can connect to it using SSH.
First, you must copy the public IPv4 (or IPv6) address from your console. Then in your terminal, simply type:
```bash theme={null}
ssh @
# If you didn't change default user name when creating the VM, you can run:
ssh ubi@
```
**Summary:** You created a VM in this quick start guide. The VM comes with local block storage and has its own virtual private network. The data gets encrypted at rest and in transit; and you can collaborate with others using Attribute-Based Access Control (ABAC). If you used the default provider, this VM will cost you 3x lower than it would with AWS in similar cloud regions.
# Using Kamal with Ubicloud
Source: https://ubicloud.com/docs/quick-start/using-kamal-with-ubicloud
Kamal is an open source tool to deploy web apps anywhere. It simplifies the process of deploying and managing your web app in production with Docker.
Even with Kamal, you still need certain infrastructure primitives, including virtual machines and managed databases. Ubicloud offers these primitives on the cloud. We believe the combination of Kamal and Ubicloud provide a compelling open source web app deployment platform.
In this guide, we'll show steps for configuring an example Rails 8 application in a way that allows you to use Kamal 2 to deploy it to Ubicloud.
### Step 1: Install Kamal
First, we need to install Rails and Kamal. Assuming you have Ruby installation in your local machine, run:
```bash theme={null}
gem install -N rails kamal
```
### Step 2: Create a Simple Rails App
Next, create a basic Rails app using PostgreSQL as the database and Tailwind CSS for the frontend, and generate a scaffold:
```bash theme={null}
rails new blog -d postgresql -c tailwind
cd blog
rails generate scaffold post title:string content:text
```
Commit the generated application, so you can easily tell the changes you will be making from the defaults:
```bash theme={null}
git add .
git commit -m "Initial commit: rails new and rails generate scaffold post"
```
### Step 3: Configure Routes
Set the root route to serve the `/posts` endpoint by updating `config/routes.rb`:
```ruby theme={null}
root "posts#index"
```
### Step 4: Set Up Docker Registry
Now, we need to set up a dockerhub repository to store and fetch our images. For that, you need to create an account at [https://hub.docker.com](https://hub.docker.com).
Once you have the account, please create a new repository named “blog” in the docker hub page and generate a new key at [https://app.docker.com/settings/personal-access-tokens](https://app.docker.com/settings/personal-access-tokens) and paste it to the .env file as shown below.
```bash theme={null}
KAMAL_REGISTRY_PASSWORD=DOCKER_REGISTRY_KEY
```
Update `.kamal/secrets` to copy the key from the environment:
```bash theme={null}
DATABASE_URL=$DATABASE_URL
```
Configure the `config/deploy.yml` file to make it load from `.env`, and include your docker registry and the service names in place:
```yaml theme={null}
<% require "dotenv"; Dotenv.load(".env") %>
service: blog
image: YOUR_DOCKER_REGISTRY_NAME/blog
registry:
username: YOUR_DOCKER_REGISTRY_NAME
```
### Step 5: Set Up Ubicloud Resources
Create the following resources:
* **Virtual Machines (VMs):** Create a VM from console.ubicloud.com. When creating the VM, you need to pay attention to three things:
* For the location, pick Germany. Later, we're going to provision a managed Postgres in the same region.
* Make sure to include an IPv4 address, as Kamal 2 will have deployment issues in IPv6 only environments.
* Change the user from `ubi` to `root`. We use `root` because Kamal installs Docker and connects to it on the VMs. Using `root` avoids the need to manage users and groups.
* **Managed PostgreSQL Database:** Set up a managed PostgreSQL database.
## Connect to your VM
After your VM gets created, you can connect to it using SSH.
First, you must copy the public IPv4 (or IPv6) address from your console. Then in your terminal, simply type:
```bash theme={null}
ssh @
# If you didn't change default user name when creating the VM, you can run:
ssh ubi@
```
**Summary:** You created a VM in this quick start guide. The VM comes with local block storage and has its own virtual private network. The data gets encrypted at rest and in transit; and you can collaborate with others using Attribute-Based Access Control (ABAC). If you used the default provider, this VM will cost you 3x lower than it would with AWS in similar cloud regions.
# Using Kamal with Ubicloud
Source: https://ubicloud.com/docs/quick-start/using-kamal-with-ubicloud
Kamal is an open source tool to deploy web apps anywhere. It simplifies the process of deploying and managing your web app in production with Docker.
Even with Kamal, you still need certain infrastructure primitives, including virtual machines and managed databases. Ubicloud offers these primitives on the cloud. We believe the combination of Kamal and Ubicloud provide a compelling open source web app deployment platform.
In this guide, we'll show steps for configuring an example Rails 8 application in a way that allows you to use Kamal 2 to deploy it to Ubicloud.
### Step 1: Install Kamal
First, we need to install Rails and Kamal. Assuming you have Ruby installation in your local machine, run:
```bash theme={null}
gem install -N rails kamal
```
### Step 2: Create a Simple Rails App
Next, create a basic Rails app using PostgreSQL as the database and Tailwind CSS for the frontend, and generate a scaffold:
```bash theme={null}
rails new blog -d postgresql -c tailwind
cd blog
rails generate scaffold post title:string content:text
```
Commit the generated application, so you can easily tell the changes you will be making from the defaults:
```bash theme={null}
git add .
git commit -m "Initial commit: rails new and rails generate scaffold post"
```
### Step 3: Configure Routes
Set the root route to serve the `/posts` endpoint by updating `config/routes.rb`:
```ruby theme={null}
root "posts#index"
```
### Step 4: Set Up Docker Registry
Now, we need to set up a dockerhub repository to store and fetch our images. For that, you need to create an account at [https://hub.docker.com](https://hub.docker.com).
Once you have the account, please create a new repository named “blog” in the docker hub page and generate a new key at [https://app.docker.com/settings/personal-access-tokens](https://app.docker.com/settings/personal-access-tokens) and paste it to the .env file as shown below.
```bash theme={null}
KAMAL_REGISTRY_PASSWORD=DOCKER_REGISTRY_KEY
```
Update `.kamal/secrets` to copy the key from the environment:
```bash theme={null}
DATABASE_URL=$DATABASE_URL
```
Configure the `config/deploy.yml` file to make it load from `.env`, and include your docker registry and the service names in place:
```yaml theme={null}
<% require "dotenv"; Dotenv.load(".env") %>
service: blog
image: YOUR_DOCKER_REGISTRY_NAME/blog
registry:
username: YOUR_DOCKER_REGISTRY_NAME
```
### Step 5: Set Up Ubicloud Resources
Create the following resources:
* **Virtual Machines (VMs):** Create a VM from console.ubicloud.com. When creating the VM, you need to pay attention to three things:
* For the location, pick Germany. Later, we're going to provision a managed Postgres in the same region.
* Make sure to include an IPv4 address, as Kamal 2 will have deployment issues in IPv6 only environments.
* Change the user from `ubi` to `root`. We use `root` because Kamal installs Docker and connects to it on the VMs. Using `root` avoids the need to manage users and groups.
* **Managed PostgreSQL Database:** Set up a managed PostgreSQL database.
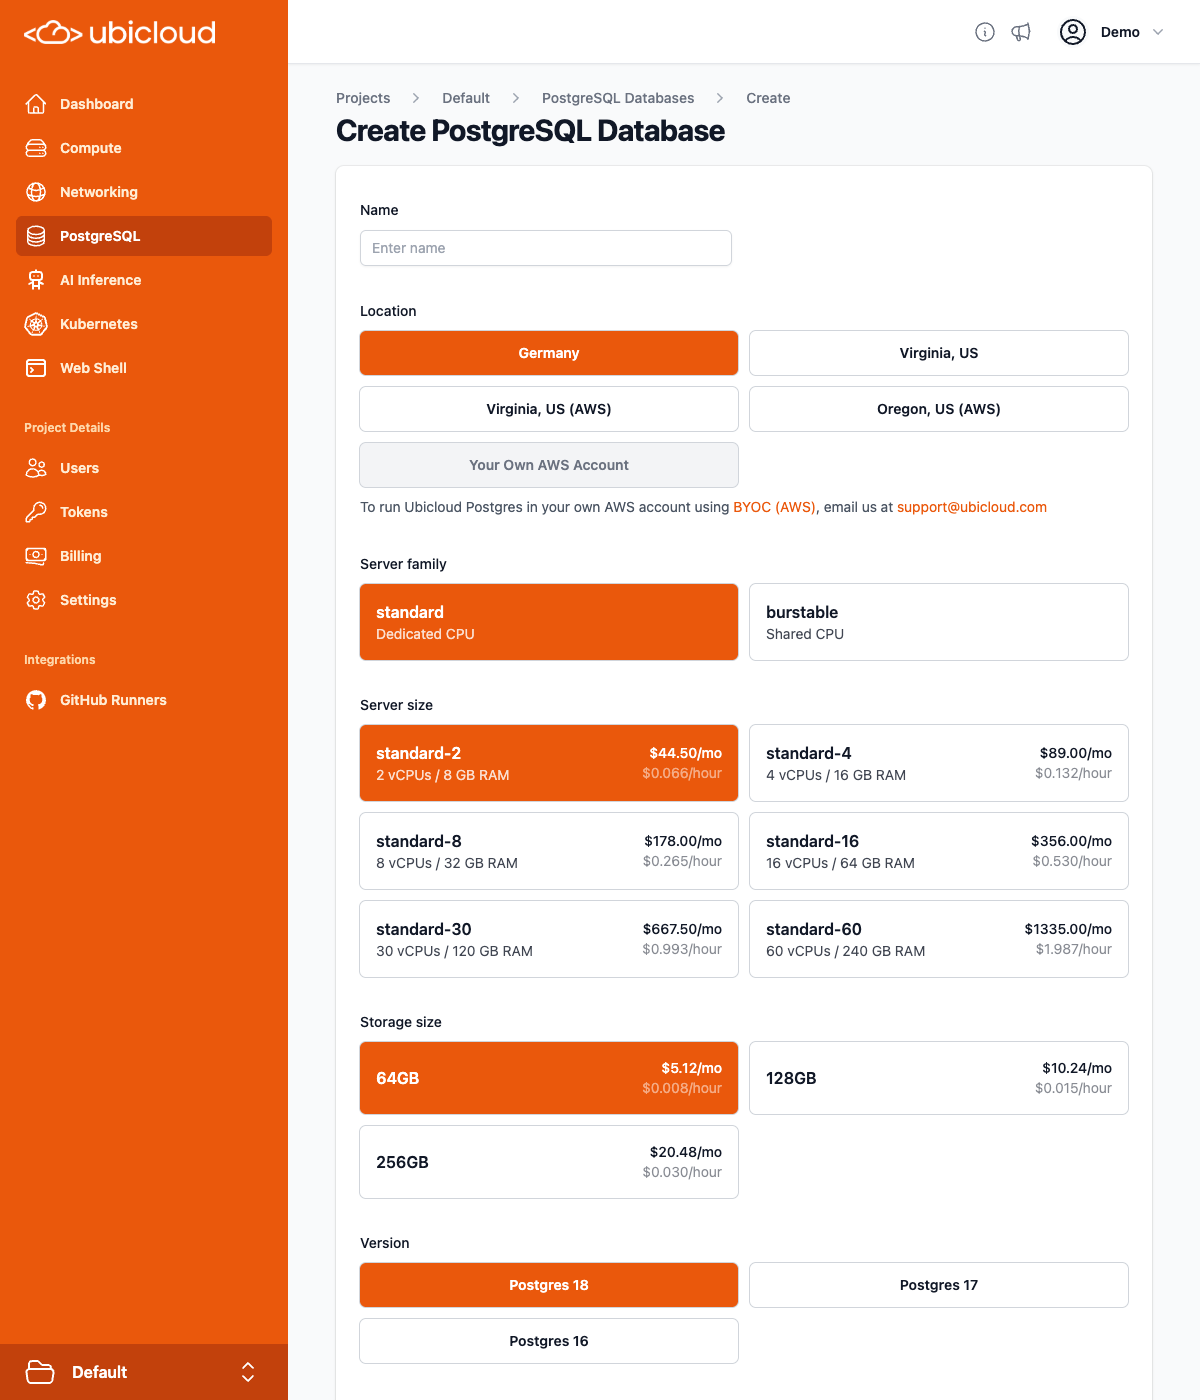 ### Step 6: Gather Resource Information
After setting up the resources, collect the following information from the Ubicloud Console:
* **PostgreSQL Connection String:** Shown by clicking on the database name on the PostgreSQL page
* **Public IP of the VM:** Shown in the IP Address column on the Compute page
### Step 7: Configure Kamal and Environment Variables
Next, copy the master key from `config/master.key` and paste it into the `.env` file:
```bash theme={null}
RAILS_MASTER_KEY=YOUR_MASTER_KEY
```
Add the PostgreSQL connection string to the `.env` file:
```bash theme={null}
DATABASE_URL="postgres://postgres:password@hostname/?channel_binding=require"
```
Configure server IP address to deploy to in `config/deploy.yml`:
```yaml theme={null}
servers:
web:
hosts:
- IP
```
Rails 8's Kamal 2 configuration defaults to an HTTPS-only application, using certificates from Let's Encrypt, so you need to edit the `config/deploy.yml` file to set the hostname for the application:
```yaml theme={null}
proxy:
ssl: true
host: your-host.your-domain.com
```
You will need to create or update your DNS records so that the hostname you are using resolves to the IP address of the VM you created. How you do this depends on your DNS provider.
Update `config/deploy.yml` to pass the environment variables:
```yaml theme={null}
env:
secret:
- RAILS_MASTER_KEY
- DATABASE_URL
```
Modify `config/database.yml` to use the `DATABASE_URL` environment variable, which will already contain the user, password and the database name:
```yaml theme={null}
production:
<<: *default
url: <%= ENV["DATABASE_URL"] %>
```
### Step 8: Deploy the Application
Commit your changes:
```bash theme={null}
git add .
git commit -m "Changes to allow deploying to Ubicloud using Kamal"
```
Run Kamal setup, which will setup Docker on the VM you created, and then deploy your application to it:
```bash theme={null}
kamal setup
```
### Step 9: Enjoy Your HTTPS-Enabled Rails App
Visit the DNS name you configured and enjoy your newly deployed, secure Rails app!
By following these steps, you can seamlessly integrate Kamal with Ubicloud services to deploy your web applications efficiently and securely. If you have any questions or need further assistance, feel free to reach out to our support team.
### Step 10: Deploying Changes After Initial Setup
After making and committing changes in your application, you can deploy them using:
```bash theme={null}
kamal deploy
```
# Authorization
Source: https://ubicloud.com/docs/security/authorization
Ubicloud's authorization system is designed to be easy to use for simple cases, while still giving you full control over what actions your users can perform in the system.
## Transparent By Default
Every project in Ubicloud uses Ubicloud's access control system. Even if you are the only account with access to the project, all actions you take in the system are checked by the access control system to see if they are allowed. This is transparent by default, because the account that creates the project is made an admin of the project, and project admins are allowed to take any action on any object in the project.
## User Management
When you create a project, you are the sole user and admin of the project. From the users page, you can invite new and existing Ubicloud users to the project:
### Step 6: Gather Resource Information
After setting up the resources, collect the following information from the Ubicloud Console:
* **PostgreSQL Connection String:** Shown by clicking on the database name on the PostgreSQL page
* **Public IP of the VM:** Shown in the IP Address column on the Compute page
### Step 7: Configure Kamal and Environment Variables
Next, copy the master key from `config/master.key` and paste it into the `.env` file:
```bash theme={null}
RAILS_MASTER_KEY=YOUR_MASTER_KEY
```
Add the PostgreSQL connection string to the `.env` file:
```bash theme={null}
DATABASE_URL="postgres://postgres:password@hostname/?channel_binding=require"
```
Configure server IP address to deploy to in `config/deploy.yml`:
```yaml theme={null}
servers:
web:
hosts:
- IP
```
Rails 8's Kamal 2 configuration defaults to an HTTPS-only application, using certificates from Let's Encrypt, so you need to edit the `config/deploy.yml` file to set the hostname for the application:
```yaml theme={null}
proxy:
ssl: true
host: your-host.your-domain.com
```
You will need to create or update your DNS records so that the hostname you are using resolves to the IP address of the VM you created. How you do this depends on your DNS provider.
Update `config/deploy.yml` to pass the environment variables:
```yaml theme={null}
env:
secret:
- RAILS_MASTER_KEY
- DATABASE_URL
```
Modify `config/database.yml` to use the `DATABASE_URL` environment variable, which will already contain the user, password and the database name:
```yaml theme={null}
production:
<<: *default
url: <%= ENV["DATABASE_URL"] %>
```
### Step 8: Deploy the Application
Commit your changes:
```bash theme={null}
git add .
git commit -m "Changes to allow deploying to Ubicloud using Kamal"
```
Run Kamal setup, which will setup Docker on the VM you created, and then deploy your application to it:
```bash theme={null}
kamal setup
```
### Step 9: Enjoy Your HTTPS-Enabled Rails App
Visit the DNS name you configured and enjoy your newly deployed, secure Rails app!
By following these steps, you can seamlessly integrate Kamal with Ubicloud services to deploy your web applications efficiently and securely. If you have any questions or need further assistance, feel free to reach out to our support team.
### Step 10: Deploying Changes After Initial Setup
After making and committing changes in your application, you can deploy them using:
```bash theme={null}
kamal deploy
```
# Authorization
Source: https://ubicloud.com/docs/security/authorization
Ubicloud's authorization system is designed to be easy to use for simple cases, while still giving you full control over what actions your users can perform in the system.
## Transparent By Default
Every project in Ubicloud uses Ubicloud's access control system. Even if you are the only account with access to the project, all actions you take in the system are checked by the access control system to see if they are allowed. This is transparent by default, because the account that creates the project is made an admin of the project, and project admins are allowed to take any action on any object in the project.
## User Management
When you create a project, you are the sole user and admin of the project. From the users page, you can invite new and existing Ubicloud users to the project:
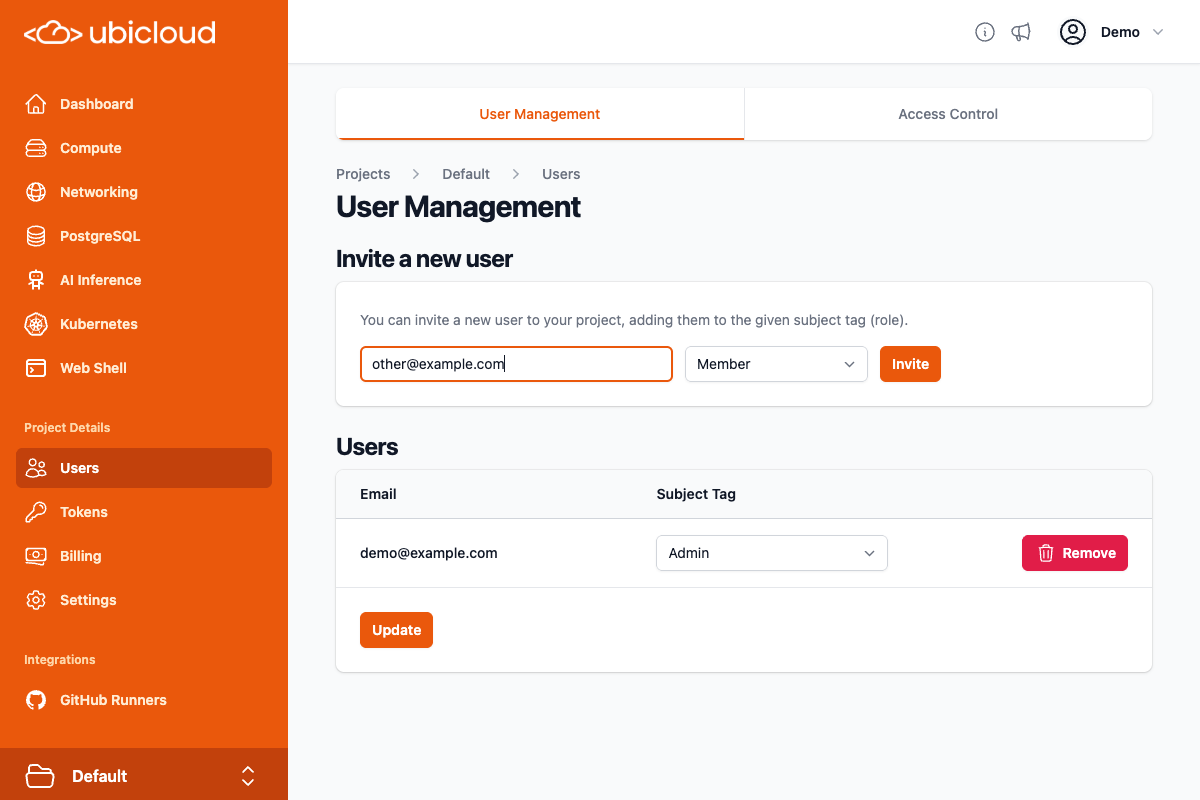 By default, users you invite to the project are invited as members of the project. Members have more limited access rights than admins. By default, members can take all actions on virtual machines, PostgreSQL databases, private subnets, firewalls, and load balancers. They can also setup GitHub Runners in the project, as well as view AI inference endpoints.
You can change access for users from during the invitation process, or at any point after inviting the user. On the user management page, you can choose from either Admin, Member, or No Access for users:
By default, users you invite to the project are invited as members of the project. Members have more limited access rights than admins. By default, members can take all actions on virtual machines, PostgreSQL databases, private subnets, firewalls, and load balancers. They can also setup GitHub Runners in the project, as well as view AI inference endpoints.
You can change access for users from during the invitation process, or at any point after inviting the user. On the user management page, you can choose from either Admin, Member, or No Access for users:
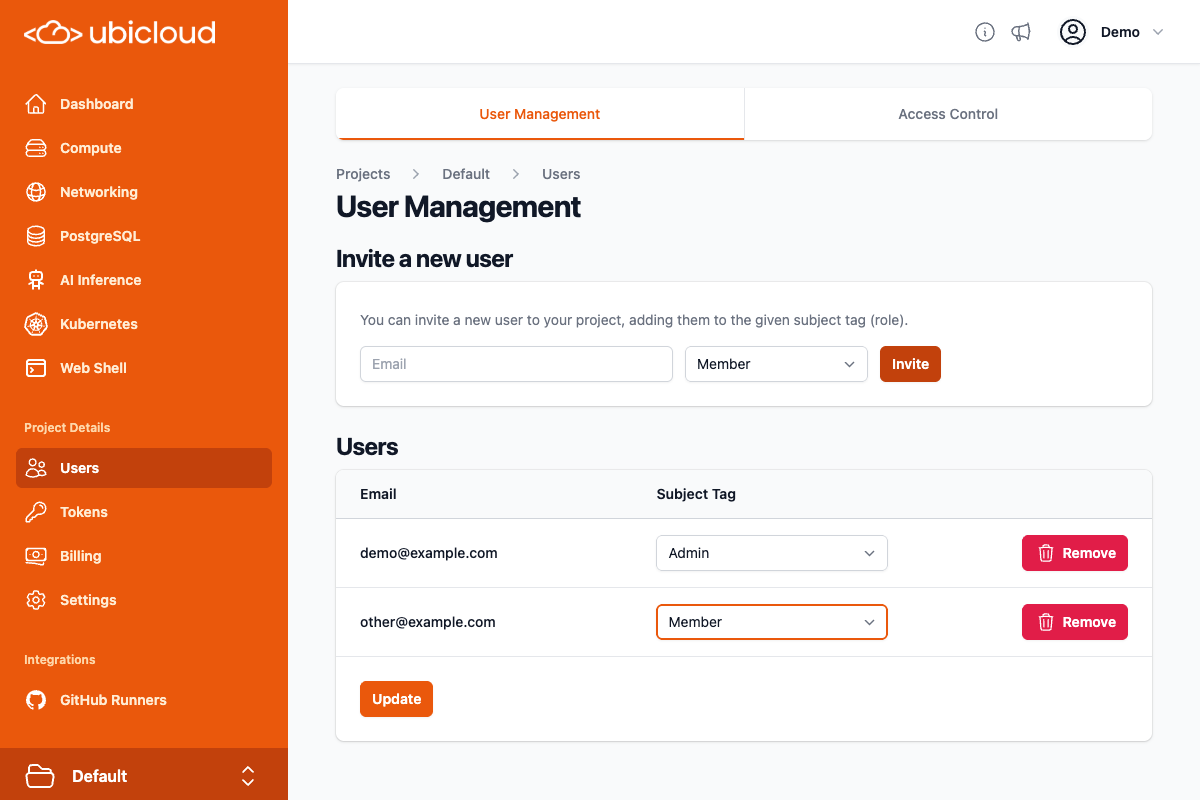 The per-user Admin/Member/No Access setting is sufficient for many projects. However, some projects need more control over access, and those can use the Access Control system for full control over access.
## Access Control
The Access Control tab on the User Management page gives you full control to manage access to the system:
The per-user Admin/Member/No Access setting is sufficient for many projects. However, some projects need more control over access, and those can use the Access Control system for full control over access.
## Access Control
The Access Control tab on the User Management page gives you full control to manage access to the system:
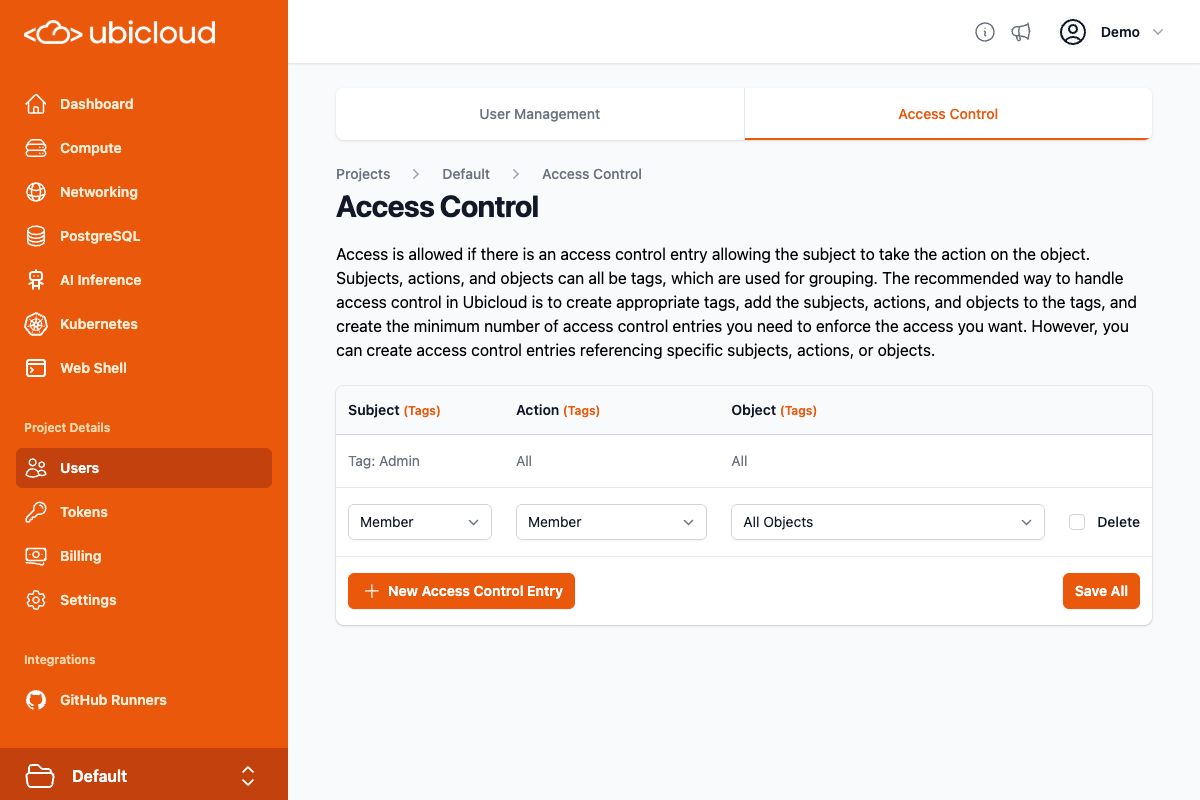 In order to use the access system properly, you need to understand how it works. All access control in Ubicloud boils down to the question of whether the subject has access to perform a particular action, on a particular object. Ubicloud stores such information in access control entries. Each access control entry for the project has a subject, action, and object.
Subjects are generally users, roles, or groups. Actions are either specific actions (such as Vm:view to view virtual machines), groups of actions, or all actions. Objects are either specific objects (such as a specific virtual machine), groups of objects, or all objects.
To group multiple subjects, actions, or objects, you use tags. Ubicloud has subject tags for grouping multiple subjects, action tags for grouping multiple actions, and object tags for grouping multiple objects.
By default, projects in Ubicloud have 2 access control entries:
* Members of the Admin subject tag (i.e. project admins) can perform all actions on all objects (this access control entry is not modifiable, but you can modify which users are in the Admin subject tag)
* Members of the Member subject tag (the default for invited users) can perform all actions in the Member action tag, on all objects.
The recommended way to manage access control in Ubicloud is to create appropriate subject tags, action tags, and object tags, and then using those tags, add the minimum number of access control entries for the access you want to enforce.
### Example: Different Types of Administrators
Let's say you have three groups:
* System Administrators
* Network Administrators
* Database Administrators
And you want to enforce the following access:
* System administrators only have access to virtual machines.
* Network administrators only have access to private subnets, firewalls, and load balancers.
* Database administrators only have access to PostgreSQL databases.
We need to start by defining subject tags for these three groups. You can think of subject tags as groups or roles. On the Access Control page, click the "(Tags)" link next to Subject, to go to the Subject Tags page:
In order to use the access system properly, you need to understand how it works. All access control in Ubicloud boils down to the question of whether the subject has access to perform a particular action, on a particular object. Ubicloud stores such information in access control entries. Each access control entry for the project has a subject, action, and object.
Subjects are generally users, roles, or groups. Actions are either specific actions (such as Vm:view to view virtual machines), groups of actions, or all actions. Objects are either specific objects (such as a specific virtual machine), groups of objects, or all objects.
To group multiple subjects, actions, or objects, you use tags. Ubicloud has subject tags for grouping multiple subjects, action tags for grouping multiple actions, and object tags for grouping multiple objects.
By default, projects in Ubicloud have 2 access control entries:
* Members of the Admin subject tag (i.e. project admins) can perform all actions on all objects (this access control entry is not modifiable, but you can modify which users are in the Admin subject tag)
* Members of the Member subject tag (the default for invited users) can perform all actions in the Member action tag, on all objects.
The recommended way to manage access control in Ubicloud is to create appropriate subject tags, action tags, and object tags, and then using those tags, add the minimum number of access control entries for the access you want to enforce.
### Example: Different Types of Administrators
Let's say you have three groups:
* System Administrators
* Network Administrators
* Database Administrators
And you want to enforce the following access:
* System administrators only have access to virtual machines.
* Network administrators only have access to private subnets, firewalls, and load balancers.
* Database administrators only have access to PostgreSQL databases.
We need to start by defining subject tags for these three groups. You can think of subject tags as groups or roles. On the Access Control page, click the "(Tags)" link next to Subject, to go to the Subject Tags page:
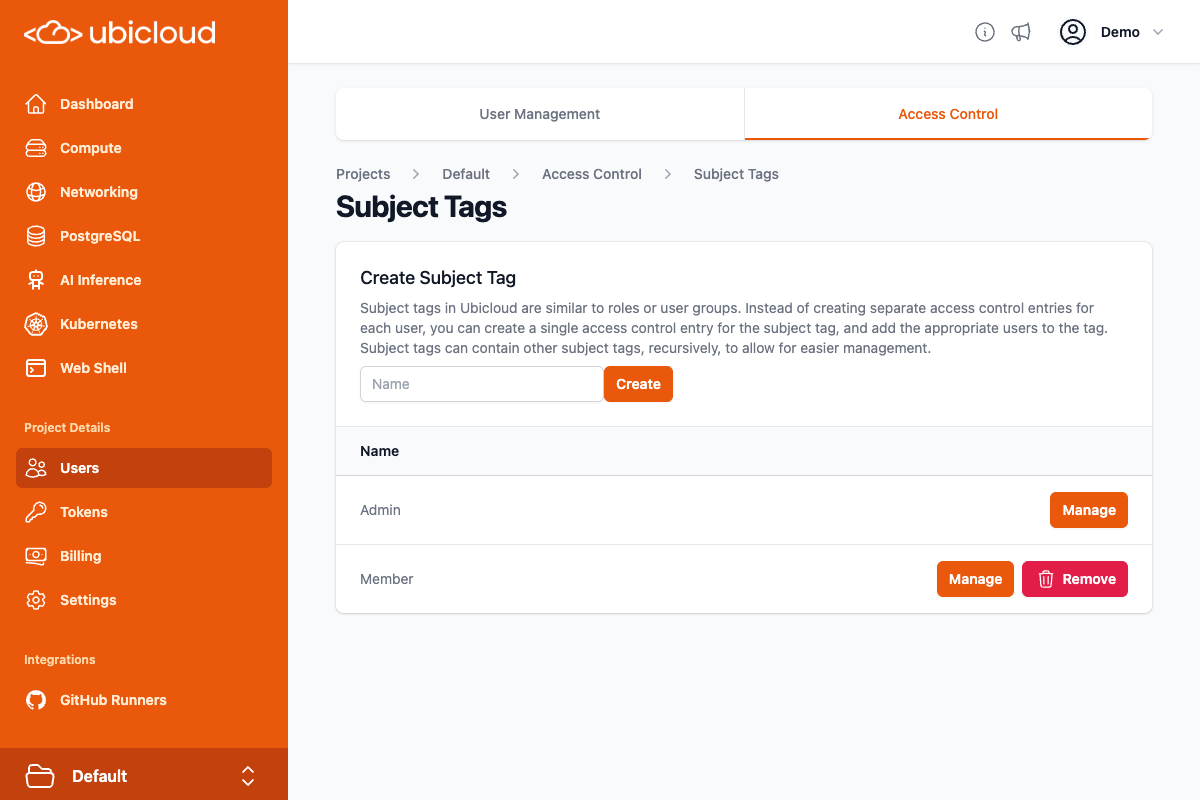 On this page, you can create the subject tags for each group by setting the tag name, and then clicking the Create button. Note that tag names cannot contain spaces, so you are recommended to use dashes instead of spaces:
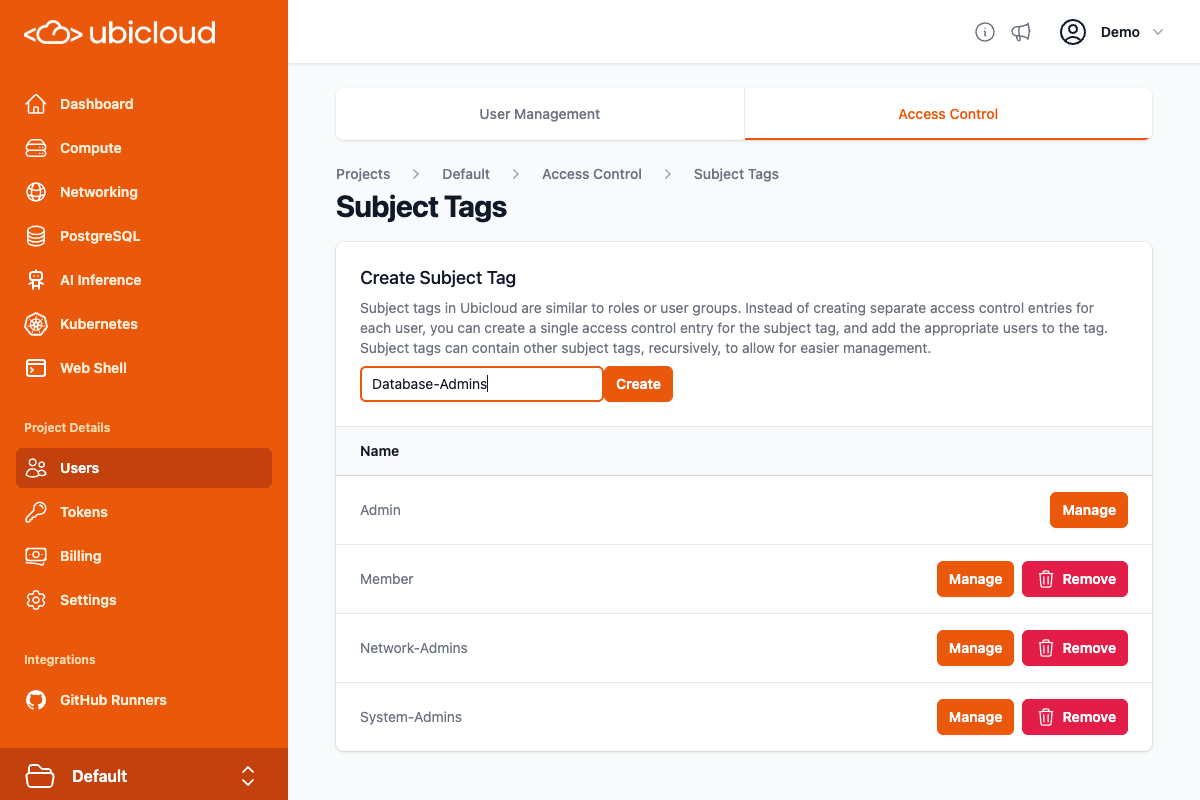 After creating the three subject tags, you can click on the "Manage" button for the subject tag to go to the page to add or remove members of that tag:
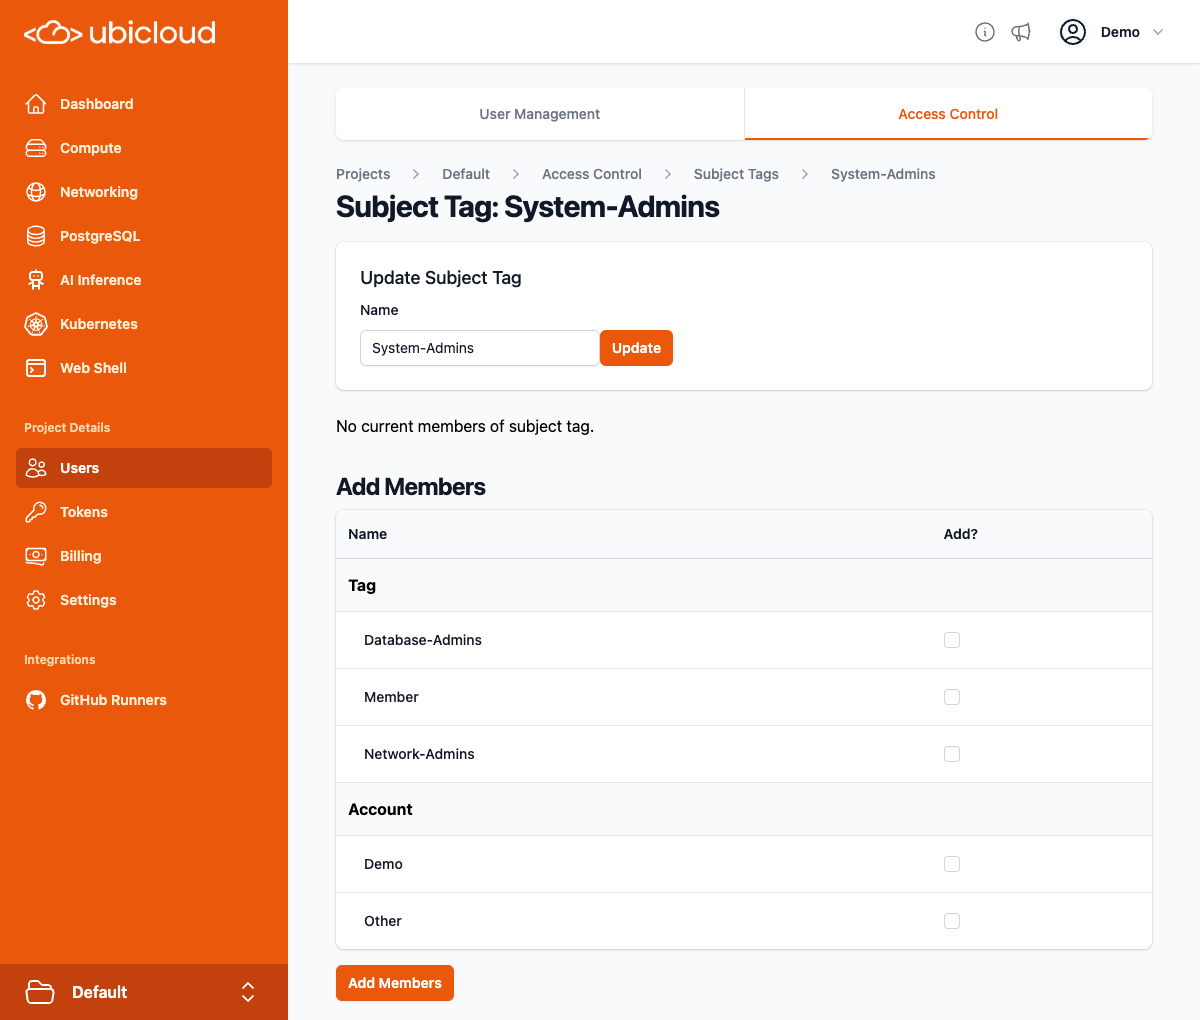 Subject tags created by users have no members by default. After creating the subject tag, you should add the appropriate members to it. As you can see on the page, in addition to adding accounts to subject tags, you can add other subject tags to a subject tag. For example, if you make the Web-Server-Admins tag a member of the System-Admins tag, then all members of the Web-Server-Admins tag are considered members of the System-Admins tag. This works recursively, up to a configuable limit (32 levels by default).
In the "Add Members" table, you can check the box for any of the accounts or tags, and then click the "Add Members" button to add members:
Subject tags created by users have no members by default. After creating the subject tag, you should add the appropriate members to it. As you can see on the page, in addition to adding accounts to subject tags, you can add other subject tags to a subject tag. For example, if you make the Web-Server-Admins tag a member of the System-Admins tag, then all members of the Web-Server-Admins tag are considered members of the System-Admins tag. This works recursively, up to a configuable limit (32 levels by default).
In the "Add Members" table, you can check the box for any of the accounts or tags, and then click the "Add Members" button to add members:
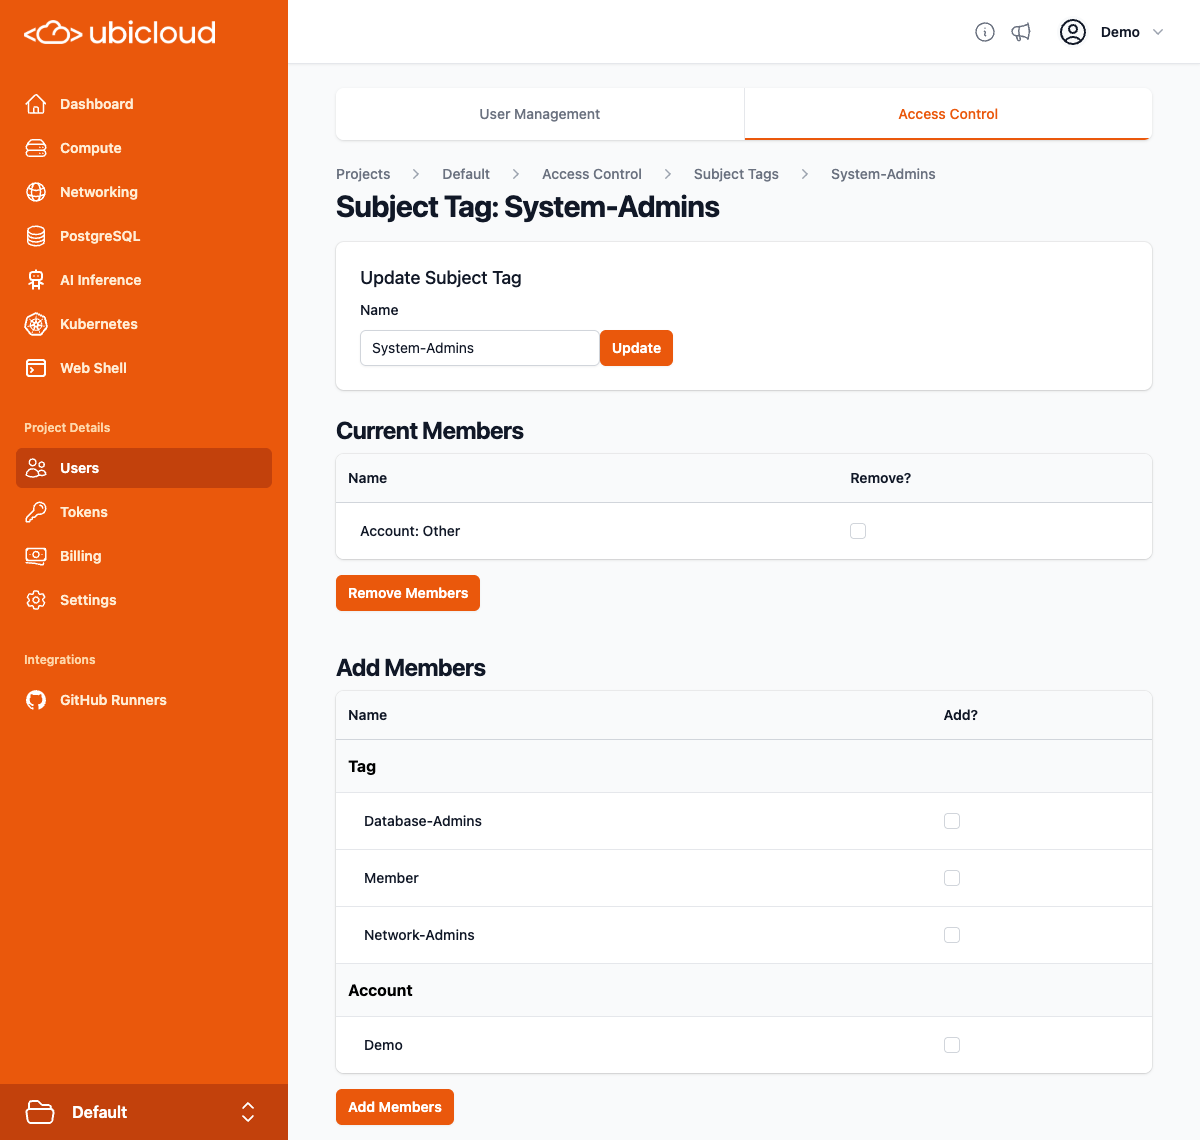 That handles the subject tags. Action tags are handled similarly, but to make things easier to users, Ubicloud includes some default action tags (called global action tags) that are available in every project. There are global action tags for all actions you can take on a virtual machine (Vm:all), as well as for all actions you can take on a PostgreSQL database (Postgres:all). There are also global action tags for all actions you can take on private subjects (PrivateSubnet:all), firewalls (Firewall:all), and load balancers (LoadBalancer:all), but the network admins need a single tag that includes those three global tags.
Back on the Access Control page, lick on the "(Tags)" link next to Action, to go to the Action Tags page. Then add a Networking action tag:
That handles the subject tags. Action tags are handled similarly, but to make things easier to users, Ubicloud includes some default action tags (called global action tags) that are available in every project. There are global action tags for all actions you can take on a virtual machine (Vm:all), as well as for all actions you can take on a PostgreSQL database (Postgres:all). There are also global action tags for all actions you can take on private subjects (PrivateSubnet:all), firewalls (Firewall:all), and load balancers (LoadBalancer:all), but the network admins need a single tag that includes those three global tags.
Back on the Access Control page, lick on the "(Tags)" link next to Action, to go to the Action Tags page. Then add a Networking action tag:
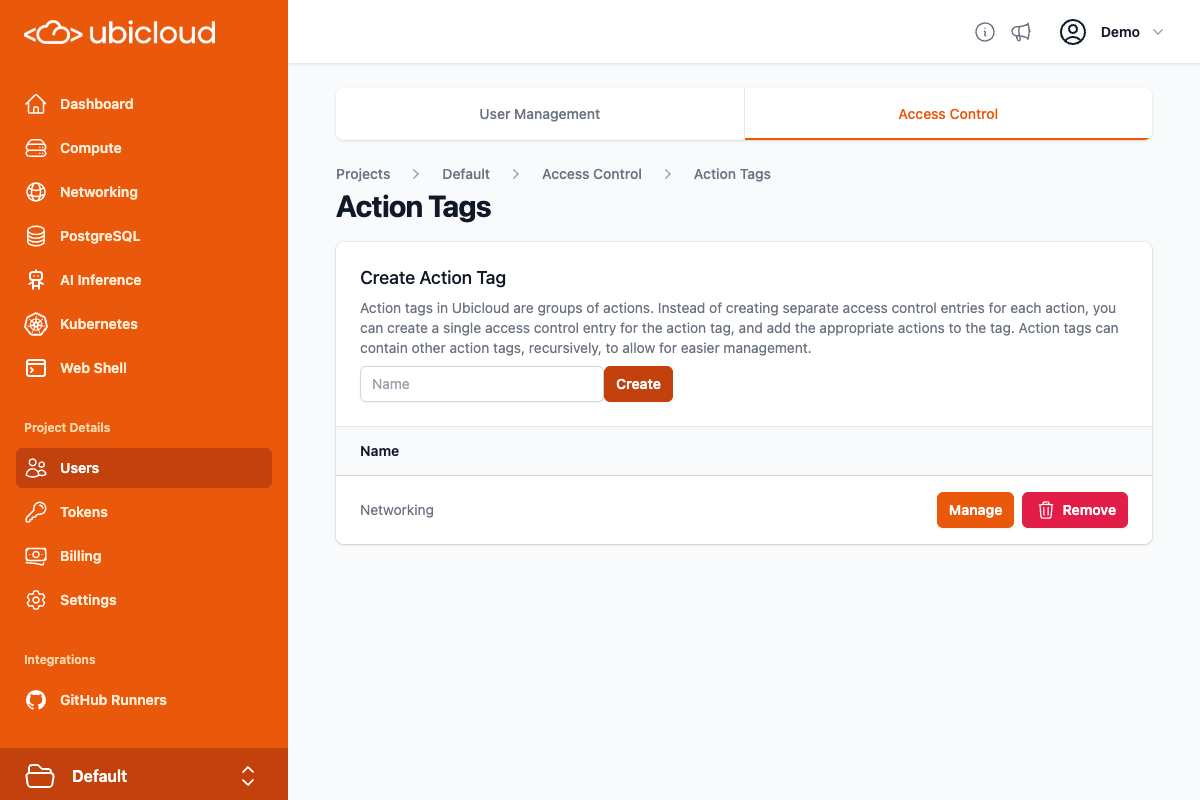 Click on the Manage button. Then check the boxes for the PrivateSubnet:all, Firewall:all, and LoadBalancer:all global action tags:
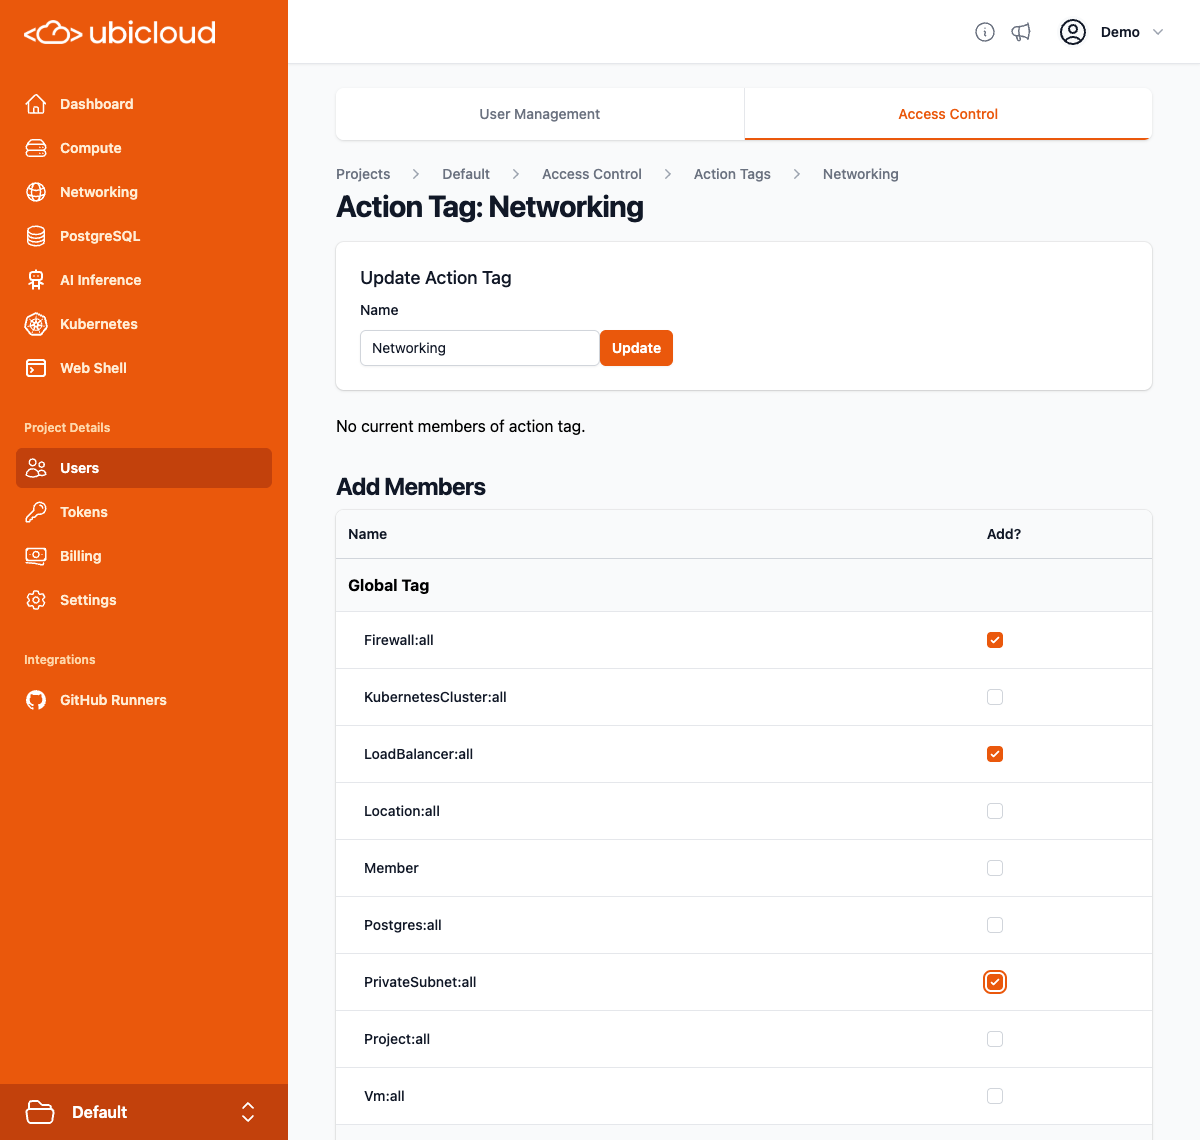 Then click on the Add Members button on the button to add them to the tag:
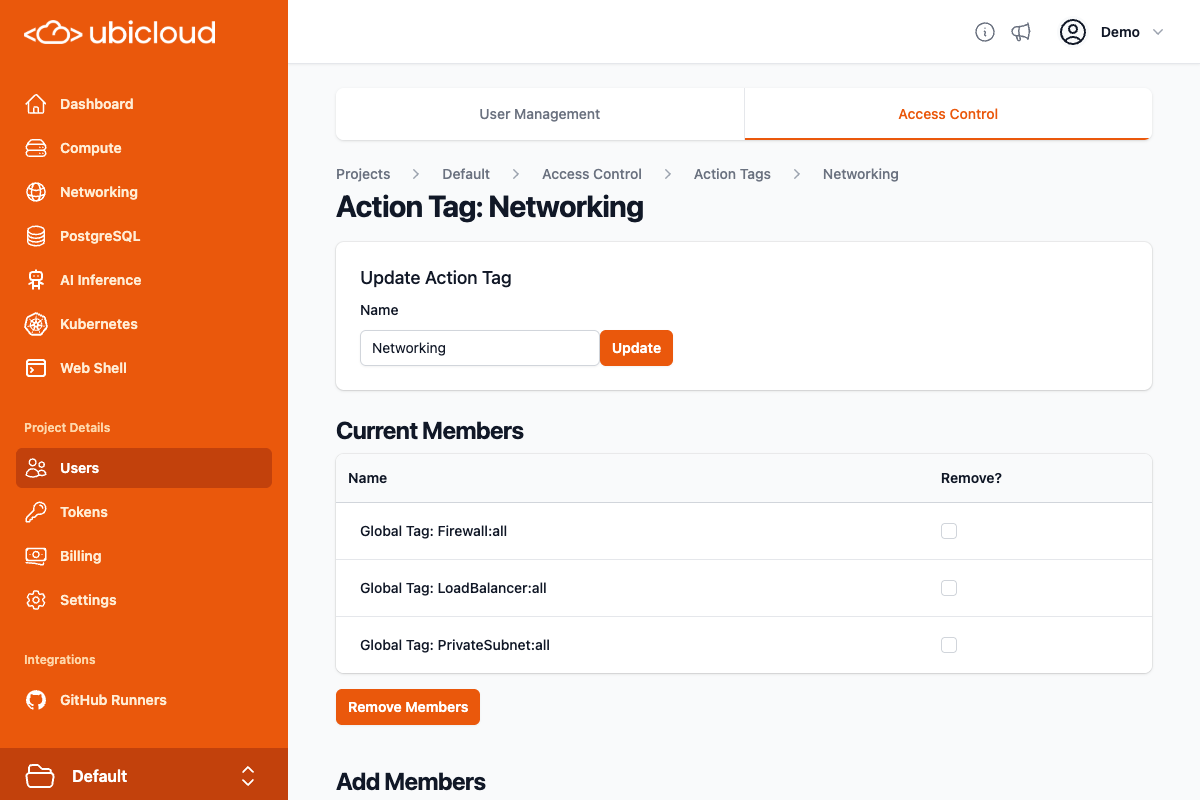 Now that the subject and action tags have been setup, we can create the necessary access control entries. Back on the Access Control page, you can click the New Access Control Entry button three times to create three new, unsaved entries. On the access control form, changes are not made until you click the Save All button on the bottom right.
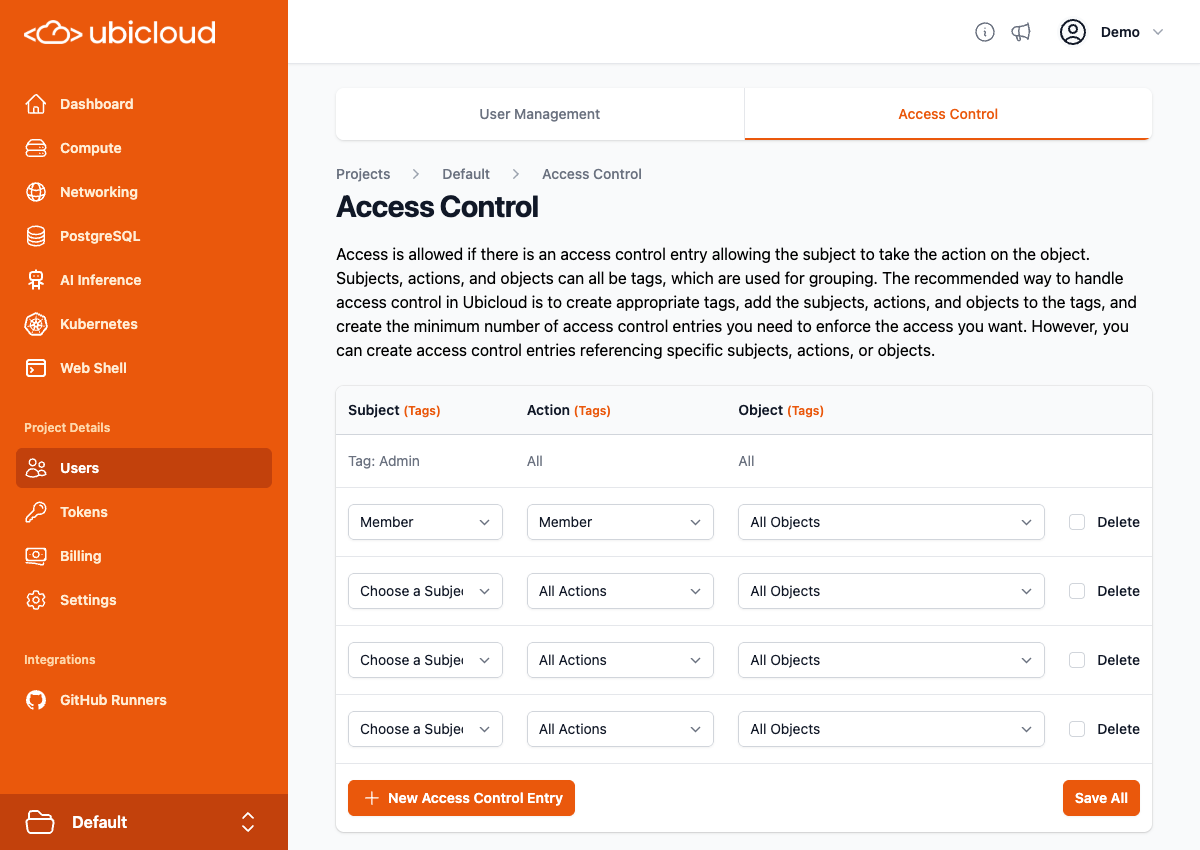 You can then populate the access control entries:
* Subject: System-Admins, Action: Vm:all, Object: All Objects
* Subject: Network-Admins, Action: Networking, Object: All Objects
* Subject: Database-Admins, Action: Postgres:all, Object: All Objects
You can then populate the access control entries:
* Subject: System-Admins, Action: Vm:all, Object: All Objects
* Subject: Network-Admins, Action: Networking, Object: All Objects
* Subject: Database-Admins, Action: Postgres:all, Object: All Objects
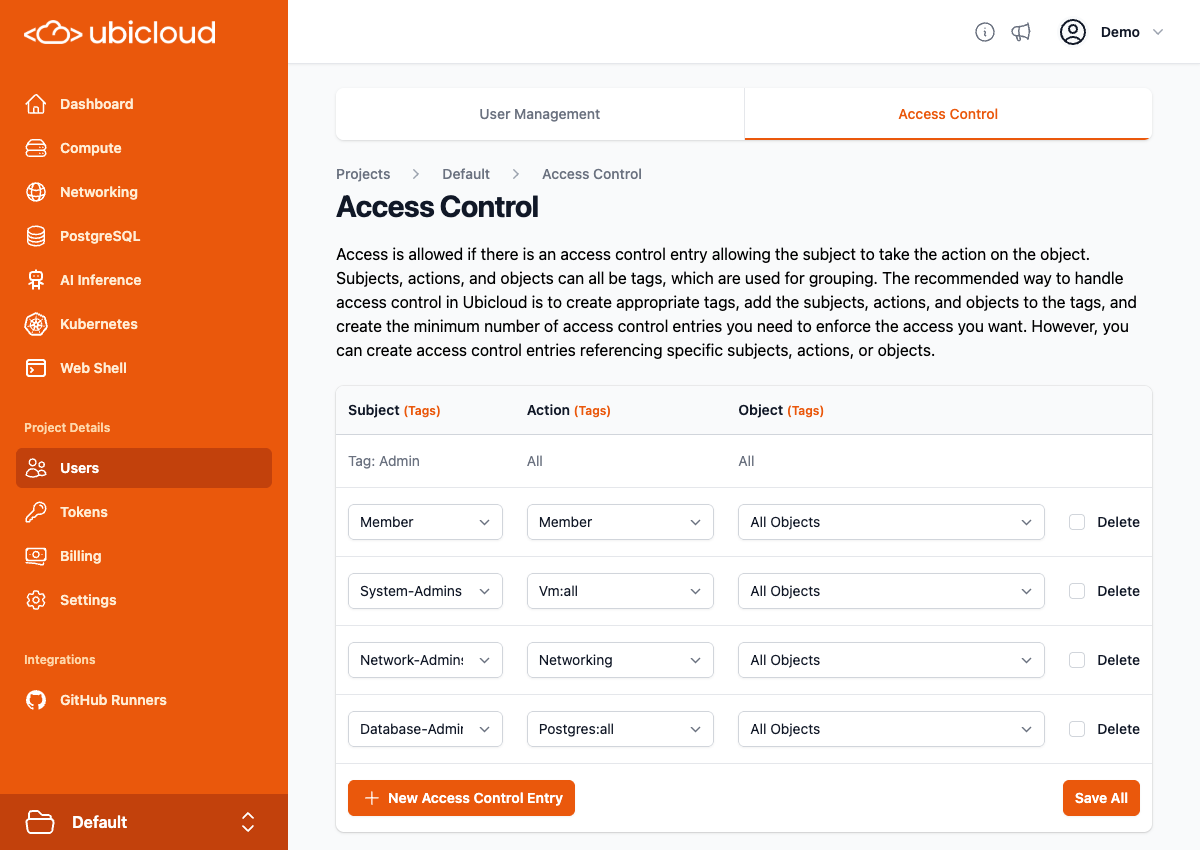 Make sure to click the Save All button after populating the entries, to make sure they are saved.
### Object Tags
The above example did not discuss the use of object tags, but they work similarly to subject and action tags, and allow you to grant users actions to specific objects (or more likely, groups of objects). For example, if you have both web servers and media encoding servers, and they are managed by different groups, you can create Web-Servers and Media-Encoding-Servers object tags, and create Web-Server-Admins and Media-Encoding-Server-Admins subject tags, and then create two access control entries:
* Subject: Web-Server-Admins, Action: All Actions, Object: Web-Servers
* Subject: Media-Encoding-Server-Admins, Action: All Actions, Object: Media-Encoding-Servers
### Access Control for Your Access Control
Ubicloud's access control system uses the access control system to ensure that only allowed access control changes are permitted. Project admins have full control over the access control system, but they can create access control entries granting other users more limited access.
For example, if only members of the Human-Resources subject tag should be adding or removing users from the Member subject tag, you could add an action tag named Tag-Membership, that contains the SubjectTag:add and SubjectTag:remove actions, and an access control entry:
* Subject: Human-Resources, Action: Tag-Membership, Object: Members (Subject Tag)
As you can see, a subject tag can be a member of an object tag, granting access to actions on that subject tag. An action tag can also be a member of an object tag, granting access to actions on that action tag. An object tag can be a member of an object tag, but this could potentially be ambiguous. If an object tag named Servers includes an object tag named Web-Servers, does that mean that members of Web-Servers are members of Servers, or does it means that actions on the Web-Servers tag are granted to members of the Servers tag? Ubicloud handles this by separating the inclusion, so you can choose when making an object tag a member of another object tag whether you want inclusion or access control (or both, as there are separate checkboxes for the two separate kinds of access).
# GitHub Actions
Source: https://ubicloud.com/docs/security/github-actions
Ubicloud is committed to keeping customer data safe and secure. You can read more about our security practices in [the general security page](/security/overview). This page shares certain best practices that are relevant in the context of our GitHub Actions integration.
## Clean and Ephemeral VM for Each Job
Ubicloud uses VMs to securely isolate your data from other users. For each new CI/CD job, we also provide you with a clean and ephemeral VM. Upon the job's completion, we decommission the VM and delete the block storage device associated with the VM.
This ensures that there is no way to persistently compromise the GitHub Actions environment or otherwise gain access to more information than was placed in this environment during the bootstrap process.
## Using Just-In-Time Runners
Ubicloud follows GitHub's recommendation of using [just-in-time (JIT) runner APIs](https://docs.github.com/en/actions/security-guides/security-hardening-for-github-actions#using-just-in-time-runners) to improve runner registration security. We use GitHub's REST API to create and receive a JIT config file from GitHub and pass on this file to the Ubicloud runner at start-up. We don't store this JIT config file in any way.
This ensures that we create ephemeral, JIT runners. These runners perform at most one job before being automatically removed from the repository
## Log Retention
We retain metadata logs containing information about CI/CD jobs, including the initiator, start time, duration, and selected hardware. With this metadata, we can maintain an audit log and analyze security incidents, if there are any, in more detail.
# Overview
Source: https://ubicloud.com/docs/security/overview
Ubicloud is committed to keeping customer data safe and secure. This is a hard problem and we take it seriously.
## Network / Infrastructure Security
We use established best practices to provide cloud security. Those practices and their applications are also publicly available in our GitHub repository. In summary, we take the following steps.
* For our managed service, we review and select hosting providers based on their physical and digital security practices.
* **Elastic Compute:** We use Linux KVM for full virtualization. We further use the Cloud Hypervisor as our virtual machine monitor (VMM); and contain each VMM within Linux namespaces for isolation and security.
* **Block Storage:** We use Storage Performance Development Toolkit (SPDK) to provide virtualized block storage to VMs. We encrypt the data encryption key itself, ensuring that a compromised host isn't enough to decrypt customer data. We also regularly rotate encryption keys.
* **Virtual Networking:** We use IPsec tunneling to establish an encrypted and private network environment; and regularly rotate encryption keys. For security, each customer's VMs operate in their own networking namespace.
* **Firewalls:** By default, we block incoming traffic to all virtual machines (VMs). The exception to this is our managed PostgreSQL database, which allows incoming traffic to the PostgreSQL port (5432). We allow connections initiated by the VM and any return traffic.
## Software Security
Ubicloud cloud services are available under the AGPL v3 License. We follow an open development model and our source code is available for review in GitHub: [https://github.com/ubicloud/ubicloud](https://github.com/ubicloud/ubicloud)
Additionally, we follow standard security best prices to receive vulnerability alerts. These include:
* Code scanning alters through industry-leading semantic code analysis engine CodeQL
* Security issue alerts through language specific static code analysis engine Ruby Brakeman
* Secret scanning alerts
* Dependabot alerts to receive notifications when one of our dependencies has a vulnerability
## Security Issues
### Reporting A Security Vulnerability
If you have a security concern or believe you have found a vulnerability in our infrastructure, please send your report to [security@ubicloud.com](mailto:security@ubicloud.com). This will give us a structured way to track and respond to your concerns.
When we receive your report, we will reply within 24 hours and issue you a ticket ID for future tracking.
### Vulnerability Remediation
We will investigate each reported vulnerability according to its severity. We will then patch or remediate each issue within a timeframe that's appropriate to the vulnerability's severity, given that a patch or remediation steps are available.
**Severity: Timeframe**
* Critical: 24 hours
* High: 1 week
* Medium: 1 month
* Others: As necessary
If your vulnerability report includes a severity rating, we'll use that as our starting point. Based on our investigation, we may upgrade or downgrade the severity rating.
# SOC2
Source: https://ubicloud.com/docs/security/soc2
Ubicloud is SOC2 Type 2 compliant.
Contact us at [info@ubicloud.com](mailto:info@ubicloud.com) to receive a copy of our SOC2 Type 2 report and our most recent penetration test certificate.
We are also happy to complete any security questionnaires.
Make sure to click the Save All button after populating the entries, to make sure they are saved.
### Object Tags
The above example did not discuss the use of object tags, but they work similarly to subject and action tags, and allow you to grant users actions to specific objects (or more likely, groups of objects). For example, if you have both web servers and media encoding servers, and they are managed by different groups, you can create Web-Servers and Media-Encoding-Servers object tags, and create Web-Server-Admins and Media-Encoding-Server-Admins subject tags, and then create two access control entries:
* Subject: Web-Server-Admins, Action: All Actions, Object: Web-Servers
* Subject: Media-Encoding-Server-Admins, Action: All Actions, Object: Media-Encoding-Servers
### Access Control for Your Access Control
Ubicloud's access control system uses the access control system to ensure that only allowed access control changes are permitted. Project admins have full control over the access control system, but they can create access control entries granting other users more limited access.
For example, if only members of the Human-Resources subject tag should be adding or removing users from the Member subject tag, you could add an action tag named Tag-Membership, that contains the SubjectTag:add and SubjectTag:remove actions, and an access control entry:
* Subject: Human-Resources, Action: Tag-Membership, Object: Members (Subject Tag)
As you can see, a subject tag can be a member of an object tag, granting access to actions on that subject tag. An action tag can also be a member of an object tag, granting access to actions on that action tag. An object tag can be a member of an object tag, but this could potentially be ambiguous. If an object tag named Servers includes an object tag named Web-Servers, does that mean that members of Web-Servers are members of Servers, or does it means that actions on the Web-Servers tag are granted to members of the Servers tag? Ubicloud handles this by separating the inclusion, so you can choose when making an object tag a member of another object tag whether you want inclusion or access control (or both, as there are separate checkboxes for the two separate kinds of access).
# GitHub Actions
Source: https://ubicloud.com/docs/security/github-actions
Ubicloud is committed to keeping customer data safe and secure. You can read more about our security practices in [the general security page](/security/overview). This page shares certain best practices that are relevant in the context of our GitHub Actions integration.
## Clean and Ephemeral VM for Each Job
Ubicloud uses VMs to securely isolate your data from other users. For each new CI/CD job, we also provide you with a clean and ephemeral VM. Upon the job's completion, we decommission the VM and delete the block storage device associated with the VM.
This ensures that there is no way to persistently compromise the GitHub Actions environment or otherwise gain access to more information than was placed in this environment during the bootstrap process.
## Using Just-In-Time Runners
Ubicloud follows GitHub's recommendation of using [just-in-time (JIT) runner APIs](https://docs.github.com/en/actions/security-guides/security-hardening-for-github-actions#using-just-in-time-runners) to improve runner registration security. We use GitHub's REST API to create and receive a JIT config file from GitHub and pass on this file to the Ubicloud runner at start-up. We don't store this JIT config file in any way.
This ensures that we create ephemeral, JIT runners. These runners perform at most one job before being automatically removed from the repository
## Log Retention
We retain metadata logs containing information about CI/CD jobs, including the initiator, start time, duration, and selected hardware. With this metadata, we can maintain an audit log and analyze security incidents, if there are any, in more detail.
# Overview
Source: https://ubicloud.com/docs/security/overview
Ubicloud is committed to keeping customer data safe and secure. This is a hard problem and we take it seriously.
## Network / Infrastructure Security
We use established best practices to provide cloud security. Those practices and their applications are also publicly available in our GitHub repository. In summary, we take the following steps.
* For our managed service, we review and select hosting providers based on their physical and digital security practices.
* **Elastic Compute:** We use Linux KVM for full virtualization. We further use the Cloud Hypervisor as our virtual machine monitor (VMM); and contain each VMM within Linux namespaces for isolation and security.
* **Block Storage:** We use Storage Performance Development Toolkit (SPDK) to provide virtualized block storage to VMs. We encrypt the data encryption key itself, ensuring that a compromised host isn't enough to decrypt customer data. We also regularly rotate encryption keys.
* **Virtual Networking:** We use IPsec tunneling to establish an encrypted and private network environment; and regularly rotate encryption keys. For security, each customer's VMs operate in their own networking namespace.
* **Firewalls:** By default, we block incoming traffic to all virtual machines (VMs). The exception to this is our managed PostgreSQL database, which allows incoming traffic to the PostgreSQL port (5432). We allow connections initiated by the VM and any return traffic.
## Software Security
Ubicloud cloud services are available under the AGPL v3 License. We follow an open development model and our source code is available for review in GitHub: [https://github.com/ubicloud/ubicloud](https://github.com/ubicloud/ubicloud)
Additionally, we follow standard security best prices to receive vulnerability alerts. These include:
* Code scanning alters through industry-leading semantic code analysis engine CodeQL
* Security issue alerts through language specific static code analysis engine Ruby Brakeman
* Secret scanning alerts
* Dependabot alerts to receive notifications when one of our dependencies has a vulnerability
## Security Issues
### Reporting A Security Vulnerability
If you have a security concern or believe you have found a vulnerability in our infrastructure, please send your report to [security@ubicloud.com](mailto:security@ubicloud.com). This will give us a structured way to track and respond to your concerns.
When we receive your report, we will reply within 24 hours and issue you a ticket ID for future tracking.
### Vulnerability Remediation
We will investigate each reported vulnerability according to its severity. We will then patch or remediate each issue within a timeframe that's appropriate to the vulnerability's severity, given that a patch or remediation steps are available.
**Severity: Timeframe**
* Critical: 24 hours
* High: 1 week
* Medium: 1 month
* Others: As necessary
If your vulnerability report includes a severity rating, we'll use that as our starting point. Based on our investigation, we may upgrade or downgrade the severity rating.
# SOC2
Source: https://ubicloud.com/docs/security/soc2
Ubicloud is SOC2 Type 2 compliant.
Contact us at [info@ubicloud.com](mailto:info@ubicloud.com) to receive a copy of our SOC2 Type 2 report and our most recent penetration test certificate.
We are also happy to complete any security questionnaires.